
Achieving the perfect consistency in your recipes hinges on using the correct blender jar. This guide explains the fundamental differences between dry and wet grinding jars. Discover how to identify each type and the specific ingredients best suited for them, ensuring you avoid common mistakes and achieve superior culinary results.
Use the Right Jar for Dry or Wet Grinding
Are you tired of lumpy spice powders, gritty nut butters, or watery smoothies? The secret to achieving culinary perfection often lies in a simple, yet often overlooked, detail: using the right blender jar for the job. While many blenders come with multiple attachments, understanding their distinct purposes can dramatically elevate your cooking and blending game. This comprehensive guide will walk you through the essential differences between dry and wet grinding jars, how to identify them, and the best ingredients to use with each. Get ready to unlock your blender’s full potential!
Key Takeaways
- Understand Jar Differences: Dry grinding jars often have flatter blades designed for pulverizing, while wet grinding jars feature sharper, multi-tiered blades for efficient liquid-based blending.
- Identify Wet Grinding Ingredients: Ideal for smoothies, purees, batters, and sauces, where liquids are present to aid the blending process.
- Identify Dry Grinding Ingredients: Best for grinding spices, nuts, seeds, coffee beans, and making powdered sugar, where a fine, powdery texture is desired.
- Safety First: Never overfill any jar. Ensure lids are securely fastened before operating the blender.
- Cleanliness is Crucial: Proper cleaning after each use prevents flavor transfer and prolongs the life of your blender jars.
- Experiment Wisely: While some overlap exists, sticking to the intended use of each jar generally yields the best outcomes.
Why Does the Jar Matter?
Blenders are versatile kitchen appliances, but they aren’t one-size-fits-all. The design of a blender jar, particularly its blades and construction, is optimized for specific tasks. Using the wrong jar can lead to inefficient blending, poor texture, or even damage to your appliance. Think of it like using a hammer to screw in a nail – it might work in a pinch, but it’s not the most effective or safest method. This guide aims to demystify the world of blender jars so you can confidently tackle any blending task.
Understanding the Difference: Dry vs. Wet Grinding Jars
The primary distinction between dry and wet grinding jars lies in their blade design and intended function. While some blenders may have interchangeable blades, the jar itself is often designed with these specific tasks in mind.
Visual guide about Use the Right Jar for Dry or Wet Grinding
Image source: tiimg.tistatic.com
Wet Grinding Jars
Wet grinding jars are your go-to for anything that involves liquids. They are designed to efficiently process ingredients that need to be blended into a smooth, often pourable, consistency.
Key Features of Wet Grinding Jars:
- Blade Design: Wet grinding jars typically feature sharper, multi-tiered blades. These blades are designed to create a vortex, pulling ingredients down towards the center for a thorough and even blend. The sharper edges are excellent at pulverizing softer ingredients and incorporating liquids.
- Jar Shape: Often taller and narrower, which helps in creating the vortex effect.
- Material: Can be made from glass, BPA-free plastic, or stainless steel.
What to Grind in a Wet Grinding Jar:
If your recipe involves liquids, a wet grinding jar is usually your best bet. Think of:
- Smoothies and Shakes: Fruits, vegetables, yogurt, milk, protein powder – all blend beautifully.
- Purees: Baby food, vegetable purees for soups, or fruit purees for desserts.
- Batters: Pancake batter, crepe batter, or even thin cake batters.
- Sauces and Dressings: Mayonnaise, salad dressings, tomato sauces, or pesto.
- Soups: Blending cooked vegetables into a smooth soup.
- Juices: For blended juices (as opposed to centrifugal juicers).
Example: To make a creamy banana and spinach smoothie, you’d use your wet grinding jar. The liquid (milk or water) helps the blades spin efficiently, breaking down the spinach and banana into a smooth, drinkable consistency.
Dry Grinding Jars
Dry grinding jars, on the other hand, are built for breaking down solid, dry ingredients into powders or fine granules. These jars are all about pulverization.
Key Features of Dry Grinding Jars:
- Blade Design: Dry grinding jars often have flatter, duller blades that are designed for maximum impact and crushing. They excel at grinding ingredients into fine particles rather than liquefying them. Some designs might even have a chopping action rather than a continuous spin.
- Jar Shape: Can be shorter and wider, allowing ingredients to tumble and make better contact with the blades.
- Material: Often made of sturdy plastic or stainless steel.
What to Grind in a Dry Grinding Jar:
When you need a fine powder or want to break down hard, dry ingredients, reach for your dry grinding jar. This includes:
- Spices: Whole peppercorns, cumin seeds, coriander seeds, turmeric, etc., for freshly ground spice mixes.
- Nuts and Seeds: Almonds, walnuts, flax seeds, chia seeds – for nut flours, seed powders, or coarse nut pieces for toppings.
- Coffee Beans: For freshly ground coffee (though a dedicated coffee grinder is often preferred for optimal consistency).
- Grains: Small amounts of rice or oats for flours or meal.
- Sugar: To make powdered sugar from granulated sugar.
- Dried Herbs: To create finer herbal powders.
Example: To make your own garam masala, you would use the dry grinding jar to pulverize whole spices like cinnamon sticks, cloves, and cardamom pods into a fine powder. The dry environment allows the blades to effectively crush and mill the spices without the ingredients sticking or becoming clumpy.
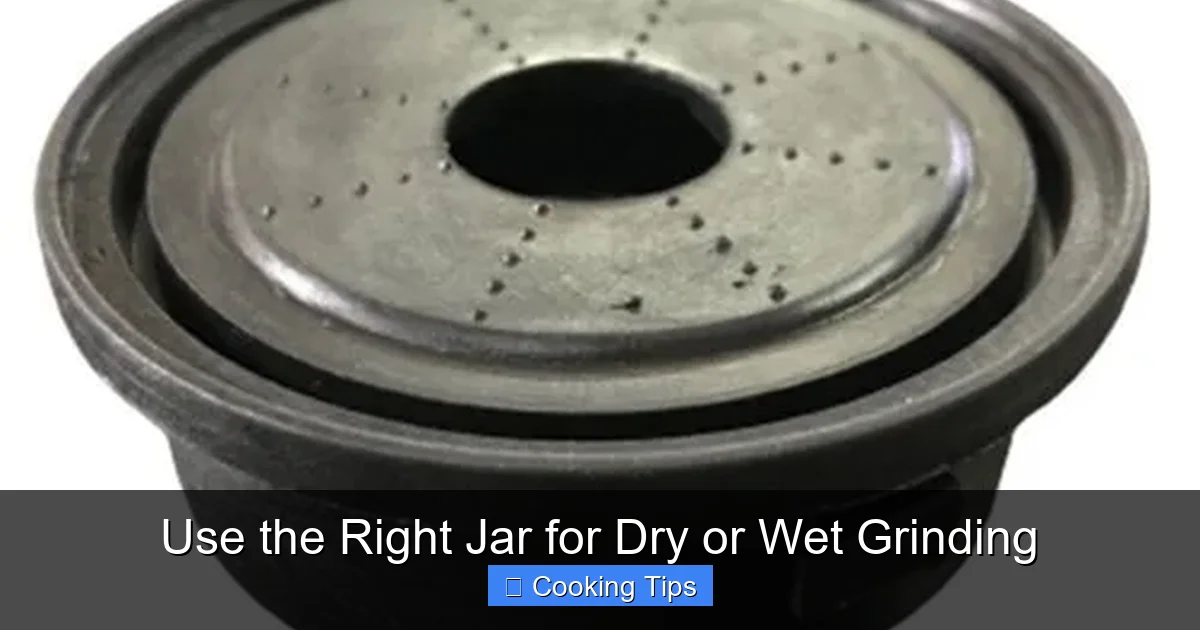
How to Identify Your Blender Jars
Most modern blenders come with multiple jars or attachments. Here’s how to tell them apart:

Visual guide about Use the Right Jar for Dry or Wet Grinding
Image source: tiimg.tistatic.com
Visual Inspection
The easiest way is to look at the blades. If they are sharp and angled for a slicing or vortex action, it’s likely a wet grinding jar. If they are flatter, more blunt, or designed for crushing, it’s probably a dry grinding jar. The shape of the jar can also be a clue – taller and narrower often indicates wet grinding, while shorter and wider can be for dry grinding.
Manufacturer’s Instructions
Always refer to your blender’s user manual. It will explicitly state which jar is designed for what purpose and provide usage guidelines.
Labels or Markings
Some manufacturers label their jars or blades to indicate their intended use. Check for any icons or text that might suggest “dry” or “wet” applications.
Step-by-Step Guide to Using the Right Jar
Using the correct jar is straightforward, but following these steps will ensure you get the best results and protect your appliance.

Visual guide about Use the Right Jar for Dry or Wet Grinding
Image source: 5.imimg.com
Step 1: Assess Your Ingredients
Before you even reach for your blender, consider what you’re trying to achieve. Are you making a drink, a sauce, or a powder?
- If liquids are present or will be added significantly: Choose the wet grinding jar.
- If you’re processing dry, solid ingredients to a powder: Choose the dry grinding jar.
Step 2: Select the Appropriate Jar
Based on your assessment, attach the correct jar to your blender base.
Step 3: Add Ingredients Correctly
There are general guidelines for filling blender jars to ensure optimal performance and safety.
For Wet Grinding Jars:
- Don’t Overfill: Most jars have a maximum fill line. Exceeding this can lead to leaks, inefficient blending, or motor strain.
- Liquid First: Often, adding liquids first helps the blades get started and creates the necessary vortex for smooth blending.
- Add Solids Gradually: If making a thick smoothie, add softer ingredients first, then harder ones.
For Dry Grinding Jars:
- Don’t Overfill: Similar to wet jars, an overfilled dry jar can lead to uneven grinding and potential motor overheating.
- Fill Appropriately: For spices or coffee beans, you usually don’t need to fill the jar to the brim. A partial fill often works best for pulverizing.
- Consider Batch Size: Dry grinding works best in smaller batches to ensure all particles get evenly pulverized.
Step 4: Secure the Lid
This is crucial! Ensure the lid is firmly in place, with the center cap or measuring cup securely locked. This prevents ingredients from splattering out during operation.
Step 5: Blend Carefully
Start on a lower speed and gradually increase as needed. For dry grinding, pulses can be very effective in breaking down stubborn ingredients.
- Listen to Your Blender: If it sounds like it’s struggling, stop, check the contents, and adjust if necessary.
- Avoid Over-Grinding: Especially with nuts, over-grinding can turn them into a paste or butter. Stop when you reach your desired consistency.
Step 6: Clean Immediately
Clean your blender jars right after use to prevent food particles from drying and sticking, which makes cleaning much harder and can lead to flavor transfer.
- For Wet Jars: Rinse immediately with warm water. For tougher residue, fill with warm water and a drop of dish soap, then blend for a few seconds. Rinse thoroughly.
- For Dry Jars: Empty completely. Use a brush to remove any clinging powder. Wipe with a damp cloth or rinse and dry thoroughly.
Practical Tips and Examples
Here are some additional tips to make your blending experience even better:
- Fresh is Best: Grinding your own spices and nuts from scratch offers unparalleled flavor and aroma.
- Batch Grinding: For spices, you can grind a larger batch and store it in an airtight container, but be aware that the flavor will diminish over time compared to freshly ground.
- Nut Butters: While dry grinding jars are great for making nut flour, you can also use them to start making nut butter. As the nuts are ground, they release oils and will eventually form a paste. You may need to scrape down the sides and continue blending.
- Consistency Control: When grinding dry ingredients, pay attention to the texture. Stop when you achieve the desired fineness. A little more blending time for spices can make them very fine, while over-blending nuts can lead to an oily paste.
- Hard Ingredients: For very hard ingredients like turmeric root, it’s often best to chop them into smaller pieces before dry grinding to reduce strain on the blender.
Troubleshooting Common Issues
Even with the right jar, you might encounter a few hiccups. Here’s how to fix them:
- Issue: Ingredients not blending smoothly in a wet jar.
- Solution: Ensure you have enough liquid. Try adding more, or stop the blender and use a tamper or spatula to push ingredients down towards the blades (always with the blender OFF!). Check if you have overfilled the jar.
- Issue: Dry ingredients are clumping instead of powdering.
- Solution: You might have too many ingredients at once. Try grinding in smaller batches. Ensure the ingredients are completely dry. Moisture is the enemy of fine dry grinding.
- Issue: Blender smells like it’s burning.
- Solution: This can happen if the motor is overloaded or overheating. Stop the blender immediately, unplug it, and let it cool down. Ensure you are not overfilling the jar and that the ingredients are suitable for the jar type.
- Issue: Leaks from the jar.
- Solution: Double-check that the lid is securely fastened. If the jar or lid is damaged, discontinue use and contact the manufacturer.
Conclusion
Mastering the use of the right blender jar for dry or wet grinding is a simple yet powerful step towards unlocking your blender’s full potential. By understanding the distinct roles of wet and dry grinding jars, their blade designs, and their ideal applications, you can achieve consistently superior results. From perfectly smooth smoothies to exquisitely ground spices, the right jar makes all the difference. So, next time you reach for your blender, take a moment to consider the task at hand, select the appropriate jar, and blend with confidence. Happy blending!