
Maintaining a clean air fryer is crucial for optimal performance and delicious food. This guide provides a simple, step-by-step process to effectively clean your air fryer after each use. Regular cleaning prevents food buildup and ensures healthier cooking, extending the lifespan of your appliance. Follow these easy tips to keep your air fryer sparkling and ready for your next culinary creation.
How to Clean an Air Fryer After Use
Welcome to the ultimate guide for keeping your beloved air fryer in pristine condition! If you’re like most of us in 2026, your air fryer has probably become a kitchen staple, churning out perfectly crispy fries, juicy chicken wings, and delightful roasted vegetables with impressive speed and ease. But with great cooking comes the inevitable mess. Food splatters, grease drips, and tiny food particles can accumulate, making your air fryer look a little less than appetizing. Fear not! This guide will walk you through the simple, effective, and often surprisingly quick process of cleaning your air fryer after every use. You’ll learn how to tackle common messes, keep your appliance running efficiently, and ensure every meal you cook is as delicious as the last.
Key Takeaways
- Immediate Post-Cooking Wipe-Down: A quick wipe with a damp cloth right after use prevents most grease and food particles from hardening.
- Dishwasher-Safe Components: Many air fryer baskets and trays are dishwasher-safe, simplifying the cleaning process significantly.
- Gentle Cleaning Solutions: Avoid harsh chemicals or abrasive scrubbers that can damage the non-stick coating of your air fryer.
- Addressing Stubborn Grime: For tough, baked-on food, a soak in warm, soapy water or a paste of baking soda and water can work wonders.
- Exterior Care: Don’t forget the outside! A simple wipe-down with a damp cloth keeps the appliance looking its best.
- Regular Deep Cleaning: Beyond everyday cleaning, a more thorough deep clean every few weeks ensures longevity and efficiency.
Why Cleaning Your Air Fryer is So Important
Before we dive into the how-to, let’s quickly touch on why this is more than just a cosmetic chore. A clean air fryer is a happy air fryer, and a happy air fryer means better food and a longer lifespan for your appliance.
- Food Quality: Lingering food debris can impart off-flavors to your next meal, turning your perfectly cooked salmon into something slightly… questionable.
- Hygiene: Built-up grease and food particles can become a breeding ground for bacteria, which is definitely not something you want near your food.
- Appliance Performance: A clogged fan or greasy heating element can reduce the air fryer’s efficiency, leading to longer cooking times and less crispy results.
- Longevity: Regular maintenance, including cleaning, is key to ensuring your air fryer serves you well for years to come.
The Step-by-Step Cleaning Process
Cleaning your air fryer doesn’t have to be a daunting task. By following these steps, you can have it sparkling clean in just a few minutes.
Step 1: Safety First – Unplug and Cool Down
This is the most crucial first step. Never attempt to clean a hot air fryer.
Unplugging
As soon as you’re done cooking, unplug your air fryer from the wall socket. This prevents any accidental starts and, more importantly, ensures your safety while cleaning.
Visual guide about How to Clean an Air Fryer After Use
Image source: feelgoodfoodie.net
Visual guide about How to Clean an Air Fryer After Use
Image source: feelgoodfoodie.net
Cooling Time
Allow the air fryer to cool down completely. This usually takes about 15-30 minutes, depending on the model and how long you used it. You’ll know it’s cool when the exterior feels no longer warm to the touch.
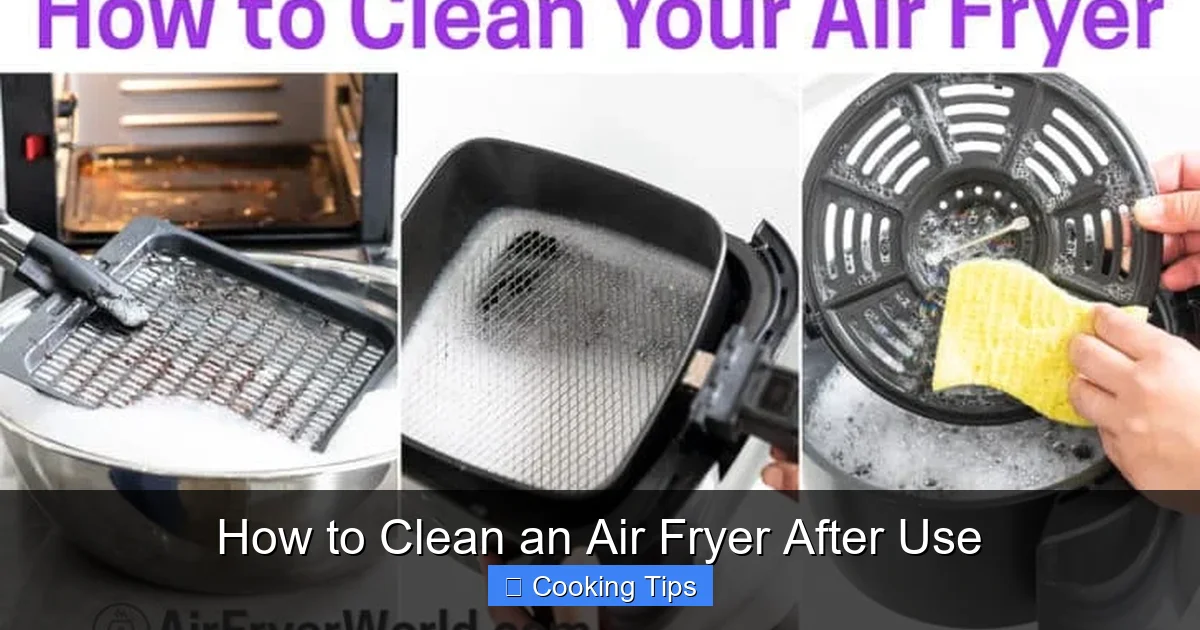
Step 2: Remove and Inspect the Basket and Tray
Most air fryers have a removable basket and a drip tray (or a similar component). These are usually the dirtiest parts.
Careful Removal
Gently slide out the basket and tray. Be mindful if there’s any hot oil or grease that might still be in the bottom of the tray. It’s a good idea to have a sink or a heat-resistant surface ready to place them on.
Visual guide about How to Clean an Air Fryer After Use
Image source: airfryerworld.com
Initial Check
Take a quick look at the extent of the mess. Are there just a few crumbs, or is it caked with grease and burnt-on bits? This will help you determine the best cleaning method.
Step 3: Cleaning the Basket and Tray
This is where the magic happens. Most baskets and trays are designed for easy cleaning.
Option A: Dishwasher (If Applicable)
Many modern air fryer baskets and trays are fully dishwasher-safe. Check your appliance’s manual to confirm. If yours is, this is the easiest route!
- Simply place the basket and tray into your dishwasher.
- Run a normal wash cycle.
- Ensure they are completely dry before reassembling and storing.
Pro Tip: Even if dishwasher-safe, a quick pre-rinse can remove larger debris and prevent your dishwasher from getting overly greasy.
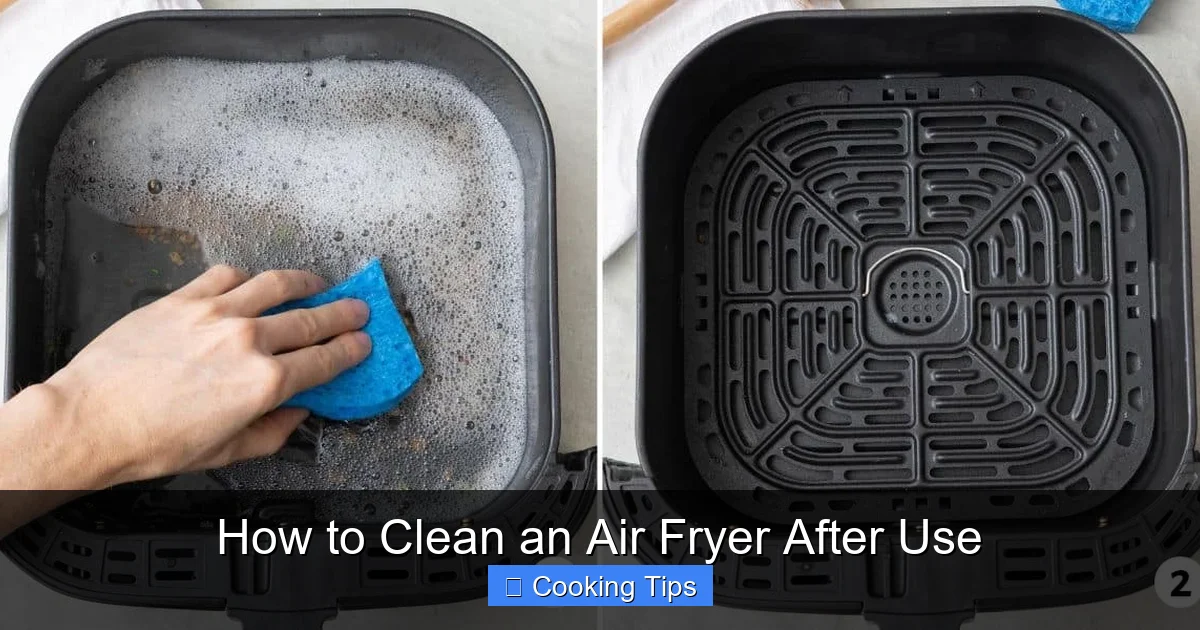
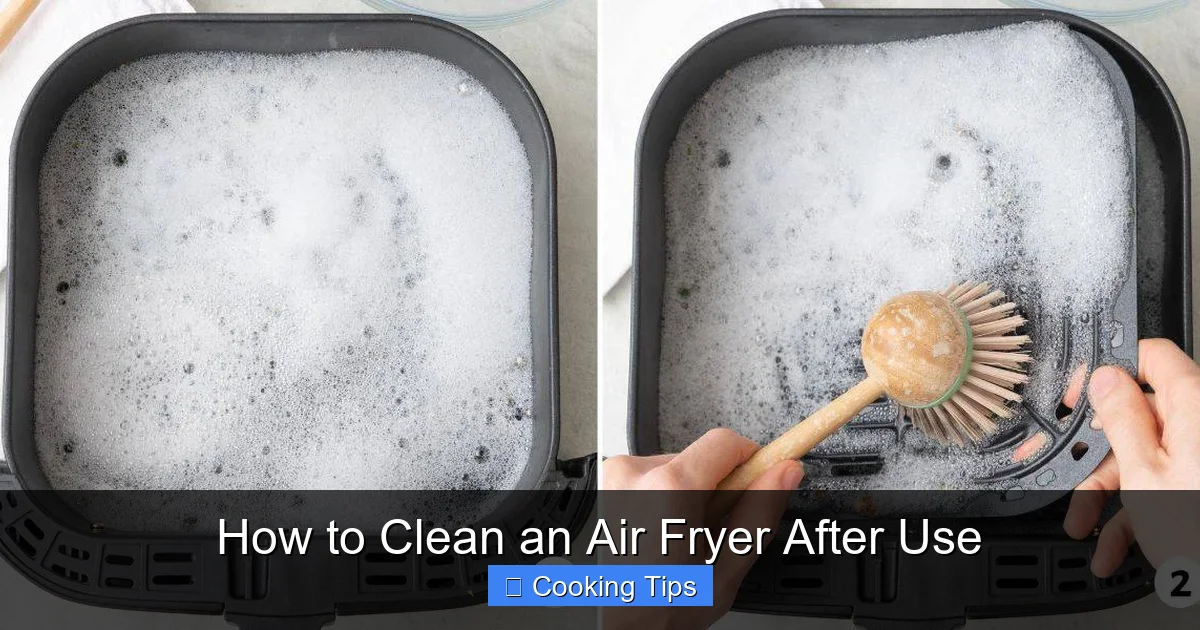
Option B: Hand Washing for Stubborn Grime
For those times when the dishwasher isn’t an option, or for tougher messes, hand washing is effective.
- Fill your sink or a large basin with warm water. Add a few drops of mild dish soap.
- Soak the basket and tray. Let them sit for at least 10-15 minutes to loosen any stuck-on food or grease. For really tough messes, you might need to soak them longer.
- Scrub gently. Use a soft sponge, a non-abrasive scrub pad, or a soft brush. Avoid steel wool or harsh scrubbers, as they can scratch the non-stick coating.
- Rinse thoroughly. Make sure all soap residue is gone.
- Dry completely. Pat them dry with a clean dish towel or let them air dry completely.
Tackling Baked-On Food (The Baking Soda Method)
If you have particularly stubborn, burnt-on food particles that won’t budge with regular scrubbing, try this effective DIY paste:
- Create a paste: Mix a few tablespoons of baking soda with a small amount of water until you have a thick, spreadable paste.
- Apply the paste: Gently spread the paste over the affected areas of the basket or tray.
- Let it sit: Allow the paste to sit for 15-30 minutes, or even longer for very tough spots. The baking soda will help to break down the grime.
- Scrub and rinse: Use a soft sponge or cloth to gently scrub away the paste and loosened food. Rinse thoroughly with warm water.
Step 4: Cleaning the Air Fryer Interior
While the basket and tray are soaking or being washed, you can tackle the inside of the air fryer.
Wipe Down the Heating Element
The heating element is usually at the top, often with a fan. It can accumulate grease splatters.
- Be gentle: This area is delicate. Do NOT submerge it in water.
- Use a damp cloth: Lightly dampen a microfiber cloth with warm water and a tiny bit of dish soap (if needed). Wring it out very well so it’s just slightly damp.
- Wipe carefully: Gently wipe around the heating element and fan. Be careful not to push too hard or get water into any electrical components.
- Dry if necessary: If you used any moisture, use a dry part of the cloth or a separate dry cloth to gently pat the area dry.
Clean the Interior Walls and Base
The inside walls and base of the air fryer can also get greasy.
- Damp cloth: Use a damp, soapy microfiber cloth (well wrung out) to wipe down the interior surfaces.
- Stubborn spots: For any stubborn spots, you can use the same baking soda paste method described for the basket and tray. Apply with a soft cloth or sponge, let it sit, then wipe clean.
- Final wipe: Finish with a clean, damp cloth to remove any soap residue, and then a dry cloth to ensure the interior is dry.
Step 5: Cleaning the Exterior
Don’t forget the outside! It’s what everyone sees.
Simple Wipe-Down
Most air fryer exteriors are best cleaned with a simple damp cloth. Check your manual, as some materials might require specific cleaners, but generally, this is safe for most finishes.
- Damp microfiber cloth: Use a damp, but not wet, microfiber cloth to wipe down the outer casing, control panel, and handle.
- For greasy marks: If you have greasy fingerprints or smudges, a tiny bit of mild dish soap on the damp cloth can help.
- Dry it off: Immediately dry the exterior with a clean, dry cloth to prevent water spots.
Important Note: Never spray cleaning solutions directly onto the exterior, especially near the control panel, as liquid can seep into the electronics.
Step 6: Reassemble and Store
Once everything is clean and dry, it’s time to put your air fryer back together.
Ensure Dryness
Double-check that the basket, tray, and the interior of the air fryer are completely dry. Moisture left behind can lead to rust or mildew over time.
Reassemble
Slide the clean, dry basket and tray back into the air fryer. Ensure they fit snugly.
Storage
Store your air fryer in a cool, dry place. If it’s a countertop appliance, make sure it has adequate ventilation.
Troubleshooting Common Air Fryer Cleaning Issues
Sometimes, even with regular cleaning, you might encounter a few stubborn issues. Here’s how to handle them.
Persistent Odors
If your air fryer seems to retain food smells, try this:
- Lemon Power: Place a few lemon slices (or a whole lemon, cut in half) in the air fryer basket. Add about half a cup of water to the bottom of the basket. Air fry at 300°F (150°C) for about 5-10 minutes. The steam will help neutralize odors. Wipe down afterward.
- Vinegar Method: Similar to lemon, you can use a solution of equal parts white vinegar and water in the basket. Air fry for 5-10 minutes at 300°F (150°C), then wipe clean.
Residue on the Heating Element
If you notice residue on the heating element that you can’t quite reach:
- Wait and Scrape (Carefully): Ensure the air fryer is unplugged and completely cool. Sometimes, a gentle scrape with a plastic utensil (like a spatula) or a wooden skewer can dislodge baked-on debris. Follow up with a gentle wipe with a damp cloth as described above.
- Professional Check: If you’re concerned or the residue is significant and won’t budge, consult your air fryer’s manual or contact the manufacturer.
Damaged Non-Stick Coating
If you accidentally damaged the non-stick coating with a harsh scrub:
- Assess the damage: Small scratches might not be a major issue, but larger areas of peeling coating are cause for concern.
- Manufacturer Contact: The best course of action is to contact the manufacturer. They can advise you on repair or replacement options. Continue to use mild cleaning methods to prevent further damage.
Conclusion: A Clean Air Fryer is a Happy Air Fryer
By incorporating these simple cleaning steps into your routine, you’ll ensure your air fryer remains a reliable and effective kitchen tool for years to come. A quick wipe-down after each use is your best defense against stubborn messes, while regular hand washing or a dishwasher cycle keeps the basket and tray sparkling. Remember, a little effort goes a long way in maintaining hygiene, preserving food quality, and maximizing the performance of your favorite kitchen gadget. So, go forth and air fry with confidence, knowing you’ve got the skills to keep your appliance in top-notch condition!