
Facing mysterious error codes on your digital rice cooker display? This comprehensive guide will help you understand what those blinking lights and cryptic messages mean. We’ll provide clear explanations for common error codes and offer practical, step-by-step troubleshooting tips to get your rice cooker back in working order, ensuring perfectly cooked rice for every meal. Don’t let an error code frustrate you; learn how to fix it!
Troubleshooting Your Digital Rice Cooker: A Comprehensive Guide to Understanding Error Codes
In the hustle of modern life, a reliable rice cooker is a kitchen essential. It promises perfectly fluffy rice with minimal effort. But what happens when your trusty digital rice cooker starts displaying cryptic error codes instead of the comforting “cooking” indicator? It can be frustrating, especially when you’re craving a delicious bowl of rice. This guide is here to demystify those blinking lights and alphanumeric messages.
By the end of this guide, you’ll be equipped to understand what most common error codes on your digital rice cooker display mean. We’ll walk you through practical, step-by-step troubleshooting methods that you can perform at home. Whether it’s an “E1” or a flashing temperature symbol, we’ll help you get your digital rice cooker back on track, ensuring you can continue enjoying perfectly cooked rice without the added stress.
Key Takeaways
- Understand Common Error Codes: Learn to recognize the most frequent error codes displayed on digital rice cookers, such as those indicating lid issues, sensor malfunctions, or overheating.
- Basic Troubleshooting Steps: Discover simple, universal troubleshooting steps like unplugging the unit, cleaning components, and checking for obstructions that can resolve many common errors.
- Model-Specific Solutions: Recognize that error codes can vary by manufacturer and model, and learn how to access your rice cooker’s manual for specific diagnostic information.
- Sensor Care is Crucial: Understand the importance of keeping temperature sensors clean and free from debris to prevent sensor-related error messages.
- Lid and Seal Integrity: Learn how to inspect and ensure the rice cooker lid and sealing mechanism are properly closed and free from damage, as this often triggers error codes.
- Overheating Prevention: Identify causes of overheating errors and how to prevent them by using the correct amount of water and avoiding overloading.
- When to Seek Professional Help: Know when an error code indicates a more serious issue that requires professional repair or replacement of the rice cooker.
Understanding Your Digital Rice Cooker’s Display
Digital rice cookers are marvels of modern kitchen technology. They use sensors, microprocessors, and sophisticated heating elements to cook rice to perfection. The display panel is your primary interface with this technology. It shows the cooking progress, selected modes, and, crucially, any error codes that indicate a problem.
Error codes are essentially the rice cooker’s way of communicating a malfunction or an issue that is preventing it from operating correctly. These codes are designed to be specific enough to guide you toward a solution. However, the exact meaning and appearance of these codes can vary significantly between different brands and models.
The Importance of Your Rice Cooker Manual
Before diving into general troubleshooting, it’s essential to highlight the most valuable resource you have: your rice cooker’s user manual. Your manual will have a dedicated section listing all the error codes specific to your model and what they signify. If you’ve misplaced it, most manufacturers provide digital copies on their websites. Always consult your manual first for the most accurate information regarding your specific appliance.
Common Digital Rice Cooker Error Codes and Their Meanings
While specific codes differ, several common issues trigger similar types of error messages across many digital rice cooker brands. Here are some of the most frequently encountered error codes:

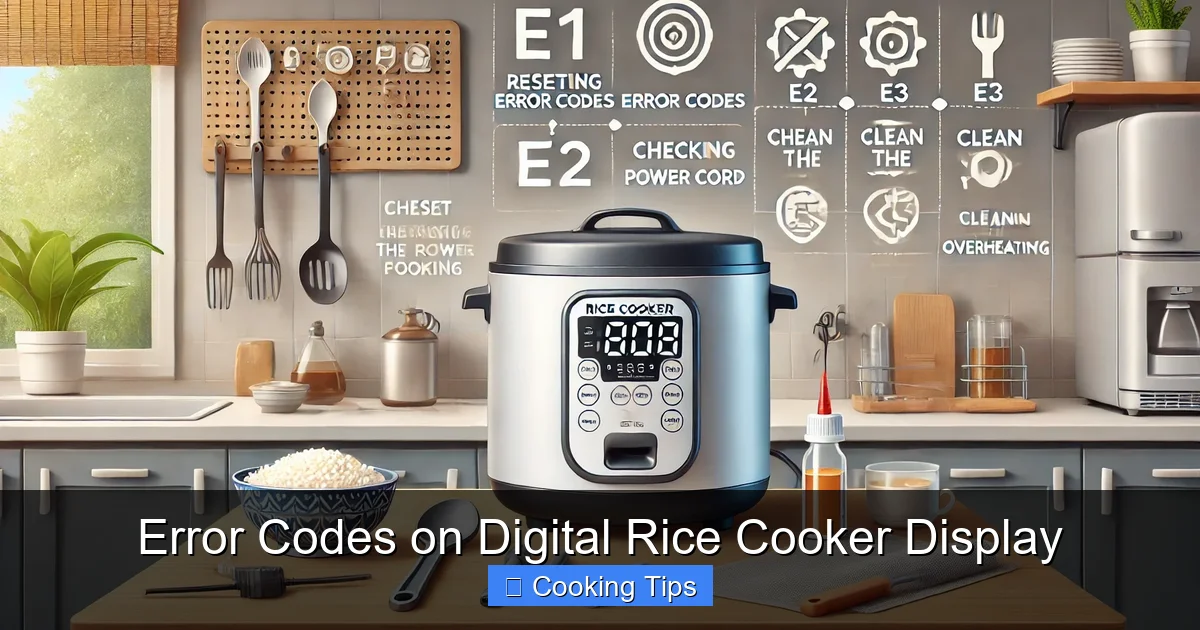
Visual guide about Error Codes on Digital Rice Cooker Display
Image source: kitchenadvising.com
“E1” or “Error 1” – Lid Sensor / Lid Not Closed Properly
This is perhaps the most common error code. It typically indicates that the rice cooker’s lid is not properly secured or that the lid sensor is not detecting that the lid is closed. The cooker needs a sealed environment to maintain the correct temperature and pressure for cooking rice.
Possible Causes:
- The lid is not fully latched.
- Foreign objects are preventing the lid from closing completely.
- The lid gasket or seal is dirty or damaged.
- The lid sensor itself is obstructed or faulty.
“E2” or “Error 2” – Temperature Sensor Malfunction / Overheating
This error code usually signals a problem with the internal temperature sensor. It might be that the sensor is reading an unusually high temperature (overheating) or that it’s not functioning correctly at all.
Possible Causes:
- The rice cooker is overheating due to excessive use or an environmental issue (e.g., placed too close to a heat source).
- The temperature sensor is dirty or covered in residue.
- Internal wiring issue to the temperature sensor.
- The heating element is malfunctioning.
“E3” or “Error 3” – Water Level Too Low or Too High
Some advanced digital rice cookers have sensors to detect the water level. This error code indicates that the water level is either significantly below the minimum requirement or above the maximum fill line.
Possible Causes:
- Not enough water was added for the amount of rice.
- Too much water was added, exceeding the capacity.
- The water level sensor is dirty or obstructed.
“E4” or “Error 4” – Heating Element Failure
This is a more serious error, indicating a problem with the primary heating element. The cooker cannot generate the heat required to cook the rice.
Possible Causes:
- The heating element has failed or is damaged.
- A fuse related to the heating element has blown.
- Internal wiring issues connected to the heating element.
“E5” or “Error 5” – Cooker Not on a Level Surface
Believe it or not, some rice cookers have sensors to detect if they are placed on a stable, level surface. If the cooker is tilted, it could affect its ability to heat evenly or trigger this error.
Possible Causes:
- The rice cooker is placed on an uneven surface.
- The unit has been bumped or moved during operation.
“E6” or “Error 6” – Power Supply / Internal Error
This is a general error code that can indicate a variety of internal issues, often related to the power supply or the main control board. It’s a catch-all for problems the cooker can’t specifically diagnose.
Possible Causes:
- Fluctuations in the power supply.
- A general electronic malfunction within the cooker.
- Software glitch.
Step-by-Step Troubleshooting Guide
When you encounter an error code, don’t panic! Follow these general troubleshooting steps. Remember to always unplug your rice cooker from the power outlet before performing any cleaning or inspection.

Visual guide about Error Codes on Digital Rice Cooker Display
Image source: expertreviewsbestricecooker.com
Step 1: Identify the Error Code
Carefully note the exact error code displayed on your digital rice cooker. Is it “E1,” “E2,” “E3,” or something else? Also, observe any blinking lights or unusual sounds. This information is crucial for determining the next steps.
Visual guide about Error Codes on Digital Rice Cooker Display
Image source: expertreviewsbestricecooker.com
Step 2: Consult Your User Manual
As mentioned earlier, this is your first and most important step. Find your manual and look up the specific error code. The manual will provide the most accurate explanation and recommended solutions for your particular model.
Step 3: Perform Basic Checks (Universal for most errors)
These steps can often resolve simple issues that lead to error codes:
H3: Unplug and Reset
Action: Unplug the rice cooker from the wall outlet. Wait for at least 5-10 minutes. This allows any internal temporary glitches to clear. Then, plug it back in and try to power it on again or start a cooking cycle.
Example: If you saw an “E6” error, this simple reset might clear a temporary electronic hiccup.
H3: Check the Lid and Seal
Action: Ensure the lid is fully closed and latched. Inspect the rubber gasket or seal around the lid for any food particles, debris, or damage. Clean the gasket and the rim of the pot where the lid seals with a damp cloth. Make sure there’s nothing preventing a complete seal.
Example: If you see an “E1” error, thoroughly cleaning the lid and its seal is your first priority.
H3: Clean the Interior and Exterior
Action: Remove the inner pot. Wash it according to the manufacturer’s instructions. While the pot is out, inspect the heating element at the bottom of the cooker. Gently wipe away any food residue or debris from the heating element and the area around it with a dry or slightly damp cloth. Also, ensure the area where the lid closes is clean.
Example: For “E2” or “E3” errors, residue on the heating element or water level sensor can cause false readings.
H3: Verify Water Level
Action: If the error suggests a water level issue (“E3”), carefully measure and add the correct amount of water and rice according to your recipe or the cooker’s markings. Double-check the rice-to-water ratio. Ensure you haven’t overfilled or underfilled the pot.
Example: For “E3,” ensure the water is between the min and max lines indicated in your manual.
H3: Ensure a Level Surface
Action: Place the rice cooker on a stable, flat, and level countertop. Make sure it’s not wobbling or tilted. If the surface is uneven, the cooker might display an error related to stability (“E5”).
Example: If you get an “E5,” try moving the cooker to a different spot on your counter.
Step 4: Addressing Specific Error Codes with Targeted Solutions
Once you’ve performed the basic checks, let’s look at more specific solutions for common error codes:
H3: Troubleshooting “E1” (Lid Sensor)
If Basic Checks Don’t Work: After ensuring the lid is clean and closed, and the gasket is intact, the lid sensor itself might be the issue. Sometimes, a firm tap on the lid or the side of the cooker can dislodge a minor obstruction. If the error persists, the sensor might be faulty and require professional repair.
H3: Troubleshooting “E2” (Temperature Sensor / Overheating)
If Basic Checks Don’t Work: Ensure the rice cooker is not placed near a heat source like an oven or stovetop, which could cause external heat to interfere with the sensor. If the sensor itself appears damaged or corroded, it likely needs replacement. Overheating can also be a sign of a failing heating element, which is a more serious issue.
H3: Troubleshooting “E3” (Water Level Sensor)
If Basic Checks Don’t Work: If you’re confident about your water and rice measurements, and the sensor area is clean, there might be an issue with the sensor’s calibration or its connection. Some models have a removable sensor that can be cleaned more thoroughly.
H3: Troubleshooting “E4” (Heating Element Failure)
Action: This error typically indicates a hardware failure. If you suspect an “E4” error, it’s unlikely to be something you can fix yourself. Attempting to repair a heating element can be dangerous. Contact the manufacturer or a qualified repair technician.
H3: Troubleshooting “E5” (Level Surface)
Action: If the cooker consistently shows “E5” even on a perfectly level surface, there might be an internal sensor that is miscalibrated or damaged. Ensure the cooker’s feet are all intact and not compressed unevenly.
H3: Troubleshooting “E6” (Power Supply / Internal Error)
Action: Try plugging the rice cooker into a different electrical outlet to rule out an issue with the outlet itself. If the error persists, it points to an internal electronic problem within the cooker, which usually requires professional service.
When to Seek Professional Help or Replace Your Rice Cooker
While this guide covers many common issues, some error codes indicate a more significant problem that you cannot resolve yourself. If you have tried all the relevant troubleshooting steps for your specific error code, and the problem persists, it’s time to consider the next steps:
- Contact the Manufacturer: If your rice cooker is still under warranty, contact the manufacturer’s customer support. They can guide you through further troubleshooting or arrange for repair or replacement.
- Professional Repair: For out-of-warranty units, you might consider taking it to a small appliance repair shop. However, the cost of repair for digital appliances can sometimes approach the cost of a new unit.
- Consider Replacement: If your rice cooker is older, has had previous issues, or the cost of repair is prohibitive, it might be more economical to replace it with a new model. Digital rice cookers have advanced significantly, and newer models may offer improved features and efficiency.
Preventative Maintenance for Your Digital Rice Cooker
To minimize the chances of encountering error codes in the future, adopt these simple preventative maintenance practices:
- Clean After Every Use: Wash the inner pot and lid after each use. Wipe down the exterior and the area around the lid seal.
- Inspect Regularly: Periodically check the lid gasket, heating element, and sensors for any signs of wear or damage.
- Use Correct Water Ratios: Always follow the recommended rice-to-water ratios in your manual or recipe.
- Avoid Overfilling: Do not exceed the maximum fill line for the inner pot.
- Handle with Care: Avoid dropping or bumping the rice cooker, which could misalign internal components or sensors.
- Proper Storage: Store your rice cooker in a clean, dry place when not in use.
Conclusion
Digital rice cooker error codes, while initially daunting, are designed to help you identify and resolve issues. By understanding common error messages like “E1,” “E2,” and others, and by following the step-by-step troubleshooting process outlined in this guide, you can often fix the problem yourself and get back to cooking perfect rice.
Remember to always prioritize your user manual for model-specific advice. Regular cleaning and careful use will also go a long way in preventing future error codes. With a little knowledge and a systematic approach, you can ensure your digital rice cooker remains a reliable workhorse in your kitchen for years to come.