
Dealing with a stubborn blender lid is a common kitchen frustration. This comprehensive guide from 2026 provides a variety of safe and effective methods to help you unstick your blender lid without damaging your appliance. From simple temperature changes to gentle leverage techniques, you’ll learn how to get your blender back in working order quickly and safely.
Key Takeaways
- Gentle is Best: Always start with the least forceful methods to avoid damaging the blender lid or jar.
- Temperature Matters: Using hot water to expand the lid or cold water to contract the jar can often release stubborn seals.
- Lubrication Aids: A small amount of food-grade oil or dish soap can help a stuck lid slide free.
- Leverage Wisely: Employing gentle prying or twisting with tools should be a last resort and done with care.
- Prevention is Key: Proper cleaning and storage habits can significantly reduce the likelihood of lids getting stuck in the future.
- Know When to Stop: If none of the methods work or you feel you’re applying too much force, it’s time to contact the manufacturer.
Fixing a Stuck Lid on Your Blender
It’s a scene familiar to many home cooks in 2026: you’ve just finished a delicious smoothie, soup, or sauce, and now you’re faced with a seemingly insurmountable obstacle – a blender lid that refuses to budge. You twist, you pull, you might even give it a good whack (we’ve all been there!), but that lid remains stubbornly attached. Don’t despair! A stuck blender lid doesn’t mean you need a new blender. With a few simple techniques, you can usually free it up and get back to blending in no time. This guide will walk you through the most effective and safe methods to tackle that stubborn blender lid.
Understanding why blender lids get stuck can also help prevent future issues. Often, it’s due to a combination of sticky food residue, pressure changes, and the natural expansion and contraction of materials like plastic or glass. Over time, small particles can get lodged between the lid and the jar, creating a seal that’s hard to break. But rest assured, there are solutions!
We’ll start with the gentlest approaches and gradually move towards more involved techniques. The key is patience and applying the right amount of force at the right time. You want to loosen the seal, not break the lid or the jar.
Step 1: The Initial Assessment and Gentle Twists
Before you launch into drastic measures, take a moment to assess the situation. Look closely at where the lid meets the jar. Is there any visible food residue? Is the lid skewed or crooked?
H3: Visual Inspection
Examine the lid and the rim of the blender jar. Sometimes, a visible piece of food or a small blockage is the culprit. If you can see something obvious, try to gently dislodge it with a soft cloth or a non-sharp tool like a silicone spatula. Be careful not to scratch the plastic or glass.
H3: Basic Twisting Technique
With dry hands or a dry kitchen towel for better grip, try twisting the lid counter-clockwise (the standard direction for unscrewing). Apply firm, steady pressure. Avoid jerky movements. If it doesn’t budge immediately, don’t force it with all your might just yet. Try a few more gentle, sustained twists.
Step 2: Leveraging Temperature Changes
One of the most effective ways to deal with a stuck lid is to use the properties of expansion and contraction. Materials expand when heated and contract when cooled. We can use this to our advantage.
H3: The Hot Water Method (For Stuck Lids)
This is often the go-to method for a lid that seems to be “welded” shut. The idea is to gently warm the lid, causing it to expand slightly, which can break the seal.
1. **Prepare Hot Water:** Fill your sink or a large bowl with hot, but not boiling, tap water. You want it hot enough to be comfortable to touch but not so hot that it poses a burn risk or could damage plastic parts of your blender.
2. **Invert the Blender:** Carefully invert your blender so the lid is facing down.
3. **Submerge the Lid:** Submerge the lid part of the blender into the hot water. Make sure the water level doesn’t go above the lid itself and onto the rest of the blender jar or base. You only want to heat the lid. Let it sit for 1-3 minutes.
4. **Attempt to Unscrew:** Remove the blender from the water. Dry your hands and the lid with a towel for a good grip. Try twisting the lid counter-clockwise again. The warmth should have created enough expansion to loosen it.
*Practical Tip:* If your blender lid has a removable central cap, you can try removing that first. Sometimes, pressure builds up inside the blender, and releasing the central cap can release some of that pressure, making the main lid easier to remove.
H3: The Cold Water Method (For Stuck Jars)
While less common for stuck lids, this method can be useful if the jar itself seems to have shrunk or is contributing to the tightness. This is particularly relevant if you’ve just used the blender with hot ingredients and then tried to remove the lid.
1. **Prepare Cold Water:** Fill the blender jar with cold water, perhaps adding a few ice cubes.
2. **Let it Sit:** Let the cold water sit inside the jar for a few minutes. This will cause the jar material to contract slightly.
3. **Attempt to Unscrew:** While holding the jar firmly, try to twist the lid. This method is more about the jar contracting than the lid expanding, so it might require a firmer grip on the lid itself.
Step 3: Using Lubrication to Slide Free
If temperature changes haven’t done the trick, a little bit of lubrication can help the lid slide off more easily.
H3: Dish Soap Lubrication
Dish soap is designed to break down grease and food residue, and its slippery nature can help a stuck lid.
1. **Apply Dish Soap:** Put a small drop or two of liquid dish soap around the seam where the lid meets the jar.
2. **Work it In:** Gently try to work the soap into the seam by wiggling the lid or using a soft cloth.
3. **Let it Sit:** Allow the soap to sit for a minute or two.
4. **Attempt to Unscrew:** Dry your hands and the lid for grip, and try twisting again. Rinse the lid and jar thoroughly afterward to remove all soap residue.
H3: Food-Grade Oil Lubrication
For a more robust solution, a tiny amount of food-grade oil, such as vegetable oil or olive oil, can be very effective.
1. **Apply a Few Drops:** Carefully apply a few drops of food-grade oil around the edge of the lid where it seals against the jar.
2. **Work it In:** Gently rotate the lid back and forth to distribute the oil. You can also use a clean cloth to help work it into the seam.
3. **Let it Sit:** Give the oil a minute to seep into the joint.
4. **Attempt to Unscrew:** With a good grip, try twisting the lid counter-clockwise. Again, ensure you wash everything thoroughly after you’ve freed the lid.
*Caution:* Use oil sparingly. Too much oil can make the lid and jar slippery and difficult to grip.
Step 4: Gentle Leverage and Gripping Aids
If the above methods haven’t worked, you might need to apply a bit more force, but always with caution.
H3: Using a Rubber Grip or Towel
A standard kitchen towel can sometimes provide just enough extra friction to get a stubborn lid to turn.
1. **Wrap the Lid:** Wrap a dry, clean kitchen towel tightly around the lid.
2. **Grip and Twist:** Grip the lid firmly through the towel and try to twist counter-clockwise. You can use another towel or a rubber glove on the jar for better grip there, if needed.
H3: Using a Rubber Jar Opener
Many people have rubber jar openers in their kitchen drawers. These are excellent for providing extra grip on lids.
1. **Place the Opener:** Place a rubber jar opener over the blender lid.
2. **Grip and Twist:** Apply firm pressure and twist the lid counter-clockwise.
3. **Consider Two Opener:** If the jar is also slippery, you might use a second rubber opener on the jar itself for added stability.
H3: Gentle Prying (Last Resort!)
This should only be attempted if absolutely necessary and with extreme care. The goal is to break the seal without cracking or damaging the lid or jar.
1. **Choose a Tool:** Select a thin, flat, and sturdy but not sharp tool. A silicone spatula, a plastic scraper, or even the edge of a butter knife (used very gently and carefully) can work. Avoid anything metal that could easily chip or scratch plastic or glass.
2. **Insert Gently:** Carefully slide the edge of the tool into the seam between the lid and the jar. You’re not trying to pry it open like a crowbar, but rather to create a tiny gap.
3. **Work Around:** Gently move the tool around the circumference of the lid, trying to release the seal in small sections. You may hear a faint ‘pop’ as the seal breaks.
4. **Combine with Twisting:** As you create small gaps, try twisting the lid again. Often, breaking the seal in one or two spots is enough to allow it to be unscrewed normally.
*Warning:* Never use excessive force when prying. If you feel the lid or jar starting to bend or crack, stop immediately.
Troubleshooting: What If Nothing Works?
If you’ve tried all these methods and your blender lid is still stuck tight, don’t feel defeated. Here are a few final considerations:
* **Check Your Blender Model:** Some blender models have specific quirks or locking mechanisms. Consult your blender’s user manual. Many manuals are available online on the manufacturer’s website. Searching for “[Your Blender Brand and Model] stuck lid” can also yield helpful results from online forums or user groups.
* **Contact the Manufacturer:** If your blender is still under warranty, or if you’ve exhausted all safe troubleshooting steps, it’s best to contact the manufacturer’s customer support. They may have specific advice for your model or be able to offer a replacement lid or jar.
* **Consider the Age of the Blender:** If your blender is very old, the plastic components might have degraded, making them more prone to sticking or damage. In some cases, it might be more cost-effective to replace the appliance.
Preventing Future Stuck Lids
The best way to deal with a stuck lid is to prevent it from happening in the first place! Here are some tips for 2026:
* **Clean Immediately After Use:** Don’t let food residue dry and harden on the lid and jar. Rinse and wash them as soon as possible after you’re done blending.
* **Dry Thoroughly:** Make sure both the lid and the jar rim are dry before attaching the lid for storage. Moisture can contribute to seals becoming stuck.
* **Don’t Overtighten:** When attaching the lid, snug it up, but don’t crank it down with excessive force. This can damage the seal and make it harder to remove later.
* **Store Properly:** If you store your blender with the lid on, ensure it’s not too tight. Some people prefer to store the lid separately to avoid any issues.
* **Regular Cleaning:** Even with regular use, give your lid and jar a more thorough cleaning periodically. A soft brush can help remove any hidden residue.
Conclusion
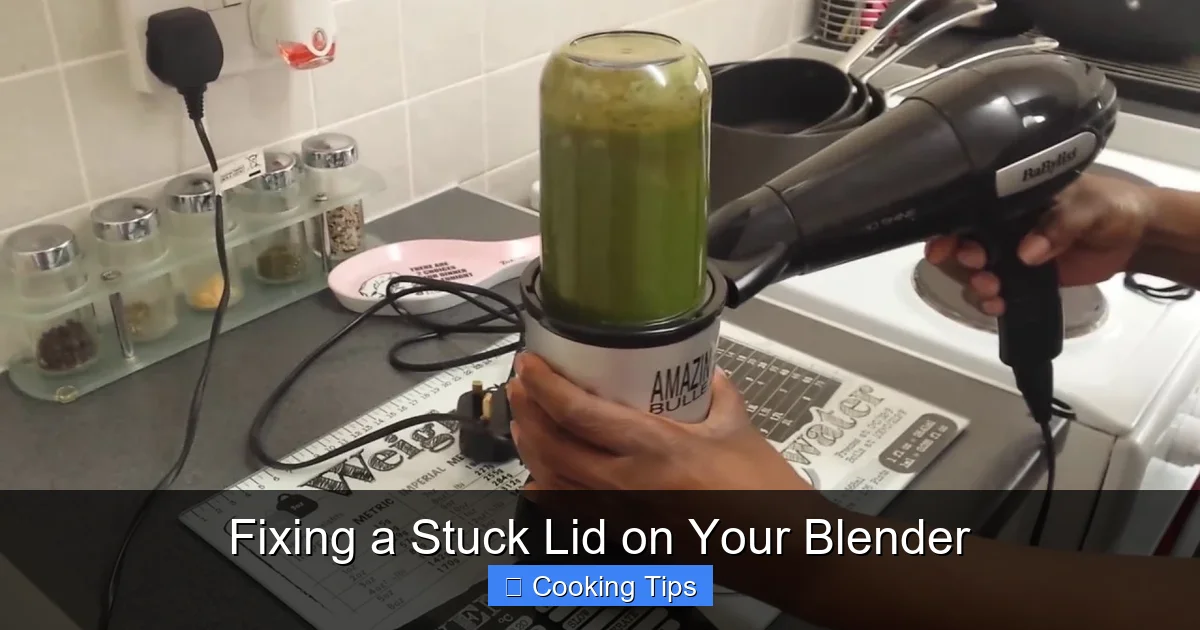
Visual guide about Fixing a Stuck Lid on Your Blender
Image source: storables.com
A stuck blender lid can be a frustrating hiccup in your culinary routine. However, by following the steps outlined in this guide, you’ll have a range of safe and effective techniques at your disposal. Remember to start with the gentlest methods, employ temperature changes, and use lubrication wisely. With a little patience and the right approach, you can quickly liberate your blender lid and get back to enjoying your favorite blended creations. Happy blending!