
Learn how to cook perfectly juicy and tender chicken breast in your air fryer with this comprehensive guide. We’ll cover everything from prep to seasoning and achieving that ideal cook. Say goodbye to dry, bland chicken and hello to a delicious, healthy meal in minutes!
Air Fryer Chicken Breast: How To Cook It
Welcome! Are you tired of dry, disappointing chicken breasts? Do you want a fast, healthy, and incredibly delicious way to prepare this lean protein? Then you’ve come to the right place! This guide will walk you through, step-by-step, on how to cook chicken breast in an air fryer. Forget complicated recipes and lengthy cooking times. With your air fryer, you can achieve perfectly juicy, tender, and flavorful chicken breasts in a fraction of the time.
This guide is designed for everyone, from beginner cooks to experienced home chefs. We’ll cover everything you need to know, from selecting the best chicken breasts to ensuring they come out perfectly cooked every single time. You’ll learn the secrets to getting that coveted golden-brown exterior and moist, succulent interior that air fryer chicken breast is famous for. Get ready to transform your weeknight dinners!
Key Takeaways
- Prep is Key: Patting the chicken dry and ensuring even thickness are crucial for uniform cooking.
- Season Generously: Don’t be shy with your favorite spices and herbs to infuse flavor throughout the chicken breast.
- Preheat Your Air Fryer: A hot air fryer basket ensures immediate crisping and prevents sticking.
- Cook Time Varies: Adjust cooking time based on the thickness of your chicken breast and your air fryer model.
- Rest is Best: Allowing the chicken to rest after cooking is essential for locking in juices and achieving tenderness.
- Internal Temperature Matters: Always use a meat thermometer to confirm the chicken has reached a safe internal temperature of 165°F (74°C).
Why Air Fryer Chicken Breast?
Before we dive into the “how,” let’s talk about “why.” The air fryer is a revolutionary kitchen appliance that circulates hot air around your food, creating a crispy, golden-brown exterior much like deep frying, but with significantly less oil. This means you get healthier, guilt-free “fried” chicken that’s incredibly tender and flavorful.
For chicken breasts, the air fryer is a game-changer. Unlike ovens that can sometimes dry them out, the rapid circulation of hot air cooks chicken breasts quickly and evenly, locking in moisture. This results in a protein that is not only delicious but also incredibly versatile. You can slice it for salads, shred it for tacos, or serve it as a main course with your favorite sides.
What You’ll Need
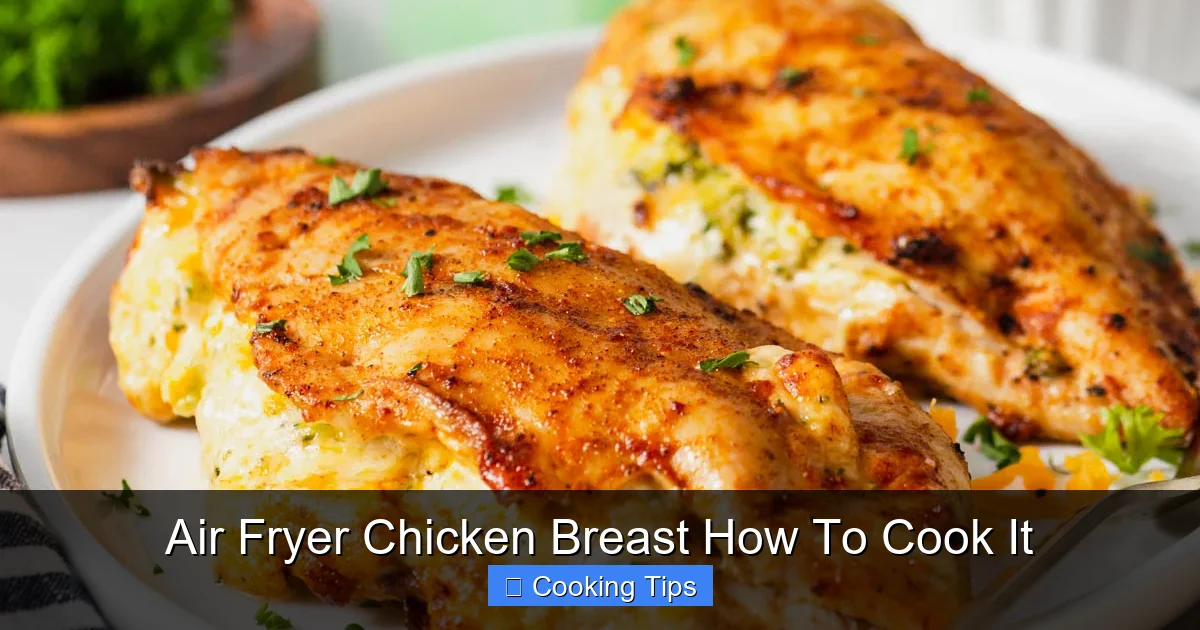
Visual guide about Air Fryer Chicken Breast How To Cook It
Image source: recipes.net
Gathering your ingredients and equipment beforehand makes the cooking process smooth and enjoyable. Here’s what you’ll need:
Ingredients:
* Chicken Breasts: About 1 to 4 boneless, skinless chicken breasts (depending on the size of your air fryer and how many you want to make). Aim for breasts of similar thickness for even cooking.
* Oil: 1-2 tablespoons of your preferred cooking oil (olive oil, avocado oil, or vegetable oil work well). This helps with browning and flavor.
* Seasonings: This is where you can get creative!
* Salt (kosher salt or sea salt)
* Black pepper (freshly ground is best)
* Garlic powder
* Onion powder
* Paprika (smoked or sweet)
* Dried herbs like oregano, thyme, or rosemary
* Other options: chili powder, cumin, Italian seasoning, lemon pepper, or your favorite pre-made chicken rub.
Equipment:
* Air Fryer: Any model will do.
* Paper Towels: For drying the chicken.
* Small Bowl: For mixing seasonings.
* Measuring Spoons: For oil and seasonings.
* Tongs: For handling the chicken.
* Meat Thermometer: Essential for ensuring the chicken is cooked to a safe and perfect temperature.
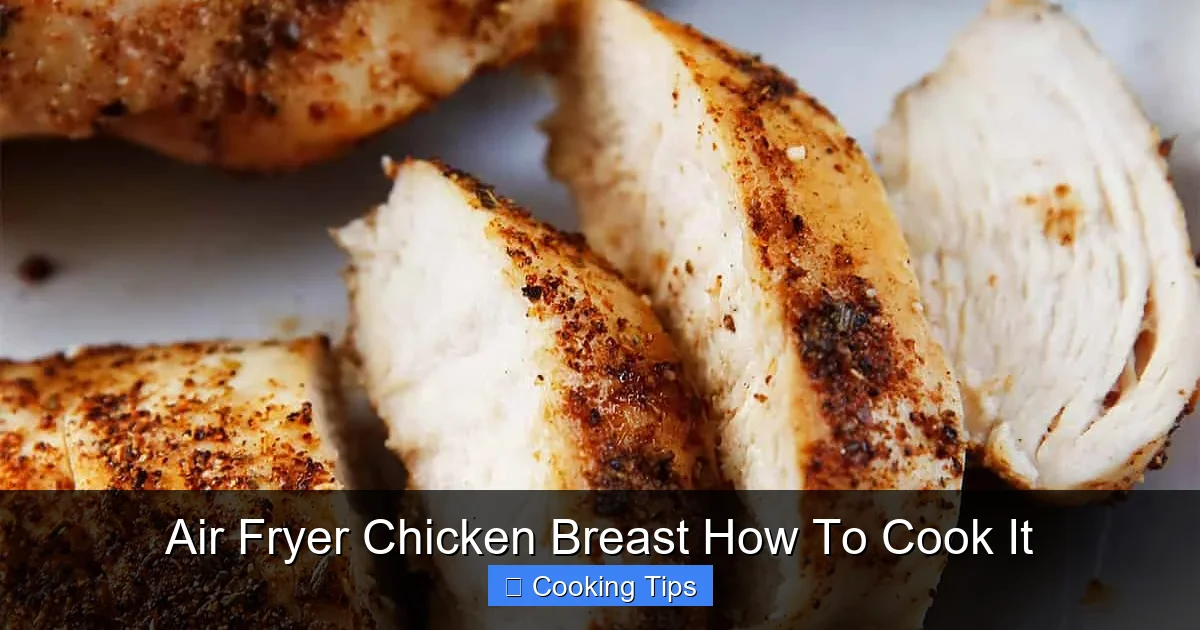
Step-by-Step Guide to Air Fryer Chicken Breast

Visual guide about Air Fryer Chicken Breast How To Cook It
Image source: carmyy.com
Let’s get cooking! Follow these simple steps for perfectly air-fried chicken breast.
Step 1: Prepare the Chicken Breasts
Visual guide about Air Fryer Chicken Breast How To Cook It
Image source: lexiscleankitchen.com
Proper preparation is the first and most important step to achieving succulent chicken breast.
1.1 Trim Excess Fat
Inspect your chicken breasts. If there’s any visible excess fat, trim it off with a sharp knife. This ensures a cleaner cook and better texture.
1.2 Pound for Even Thickness (Optional but Recommended)
This is a crucial step for ensuring your chicken cooks evenly. Chicken breasts are often thicker at one end than the other.
* Place one chicken breast at a time between two pieces of plastic wrap or inside a resealable plastic bag.
* Using a meat mallet, rolling pin, or the flat side of a heavy pan, gently pound the thicker end until the breast is about ½ to ¾ inch thick all over. Be gentle; you don’t want to shred the meat.
* If you have very small, naturally uniform chicken breasts, you might be able to skip this step, but it’s generally a good practice.
1.3 Pat Dry
This might seem like a small detail, but it makes a big difference!
* Use paper towels to thoroughly pat each chicken breast completely dry.
* Drying the surface of the chicken allows the seasonings to adhere better and helps create a crispier exterior during the air frying process. Moisture on the surface will steam the chicken instead of crisping it.
Step 2: Season the Chicken
Now for the fun part – flavor!
2.1 Mix Your Seasonings
In a small bowl, combine your chosen seasonings. A good basic blend is:
* 1 teaspoon salt
* ½ teaspoon black pepper
* 1 teaspoon garlic powder
* 1 teaspoon onion powder
* ½ teaspoon paprika
Feel free to adjust these amounts or add your favorite herbs and spices. For example, if you like a little heat, add ¼ teaspoon of chili powder. For an herby flavor, mix in ½ teaspoon of dried oregano or thyme.
2.2 Coat the Chicken
Place the dried chicken breasts in a clean bowl or on a plate. Drizzle them with the cooking oil.
* Use your hands or tongs to ensure the oil coats all sides of the chicken breasts evenly.
* Sprinkle the mixed seasonings generously over the chicken.
* Rub the seasonings into the meat, making sure all surfaces are well-coated. Don’t forget the sides!
For an even deeper flavor, you can let the seasoned chicken breasts sit at room temperature for about 15-30 minutes before cooking, or refrigerate them for a longer marinade of up to a few hours.
Step 3: Preheat Your Air Fryer
Just like preheating an oven, preheating your air fryer is essential for optimal results.
* Set your air fryer to 375°F (190°C).
* Let it preheat for about 3-5 minutes.
* A hot air fryer basket ensures the chicken starts cooking immediately upon insertion, promoting better browning and crispiness, and preventing the chicken from sticking to the basket.
Step 4: Air Fry the Chicken
It’s time to cook!
4.1 Arrange Chicken in the Basket
Carefully place the seasoned chicken breasts in the preheated air fryer basket in a single layer.
* Make sure the chicken pieces are not overlapping. If they are, cook in batches. Overcrowding the basket will prevent the hot air from circulating properly, leading to uneven cooking and less crispy results.
* Most standard air fryers can fit 1-2 chicken breasts comfortably.
4.2 Cook Time and Temperature
* Set your air fryer to 375°F (190°C).
* The cooking time will depend on the thickness of your chicken breasts and the wattage of your air fryer. As a general guideline, start with 15-20 minutes for chicken breasts that are about ¾ inch thick.
4.3 Flip Halfway Through
About halfway through the cooking time (around the 8-10 minute mark), carefully open the air fryer and flip the chicken breasts using tongs. This ensures even browning and cooking on both sides.
4.4 Check for Doneness
This is where your meat thermometer is your best friend!
* Once the cooking time is nearing completion, insert a meat thermometer into the thickest part of the largest chicken breast.
* The chicken is safely cooked when the internal temperature reaches 165°F (74°C).
* If the chicken has not reached 165°F (74°C), continue cooking in 2-3 minute intervals, checking the temperature each time, until it reaches the safe internal temperature. You might see a little pink in the very center before it reaches 165°F, but it will cook through as it rests.
Step 5: Rest the Chicken
Don’t skip this vital step! Resting allows the juices to redistribute throughout the chicken.
* Once the chicken reaches 165°F (74°C), carefully remove the chicken breasts from the air fryer basket using tongs.
* Place them on a clean plate or cutting board.
* Tent them loosely with aluminum foil.
* Let them rest for at least 5-10 minutes before slicing or serving. This resting period is crucial for ensuring your chicken breast is incredibly moist and tender. If you cut into it immediately, the juices will run out, leaving you with dry chicken.
Step 6: Slice and Serve
After resting, your perfectly cooked air fryer chicken breast is ready to be enjoyed!
* Slice the chicken breasts against the grain for maximum tenderness.
* Serve as a main course with your favorite side dishes, like roasted vegetables, a fresh salad, or rice.
* Or, shred or dice it for use in sandwiches, wraps, salads, or pasta dishes.
Tips for Perfect Air Fryer Chicken Breast
Here are some extra tips to elevate your air fryer chicken breast game:
* Uniform Thickness is King: I can’t stress this enough – even thickness is key to even cooking. If your breasts are significantly different in thickness, you’ll end up with some overcooked and some undercooked pieces.
* Don’t Overcrowd: As mentioned, cook in batches if necessary. Your air fryer is designed for air circulation.
* Experiment with Seasonings: Don’t be afraid to get creative! Try different spice blends, marinades (though for air frying, keep marinades light and pat dry thoroughly), or even a simple lemon and herb rub.
* Adjust Cooking Time: Every air fryer is a little different. Get to know yours. The first time you make this, keep a close eye on it and check the temperature a little early. You’ll quickly learn the perfect timing for your machine.
* Crispier Skin (if using skin-on breasts): If you happen to be air frying skin-on chicken breasts, pat the skin extremely dry. You can also lightly brush or spray the skin with oil for extra crispiness.
* Sauce it Up: If you want to add a sauce, do it *after* the chicken has rested or during the last minute or two of cooking. Too much sauce early on can prevent browning and crisping.
Troubleshooting Common Issues
Even with the best guides, sometimes things don’t go exactly as planned. Here are some common issues and how to fix them:
Issue: Chicken is Dry
* Cause: Overcooked, not rested, or not enough oil/seasoning.
* Solution: Ensure you’re using a meat thermometer and pulling the chicken out as soon as it hits 165°F (74°C). Always rest the chicken for at least 5-10 minutes. Make sure you are seasoning it well and using a little oil. Pounding the chicken to an even thickness also helps prevent this.
Issue: Chicken is Not Crispy
* Cause: Basket was overcrowded, chicken wasn’t patted dry, or air fryer wasn’t preheated.
* Solution: Cook in a single layer with space between pieces. Pat chicken very dry before seasoning. Always preheat your air fryer.
Issue: Chicken is Unevenly Cooked
* Cause: Chicken breasts were not pounded to an even thickness.
* Solution: Always pound chicken breasts to an even thickness (about ½ to ¾ inch) before cooking. This is the most common reason for uneven cooking.
Issue: Chicken is Sticking to the Basket
* Cause: Basket wasn’t preheated, or not enough oil was used.
* Solution: Preheat your air fryer thoroughly. Ensure the chicken is lightly coated in oil. If you have persistent sticking issues, consider using a light spray of cooking oil on the basket itself.
Conclusion
Congratulations! You’ve learned how to cook incredibly delicious, juicy, and tender chicken breast in your air fryer. This method is not only fast and easy but also a fantastic way to enjoy a healthy and satisfying meal. By following these simple steps—from preparation and seasoning to proper cooking and resting—you can consistently achieve restaurant-quality results in your own kitchen.
Say goodbye to guesswork and hello to perfectly cooked air fryer chicken breast every time. This recipe is a foundation that you can build upon, experimenting with different seasonings and flavor profiles to suit your taste. Enjoy your culinary adventures, and happy air frying!