
Discover how to achieve delicious and healthy baked goods with minimal oil using the power of nonstick loaf pans. This guide covers everything from choosing the right pan to mastering techniques for lower-fat recipes. Unlock the secrets to guilt-free baking and enjoy moist, flavorful loaves with ease.
Nonstick Loaf Pans for Low Oil Baking
Welcome to the future of healthier baking! In 2026, we’re all about making smarter, more nutritious choices in the kitchen. Baking delicious treats doesn’t have to mean overloading them with oil. With the right tools and techniques, you can create moist, flavorful loaves with significantly less fat. This comprehensive guide is your go-to resource for mastering low-oil baking using the incredible benefits of nonstick loaf pans. You’ll learn everything you need to know, from selecting the perfect pan to adapting your favorite recipes and ensuring perfect results every time.
Baking is a joy, and making it healthier is even more rewarding. Many traditional recipes call for a substantial amount of oil or butter to prevent sticking and ensure moisture. However, modern advancements in cookware, particularly nonstick technology, have opened up new possibilities. Nonstick loaf pans are game-changers, allowing us to achieve fantastic textures and flavors while drastically reducing the need for added fats. So, let’s dive in and discover how to transform your baking!
Key Takeaways
- Choosing the Right Pan: Opt for high-quality, PFOA-free nonstick loaf pans with a dark, heavy gauge for even heat distribution and superior release.
- Preparation is Crucial: Even with nonstick, a light greasing or parchment paper lining further ensures your baked goods won’t stick, especially for delicate recipes.
- Recipe Adaptation: Understand how to adjust your favorite recipes to reduce oil content by substituting with ingredients like applesauce, yogurt, or mashed bananas.
- Temperature and Time Adjustments: Low-oil batters can sometimes brown faster. Be prepared to adjust baking temperatures and times slightly for optimal results.
- Cooling Techniques: Proper cooling on a wire rack is essential for preventing condensation and ensuring the loaf releases cleanly from the pan.
- Cleaning and Maintenance: Gentle cleaning with a soft sponge and mild detergent will preserve the nonstick coating, extending the life of your loaf pan.
Understanding Nonstick Loaf Pans
Before we get to baking, it’s important to understand what makes a good nonstick loaf pan for low-oil baking. Not all nonstick pans are created equal, and understanding their features will help you make the best choice.
Types of Nonstick Coatings
Most modern nonstick loaf pans feature PTFE-based coatings (like Teflon) or ceramic-based coatings. For low-oil baking, both can be effective. PTFE coatings are known for their excellent nonstick properties. Ceramic coatings are often touted as a more environmentally friendly option, though their durability can sometimes vary. In 2026, look for pans that explicitly state they are PFOA-free and PFTE-free for added peace of mind.
Material and Gauge
The material and thickness (gauge) of your loaf pan significantly impact how your baked goods turn out.
- Aluminum: Lightweight and conducts heat well, but can be prone to warping.
- Steel: More durable and offers good heat distribution.
- Heavy Gauge: A heavier gauge pan is generally preferred. It promotes more even heating, reducing hot spots that can lead to uneven browning or burnt edges. This is crucial when baking with less oil, as the fat helps to buffer against extreme heat.
Look for pans that are described as “heavy-duty” or “commercial-grade” for the best performance.
Color of the Pan
The color of your loaf pan plays a role in baking.
- Dark-colored pans absorb more heat, leading to faster browning. This can be beneficial for achieving a lovely crust on loaves, especially when using less oil.
- Light-colored pans reflect heat, resulting in a lighter crust.
For low-oil baking where you want to ensure a beautiful, golden-brown finish without relying on fat for browning, a dark-colored, heavy-gauge nonstick loaf pan is often the ideal choice.
Choosing Your Nonstick Loaf Pan
With so many options available, selecting the right nonstick loaf pan can feel overwhelming. Here’s a simple breakdown to guide your decision.
Prioritize Quality
Investing in a good quality nonstick loaf pan will pay dividends in the long run. Cheaper pans might have coatings that scratch easily or wear out quickly. A well-made pan will offer reliable nonstick performance for years, even with frequent use. Look for reputable brands known for their durable cookware.
Visual guide about Nonstick Loaf Pans for Low Oil Baking
Image source: static-01.daraz.pk
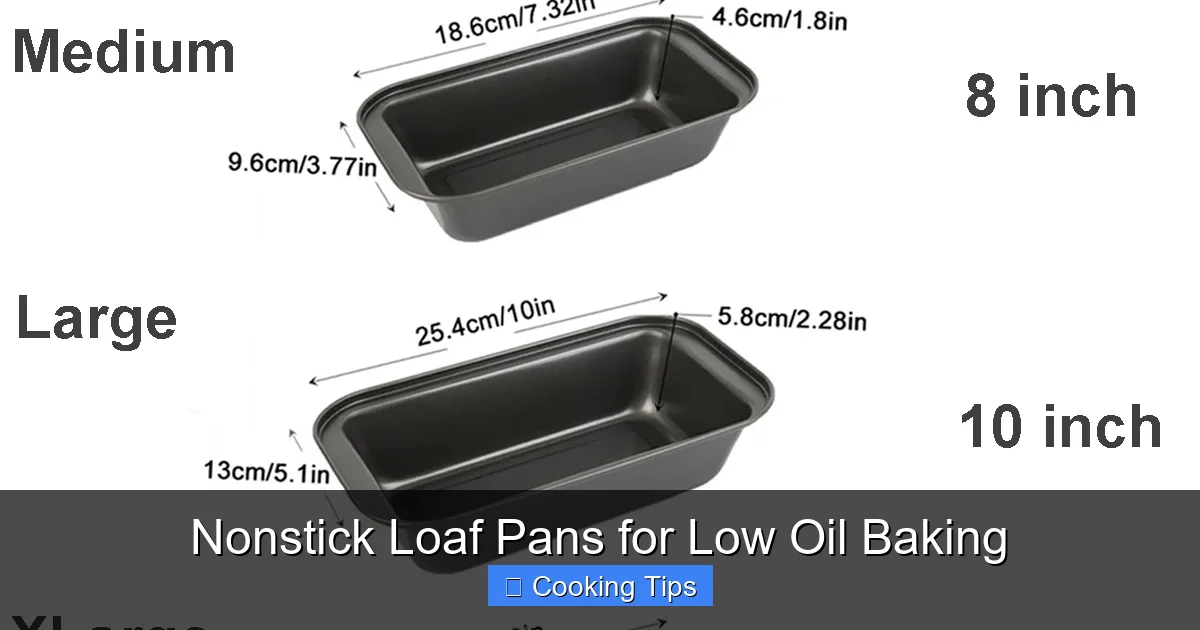
Consider the Size
Standard loaf pans are typically around 9×5 inches (23×13 cm) or 8.5×4.5 inches (21.5×11.5 cm). Ensure the size you choose matches the recipes you plan to make. Some recipes might specify a particular pan size, so it’s good to have a standard size on hand.
Check for Durability and Warranty
Read reviews to gauge the durability of the nonstick coating and the overall construction of the pan. A good warranty can also be an indicator of a manufacturer’s confidence in their product’s quality.
Prepping Your Nonstick Loaf Pan for Low Oil Baking
Even the best nonstick pans can benefit from a little extra preparation, especially when you’re intentionally reducing oil in your recipes. These steps will ensure your loaves release flawlessly every time.
The “Light Touch” Greasing Method
While the nonstick surface is designed to prevent sticking, a minimal application of oil can further enhance release and add a touch of richness.
- Use a minimal amount: Dispense just a tiny amount of your chosen oil (e.g., olive oil, avocado oil, or melted coconut oil) onto a paper towel.
- Wipe it around: Gently wipe the inside surfaces of the loaf pan – the bottom and all four sides. You’re aiming for a very thin, almost invisible film of oil, not a thick coating.
- Wipe away excess: If it looks like there’s too much oil, use a clean, dry paper towel to gently wipe away any excess. The goal is just to lightly condition the surface.
This light touch is especially helpful for recipes that are naturally less forgiving, such as those made with alternative flours or very low fat content.
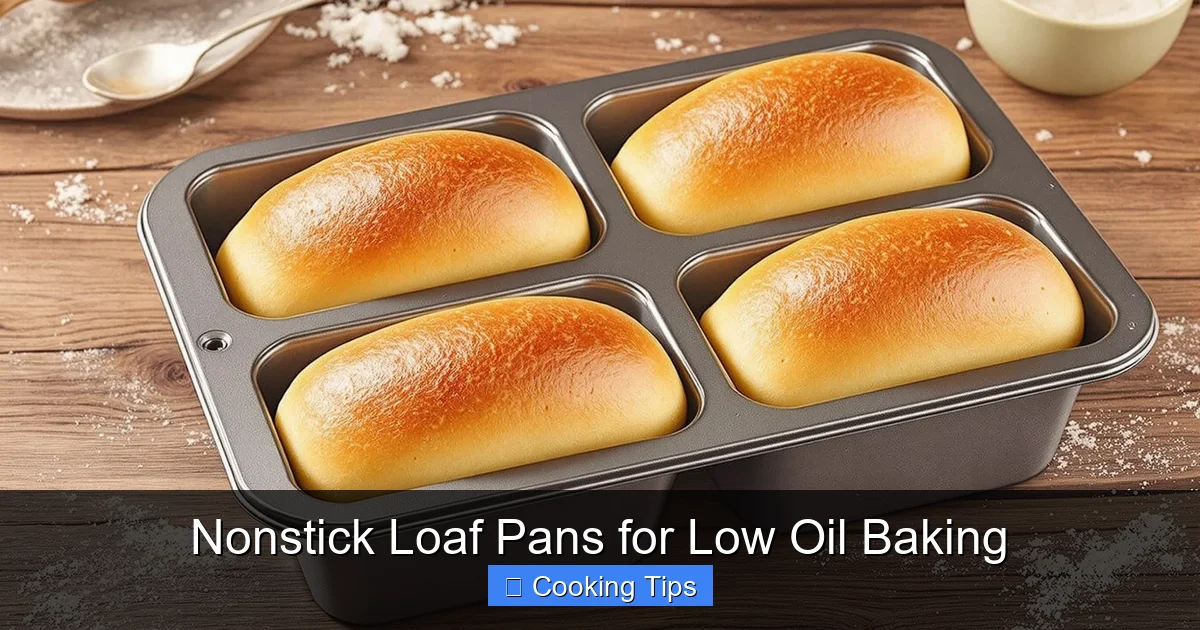
Visual guide about Nonstick Loaf Pans for Low Oil Baking
Image source: solobaking.com
Parchment Paper Magic
For ultimate peace of mind and a guaranteed easy release, consider using parchment paper. This is a fantastic technique for low-oil baking.
- Measure and cut: Cut a piece of parchment paper to fit the bottom of your loaf pan.
- Create “sling” handles: Cut two additional strips of parchment paper that are long enough to run up the sides of the pan. These will act as “handles” to lift your loaf out once baked.
- Line the pan: Place the bottom piece in the pan. Then, position the two side strips so they overlap slightly at the bottom and extend up the sides of the pan, creating a hammock-like sling.
- Grease lightly (optional): You can lightly grease the parchment paper itself, though it’s often not necessary for its primary function.
This method is particularly useful for delicate cakes, quick breads, or any recipe where you want to be absolutely certain of a clean release without using excessive oil in the batter.
Adapting Recipes for Low Oil Baking
This is where the magic truly happens! With a nonstick loaf pan, you can confidently tweak your favorite recipes to reduce their oil content.
Understanding Oil’s Role
Oil in baking primarily contributes to:
- Moisture: It coats flour particles, preventing them from absorbing too much liquid, which keeps the baked good tender.
- Tenderness: Fat shortens gluten strands, resulting in a softer crumb.
- Flavor: Some oils impart distinct flavors.
- Browning: It helps in achieving a golden-brown crust.
When reducing oil, you need to compensate for these roles.
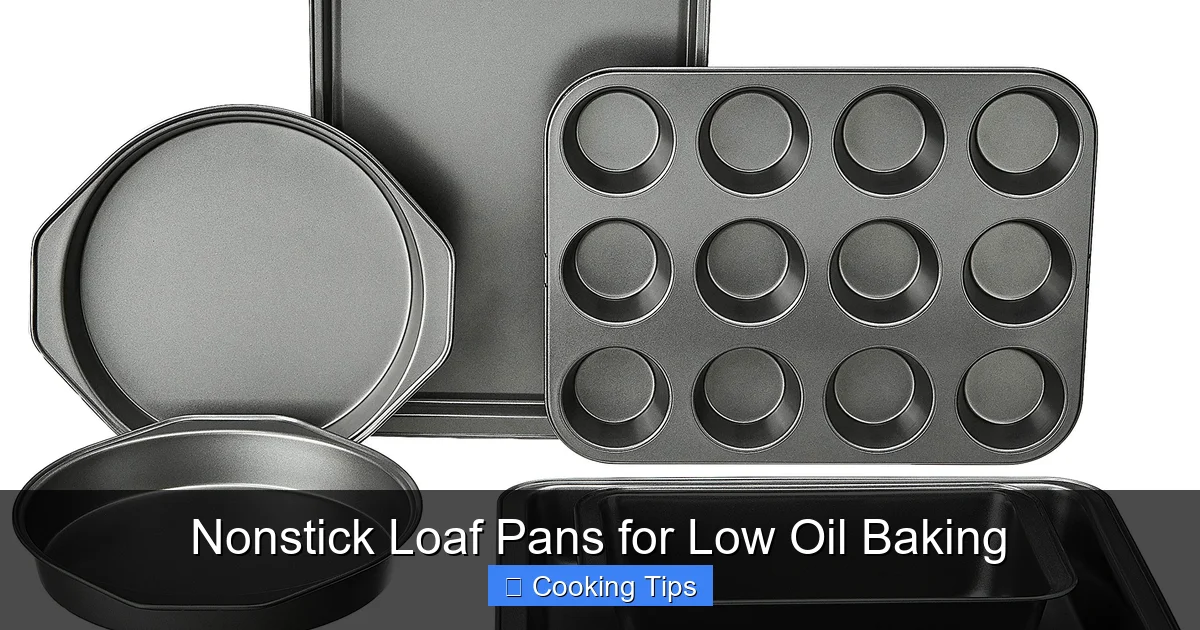
Visual guide about Nonstick Loaf Pans for Low Oil Baking
Image source: m.media-amazon.com
Healthy Substitutes for Oil
Fortunately, there are many wonderful ingredients you can use to replace some or all of the oil in your recipes. Here are some popular and effective options for 2026:
- Unsweetened Applesauce: A classic substitute. It adds moisture and a subtle sweetness. Use a 1:1 ratio (e.g., 1 cup applesauce for 1 cup oil). Be aware it can make baked goods a bit denser.
- Plain Yogurt or Greek Yogurt: Adds moisture and a slight tang, which can complement flavors well. Use a 1:1 ratio. Greek yogurt, being thicker, will provide more structure.
- Mashed Banana: Perfect for sweet loaves (like banana bread!). It adds moisture, sweetness, and a distinct banana flavor. Use a 1:1 ratio, but this will significantly change the flavor profile.
- Pumpkin Puree: Similar to applesauce, it adds moisture and a beautiful color. Great for spice cakes and quick breads. Use a 1:1 ratio.
- Pureed Silken Tofu: A neutral-tasting option that adds moisture and a tender crumb. Use a 1:1 ratio.
- Other Fruit Purees: Pear puree or prune puree can also work well, adding moisture and natural sweetness.
- Water or Milk: In some cases, you can simply reduce the oil and increase the liquid slightly if the batter seems too dry. This works best when the oil is primarily for moisture rather than tenderness.
Tip: Start by replacing half of the oil with a substitute. Bake and assess. If the result is satisfactory, you can try replacing more in future attempts. Experimentation is key!
Adjusting Other Ingredients
When you reduce oil, your batter might be less rich. You may want to slightly increase other ingredients that add flavor and moisture, such as:
- Spices: A little extra cinnamon, nutmeg, or vanilla extract can boost flavor.
- Sweeteners: If using a less sweet substitute like yogurt, you might need to slightly increase sugar or another sweetener.
- Eggs: Eggs provide structure and richness. If your recipe is already low in eggs, consider if a substitute like flax egg (1 tbsp flax meal + 3 tbsp water, let sit for 5 mins) can provide binding without adding fat.
Remember, the goal is to maintain balance. You want to reduce oil without sacrificing taste or texture.
Baking with Your Nonstick Loaf Pan
Now that your pan is prepped and your recipe is adapted, let’s talk about the actual baking process.
Oven Temperature and Time
Low-oil batters can sometimes bake differently than their higher-fat counterparts.
- Monitor Closely: Be vigilant when checking your loaf for doneness. It might brown faster or slower depending on the substitutes you’ve used.
- Adjust Temperature: If your loaf is browning too quickly on the outside before the inside is cooked, you might need to slightly reduce the oven temperature (by about 10-15°F or 5-8°C) and increase the baking time.
- Toothpick Test: The most reliable way to check for doneness is the toothpick test. Insert a toothpick into the center of the loaf. If it comes out clean or with a few moist crumbs attached, it’s done. If it comes out with wet batter, continue baking and check again in 5-10 minute intervals.
Using a dark, heavy-gauge nonstick loaf pan will generally help with even heat distribution, which is a great advantage when you’re working with less oil.
Dealing with Stickiness (Troubleshooting)
Despite using a nonstick pan and preparing it correctly, occasional sticking can still happen, especially with very delicate recipes or if the pan’s coating is aging.
- Initial Resistance: If the loaf seems to resist coming out, don’t force it immediately. Let it cool in the pan for an additional 10-15 minutes on the wire rack. The residual heat can sometimes help it contract slightly and release more easily.
- Gentle Loosening: If it’s still stuck, use a thin, flexible spatula or a silicone spatula to gently run around the edges of the loaf. Be careful not to scratch the nonstick surface.
- Troubleshooting the Pan: If sticking is a persistent problem, it might be time to consider replacing your loaf pan. Over time, even the best nonstick coatings can degrade.
For most recipes, with proper preparation, sticking should be minimal to non-existent.
Cooling and Releasing Your Loaf
The cooling process is as critical as the baking itself. Proper cooling ensures your loaf maintains its structure and releases cleanly from the pan.
The Wire Rack Method
Once your loaf is baked, the first step is to immediately turn it out onto a wire cooling rack.
- Invert the Pan: Carefully invert the loaf pan onto the wire rack. The loaf should slide out easily. If you used parchment paper sling handles, you can simply lift the loaf out by the edges of the paper.
- Allow to Cool: Let the loaf cool completely on the wire rack. This allows air to circulate around all sides, preventing the bottom from becoming soggy from steam.
Cooling on a wire rack is essential for preventing condensation, which can make the bottom of your loaf gummy and potentially cause it to stick if you were to leave it in the pan too long.
Why Immediate Release is Key
Leaving a baked loaf in its pan for too long after baking can cause it to steam. This trapped moisture can make the crust soft and, in some cases, can cause the loaf to adhere to the pan as it cools and condenses. Turning the loaf out onto a wire rack promptly after baking allows steam to escape and helps maintain the integrity of the crust.
Cleaning and Maintaining Your Nonstick Loaf Pans
To ensure your nonstick loaf pans continue to perform beautifully for years to come, proper cleaning and maintenance are essential.
Gentle Cleaning Practices
Avoid harsh scrubbing or abrasive cleaners, which can damage the nonstick coating.
- Wait for Cooling: Always allow your loaf pan to cool completely before washing it.
- Use Soft Tools: Wash with a soft sponge or cloth. Avoid abrasive scrubbers, steel wool, or harsh scouring pads.
- Mild Detergent: Use a mild dish soap.
- Rinse Thoroughly: Rinse well to remove all soap residue.
- Dry Completely: Dry the pan thoroughly with a soft towel.
Some nonstick pans are advertised as dishwasher safe. While this can be convenient, hand washing is generally recommended to extend the life of the nonstick coating.
What to Avoid
To protect your investment:
- No Metal Utensils: Never use metal spatulas, whisks, or knives inside your nonstick loaf pan. Stick to silicone, wood, or plastic utensils.
- Avoid Cooking Sprays: Some cooking sprays can build up on nonstick surfaces and are difficult to remove. It’s better to use a light wipe of oil or parchment paper.
- No Oven-Ready Sprays: Similarly, avoid sprays that claim to be “oven-ready” or “nonstick” themselves.
- Extreme Temperature Changes: Don’t plunge a hot pan into cold water, as this can cause warping or damage to the coating.
By following these simple care instructions, your nonstick loaf pans will remain your trusted allies in the kitchen for countless low-oil baking adventures.
Conclusion
You are now equipped with the knowledge and confidence to embrace low-oil baking using nonstick loaf pans. From selecting the ideal pan and prepping it for success to creatively adapting recipes and mastering the baking and cooling process, you’ve got all the tools at your fingertips. In 2026, making healthier choices in the kitchen is more accessible and rewarding than ever. Enjoy the delicious, moist, and guilt-free loaves that await you. Happy baking!