
This comprehensive guide details how to effectively use a stainless steel rotisserie kit for cooking lean meats. Learn everything from selecting the right kit and preparing your food to achieving perfectly juicy results. We’ll cover setup, cooking techniques, and essential tips to elevate your rotisserie game, ensuring succulent and flavorful lean cuts every time.
Stainless Steel Rotisserie Kit for Lean Meats
Are you ready to take your grilling and roasting to the next level? In 2026, the humble rotisserie kit is making a serious comeback, especially for those who love the flavor and health benefits of lean meats. But what’s the best way to use a stainless steel rotisserie kit to achieve those mouthwatering, juicy results with cuts like chicken breast, pork loin, or even fish? You’ve come to the right place!
This guide is designed to walk you through every step, from choosing the right stainless steel rotisserie kit to carving your perfectly cooked masterpiece. We’ll demystify the process, offering practical advice and handy tips to ensure your lean meats are never dry or tough again. Get ready to impress yourself and your guests with restaurant-quality rotisserie creations right in your backyard.
Key Takeaways
- Understand Your Kit: Familiarize yourself with all the components of your stainless steel rotisserie kit, including the spit rod, forks, counterweights, and motor.
- Meat Preparation is Crucial: Properly trussing and balancing your lean meat on the spit is essential for even cooking and preventing it from falling off.
- Motor Power Matters: Ensure your rotisserie motor has sufficient power to handle the weight and size of the lean meat you’re cooking for consistent rotation.
- Temperature Control is Key: Maintain a consistent cooking temperature to allow the lean meat to cook through without drying out, often requiring monitoring and adjustments.
- Basting and Flavoring: While lean meats can be prone to drying, strategic basting and the use of marinades can add moisture and enhance flavor throughout the cooking process.
- Resting is Non-Negotiable: Allowing the cooked lean meat to rest after removal from the rotisserie is vital for redistributing juices and ensuring maximum tenderness.
Understanding Your Stainless Steel Rotisserie Kit
Before you can start cooking, it’s important to know your equipment. A stainless steel rotisserie kit is a versatile tool, and understanding its parts will make the whole process much smoother.
The Spit Rod
This is the long metal rod that goes through the center of your meat. Stainless steel is ideal because it’s durable, easy to clean, and won’t impart any unwanted flavors to your food. Ensure it’s long enough to accommodate your chosen cut of meat and fit securely into your rotisserie setup.
The Forks
These are the sharp, pronged attachments that secure your meat to the spit rod. Most kits come with at least two forks. For lean meats, it’s especially important that these forks have sharp prongs that can firmly grip the meat without tearing it too much.
The Counterweight
This is a crucial component for balanced cooking. A counterweight is a small, adjustable weight that helps balance the load on the spit rod. If your meat is unbalanced, it will cause the spit to wobble, leading to uneven cooking and potential strain on your rotisserie motor.
The Motor and Housing
The motor is the powerhouse that turns the spit rod. Stainless steel rotisserie motors are common and generally robust. The housing protects the motor from the elements and heat. Ensure the motor is rated for the weight of the meat you intend to cook.
Mounting Brackets and Hardware
These are the pieces that attach the spit rod and motor to your grill or fire pit. They need to be sturdy and adjustable to ensure everything is aligned correctly.
Preparing Your Lean Meat for the Rotisserie
The success of your rotisserie lean meat hinges on proper preparation. This is where you set yourself up for a flavorful and tender outcome.
Choosing the Right Cut
For rotisserie cooking, lean cuts work best when they have some inherent moisture or can benefit from basting. Excellent choices include:
- Whole chickens (though not strictly lean, they are a classic and work well)
- Pork loin roasts
- Beef sirloin tip roasts
- Turkey breasts
- Large firm fish (like salmon or halibut, often wrapped in foil or a net)
Avoid extremely lean, dry cuts that have little to no fat, as they will be more challenging to keep moist.
Trussing for Even Cooking
Trussing is the art of tying your meat neatly. This is vital for lean meats to ensure they cook evenly and hold their shape.
For a whole chicken or turkey breast:
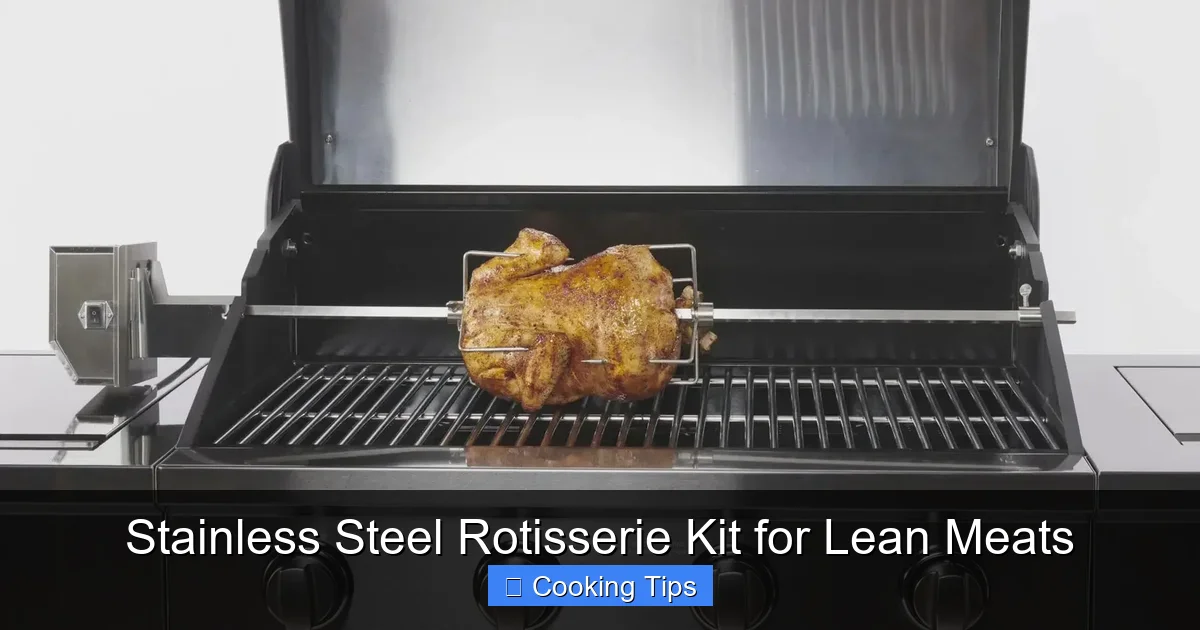
Visual guide about Stainless Steel Rotisserie Kit for Lean Meats
Image source: grillcollection.com
- Tuck the wings close to the body.
- Tie the legs together with butcher’s twine.
- If your kit allows, you can also tie the breast meat more snugly to the bone for a more compact shape.
For roasts:
- Roll the roast into a uniform cylindrical shape.
- Use butcher’s twine to tie it at intervals of about 1-2 inches. This creates a compact roast that spins evenly.
A well-trussed roast will spin smoothly, leading to more consistent heat exposure.
Marinating and Seasoning
Lean meats benefit greatly from marinades and rubs.
- Marinades: Use marinades that include oil, acid (like citrus juice or vinegar), and seasonings. The oil helps add moisture, while the acid tenderizes. Marinate for at least 4 hours, or overnight for deeper flavor.
- Rubs: A dry rub applied generously to the surface creates a flavorful crust. Ensure it adheres well to the meat.
Pat your meat dry after marinating before skewering to help the exterior brown nicely.
Assembling and Mounting Your Rotisserie Kit
This is where you get your equipment ready for action. Precision here prevents problems later.
Securing the Spit Rod
Slide the spit rod through the thickest part of your meat, ideally from end to end. Ensure the meat is centered on the rod.
Attaching the Forks
Slide the forks onto the spit rod, one towards each end of the meat. Position them so their prongs dig firmly into the meat. You want them to grip securely enough that the meat won’t shift during rotation.
Tip: For larger cuts, you might consider using a third fork or additional butcher’s twine to further secure the meat to the spit rod.
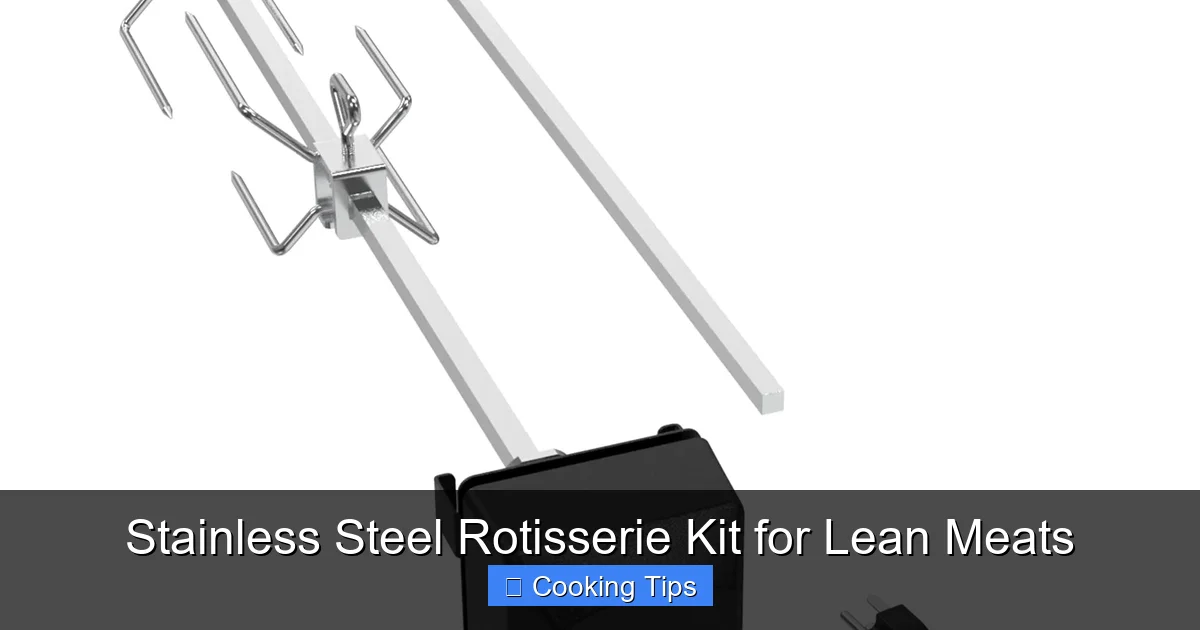
Visual guide about Stainless Steel Rotisserie Kit for Lean Meats
Image source: images-na.ssl-images-amazon.com
Balancing the Load (Counterweight Magic!)
This is a critical step.
- Mount the spit rod with the meat onto your rotisserie brackets, but do not attach the motor yet.
- Let the spit rod spin freely. Observe which side is heavier.
- Loosen the counterweight screw and slide the counterweight towards the lighter side until the spit rod remains relatively still when you let go.
- You might need to make small adjustments back and forth. The goal is a balanced spin with minimal wobble.
A well-balanced load ensures even cooking and protects your motor.
Connecting the Motor
Once balanced, attach the motor to the designated housing or bracket. Connect the spit rod to the motor’s drive mechanism. Ensure it’s a snug and secure connection.
Cooking Your Lean Meats on the Rotisserie
Now for the main event! This phase requires attention and temperature management.
Preheating Your Grill or Fire Pit
You want a consistent heat source. For most grills, aim for a medium-high heat. If using charcoal, arrange your coals for indirect cooking, with the main heat source to the sides of the rotisserie, not directly underneath.
Ideal temperature: Generally, aim for an internal temperature of around 325-350°F (160-175°C) in the cooking chamber.
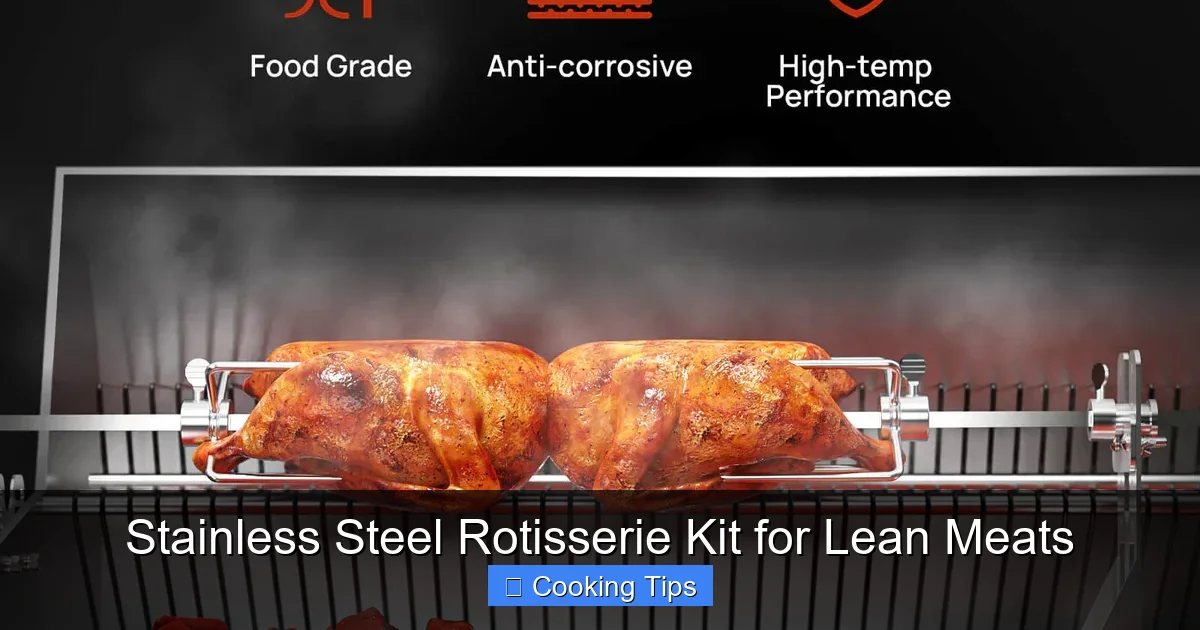
Visual guide about Stainless Steel Rotisserie Kit for Lean Meats
Image source: turbro.com
Starting the Rotisserie Motor
Once your grill is preheated and your setup is secure, turn on the rotisserie motor. Watch for a few minutes to ensure it’s spinning smoothly without any wobbling.
Cooking Times and Temperatures
Cooking times will vary greatly depending on the size and type of meat.
- Whole Chicken (approx. 3-4 lbs): 1.5 to 2 hours, or until internal temperature reaches 165°F (74°C) in the thickest part of the thigh.
- Pork Loin Roast (approx. 3-4 lbs): 1 to 1.5 hours, or until internal temperature reaches 145°F (63°C).
- Beef Sirloin Tip Roast (approx. 3-4 lbs): 1 to 1.5 hours for medium-rare (130-135°F / 54-57°C), or longer for more well-done results.
Crucially: Always use a reliable meat thermometer to check for doneness. Insert it into the thickest part of the meat, avoiding bone.
Basting for Moisture and Flavor
Lean meats can benefit from basting, especially during the last hour of cooking.
- Use reserved marinade, melted butter, broth, or a favorite barbecue sauce.
- Baste every 20-30 minutes.
- Be mindful of the heat: if basting causes flare-ups, you might need to adjust your heat source or reduce the frequency.
For very lean cuts, a light coating of oil or butter brushed on before cooking can also help create a more appealing crust.
Troubleshooting Common Rotisserie Issues
Even with the best intentions, things can sometimes go awry. Here are a few common problems and how to fix them.
Uneven Cooking
Problem: One side of the meat is cooked more than the other.
Solution: This is almost always a balancing issue. Re-balance your meat using the counterweight. Ensure your heat source is also distributed evenly around the rotisserie.
Motor Strain or Slowdown
Problem: The motor seems to be struggling or spinning slowly.
Solution: The meat might be too heavy for the motor, or it’s not balanced properly. Remove the meat, re-balance carefully, and ensure the motor’s weight rating hasn’t been exceeded. Check for any obstructions.
Meat Falling Off the Spit
Problem: The meat is not staying secured to the spit rod.
Solution: The forks aren’t dug in deeply enough, or the meat has shifted. Ensure the forks are firmly embedded and consider adding more twine to secure loose parts of the meat.
Dry Meat
Problem: The lean meat is dry and tough.
Solution: This can be due to overcooking or insufficient moisture. Ensure you’re using a meat thermometer and remove the meat as soon as it reaches the desired internal temperature. Increase basting, especially with moist liquids like broth or juices. Consider brining leaner cuts before cooking.
Resting and Carving Your Rotisserie Creation
The final steps are just as important as the cooking itself for ensuring a delicious final product.
The Importance of Resting
Once your lean meat has reached the perfect internal temperature, remove it from the rotisserie. Place it on a clean cutting board, tent it loosely with foil, and let it rest for at least 10-20 minutes (longer for larger roasts).
Why rest? During cooking, the juices in the meat are pushed towards the center. Resting allows these juices to redistribute throughout the meat, resulting in a much more tender and moist final product. Skipping this step is a common mistake that leads to dry meat.
Carving Techniques
Once rested, carve your masterpiece.
- For whole birds, carve as you normally would.
- For roasts, slice against the grain. Look for the direction of the muscle fibers and cut perpendicular to them. This shortens the fibers, making the meat more tender to chew.
Conclusion
Using a stainless steel rotisserie kit for lean meats is a rewarding culinary adventure. By understanding your kit, preparing your meat meticulously, assembling it correctly, and mastering temperature control, you can achieve exceptionally moist, flavorful, and tender results. Remember the power of proper balancing with the counterweight, the benefits of strategic basting, and the absolute necessity of letting your meat rest. Embrace the slow, even cooking that rotisserie provides, and you’ll discover a new favorite way to prepare lean cuts. Happy rotissering in 2026 and beyond!