
Unlock the secret to vibrant, homemade masalas with your trusty mixer grinder! This comprehensive guide will walk you through every step, from selecting your spices to achieving the perfect grind consistency. Learn essential tips and tricks to elevate your cooking with freshly ground aromatics, ensuring maximum flavor and aroma in every dish.
Welcome, home cooks and spice enthusiasts! Are you tired of store-bought masalas that lack that vibrant aroma and deep flavor? Do you want to elevate your culinary creations with the freshest, most potent spices possible? If so, you’re in the right place! This comprehensive guide will transform your mixer grinder from a simple kitchen appliance into your personal spice-grinding powerhouse.
Grinding your own masalas at home might seem daunting, but with the right knowledge and a few simple techniques, it’s incredibly rewarding. The difference in taste and aroma is simply phenomenal. Imagine the fragrance of freshly ground coriander, cumin, or garam masala wafting through your kitchen – it’s an experience that elevates any dish. This guide will teach you everything you need to know to achieve perfectly ground masalas every time, ensuring your cooking reaches new heights of deliciousness.
We’ll cover selecting the best whole spices, preparing them for grinding, the step-by-step process using your mixer grinder, important tips to avoid common mistakes, and how to properly store your precious homemade masalas. So, grab your favorite whole spices, and let’s embark on this flavorful journey together!
Key Takeaways
- Understand Your Mixer Grinder: Familiarize yourself with your appliance’s power, jar types, and blade sharpness for optimal results.
- Spice Selection is Crucial: Choose fresh, high-quality whole spices for the best flavor and aroma when grinding.
- Preparation is Key: Dry roasting and cooling spices before grinding significantly enhances their flavor and makes them easier to grind.
- The Grind Process: Use the pulse function and short bursts to prevent overheating and achieve the desired consistency without burning the spices.
- Jar Management: Don’t overload the grinder jar; grind in batches for even pulverization and to protect your appliance.
- Cleaning and Maintenance: Proper cleaning after each use ensures your mixer grinder remains in good condition and prevents flavor contamination.
- Storage is Important: Store ground masalas in airtight containers in a cool, dark place to preserve their freshness and potency.
Why Grind Your Own Masalas?
Before we dive into the “how,” let’s understand the “why.” There are several compelling reasons to embrace the art of grinding your own spices:
Superior Flavor and Aroma: This is the most significant benefit. Whole spices contain volatile oils that start to degrade once they are ground. Grinding them just before use releases these oils, resulting in an intensely fresh and aromatic flavor that pre-ground spices simply cannot match.
Purity and Control: When you grind your own masalas, you know exactly what goes into them. There are no hidden fillers, anti-caking agents, or artificial flavors. You have complete control over the ingredients and their quality.
Cost-Effectiveness: While the initial investment in whole spices might seem higher, in the long run, grinding your own can be more economical, especially for frequently used spices. You also avoid paying for the processing and packaging of pre-ground varieties.
Customization: You can create your own unique spice blends tailored to your specific recipes and taste preferences. Want a spicier garam masala? Or a milder curry powder? You’re the chef, and you have the power to customize!
Extended Shelf Life: Whole spices last much longer than ground ones. By grinding only what you need, you ensure you’re always working with fresh ingredients.
Choosing Your Mixer Grinder and Jars
Your mixer grinder is the star of this operation. Not all mixer grinders are created equal, and understanding yours is the first step.
Types of Mixer Grinder Jars
Most mixer grinders come with multiple jars of varying sizes. For grinding masalas, you’ll primarily be using the smaller, more powerful jars.
- Smallest Jar (Spice Grinder Jar): This is usually the best for grinding smaller quantities of whole spices. It often has a more robust blade designed for tough ingredients.
- Medium Jar: Can be used for larger batches or spices with a slightly less tough texture.
- Large Jar: Generally not recommended for grinding dry masalas as it’s harder to achieve a fine powder and the blades might not be optimally designed for this task.
Blade Sharpness
Sharp blades are crucial for an efficient grind. Dull blades will struggle, leading to uneven powdering, overheating, and potential damage to your mixer grinder. If your blades feel dull, consider getting them sharpened or replacing the jar.
Preparing Your Spices for Grinding
This is a critical step that separates good masalas from great ones. Proper preparation ensures a finer grind and unlocks deeper flavors.
Selecting High-Quality Whole Spices
The quality of your final masala is directly proportional to the quality of the whole spices you start with.
- Look for Freshness: Spices should have a strong, distinct aroma. If they smell faint or dusty, they’re likely old and won’t yield the best results.
- Whole is Best: Always buy whole spices. They retain their flavor and aroma for much longer.
- Check for Contaminants: Inspect the spices for any foreign matter like dust, small stones, or other unwanted particles.
- Source Wisely: Buy from reputable spice shops or ethnic grocery stores where spices are often fresher and sold in bulk.
Cleaning Your Spices
Even from a reputable source, a quick clean can be beneficial.
Wipe Down: Gently wipe down larger spices like cinnamon sticks or dried chilies with a dry cloth to remove any surface dust.

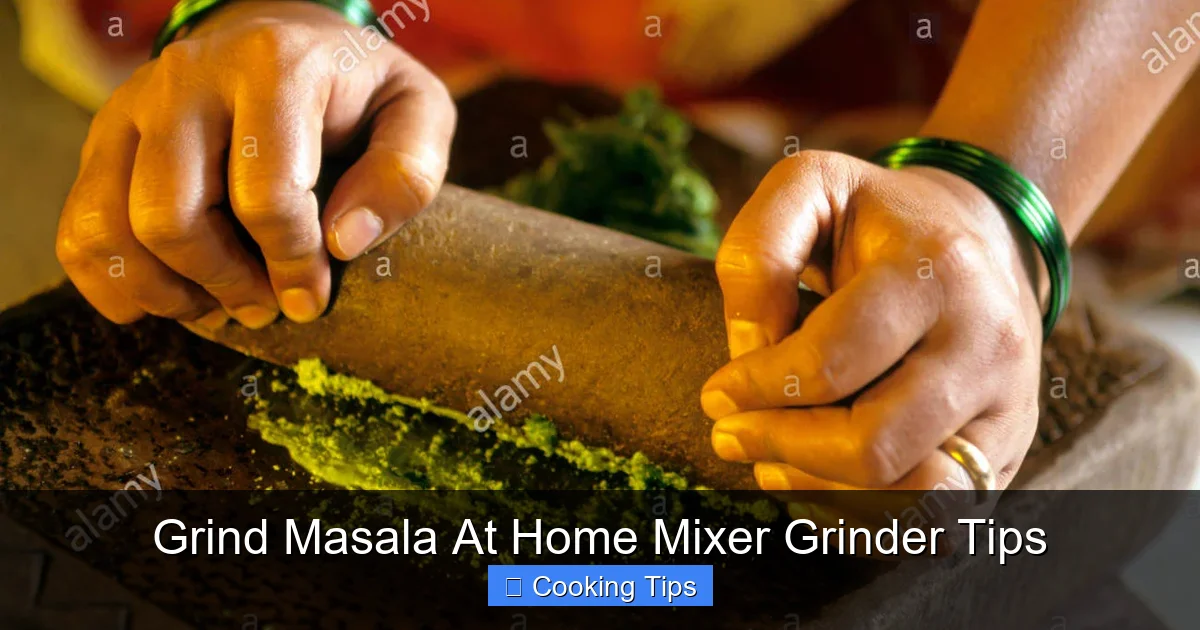
Visual guide about Grind Masala At Home Mixer Grinder Tips
Image source: pngall.com

Visual guide about Grind Masala At Home Mixer Grinder Tips
Image source: pngall.com
Rinse and Dry (for some spices): For certain spices like cumin or coriander seeds, a very quick rinse under cold water followed by thorough drying is acceptable if you suspect significant dust. Ensure they are bone dry before proceeding, as any moisture can lead to clumping and spoilage.
Dry Roasting (The Secret Weapon)
Dry roasting spices before grinding is a game-changer. It toasts the spices, enhancing their aroma and flavor by releasing essential oils, and also helps to dry them out, making them brittle and easier to grind into a fine powder.
How to Dry Roast:
- Use a Dry Pan: Heat a heavy-bottomed skillet or pan over low to medium-low heat.
- Add Spices: Add the whole spices to the dry pan. Do not add any oil or butter.
- Roast Gently: Stir the spices continuously to prevent them from burning. You’ll know they’re ready when they become fragrant and may start to lightly pop. This usually takes 1-3 minutes, depending on the spice. Be careful not to over-roast, as this will result in a burnt, bitter flavor.
- Cool Completely: Immediately remove the roasted spices from the pan and spread them on a plate or baking sheet to cool completely. This is a crucial step; grinding warm spices can lead to clumping and a gummy texture, and can also damage your mixer grinder.
Example: For garam masala, you might roast coriander seeds, cumin seeds, black peppercorns, cardamom pods, cloves, and cinnamon sticks until fragrant. For chili powder, you’d roast dried red chilies until brittle.
The Step-by-Step Grinding Process
Now, let’s get down to the actual grinding. Patience and precision are key here.
Step 1: Ensure Jars and Blades are Dry
Moisture is the enemy of dry grinding. Make sure your mixer grinder jar and blades are absolutely dry. Any residual water can cause spices to clump and make the grinding process inefficient.
Visual guide about Grind Masala At Home Mixer Grinder Tips
Image source: 1.bp.blogspot.com
Step 2: Add Spices to the Jar
Don’t Overload: This is one of the most important rules. Overloading the jar makes it difficult for the blades to effectively grind the spices, leading to uneven powdering and potentially straining your mixer grinder. It’s always better to grind in smaller batches.
Fill Level: A good rule of thumb is to fill the jar about one-third to halfway full. This allows ample space for the spices to move around and be pulverized by the blades.
Step 3: Secure the Lid
Ensure the lid of the mixer grinder jar is securely fastened. This prevents any spice dust from escaping and creating a mess.
Step 4: The Grinding Technique – Pulse Power!
This is where you’ll use your mixer grinder strategically.
Use the Pulse Function: The pulse function is your best friend for grinding masalas. It allows you to control the grinding process, prevent overheating, and achieve the desired consistency.
Short Bursts: Instead of running the mixer continuously, use short, controlled pulses. Pulse for about 5-10 seconds at a time.
Allow Resting Periods: After each pulse, let the mixer rest for a few seconds. This allows the motor to cool down and the spices to settle. This also prevents the spices from becoming too hot, which can affect their flavor and aroma.
Check Consistency: After a few pulses, open the lid (after ensuring the motor has stopped completely!) and check the consistency. You’ll see the spices transforming from whole to coarse powder, and then to a fine flour.
Example: For a fine chili powder, you might pulse 10-15 times, checking the consistency in between, until you achieve a smooth, fine powder.
Step 5: Achieve Desired Consistency
The fineness of your ground masala depends on your recipe’s needs. Some recipes call for a coarse powder (like for some rubs), while others require a fine flour (like for curry powders). Continue pulsing and checking until you reach your desired texture.
Step 6: Scrape Down the Sides
Sometimes, the spices on the sides of the jar might not get fully ground. After a few pulsing sessions, stop the mixer, remove the jar, and use a small spatula or the back of a spoon to scrape down any unground spices from the sides of the jar back into the center. This ensures an even grind.
Step 7: Final Grind
Once you’ve scraped down the sides, give it a few more pulses until you achieve a uniform consistency throughout the jar.
Troubleshooting Common Grinding Issues
Even with the best intentions, you might encounter a few snags. Here’s how to fix them:
Issue: Spices are not grinding into a fine powder.
- Possible Cause: Overloading the jar, dull blades, or spices are still slightly moist.
- Solution: Remove some spices and grind in smaller batches. Check blade sharpness. Ensure spices are thoroughly dry and have cooled completely after roasting.
Issue: Spices are clumping or turning into a paste.
Possible Cause: Grinding while the spices are still warm, or the mixer motor is overheating. Excessive moisture in the spices.
Solution: Ensure spices are completely cool before grinding. Use short pulses and allow the motor to rest. If you suspect moisture, spread the ground mixture on a plate in a thin layer and let it air dry for a few hours (or even overnight in a very dry environment) before repacking.
Issue: Mixer grinder motor seems to be struggling or smelling hot.
Possible Cause: Overloading the jar, grinding for too long without breaks, or dull blades.
Solution: Immediately stop the mixer. Remove some spices from the jar. Let the mixer and motor cool down completely (at least 15-20 minutes) before attempting to grind again. Use shorter pulses and more frequent rest periods.
Cleaning and Maintaining Your Mixer Grinder
Proper cleaning is essential for hygiene and the longevity of your appliance.
Immediate Cleaning is Best
As soon as you’re done grinding, it’s easiest to clean the jar and blades. Spice dust can be stubborn if left to sit.
How to Clean:
- Disassemble (if possible): If your jar comes apart, separate the components.
- Wash with Warm Soapy Water: Use warm water and a mild dish soap. A bottle brush or a small cleaning brush can help reach difficult areas.
- Rinse Thoroughly: Ensure all soap residue is removed.
- Dry Completely: This is non-negotiable. Use a clean kitchen towel or let the jar air dry completely. You can even place it upside down on a drying rack.
- For Stubborn Residue: You can grind a small amount of uncooked rice or a spoonful of white vinegar for a minute or two to help dislodge stubborn spice particles. Then wash as usual.
Never immerse the motor base of the mixer grinder in water. Wipe it clean with a damp cloth.
Storing Your Homemade Masalas
The journey doesn’t end with grinding. Proper storage keeps your masalas fresh and potent for longer.
Airtight Containers are Key
Once your ground masalas have cooled down completely (if you roasted them), transfer them to clean, dry, airtight containers. Glass jars with tight-fitting lids are ideal. Small spice jars are perfect for individual masalas.
Location, Location, Location
Store your spice containers in a cool, dark, and dry place. Avoid storing them near the stove, oven, or in direct sunlight, as heat and light degrade spices faster.
Labeling is a Lifesaver
Always label your containers with the name of the spice and the date you ground it. This helps you keep track of freshness and avoid confusion.
Shelf Life
When stored properly, freshly ground masalas can retain their optimal flavor for 6 months to a year. However, for the absolute best flavor, try to use them within 3-6 months.
Conclusion
Grinding your own masalas at home using a mixer grinder is a culinary skill that’s both accessible and incredibly rewarding. By following these steps and incorporating the practical tips, you’re not just saving money, you’re unlocking a world of vibrant flavors and authentic aromas for your cooking. The journey from whole spice to fragrant powder is a testament to the power of fresh ingredients and a little bit of home effort. So, go ahead, experiment with different spices, create your signature blends, and watch your dishes transform. Happy grinding, and happy cooking!