
Keep your kitchen knives performing at their peak with this comprehensive guide to using kitchen knife sharpeners. You’ll learn the essential steps for sharpening various types of knives, ensuring safety and efficiency in your culinary adventures. By following these instructions, you can achieve razor-sharp blades that make food preparation a joy.
Welcome, home chefs and aspiring culinary artists, to the ultimate guide on mastering your kitchen knife sharpener! In 2026, a sharp knife isn’t just a convenience; it’s a necessity for safe, efficient, and enjoyable food preparation. A dull knife can be frustrating, dangerous, and can even damage your ingredients. This guide will demystify the process, transforming you from a user of blunt blades to a connoisseur of keen edges. We’ll cover everything you need to know, from understanding different types of sharpeners to achieving that perfect, razor-sharp finish on your favorite knives.
Get ready to unlock the full potential of your kitchen arsenal. By the end of this article, you’ll have the confidence and knowledge to keep your knives in pristine condition, making every chop, slice, and dice a breeze.
Key Takeaways
- Understand Your Sharpener Type: Different sharpeners (manual, electric, honing rods) require distinct techniques. Identify yours before you begin.
- Safety First: Always maintain a stable grip on your knife and sharpener, and keep your fingers away from the sharpening area.
- Consistent Angle is Crucial: Maintaining a steady angle between the blade and the sharpening surface is the most important factor for effective sharpening.
- Work in Stages: Most sharpening processes involve a coarse grit for repair and a fine grit for finishing.
- Honing vs. Sharpening: Understand the difference; honing realigns the edge, while sharpening removes metal to create a new edge.
- Cleanliness is Key: Wipe down your knife and clean your sharpener after each use to maintain their effectiveness and hygiene.
Why Sharpen Your Knives? The Cutting Edge of Convenience
Before we dive into the ‘how,’ let’s reinforce the ‘why.’ A sharp knife offers several advantages:
- Safety: Counterintuitively, sharp knives are safer. They require less force to cut, reducing the chance of slippage. A dull knife demands more pressure, increasing the risk of it skidding off your food and onto your hand.
- Efficiency: Imagine slicing through a ripe tomato with ease, or dicing an onion without squishing it. Sharp knives make these tasks quick and effortless.
- Precision: For delicate tasks like filleting fish or creating fine garnishes, a sharp knife allows for clean, precise cuts, preserving the integrity of your ingredients.
- Enjoyment: Honestly, cooking is just more enjoyable when your tools are working with you, not against you.
Types of Kitchen Knife Sharpeners: Know Your Tool
The world of knife sharpeners can seem a bit overwhelming at first. However, understanding the basic types will help you choose and use the right one. The most common types you’ll encounter are:
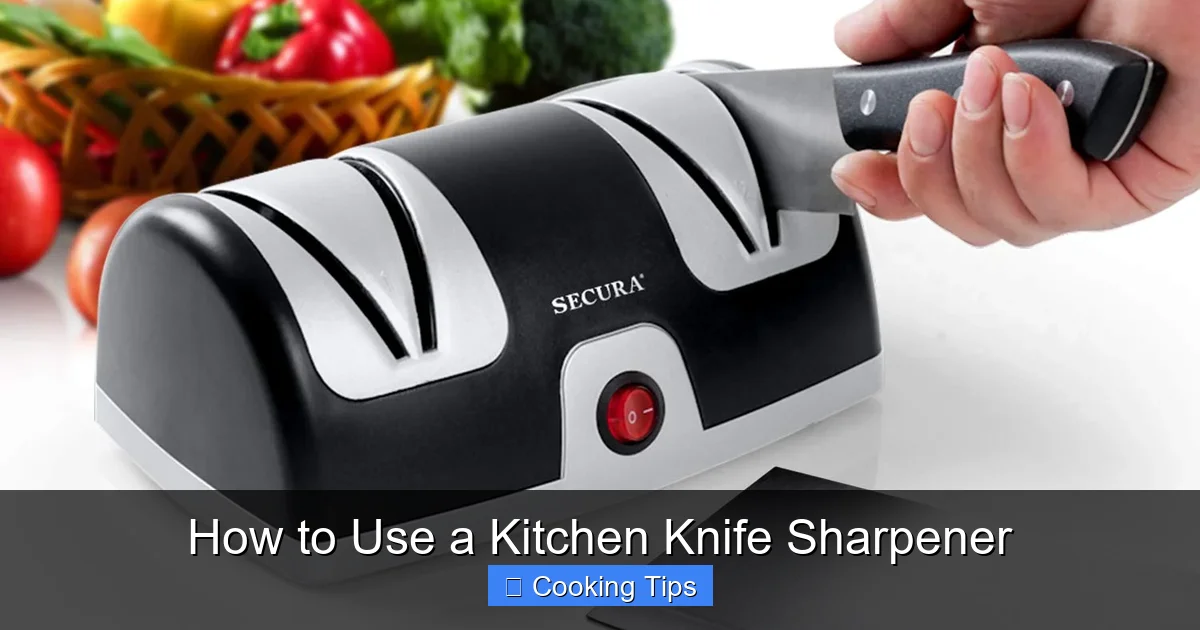
Visual guide about How to Use a Kitchen Knife Sharpener
Image source: thesecura.com
Manual Sharpeners
These are typically V-shaped devices with abrasive slots. You pull the knife blade through the slots at a specific angle. They are generally easy to use and portable.
Electric Sharpeners
Electric sharpeners automate the sharpening process. They have powered abrasive wheels or belts that move the blade. They are fast and can be very effective but can also remove more metal from your blade if not used correctly.
Honing Rods (Steels)
Honing rods, often called sharpening steels, are not technically sharpeners in the sense that they remove metal. Instead, they realign the microscopic edge of the blade that has become bent or rolled during use. This is a maintenance task to keep a knife sharp between actual sharpening sessions.
Whetstones (Sharpening Stones)
These are flat stones with abrasive surfaces, often made of natural or synthetic materials. They offer the most control and can achieve the finest edges but require more skill and practice to use effectively. Whetstones come in various grits (coarseness), from coarse for repairing damaged edges to fine for polishing and achieving razor sharpness.
For the purpose of this comprehensive guide, we will focus on the most common types found in home kitchens: manual pull-through sharpeners, electric sharpeners, and honing rods. If you’re using a whetstone, that’s a whole other level of mastery that deserves its own in-depth guide!
How to Use a Manual Kitchen Knife Sharpener
Manual pull-through sharpeners are a popular choice for their simplicity and affordability. They usually have two or three slots, often labeled:
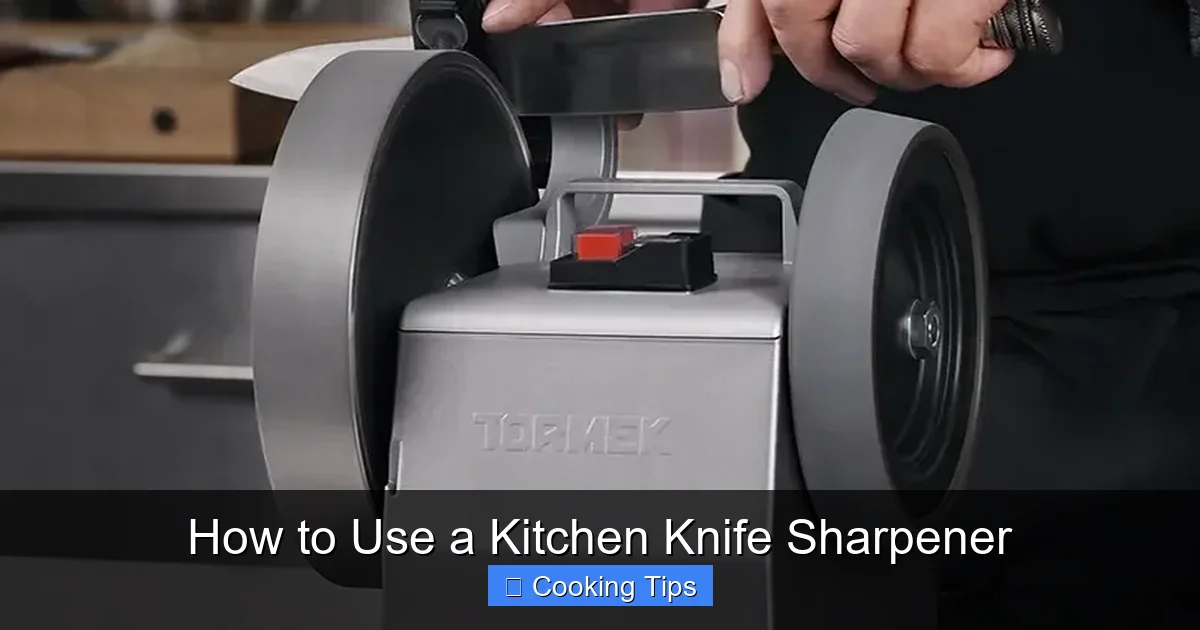
Visual guide about How to Use a Kitchen Knife Sharpener
Image source: tormek.com
- Coarse/Repair: For repairing nicks and reshaping a very dull edge.
- Fine/Honing: For honing and polishing the edge after using the coarse slot, or for regular maintenance of a moderately dull knife.
Step 1: Prepare Your Workspace
Find a stable, flat surface to place your sharpener. Ensure it won’t slip around during use. Some sharpeners have non-slip bases; if yours doesn’t, you can place a damp cloth underneath for extra stability.
Step 2: Identify the Slots
Look for labels indicating which slot is for coarse sharpening and which is for fine honing. If there are no labels, you can often tell by the appearance of the abrasive material. Coarse slots usually have visible grit or diamond particles, while fine slots might have ceramic or finer abrasive material.
Step 3: Start with the Coarse Slot (If Needed)
If your knife is significantly dull or has minor chips, begin with the coarse slot. Place the heel of the knife blade (the part closest to the handle) into the slot.
Step 4: Pull the Knife Through
Hold the handle of the knife firmly with one hand. With your other hand, gently but firmly pull the knife blade through the slot, from heel to tip. Apply light pressure. Aim for a consistent angle. Imagine you’re trying to slice off a very thin layer from the abrasive material.
How many passes?
Typically, 5-10 passes are sufficient for each slot. You’ll feel the blade catching more as it sharpens. Listen for a consistent sound.
Step 5: Move to the Fine Slot
Once you’ve completed the coarse sharpening, move to the fine slot. This step refines the edge, making it smooth and exceptionally sharp. Repeat the pulling motion, again with light, consistent pressure, for another 5-10 passes.
Step 6: Test the Sharpness
Carefully test your knife’s sharpness. A common method is the paper test: try to slice through a piece of standard printer paper held vertically. A truly sharp knife will slice through cleanly with minimal resistance. Be cautious when testing!
Step 7: Clean Up
Wipe down your knife with a damp cloth to remove any metal shavings. Clean the sharpener by brushing away any debris or wiping it with a dry cloth.
Practical Tips for Manual Sharpeners:
- Don’t Force It: Excessive pressure can damage the blade or the sharpener.
- Consistent Angle: This is the most critical factor. Try to maintain the same angle throughout each pass.
- Alternate Sides: Some sharpeners are designed for a single pass that sharpens both sides of the blade simultaneously. If yours has separate slots for each side, alternate between them.
How to Use an Electric Kitchen Knife Sharpener
Electric sharpeners are designed for speed and ease. They have powered abrasive wheels or belts that do the work for you. Most electric sharpeners have multiple slots for different stages of sharpening.
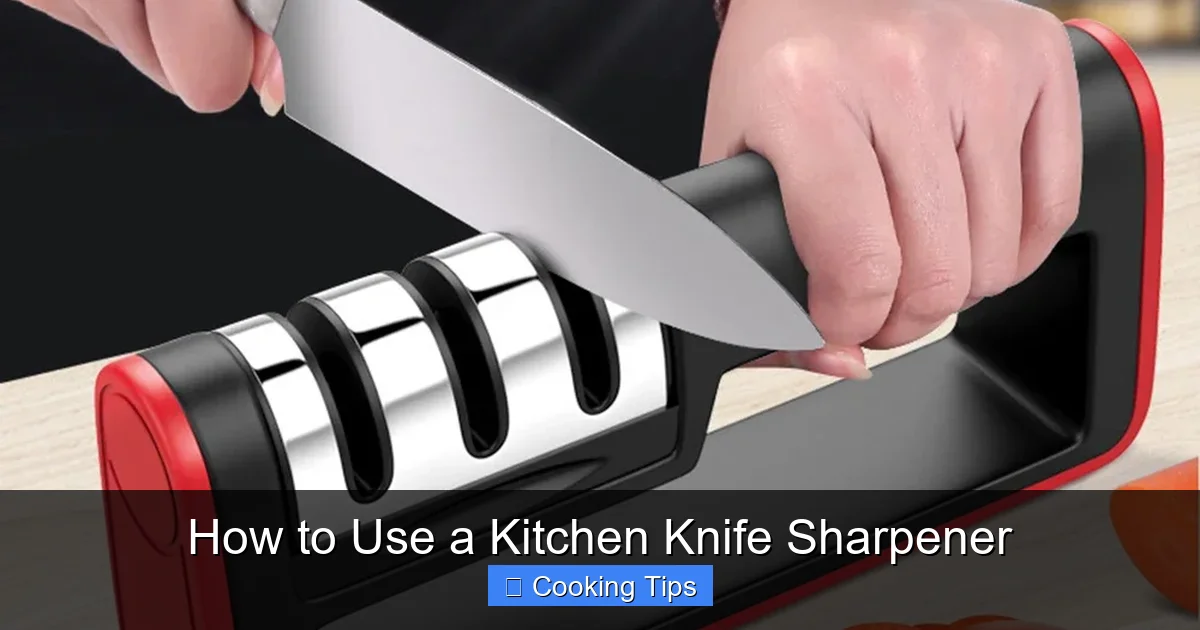
Visual guide about How to Use a Kitchen Knife Sharpener
Image source: ae01.alicdn.com
Step 1: Set Up Your Electric Sharpener
Place the electric sharpener on a stable, flat surface. Ensure it’s plugged into a power source. Read the manufacturer’s instructions for your specific model, as they can vary.
Step 2: Identify the Sharpening Stages
Electric sharpeners usually have numbered slots or clearly marked stages, typically starting with a coarse grit (Stage 1) for sharpening and progressing to finer grits (Stage 2, Stage 3, etc.) for honing and polishing. Some may also have a slot for honing rods.
Step 3: Begin with the Coarsest Stage (If Needed)
If your knife is very dull or damaged, start with the lowest-numbered or coarsest slot. Insert the heel of the knife blade into the designated slot.
Step 4: Pull the Knife Through Slowly and Steadily
Turn on the sharpener. Gently pull the knife blade through the slot from heel to tip. Let the powered abrasive wheels do the work. Avoid applying too much downward pressure, as this can overheat the blade and remove too much metal. Most manufacturers recommend a slow, steady pull.
How many passes?
Follow the manufacturer’s recommendations. Typically, 3-5 passes per slot are sufficient. You might need to sharpen one side of the blade at a time, depending on the sharpener’s design.
Step 5: Progress to Finer Stages
Once you’ve completed the coarsest stage, move to the next finer slot. Repeat the slow, steady pulling motion for the recommended number of passes. Continue this process through all the finishing stages.
Step 6: Test for Sharpness
Turn off the electric sharpener. Carefully remove the knife and perform the paper test as described earlier. If the knife isn’t sharp enough, you can repeat the process, being mindful not to over-sharpen.
Step 7: Clean and Maintain
Unplug the sharpener. Wipe your knife clean of any metal dust. Many electric sharpeners have collection trays for metal shavings that need to be emptied. Consult your manual for specific cleaning instructions for your model.
Practical Tips for Electric Sharpeners:
- Read the Manual: Electric sharpeners are more complex, so understanding your specific model is crucial.
- Don’t Rush: A slow, controlled pull is more effective than a quick, jerky motion.
- Avoid Over-Sharpening: Electric sharpeners can remove metal quickly. Stick to the recommended passes to prolong your knife’s life.
- Blade Types: Check if your electric sharpener is suitable for all types of knives, especially serrated or ceramic blades. Most are not designed for serrated knives.
How to Use a Honing Rod (Sharpening Steel)
A honing rod is an essential tool for maintaining your knives between sharpening sessions. It doesn’t actually sharpen (remove metal), but rather straightens the microscopic edge of the blade that gets bent or misaligned with regular use. This is a crucial step to keep your knives performing well.
Step 1: Prepare Your Workspace
Hold the honing rod firmly in one hand, pointing downwards. Place the tip on a stable surface, such as a cutting board or a damp cloth, to prevent it from slipping.
Step 2: Position the Knife
Hold the knife in your other hand, with the heel of the blade against the top of the honing rod. The angle between the knife blade and the rod should be approximately 15-20 degrees. Most Western-style knives benefit from an angle around 20 degrees, while Japanese knives often use a sharper 15-degree angle. If you’re unsure, look for guides on your sharpener or knife manufacturer’s recommendations.
Step 3: Draw the Blade Down the Rod
Apply very light pressure. Draw the knife blade down the rod in a smooth, sweeping motion, starting from the heel and ending at the tip. Imagine you are trying to slice off a thin layer of the rod.
Step 4: Alternate Sides
Lift the knife and repeat the process on the other side of the honing rod. Again, maintain the same 15-20 degree angle. Alternate sides for about 5-10 passes on each side.
Step 5: Test and Repeat if Necessary
Wipe your knife clean. Test its sharpness. If it feels improved, you’re done. If it still feels a bit dull, you can do a few more alternating passes.
Step 6: Clean Up
Wipe down the honing rod and the knife. Honing is a quick maintenance task, so it’s usually done before or after each significant use of your knives.
Practical Tips for Honing Rods:
- Light Pressure: Honing is about realignment, not removing material. Too much pressure can damage the edge.
- Consistent Angle: This is as important for honing as it is for sharpening.
- Practice Makes Perfect: It might feel awkward at first. Practice with an older knife if you’re nervous.
- Honing vs. Sharpening: Remember, honing realigns an existing edge; it doesn’t create a new one. If your knife is truly dull and won’t slice easily after honing, it needs actual sharpening.
Troubleshooting Common Sharpening Problems
Even with careful attention, you might encounter issues. Here are some common problems and how to fix them:
Problem: Knife still feels dull after sharpening.
Solution: You might not have sharpened enough, or you might not have maintained a consistent angle. Try another 5-10 passes on each slot/stage. Ensure you are using the correct grit for your knife’s current state of dullness. If it’s extremely dull, you may need to use a coarser grit first.
Problem: The edge seems uneven or chipped.
Solution: This usually indicates an inconsistent angle during sharpening or a damaged blade. If it’s minor, try focusing on maintaining a steady angle with a coarse grit. If the damage is significant, you might need a professional sharpening service or a whetstone to repair it properly. Electric sharpeners may not be the best tool for significant repairs.
Problem: I nicked my finger!
Solution: Safety first! If you cut yourself, stop immediately, clean the wound thoroughly, and apply pressure and a bandage. If the cut is deep, seek medical attention. Reassess your technique and ensure you have a firm grip on the knife and sharpener, keeping your fingers well away from the sharpening path.
Problem: My sharpener is leaving burrs on the blade.
Solution: A burr is a thin ridge of metal that forms on the edge during sharpening. It’s often a sign that you’ve over-sharpened or used too much pressure. Ensure you finish with a fine grit or honing stage to remove burrs. Some sharpeners have a specific burr-removal step. If persistent, try alternating strokes more evenly on both sides.
Conclusion: Your Journey to a Sharper Kitchen
Using a kitchen knife sharpener doesn’t have to be intimidating. By understanding your sharpener, practicing a consistent technique, and prioritizing safety, you can transform your dull knives into precision tools. Remember that regular honing is key to maintaining sharpness between actual sharpening sessions. A sharp knife is your best friend in the kitchen, making cooking safer, more efficient, and infinitely more enjoyable. So, grab your knives, choose your sharpener, and start your journey to a truly sharp kitchen experience!