
Discover the best kitchen knife sharpener for maintaining razor-sharp blades in 2026. This comprehensive guide explores various sharpening methods, from electric sharpeners to whetstones, helping you choose the perfect tool for your kitchen. Learn essential techniques and maintenance tips to ensure your knives perform optimally for years to come.
What Is the Best Kitchen Knife Sharpener
A dull knife is not just an inconvenience; it’s a safety hazard. When your kitchen knives lose their edge, they require more force to cut, increasing the chance of slipping and causing injury. In 2026, maintaining sharp knives is easier and more accessible than ever, thanks to a wide array of excellent kitchen knife sharpeners. But with so many options available, how do you determine what is the best kitchen knife sharpener for you?
This comprehensive guide will walk you through everything you need to know to keep your kitchen knives performing at their peak. We’ll explore the different types of sharpeners, the techniques involved in using them, and how to choose the one that best suits your needs, skill level, and budget. Get ready to transform your chopping experience and rediscover the joy of effortlessly slicing, dicing, and chopping.
Key Takeaways
- Choosing the Right Sharpener: Understanding the different types of knife sharpeners – electric, manual pull-through, whetstones, honing steels, and guided systems – is crucial for selecting the best fit for your skill level and knife collection.
- Electric Sharpeners: Offer speed and ease of use, ideal for beginners or those seeking quick results, but can remove more metal than manual methods.
- Whetstones (Sharpening Stones): Provide the most control and versatility for achieving a truly sharp edge, but require practice and a learning curve.
- Manual Pull-Through Sharpeners: A good balance of convenience and effectiveness for everyday sharpening, suitable for most home cooks.
- Honing Steels: Essential for realigning the blade’s edge between sharpenings, not for actual sharpening.
- Guided Sharpening Systems: Ensure consistent angles, making them great for beginners who want precision without the guesswork.
- Blade Material and Angle: Different knife steels and edge angles require specific sharpening approaches for optimal results.
Understanding Knife Sharpness and Honing
Before we dive into sharpeners, it’s important to distinguish between sharpening and honing. Sharpening actually removes metal from the blade to create a new, sharp edge. Honing, on the other hand, realigns the microscopic teeth of the blade that have become bent or rolled over during use. A honing steel is essential for maintaining an already sharp edge between actual sharpening sessions. Think of it like this: sharpening is like rebuilding the foundation, while honing is like straightening the fence posts. Both are vital for a well-maintained knife.
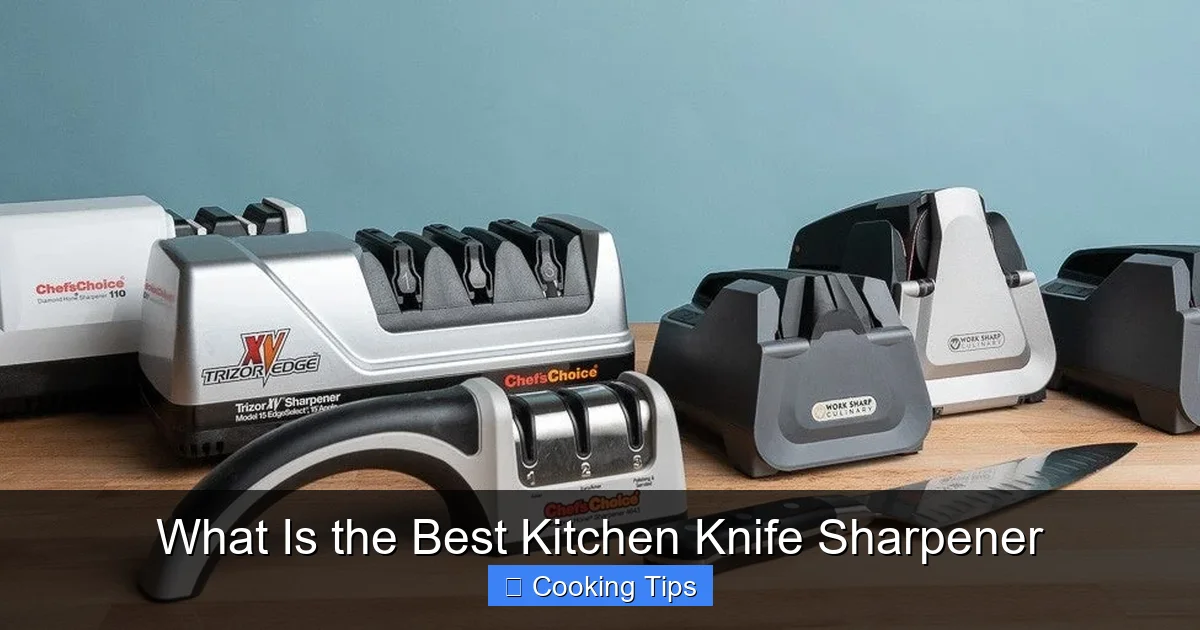
Types of Kitchen Knife Sharpeners
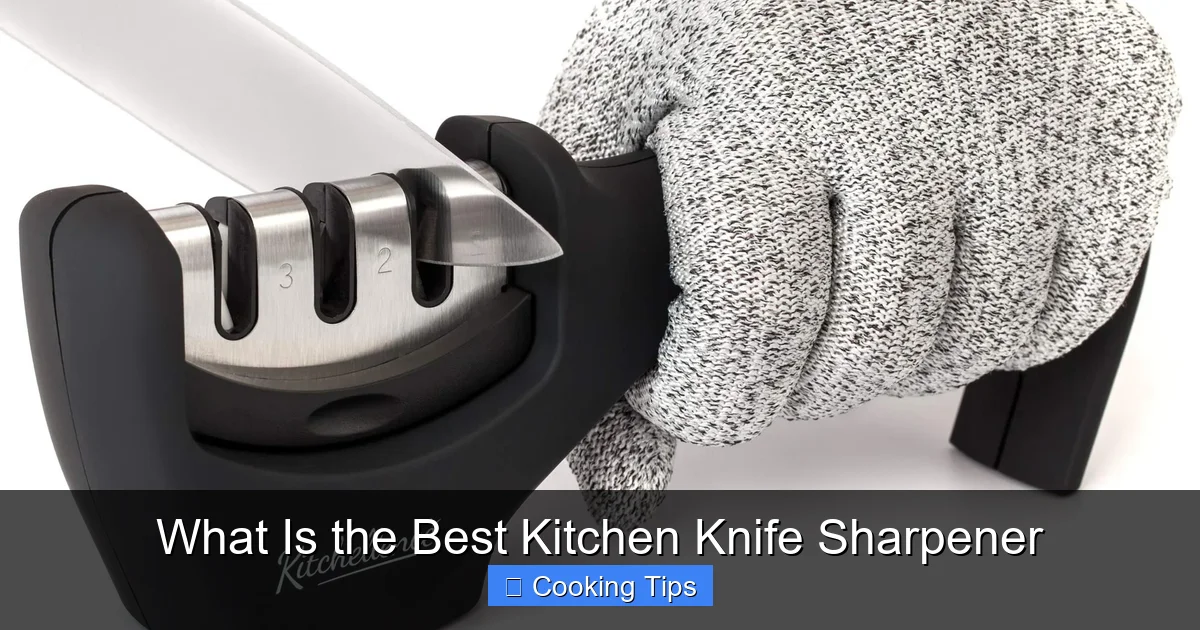
Visual guide about What Is the Best Kitchen Knife Sharpener
Image source: m.media-amazon.com
The “best” kitchen knife sharpener is subjective and depends on your personal preferences and needs. Let’s break down the most common types:
Electric Knife Sharpeners
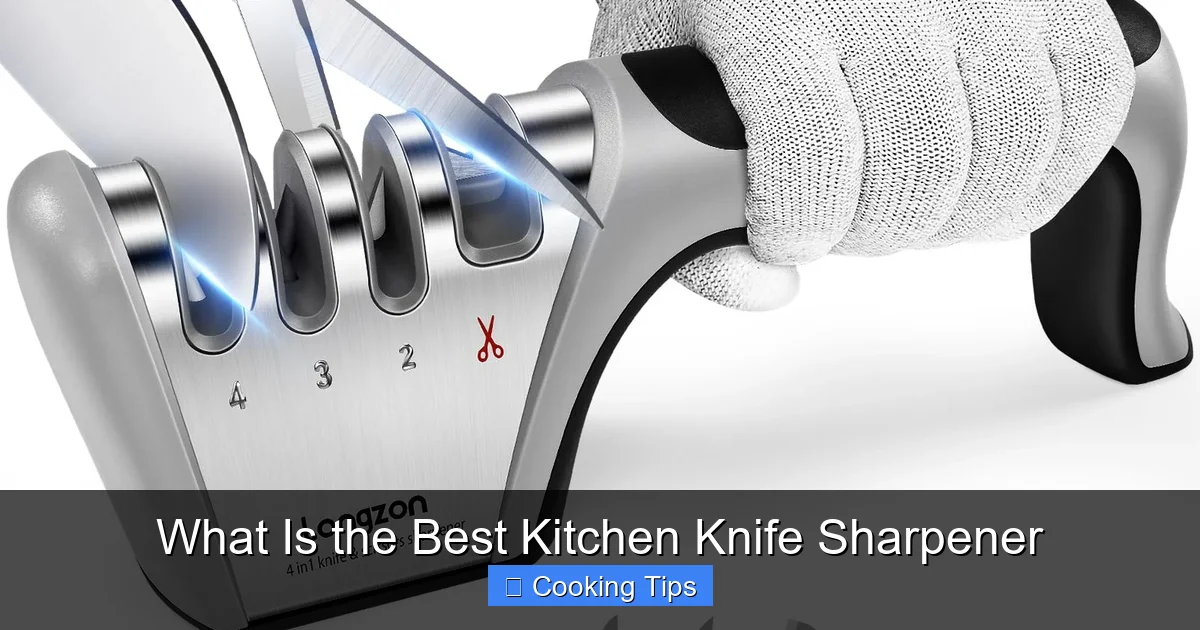
Visual guide about What Is the Best Kitchen Knife Sharpener
Image source: m.media-amazon.com
Electric knife sharpeners are known for their speed and ease of use. They typically have slots with abrasive wheels or belts that move at high speeds. You simply pull your knife through the designated slots.
Pros of Electric Sharpeners
- Speed: They can sharpen a knife in a matter of seconds.
- Ease of Use: Minimal skill is required; they are user-friendly, making them ideal for beginners.
- Consistency: Many models have built-in angle guides for consistent results.
Cons of Electric Sharpeners
- Metal Removal: They tend to remove more metal than manual methods, potentially shortening the lifespan of your knives with frequent use.
- Less Control: You have less control over the sharpening angle and pressure compared to manual methods.
- Cost: Higher-end models can be quite expensive.
Best For:
Home cooks who prioritize speed and convenience, or those new to knife sharpening and seeking a foolproof method.
Manual Pull-Through Sharpeners
Visual guide about What Is the Best Kitchen Knife Sharpener
Image source: cdn.thewirecutter.com
These are a popular choice for their balance of convenience and effectiveness. They usually feature carbide or ceramic abrasives set at a fixed angle. You pull the knife blade through the sharpening slots.
Pros of Manual Pull-Through Sharpeners
- Convenience: Quick and easy to use, requiring no special skills.
- Portability: Compact and easy to store.
- Affordability: Generally more budget-friendly than electric sharpeners.
- Good for Quick Touch-ups: Excellent for bringing a dull edge back to life efficiently.
Cons of Manual Pull-Through Sharpeners
- Fixed Angle: The pre-set angle might not be ideal for all knives, especially those with European or Japanese grinds that often require different angles.
- Aggressive Abrasives: Some carbide sharpeners can be quite aggressive and remove a lot of metal.
- Limited Versatility: Not suitable for very large knives or serrated blades.
Best For:
Everyday users who need a quick and easy way to maintain their knives, especially for standard kitchen knives.
Whetstones (Sharpening Stones)
Whetstones are the traditional and arguably the most effective method for sharpening knives. They are flat stones with abrasive particles that you use to manually grind the edge of your knife. They come in various grits (fineness of the abrasive particles), from coarse to ultra-fine.
Pros of Whetstones
- Superior Sharpness: The ultimate tool for achieving razor-sharp edges and a polished finish.
- Versatility: Can be used on virtually any type of knife, including Japanese knives with specific angles.
- Control: Offers complete control over the angle, pressure, and strokes.
- Longevity: With proper care, whetstones last for many years.
- Gentle on Knives: When used correctly, they remove minimal metal.
Cons of Whetstones
- Learning Curve: Requires practice and patience to master the correct angle and technique.
- Time-Consuming: Can take longer than electric or pull-through sharpeners.
- Maintenance: Some stones require soaking in water before use, and they need to be flattened periodically.
Best For:
Enthusiast cooks, chefs, or anyone who appreciates the art of knife sharpening and desires the absolute best edge on their blades.
Guided Sharpening Systems
These systems are designed to take the guesswork out of achieving the correct sharpening angle. They typically consist of a base with clamps or guides that hold the knife or the sharpening stones at a precise angle.
Pros of Guided Sharpening Systems
- Angle Consistency: Guarantees a consistent sharpening angle, which is crucial for a sharp and durable edge.
- Ease of Use: Easier to learn than freehand sharpening on whetstones.
- Versatility: Many systems include different grit stones or rods for various sharpening needs.
Cons of Guided Sharpening Systems
- Cost: Can range from moderately expensive to very pricey depending on the system.
- Setup Time: Some systems require a bit of setup before sharpening.
- Limited for Very Large Knives: Certain systems might struggle with very large or unusually shaped blades.
Best For:
Home cooks who want the precision of manual sharpening but find freehand whetstone sharpening intimidating.
Honing Steels (Sharpening Rods)
While not technically sharpeners, honing steels are indispensable for maintaining knife sharpness. They realign the microscopic burrs on the edge of your blade.
Pros of Honing Steels
- Maintains Sharpness: Keeps your knife edge aligned and cutting efficiently between sharpenings.
- Quick and Easy: Takes only a few seconds to use.
- Preserves Knife Life: Prevents the need for frequent sharpening.
Cons of Honing Steels
- Does Not Sharpen: Cannot restore a truly dull or damaged edge.
- Requires Technique: Needs to be used with the correct angle and pressure.
Best For:
Everyone who owns kitchen knives. It’s a vital tool for daily maintenance.
Choosing Your Best Kitchen Knife Sharpener: Key Factors
To find the best kitchen knife sharpener for your specific needs, consider these factors:
1. Your Skill Level and Patience
Are you a beginner looking for a quick fix, or do you enjoy the meticulous process of manual sharpening?
- Beginners: Electric or manual pull-through sharpeners, or guided systems are excellent starting points.
- Intermediate to Advanced: Whetstones offer the ultimate sharpening experience once you gain proficiency.
2. Your Knife Collection
Do you have a mix of Western and Japanese knives? Are they made of different steel types?
- Western Knives: Typically have a bevel angle of 15-20 degrees per side.
- Japanese Knives: Often have a more acute angle of 10-15 degrees per side.
- Serrated Knives: Require specialized sharpeners; not all sharpeners can handle them effectively.
If you have a variety of knives, a whetstone or a high-quality guided system that allows for angle adjustment will be the most versatile.
3. Time Commitment
How much time are you willing to dedicate to sharpening?
- Quick Touch-ups: Electric or manual pull-through sharpeners are ideal.
- Thorough Sharpening: Whetstones provide a more in-depth and satisfying sharpening process, but take more time.
4. Budget
Knife sharpeners range in price from under $20 to several hundred dollars.
- Budget-Friendly: Manual pull-through sharpeners and entry-level electric models are good options.
- Mid-Range: Quality electric sharpeners, good whetstone sets, and basic guided systems.
- High-End: Premium electric sharpeners, professional-grade whetstone kits, and advanced guided systems.
How to Use Different Sharpeners: Step-by-Step
Let’s get practical with how to use some of the most common types.
Using a Manual Pull-Through Sharpener
This is straightforward:
- Prepare the Sharpener: Ensure it’s on a stable, flat surface. Some may have a non-slip base.
- Identify the Slots: Most have two or three slots – a coarse grit for repair, a fine grit for sharpening, and sometimes a polishing slot.
- Start with the Coarse Slot (if needed): Place the heel of the knife in the first slot. Gently pull the blade through, applying light, even pressure. Repeat a few times.
- Move to the Fine Slot: Pull the knife through the fine slot, again with light pressure, to refine the edge. Repeat until the blade feels sharp.
- Test the Sharpness: Carefully test on a piece of paper or a tomato.
Using Whetstones (Sharpening Stones)
This requires more finesse but yields superior results.
Preparation:
- Soaking: Many water stones need to be soaked in water until they stop producing bubbles (usually 5-15 minutes). Oil stones use oil instead of water.
- Stable Surface: Place the whetstone on a damp cloth or a specialized stone holder to prevent it from slipping.
Sharpening Process:
- Find the Angle: The correct angle is crucial. For Western knives, aim for 15-20 degrees. For Japanese knives, 10-15 degrees. A simple way to visualize this is to imagine the spine of the knife is about as thick as the width of two dimes stacked up for 20 degrees.
- Start with the Coarse Stone: If your knife is very dull or chipped, begin with a coarse grit stone (e.g., 200-600 grit).
- Sharpen One Side: Place the heel of the blade on the stone at your chosen angle. Apply light, even pressure and push the blade forward, away from you, as if you were trying to slice off a thin layer of the stone. Then, pull the blade back, maintaining the angle. Repeat this motion, moving from the heel to the tip, covering the entire edge. Aim for about 10-20 strokes. You should feel a slight burr (a rough, wire-like edge) forming on the opposite side of the blade.
- Sharpen the Other Side: Flip the knife over and repeat the process on the other side of the blade until you feel a burr along the entire edge.
- Move to Finer Grits: Once you’ve established an edge, move to a medium grit stone (e.g., 800-2000 grit) and repeat the process to refine the edge.
- Polish the Edge: Finish with a fine grit stone (e.g., 3000-8000 grit) to create a razor-sharp, polished edge.
- Deburr: Some people finish by lightly stropping the blade on leather or a fine grit stone to remove the burr.
- Clean and Dry: Rinse your knife thoroughly and dry it completely. Clean your whetstones according to the manufacturer’s instructions.
Using a Guided Sharpening System
These systems simplify the angle aspect.
- Set Up the System: Follow the manufacturer’s instructions for assembling and setting your desired angle.
- Secure the Knife: Clamp the knife or position it within the guides as instructed.
- Sharpen: Use the provided sharpening rods or stones. Move them back and forth along the blade’s edge, ensuring they maintain contact with the guides.
- Repeat on Other Side: Flip the knife and sharpen the other side.
- Finish with Finer Abrasives: If your system includes finer grit options, use them to refine the edge.
Honing Your Knife
This is a crucial maintenance step.
- Hold the Honing Steel: Hold the steel vertically with the tip on a stable surface (like a cutting board).
- Position the Knife: Place the heel of your knife against the top of the steel at approximately a 15-20 degree angle.
- Draw Down the Steel: Lightly sweep the blade down the steel, moving from heel to tip. Imagine you are trying to slice off a very thin layer of the steel.
- Repeat on Other Side: Flip the knife and repeat the process on the other side of the steel.
- Repeat Several Times: Perform 5-10 strokes on each side.
**Important Note:** Honing should be done regularly, ideally before or after each use, to maintain an edge. Sharpening is needed only when honing is no longer sufficient to restore sharpness.
Troubleshooting Common Sharpening Issues
* Uneven Edge: This usually stems from an inconsistent sharpening angle. Practice with a guided system or mark your blade with a marker to see if you’re hitting the edge evenly.
* Burr Not Forming or Removing: You might not be applying enough pressure, or your abrasive might be too fine for the initial sharpening. Ensure you’re working through the grits effectively.
* Knife Still Dull After Sharpening: You might not have sharpened long enough, or the angle is incorrect. Revisit the sharpening process. It’s also possible the knife’s steel is very hard and requires a diamond stone or specialized sharpening equipment.
* Creating a “Rolled” Edge: This can happen with very soft steels or if too much pressure is applied. Ensure you’re using consistent, light pressure.
Maintaining Your Sharpeners
To ensure your sharpeners last and perform optimally:
- Electric Sharpeners: Clean out debris regularly as per the manufacturer’s instructions.
- Whetstones: Flatten them when they become dished (uneven). Clean them after use and store them properly to dry completely.
- Manual Pull-Through Sharpeners: Wipe them clean of metal dust.
Conclusion: Finding Your Perfect Edge
Determining what is the best kitchen knife sharpener is a personal journey. In 2026, the options are plentiful, catering to every skill level and budget. For those prioritizing speed and simplicity, a good electric or manual pull-through sharpener will serve admirably. If precision and the pursuit of the ultimate edge are your goals, investing time in learning to use whetstones or a quality guided system will reward you with unparalleled sharpness and control.
Remember, a sharp knife is a safe knife. By understanding the different types of sharpeners and mastering their use, you’ll not only make your kitchen tasks easier and more enjoyable but also extend the life and performance of your valuable cutlery. Happy sharpening!