
Learn how to efficiently slice almonds using your food processor for consistent results in all your culinary creations. This guide provides a detailed, step-by-step process, ensuring you achieve perfectly sliced almonds for baking, garnishing, and more. Get ready to elevate your dishes with beautifully prepared nuts, saving time and effort compared to manual slicing.
How to Slice Almonds in Food Processor
Are you tired of the tedious task of hand-slicing almonds? In the fast-paced world of 2026 kitchens, efficiency is key! This comprehensive guide will walk you through the simple and effective process of slicing almonds using your food processor. Whether you’re a seasoned baker or a beginner cook, you’ll learn how to achieve perfectly uniform almond slices every time. Say goodbye to uneven cuts and hello to beautifully prepared nuts for all your favorite recipes. From delicate pastries to savory salads, the right almond slice can make all the difference.
Key Takeaways
- Understand the Right Blade: The standard metal S-blade is your best bet for slicing almonds effectively.
- Prep Your Almonds: Ensure almonds are dry and at room temperature for optimal processing.
- Controlled Pulses are Key: Use short, controlled pulses to avoid over-processing into almond butter.
- Work in Batches: Don’t overload the food processor; process almonds in small quantities for uniform slices.
- Achieve Desired Thickness: Adjust pulsing time to get your preferred slice thickness, from slivers to thicker cuts.
- Clean Immediately: Wash your food processor parts right after use to prevent almond residue from hardening.
- Storage Matters: Properly store sliced almonds to maintain freshness and prevent rancidity.
Why Use a Food Processor for Slicing Almonds?
Before we dive into the “how,” let’s talk about the “why.” Using a food processor to slice almonds offers several distinct advantages:
- Speed: It dramatically cuts down the time spent on preparing nuts compared to manual slicing.
- Consistency: Achieve uniform slices that cook evenly and look professional.
- Ease: It requires minimal effort and skill, making it accessible to everyone.
- Versatility: While this guide focuses on slicing, a food processor can also chop or grind almonds if needed.
Gather Your Ingredients and Equipment
You don’t need much to get started. Here’s what you’ll need:
- Whole Almonds: Choose raw or roasted almonds, depending on your recipe. Ensure they are unsalted and unflavored if you want full control over seasoning.
- Food Processor: Any standard food processor with a sharp S-blade will work beautifully.
- A Spatula or Spoon: For scraping down the sides of the bowl.
- A Container: For storing your perfectly sliced almonds.
Step-by-Step Guide to Slicing Almonds
Let’s get down to business! Follow these simple steps to achieve almond slicing perfection.
Step 1: Prepare Your Almonds
The first step is crucial for successful slicing.
1.1. Ensure Almonds are Dry
Moisture is the enemy of good food processing. If your almonds are slightly damp from rinsing or storage, spread them out on a clean kitchen towel or a baking sheet and let them air dry completely. This will help them move freely in the food processor bowl and prevent clumping.
1.2. Bring Almonds to Room Temperature
Cold almonds can be a bit harder and might not process as evenly. If your almonds have been stored in the refrigerator, take them out about 30 minutes before you plan to slice them. Room temperature almonds are ideal for optimal texture and processing.
Step 2: Set Up Your Food Processor
Proper setup ensures a safe and efficient process.
2.1. Install the S-Blade
Make sure the sharp, standard S-blade (the metal blade that comes with most food processors) is securely attached to the processor’s spindle. This is the blade you’ll use for slicing. Avoid using other attachments like graters or dicers, as they are designed for different purposes.
2.2. Add Almonds to the Bowl
Measure out the amount of almonds you need. It’s best to work in batches, especially if you have a smaller food processor. Overfilling the bowl can lead to uneven slicing and can put a strain on your appliance. A good rule of thumb is to fill the bowl no more than one-third to halfway full with whole almonds. This allows them enough space to move around and get evenly sliced.
Step 3: The Art of the Pulse
This is where the magic happens. Patience and controlled pulsing are key to achieving the perfect slice.
3.1. Start with Short Pulses
Begin by using the “pulse” function on your food processor. Start with very short pulses, about 1-2 seconds each. You’ll want to hear the blades engage with the almonds and then stop.
3.2. Observe the Almonds
After each short pulse, stop the processor and look at the almonds. You’ll see them starting to break down. The goal is to get them into uniform slices, not to turn them into dust or almond butter.
3.3. Scrape Down the Sides (If Necessary)
If you notice any almonds sticking to the sides of the bowl, use your spatula to scrape them down towards the blades. This ensures that all the almonds get processed evenly.
3.4. Continue Pulsing Until Desired Consistency is Reached
Keep pulsing and observing. The slicing process is quick, so you need to pay close attention. You’ll go from whole almonds to large pieces, then to smaller chunks, and finally to slices.
* For Thicker Slices: Stop pulsing once you see the almonds have broken into pieces that resemble the thickness you desire. This usually takes only a few pulses.
* For Thinner Slices (Slivers): Continue pulsing for a few more seconds, watching carefully. The almonds will become more delicate. Be very mindful not to over-process.
The key is to stop *before* they turn into a coarse meal or paste. It’s better to stop a little early and have slightly larger pieces than to over-process and end up with almond flour. You can always pulse a bit more, but you can’t un-pulse!
Step 4: Check and Refine
Once you think you’ve reached the desired slice consistency, it’s time to check.
4.1. Examine the Almonds
Pour a small amount of the processed almonds onto a plate or your hand. Look for uniformity in size and thickness. Are they mostly the same? Are there too many fine pieces or chunks?
4.2. Adjust as Needed
* If there are too many large chunks and you want finer slices, give them a few more very short pulses.
* If you notice you’ve gone too far and have a lot of fine bits, you can try to sift them out, or accept that some almond meal will be present. This is part of the learning process!
Step 5: Remove and Store Your Sliced Almonds
The final steps involve getting your beautiful slices ready for use or storage.
5.1. Empty the Food Processor Bowl
Carefully remove the S-blade (remember, it’s sharp!) and pour the sliced almonds into your waiting container. Use your spatula to get every last delicious piece.
5.2. Storage Tips for Freshness
Proper storage is vital to keep your sliced almonds fresh and prevent them from going rancid.
* Airtight Container: Transfer your sliced almonds into an airtight container. This is the most important step to keep moisture out and flavor in.
* Cool, Dark Place: Store the container in a cool, dark place, such as your pantry.
* Refrigeration (for longer storage): For longer shelf life (several months), store sliced almonds in the refrigerator.
* Freezing (for maximum longevity): For storing for up to a year, the freezer is your best friend. Ensure they are in a truly airtight container or a freezer-safe bag with as much air removed as possible.
Practical Tips and Tricks for Slicing Almonds
To elevate your almond slicing game even further, consider these handy tips:
- Start with a Few: If you’re unsure about the pulsing time, try processing a very small handful of almonds first to get a feel for how your particular food processor behaves.
- Listen to Your Processor: You can often gauge the processing stage by the sound. Whole almonds will make a distinct chopping sound, while finer pieces will produce a different tone.
- Experiment with Pulse Length: Different food processors have different power levels and pulse settings. What works for one might be slightly different for another. Get to know your machine!
- Don’t Be Afraid of Slightly Imperfect Slices: For most recipes, a few slightly larger chunks or finer bits won’t matter. The goal is efficiency and general uniformity.
- Consider Your Recipe’s Needs: For delicate meringues or light garnishes, you might aim for thinner, more uniform slices. For hearty granola or rustic pies, slightly larger or more varied pieces are perfectly acceptable.
- Roast After Slicing (Optional): If your recipe calls for toasted sliced almonds, you can toast them after slicing and cooling. Spreading them in a single layer on a baking sheet and toasting them at a moderate oven temperature (around 300-350°F or 150-175°C) until golden brown is a great way to enhance their flavor.
Troubleshooting Common Issues
Even with the best guides, sometimes things don’t go as planned. Here are a few common issues and how to fix them:
Issue: Almonds are turning into almond butter or flour.
Solution: You’ve over-processed them! This happens when the almonds are pulsed for too long, allowing the oils to release and create a paste. Next time, use shorter, more frequent pulses and watch them very closely. It’s better to stop a little early and have larger pieces than to go too far. If this happens, you can still use the almond butter in certain recipes or for making homemade marzipan.

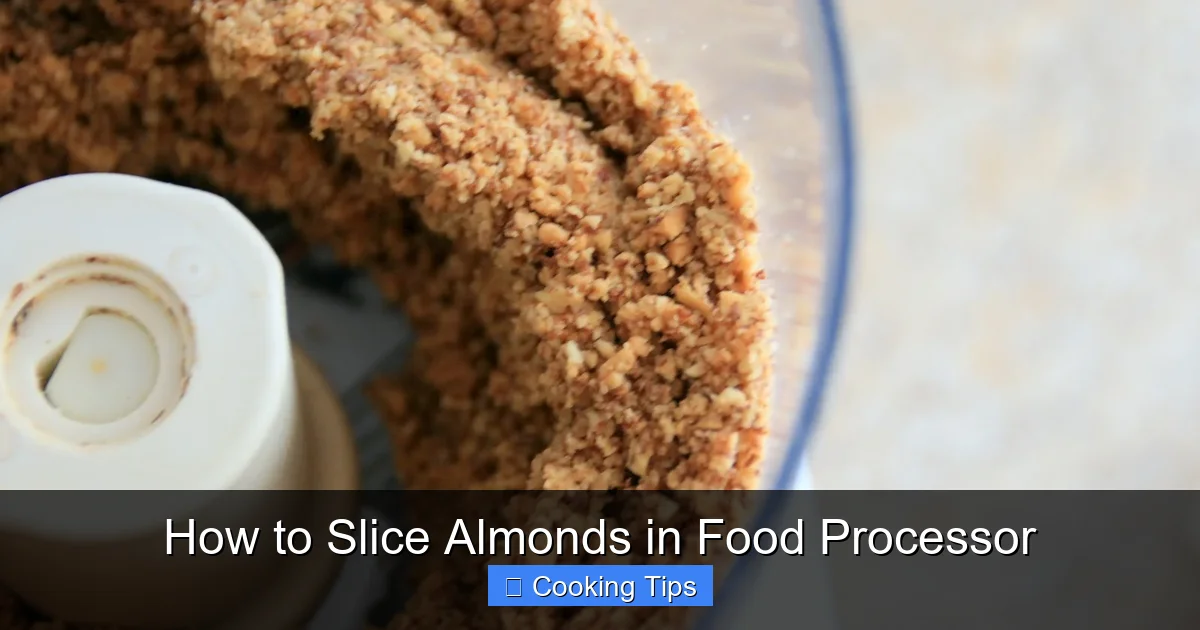
Visual guide about How to Slice Almonds in Food Processor
Image source: thumbs.dreamstime.com

Visual guide about How to Slice Almonds in Food Processor
Image source: thumbs.dreamstime.com
Visual guide about How to Slice Almonds in Food Processor
Image source: storables.com
Issue: Slices are too uneven, with many chunks and fine bits.
Solution: This could be due to overloading the food processor bowl. Try processing in smaller batches. Also, ensure your S-blade is sharp and properly seated. Sometimes, just pulsing a bit more gently and checking more frequently can help achieve better uniformity.
Issue: Some almonds are still whole while others are sliced.
Solution: This is often a sign of not enough almonds in the bowl. When there are too few almonds, they don’t have enough material to bump into each other and get evenly sliced. Try adding a few more almonds to the bowl for the next batch. Ensure you scraped down the sides of the bowl after initial pulses, as some almonds might have been stuck up high.
Cleaning Your Food Processor
Cleaning your food processor immediately after use is essential to prevent food residue from hardening and becoming difficult to remove.
6.1. Disassemble Parts
Carefully remove the S-blade, bowl, and lid.
6.2. Wash Thoroughly
Wash all removable parts in warm, soapy water. Most food processor bowls, lids, and blades are top-rack dishwasher safe, but always check your appliance’s manual to be sure.
6.3. Dry Completely
Ensure all parts are completely dry before reassembling or storing them. This prevents rust and maintains the longevity of your appliance.
Conclusion
Mastering the art of slicing almonds in a food processor is a simple yet impactful skill for any home cook or baker. By following these steps, employing a little patience, and getting to know your appliance, you can effortlessly achieve consistently beautiful almond slices. This technique will not only save you time but also elevate the presentation and texture of your dishes. So, dust off your food processor, grab some almonds, and get ready to add a professional touch to your culinary creations in 2026 and beyond! Happy slicing!