
This guide provides a clear, step-by-step process for assembling food processor replacement parts. From initial cleaning to final installation and troubleshooting, learn how to ensure your appliance is working safely and efficiently. Regular maintenance and proper assembly will extend the life of your food processor and guarantee optimal performance for all your culinary tasks.
How to Assemble Food Processor Replacement Parts
Your food processor is a kitchen workhorse, capable of chopping, slicing, pureeing, and so much more. But like any appliance, its parts can wear out, get lost, or break over time. Fortunately, replacing and assembling these parts is usually a straightforward process. This comprehensive guide will walk you through everything you need to know to confidently assemble your food processor replacement parts, ensuring your appliance is back to its peak performance in no time. We’ll cover everything from identifying the right parts to the final troubleshooting steps. Let’s get your food processor ready for action!
Key Takeaways
- Identify the Correct Parts: Always ensure your replacement parts are compatible with your specific food processor model to avoid damage or malfunction.
- Thorough Cleaning is Crucial: Before assembly, thoroughly wash and dry all new and existing food processor components to remove any manufacturing residue or contaminants.
- Follow Manufacturer Instructions: Refer to your food processor’s user manual for model-specific assembly diagrams and crucial safety warnings.
- Secure Proper Seating: Ensure each part, especially the bowl and lid, clicks or locks into place securely to prevent leaks or the motor from running.
- Test for Stability and Functionality: After assembly, perform a test run without food to check for wobbling, strange noises, or improper blade rotation.
- Troubleshoot Common Issues: Understand how to address minor problems like improper lid closure or non-starting motors before seeking professional help.
Understanding Your Food Processor’s Components
Before you can assemble anything, it’s essential to know what makes up your food processor. While models vary, most share common components:
The Base Unit
This houses the motor and controls. It’s usually the heaviest part and should always be placed on a stable, dry surface. Never immerse the base unit in water.
The Work Bowl
This is where you’ll place your ingredients. It typically has a sturdy handle and a mechanism to lock onto the base unit.
The Lid
The lid seals the work bowl and often has a feed tube for adding ingredients while the processor is running. It usually has a locking mechanism to ensure safe operation.
The Pushers/Feed Tube Inserts
These fit into the feed tube and help guide ingredients down safely. They often come in different sizes.
The Blades and Discs
This is the heart of your food processor’s functionality. You’ll find various types, including:
- S-Blade: For chopping, mincing, and pureeing.
- Dicing Disc: For creating uniform cubes.
- Slicing Disc: For uniform slices of vegetables and fruits.
- Shredding Disc: For shredding cheese, vegetables, and other foods.
These blades and discs are typically sharp, so handle them with extreme care.
The Drive Adapter/Shaft
This piece fits onto the motor shaft and is where the blades or discs attach. It’s crucial for transferring the motor’s power.
Step 1: Identifying and Acquiring the Right Replacement Parts
The first and most critical step is to ensure you have the correct replacement parts for your specific food processor model. Using incompatible parts can lead to damage, poor performance, or even safety hazards.
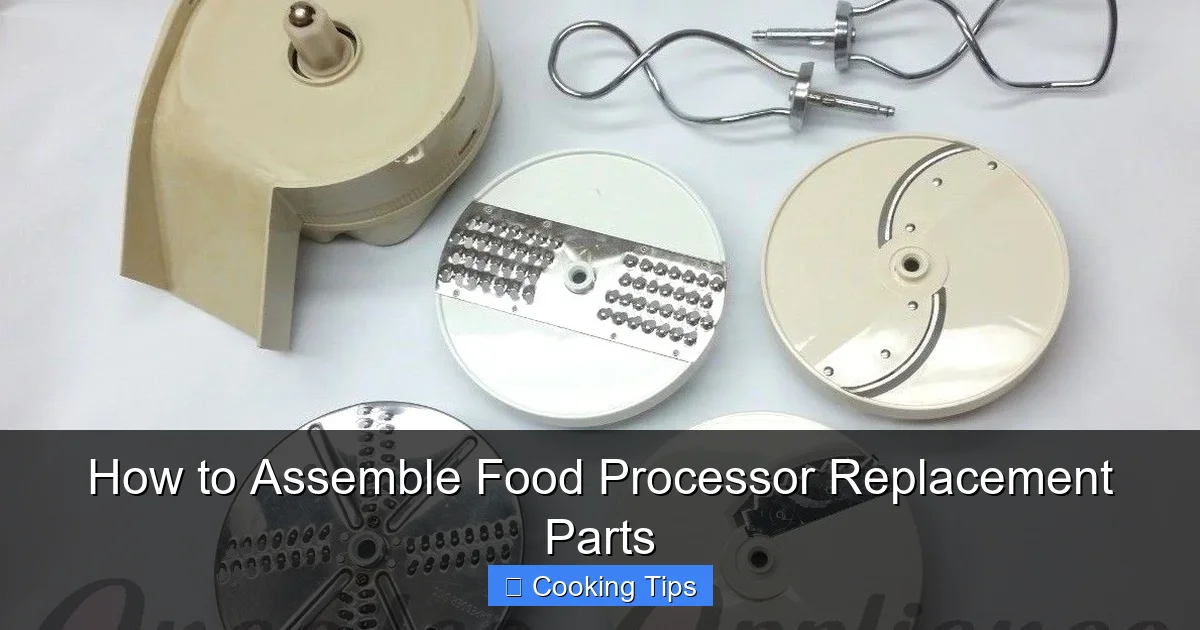
Visual guide about How to Assemble Food Processor Replacement Parts
Image source: i.ebayimg.com
Locating Your Model Number
Your food processor’s model number is usually found on a sticker on the bottom of the base unit or on the back. It’s often a combination of letters and numbers.
Checking the Manufacturer’s Website
Once you have your model number, visit the manufacturer’s official website. They typically have a “Parts & Accessories” or “Support” section where you can search for the exact parts you need. You can usually find diagrams that help you visually identify the component you’re replacing.
Authorized Retailers
Purchase replacement parts only from the manufacturer’s website or authorized retailers. This ensures you’re getting genuine, high-quality parts designed for your appliance.
Common Replacement Needs
People often need to replace:
- The work bowl (if it’s cracked or damaged)
- The lid (if the locking mechanism is broken)
- Specific blades or discs (if they’ve become dull, bent, or lost)
- The drive adapter (if it’s worn or broken)
Sometimes, a full set of attachments can be purchased if several parts are damaged.
Step 2: Preparing for Assembly: Cleaning and Safety
Before you begin assembling your new or existing parts, thorough cleaning is essential. This ensures no dirt or debris gets into your food and that you’re starting with a hygienic appliance.
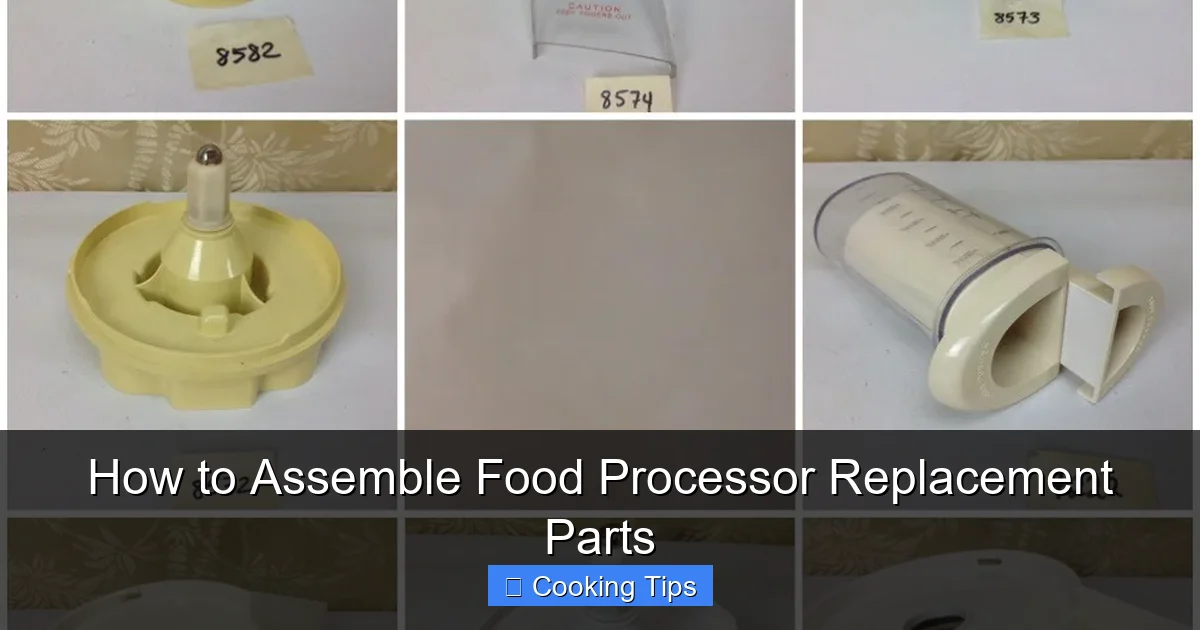
Visual guide about How to Assemble Food Processor Replacement Parts
Image source: i.ebayimg.com
Cleaning New Parts
Even new parts can have manufacturing residue. Wash all your new replacement parts in warm, soapy water. Rinse them thoroughly and let them air dry completely, or dry them with a clean, lint-free cloth.
Cleaning Existing Parts
If you’re reassembling existing parts after cleaning, ensure they are spotless. Pay attention to nooks and crannies where food particles might hide. A small brush can be helpful for this.
Safety Precautions
- Sharp Blades: Always handle blades and discs with extreme caution. Hold them by the center or the non-sharp edges. Consider wearing cut-resistant gloves.
- Unplug the Appliance: Before any assembly or disassembly, ensure the food processor is unplugged from the electrical outlet. This is non-negotiable for safety.
- Stable Surface: Work on a clean, flat, and stable surface to prevent the appliance from tipping or parts from rolling away.
- Read the Manual: Keep your food processor’s user manual handy. It contains specific diagrams and instructions for your model that are invaluable.
Step 3: Assembling the Food Processor
Now comes the actual assembly. The order and specific locking mechanisms will vary slightly between models, but the general principles remain the same.
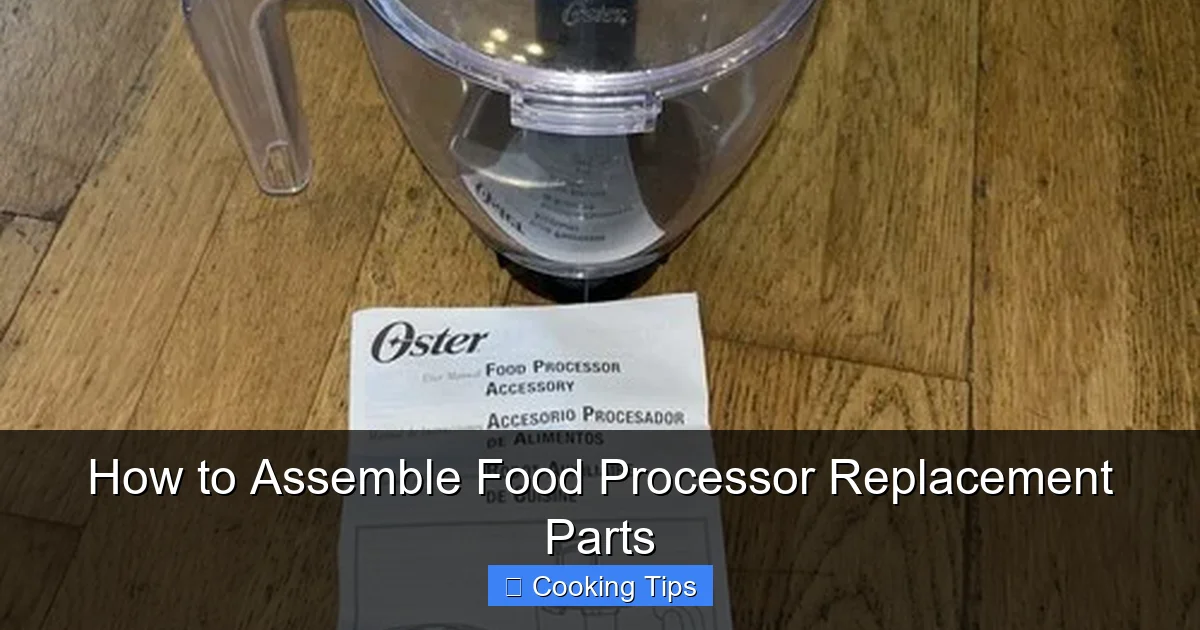
Visual guide about How to Assemble Food Processor Replacement Parts
Image source: i.ebayimg.com
H3: Attaching the Drive Adapter
If you’re replacing the drive adapter, this is usually the first component to go onto the motor shaft in the base unit. It should slide on smoothly. Some adapters might have a small notch or tab that aligns with a corresponding groove on the motor shaft.
H3: Placing the Work Bowl
Position the work bowl onto the base unit. Most food processors have a system where you need to align the bowl’s handle or a specific marking with a corresponding indicator on the base. Twist the bowl until it locks securely into place. You’ll often hear or feel a click when it’s properly seated. If the bowl doesn’t feel firmly attached, it might not be locked correctly, and the motor may not engage.
H3: Inserting the Blade or Disc
This step depends on what you’re preparing to process.
- For the S-Blade: Place the S-blade onto the drive adapter. It should sit firmly on top. There might be a small groove or hole in the center of the blade that fits over a post on the adapter.
- For Discs (Slicing, Shredding, Dicing): These discs usually have a center hole that fits over the drive adapter. Ensure the correct side of the disc is facing up (this is usually indicated in the manual). The disc should rest flat on the top of the bowl’s rim or on a specific support, depending on the model.
It’s crucial that the blade or disc is seated correctly and stable. Any wobble could be a sign of improper assembly.
H3: Attaching the Lid
Align the lid with the work bowl. Similar to the bowl, the lid usually has a specific way it needs to be positioned to lock. There are typically tabs on the lid that engage with slots on the bowl or base. You’ll need to twist or push the lid into place until it clicks or locks. Many food processors have a safety interlock system, meaning the appliance will not start if the lid is not properly secured. Ensure the feed tube opening is correctly oriented, usually at the front.
H3: Placing the Pusher
If your lid has a feed tube, insert the pusher into the feed tube opening. This is a straightforward step; it should slide in smoothly.
Step 4: Testing the Assembled Food Processor
Once everything is assembled, it’s time for a test run. This is a vital step to ensure everything is working correctly and safely.
H3: Initial Stability Check
Give the assembled unit a gentle nudge. Does it feel stable? Is anything loose or wobbly?
H3: Test Run (Without Food)
Plug in the food processor. Ensure there are no ingredients inside the bowl.
- Turn it On: Start the appliance on its lowest setting.
- Listen and Observe: Pay attention to any unusual noises. Is the motor running smoothly? Does the blade or disc spin freely without hitting the lid or bowl?
- Check for Vibrations: A small amount of vibration is normal, but excessive shaking could indicate an imbalance or improper assembly.
- Turn it Off: After a few seconds, turn the food processor off.
H3: Re-check Connections
If you noticed any issues, unplug the unit immediately. Disassemble it and re-check that each part is seated correctly and locked into place. Pay special attention to the work bowl and lid connections.
Troubleshooting Common Assembly Issues
Even with the best intentions, you might encounter a hiccup. Here are some common problems and how to fix them.
Issue: The Food Processor Won’t Turn On
Possible Causes:
- The work bowl is not locked properly onto the base.
- The lid is not secured correctly.
- A safety interlock mechanism is not engaged.
- The unit is not plugged in.
Solutions:
- Unplug the appliance. Re-seat the work bowl and twist until it clicks.
- Ensure the lid is firmly locked into place. Check that all tabs are engaged.
- Review your manual for specific interlock instructions.
- Confirm the power cord is securely plugged into a working outlet.
Issue: The Blade/Disc Wobbles or Hits the Lid/Bowl
Possible Causes:
- The blade or disc is not seated correctly on the drive adapter.
- The drive adapter is not fully engaged on the motor shaft.
- The wrong blade or disc is being used.
Solutions:
- Unplug the unit. Remove the blade/disc and re-insert it, ensuring it’s flat and stable.
- Check that the drive adapter is properly seated on the motor shaft.
- Confirm you are using the correct blade or disc for the task and that it’s the correct part for your model.
Issue: Ingredients Leak from the Work Bowl
Possible Causes:
- The work bowl is not properly sealed to the base.
- The lid is not properly secured, or its seal is damaged.
- Overfilling the work bowl.
Solutions:
- Ensure the work bowl is locked tightly onto the base.
- Check the lid for any cracks or damage to its sealing edge. Make sure it’s clicked into place.
- Do not fill the work bowl past the “max fill” line indicated by the manufacturer.
Conclusion
Assembling food processor replacement parts might seem daunting at first, but with a systematic approach, it becomes a manageable task. By carefully identifying your parts, prioritizing cleanliness and safety, following the step-by-step assembly process, and performing a thorough test run, you can ensure your food processor is functioning optimally. Remember that your user manual is your best friend in this process. Don’t hesitate to consult it for model-specific details. Regular maintenance and proper assembly of replacement parts will not only extend the lifespan of your appliance but also ensure you can continue to enjoy its convenience and versatility in your kitchen for years to come.