
Keep your kitchen knives sharp for safer, more efficient cooking. This guide walks you through sharpening with a whetstone, the most effective method for achieving a razor-sharp edge. You’ll learn the proper techniques, essential tools, and common mistakes to avoid, ensuring your knives perform like new. Invest in your kitchen tools and elevate your culinary skills by mastering the art of knife sharpening.
How to Sharpen a Kitchen Knife
Welcome to the ultimate guide on how to sharpen your kitchen knives! Are you tired of wrestling with dull blades that crush your tomatoes instead of slicing them? Do you find yourself exerting extra force to cut through onions, making the process more difficult and less enjoyable? If so, you’re in the right place. A sharp knife isn’t just a luxury; it’s a fundamental tool for any home cook. It makes your work in the kitchen safer, more efficient, and frankly, a lot more fun.
In this comprehensive guide, we’ll demystify the process of knife sharpening. We’ll focus on the most effective method for achieving a truly sharp edge: using a whetstone, also known as a sharpening stone. You’ll learn everything from the different types of whetstones to the precise angle you need to hold your knife. We’ll break down each step into easy-to-follow instructions, along with practical tips and common pitfalls to avoid. By the end of this guide, you’ll have the confidence and knowledge to bring your dull kitchen knives back to life, making them a joy to use. Let’s get your knives razor-sharp!
Key Takeaways
- Understand the Basics: Learn why a sharp knife is safer and more effective than a dull one for all your kitchen tasks.
- Choose Your Tool: Discover the benefits of using a whetstone (also known as a sharpening stone) as the primary tool for achieving a professional edge.
- Master the Angle: Understand the importance of maintaining a consistent sharpening angle (typically 15-20 degrees) for optimal results.
- Grit Progression: Learn how to use different grit levels of whetstones, starting with coarser grits for repairs and finishing with finer grits for a polished edge.
- Proper Technique: Follow step-by-step instructions for safely and effectively moving your knife across the whetstone.
- Honing vs. Sharpening: Differentiate between honing (realigning the edge) and sharpening (removing metal to create a new edge) and when to use each.
- Maintenance and Safety: Learn how to care for your whetstones and practice safe sharpening habits to prevent accidents.
Why Sharpen Your Kitchen Knives?
Before we dive into the “how,” let’s quickly touch upon the “why.” Many people believe their knives are just getting old or worn out. However, the vast majority of dull knives can be restored to their former glory with proper sharpening.
Safety First
This might sound counterintuitive, but a sharp knife is actually much safer than a dull one. When a knife is dull, you have to apply more pressure to make a cut. This increased force makes it easier for the knife to slip off the food and potentially injure you. A sharp knife requires less pressure, glides through food, and stays where you put it.
Efficiency and Precision
A sharp knife makes quick work of any task. Slicing vegetables, dicing herbs, or carving meat becomes effortless. You’ll achieve cleaner cuts, which not only look better but can also affect how food cooks. For instance, thinly sliced onions will caramelize more evenly than mashed ones.
Preserving Your Knives
Regular sharpening helps maintain the integrity of your knife’s edge. While sharpening does remove a small amount of metal, doing it correctly and regularly prevents the edge from becoming severely damaged, which would then require more aggressive (and more metal-removing) sharpening.
Understanding Your Sharpening Tools: The Whetstone
Visual guide about How to Sharpen a Kitchen Knife
Image source: img.thrivemarket.com
While there are various sharpening tools available (like electric sharpeners or pull-through sharpeners), the whetstone offers the most control and the best results for achieving a truly sharp edge. We’ll focus on this method.
Types of Whetstones
Whetstones come in different materials and grit sizes. Grit refers to the coarseness of the abrasive particles on the stone.
Waterstones
These are the most common type for kitchen knives. They are made of a softer material and require soaking in water before use. They produce a slurry that helps in the sharpening process.
Oil Stones
These stones use oil as a lubricant. They are generally harder than waterstones and can take longer to wear down. Some people prefer the feel and feedback of oil stones.
Diamond Stones
These have a steel base with a layer of diamond particles. They are very aggressive and don’t require soaking or oil. They are great for very hard steels or for quickly reshaping a damaged edge.
Grit Explained
Grit numbers indicate how coarse or fine the stone is.
* Coarse Grit (200-800): Used for repairing chips, reshaping a severely dull or damaged edge, or when you need to remove a lot of metal quickly.
* Medium Grit (1000-3000): The workhorse grit for general sharpening. This is where you’ll spend most of your time. A 1000-grit stone is a great starting point for most knives.
* Fine Grit (4000-8000+): Used for refining the edge, polishing it, and making it incredibly sharp and smooth. This is for achieving that razor-like finish.
For most home cooks, a combination stone with a medium grit (like 1000) and a fine grit (like 3000 or 6000) is an excellent starting point.
Preparing Your Whetstone
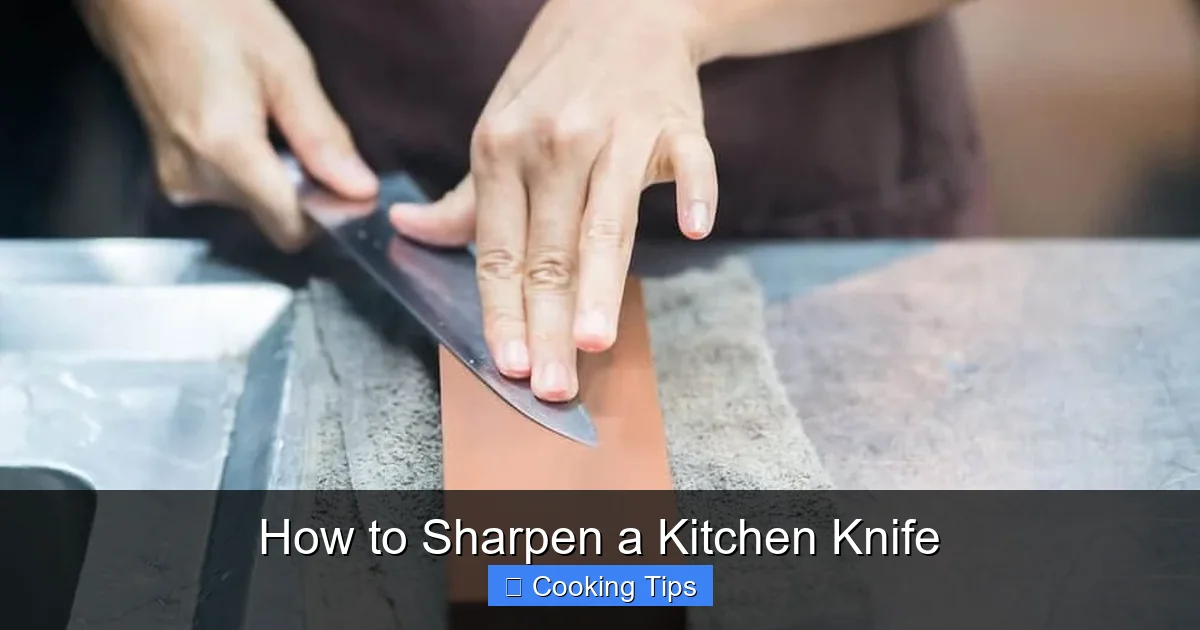
Visual guide about How to Sharpen a Kitchen Knife
Image source: choppychoppy.com
Proper preparation ensures your whetstone works effectively and efficiently.
Soaking Your Waterstone
If you’re using a waterstone, it needs to be soaked in water.
* Submerge the stone completely in a bowl or sink of cool water.
* Let it soak until the air bubbles stop rising from the surface. This typically takes 5-15 minutes, depending on the stone. Some modern stones are splash-and-go, meaning you only need to wet the surface. Always check your stone’s manufacturer instructions.
* **Keep the stone wet** during the sharpening process by splashing water on its surface periodically.
Securing Your Stone
Whetstones can be slippery, especially when wet. You need a stable surface to prevent them from moving during sharpening.
* **Use a whetstone holder:** These are designed to grip the stone and provide a stable base.
* **Place a damp cloth or paper towel** underneath the stone if you don’t have a holder. This provides friction and prevents the stone from sliding.
* **Place the stone on a stable, flat surface** like your countertop.
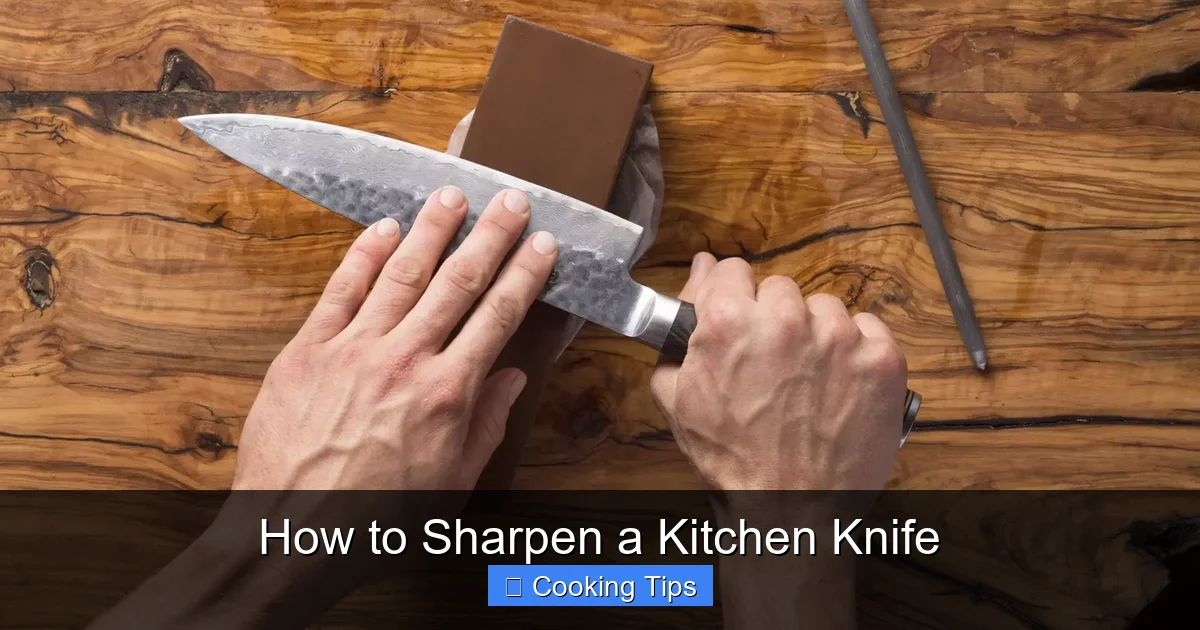
The Sharpening Process: Step-by-Step
Visual guide about How to Sharpen a Kitchen Knife
Image source: thespruceeats.com
Now, let’s get to the main event! Remember, patience and practice are key. Don’t aim for perfection on your first try. Focus on consistency.
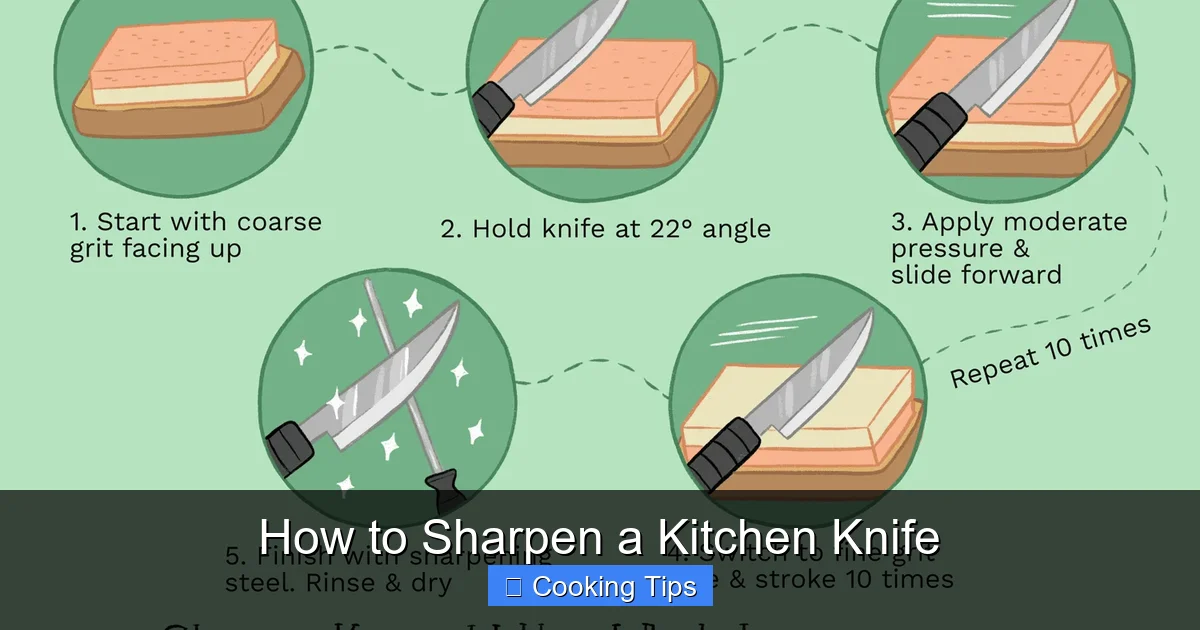
Step 1: Determine the Correct Angle
This is arguably the most crucial part of knife sharpening. Most Western-style kitchen knives have an edge angle of about 15-20 degrees per side. Japanese knives often have a more acute angle, around 10-15 degrees.
* **Visual Aid:** Imagine folding a piece of paper in half twice. The resulting angle is roughly 15 degrees. Another way is to visualize about the thickness of two quarters stacked together.
* **Angle Guides:** You can purchase angle guides that clip onto your knife, but many people learn to freehand it with practice.
* **Consistency is King:** Whatever angle you choose, stick to it throughout the sharpening process for each side of the blade.
Step 2: Sharpening the First Side (Coarse/Medium Grit)
We’ll start with the coarser or medium grit side of your stone (e.g., 1000 grit) to establish the edge.
* **Hold the Knife:** Grip the knife firmly but comfortably by the handle. Place your fingers of your non-dominant hand on the blade, just behind the edge, to apply even pressure.
* **Position the Stone:** Place the knife on the stone so that the heel of the blade (the part closest to the handle) is on the stone, and the edge is making contact. The spine of the knife should be lifted to create your target angle (15-20 degrees).
* **The Stroke:**
* Begin by moving the knife forward and across the stone, as if you were trying to slice off a thin layer of the stone. This motion moves the entire length of the blade across the stone.
* Maintain your angle and consistent pressure.
* Repeat this motion, moving the knife from heel to tip, covering the entire edge.
* **Number of Strokes:** Aim for about 10-15 strokes on one side, or until you feel a “burr” forming.
Step 3: Checking for a Burr
A burr is a small, wire-like ridge of metal that forms on the opposite side of the edge you’re sharpening. It’s a sign that you’ve reached the apex of the edge.
* **Feel for the Burr:** Carefully run your fingertip (away from the edge, of course!) across the side of the blade *opposite* the one you were just sharpening. You should feel a slight roughness or catch.
* **Visual Inspection:** You might be able to see a very fine line of metal along the edge.
* **If you don’t feel a burr:** Continue sharpening the first side for a few more strokes.
Step 4: Sharpening the Second Side (Coarse/Medium Grit)
Now, flip the knife over and repeat the sharpening process on the other side of the blade.
* **Maintain the Angle:** Ensure you are holding the knife at the same angle as before.
* **Stroke Pattern:** Use the same heel-to-tip motion.
* **Number of Strokes:** Perform the same number of strokes as you did on the first side (e.g., 10-15).
* **Check for Burr:** Again, carefully check for a burr on the first side you sharpened. You might need a few more strokes on the second side if the burr isn’t consistent along the entire length of the blade.
Step 5: Refining the Edge (Fine Grit)
Once you have a consistent burr on both sides using your medium grit stone, it’s time to refine the edge with your finer grit stone (e.g., 3000 or 6000 grit). This is what makes the knife truly sharp and polished.
* **Prepare the Fine Stone:** Ensure your fine grit stone is also prepared (soaked or wetted).
* **Repeat the Process:** Repeat the same sharpening strokes on both sides of the blade, using the same angle and pressure, but with fewer strokes. Start with about 5-10 strokes per side.
* **Focus on Smoothness:** The goal here is to smooth out the microscopic serrations left by the coarser grit.
Step 6: Removing the Burr / Polishing
The final stage is to remove any remaining burr and polish the edge.
* **Alternating Strokes:** Make lighter, alternating strokes on each side of the blade. Start with a stroke on one side, then a lighter stroke on the other. Gradually reduce the pressure with each stroke.
* **Stropping (Optional but Recommended):** For an even more polished and razor-sharp edge, you can “strop” your knife. This involves using a leather strop (or even the smooth side of a cardboard box or newspaper in a pinch) to align and polish the very apex of the edge.
* Hold the knife at a slightly shallower angle than sharpening (around 10-15 degrees).
* Drag the edge away from you on the strop, heel to tip.
* Flip the knife and repeat on the other side.
* Do this for about 10-20 alternating strokes.
Step 7: Testing the Sharpness
How do you know if your knife is sharp?
* **The Paper Test:** The most common test is to try and slice through a sheet of paper held vertically. A truly sharp knife will slice through it cleanly with no effort, almost like cutting through air.
* **The Tomato Test:** A sharp knife will easily pierce the skin of a tomato without slipping.
Step 8: Cleaning and Drying
* **Wash the Knife:** Gently wash your knife with warm, soapy water to remove any metal particles or slurry.
* **Dry Thoroughly:** Immediately and thoroughly dry your knife with a clean towel. This prevents rust.
* **Clean Your Stone:** Rinse your whetstone and let it air dry completely before storing it. Some stones benefit from light scrubbing to remove metal residue.
Honing vs. Sharpening: What’s the Difference?
It’s important to understand the difference between honing and sharpening.
* **Sharpening:** This process actually removes metal from the blade to create a new, sharp edge. It’s done on whetstones, grinding wheels, or other abrasive surfaces. You only need to sharpen your knives periodically (every few months, depending on usage).
* **Honing:** This process realigns the microscopic teeth of the knife’s edge that can get bent or misaligned with regular use. It doesn’t remove significant amounts of metal. A honing steel or rod is used for this.
You should hone your knives much more frequently than you sharpen them – even after every use. Honing helps maintain the sharpness between sharpening sessions.
Tips for Success and Common Mistakes
* **Start with a Good Knife:** While you can sharpen almost any knife, starting with a decent quality blade will yield better results.
* **Patience is Key:** Don’t rush the process. Take your time to ensure you’re maintaining the correct angle and pressure.
* **Listen to Your Stone:** You should hear a consistent, light grinding sound. If it’s too loud or aggressive, you might be pressing too hard or using the wrong angle.
* **Don’t Over-Sharpen:** Sharpening removes metal. Only sharpen when necessary. Over-sharpening can shorten the life of your knife.
* **Keep Your Stones Flat:** Over time, whetstones can develop a concave surface. Use a flattening stone or lapping plate to keep your whetstones perfectly flat for consistent results.
* **Practice on Cheaper Knives First:** If you’re nervous, grab an older, less expensive knife to practice on before tackling your favorite chef’s knife.
Troubleshooting Common Issues
* **Uneven Edge:** This often happens when the angle isn’t consistent. Focus on maintaining a steady angle from heel to tip.
* **Wire Burr Won’t Go Away:** You might need more strokes on the finer grit or alternating strokes to help break it off. Ensure you’re using enough pressure on the alternating strokes to break the burr free.
* **Knife Still Feels Dull After Sharpening:** You might not have reached the apex on both sides, or the burr wasn’t properly removed. Go back to the medium grit and ensure you have a good burr, then refine on the finer grit and remove it.
* **Edge Chipping Easily:** This could mean the edge is too thin (common with very acute angles) or the steel is too soft. It might also mean you’re not deburring properly, leaving a weak edge.
Conclusion
Mastering the art of sharpening your kitchen knives with a whetstone is a rewarding skill that will transform your cooking experience. A sharp knife is a safe knife, an efficient knife, and a knife that makes food preparation a pleasure rather than a chore. By understanding the tools, practicing the correct techniques, and maintaining consistency, you can achieve that satisfying razor-sharp edge that will have you slicing, dicing, and chopping with newfound confidence.
Don’t be discouraged if your first few attempts aren’t perfect. Every sharpening session is a learning opportunity. With regular practice, you’ll develop a feel for the angle, the pressure, and the subtle cues that indicate a perfectly sharpened edge. So, invest a little time in your tools, and enjoy the delicious results of cooking with sharp knives! Happy sharpening!