
Unlock your culinary potential with this essential guide on how to use a kitchen knife. Learn about knife types, safe handling, and mastering fundamental cutting techniques like chopping, slicing, and dicing. Proper knife skills will not only make your cooking more efficient but also safer and more enjoyable.
How to Use a Kitchen Knife
Welcome to your ultimate guide on how to use a kitchen knife! Whether you’re a brand-new home cook or looking to sharpen your existing skills, mastering the use of your kitchen knife is fundamental. A sharp, well-handled knife is your most valuable tool in the kitchen. It makes food preparation faster, safer, and more enjoyable. You’ll find yourself tackling recipes with newfound confidence. This guide will walk you through everything from selecting the right knife to executing precise cuts and keeping your blades in top condition.
Key Takeaways
- Choosing the Right Knife: Understanding the purpose of different knives, like chef’s knives, paring knives, and serrated knives, is crucial for effective food preparation.
- Safe Knife Handling: Proper grip, posture, and mindful cutting techniques are paramount to preventing accidents in the kitchen.
- The Claw Grip: This technique uses your fingertips to curl inwards, protecting them from the blade while guiding the knife.
- Rocking Motion: Utilizing the natural curve of a chef’s knife with a rocking motion allows for efficient and precise slicing and chopping.
- Mastering Basic Cuts: Learning to slice, dice, and chop accurately improves consistency in cooking times and presentation.
- Knife Maintenance: Regular sharpening and proper cleaning extend the life of your knives and ensure optimal performance.
- Practice Makes Perfect: Consistent practice with various ingredients is the most effective way to build confidence and refine your kitchen knife skills.
Understanding Your Kitchen Knives
Before you even pick up a knife, it’s helpful to know what you’re working with. Most kitchens benefit from a few key types of knives.
The Chef’s Knife
This is your workhorse. A chef’s knife typically has an 8- to 10-inch blade that curves upward towards the tip. This curve is essential for the “rocking” motion used in chopping. It’s versatile enough for slicing, dicing, and mincing most ingredients.
The Paring Knife
Smaller than a chef’s knife, a paring knife has a short, straight blade, usually 3 to 4 inches long. It’s perfect for small, intricate tasks like peeling fruits and vegetables, trimming, and deveining shrimp.
The Serrated Knife
Also known as a bread knife, this knife has a row of teeth along its blade. These teeth saw through tough exteriors and soft interiors without crushing. It’s ideal for crusty bread, tomatoes, and citrus fruits.
Other Useful Knives
While the above are essential, other knives like a utility knife (a smaller, more nimble chef’s knife) or a boning knife (for separating meat from bone) can also be valuable additions.
Knife Safety: Your Top Priority
Visual guide about How to Use a Kitchen Knife
Image source: worldkitchentools.com
Safety is not just a suggestion; it’s a necessity when working with sharp objects. A moment’s distraction can lead to a nasty cut.
The Proper Grip
How you hold your knife makes a huge difference in control and safety.
The Pinch Grip
This is the most common and recommended grip for chef’s knives. Pinch the base of the blade between your thumb and index finger. Your other fingers wrap around the handle. This grip gives you excellent control and stability.
The Handle Grip
This grip involves holding the knife just by the handle, like you would a hammer. While it feels intuitive, it offers less control and is more prone to slipping, especially with wet hands. It’s generally not recommended for precise cutting.
Stable Cutting Surface
Always use a stable cutting board. A cutting board that slides around is a recipe for disaster. You can place a damp paper towel or a silicone mat underneath your cutting board to prevent slipping.
Keep Knives Sharp
This might sound counterintuitive, but a sharp knife is a safer knife. Dull knives require more pressure to cut. This increases the chance of slipping. A sharp knife glides through food with ease, offering better control.
Cutting Direction
Always cut away from your body. This prevents accidental nicks if the knife slips.
Don’t Try to Catch a Falling Knife
This is a hard and fast rule. Never try to catch a knife that is falling. Step back and let it fall. It’s better to have a damaged floor than a damaged hand.
Keep Your Workspace Clean
Clutter can lead to accidents. Keep your cutting board area clear of other items.
Washing Your Knives
Always wash your knives by hand, separately from other dishes. Dishwashers can dull blades and damage handles. Wash the blade carefully, keeping the sharp edge away from your hand. Dry immediately and thoroughly.
Mastering Basic Knife Techniques
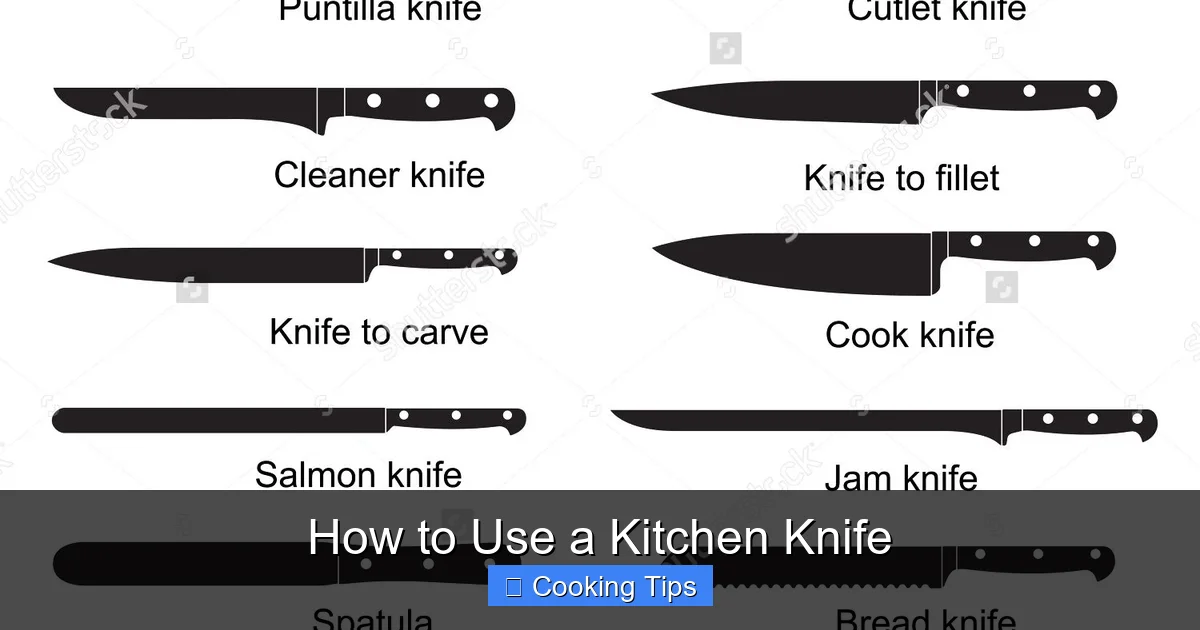
Visual guide about How to Use a Kitchen Knife
Image source: i.pinimg.com
Once you’ve got the right knife and a solid understanding of safety, it’s time to learn some fundamental cutting techniques.
The Claw Grip: Protecting Your Fingers
This is the most important technique for keeping your fingertips safe.
- Curl your fingertips inward, like you’re making a claw.
- Rest the knuckles of your guiding hand against the side of the blade.
- Your fingertips are now tucked safely under your knuckles, acting as a guide for the knife.
- As you cut, move your guiding hand backward, maintaining the “claw” shape.
This grip allows you to control the thickness and placement of your cuts.
The Rocking Motion: Efficient Chopping
This technique is best used with a chef’s knife.
- Start with the tip of the knife touching the cutting board.
- Lift the heel of the knife and bring it down through the food.
- As the blade moves through the food, rock it forward.
- The upward curve of the chef’s knife blade facilitates this smooth, rocking motion.
- Keep your guiding hand in the “claw grip” to move the food as you chop.
This method is much faster and more efficient than a straight up-and-down chopping motion.
Essential Knife Cuts
Visual guide about How to Use a Kitchen Knife
Image source: static.boker.de
Now, let’s get specific about common cuts.
Slicing
Slicing involves making long, thin cuts.
- Hold the food firmly with your guiding hand in the claw grip.
- Start the cut at the tip of the knife and pull it towards you, or push it away from you, using a slight sawing motion if needed.
- For softer items, a smooth drawing motion works best.
- For firmer items, a slight back-and-forth motion can help.
- Aim for consistent thickness for even cooking.
Example: Slicing an onion for rings or a cucumber for salads.
Chopping
Chopping involves cutting food into smaller, irregular pieces.
- Use the rocking motion described above.
- Move the knife up and down in a rhythmic pattern.
- Continue chopping until the pieces are the desired size.
- This is ideal for ingredients like herbs, garlic, or onions when you don’t need perfectly uniform pieces.
Example: Chopping parsley or dicing carrots for a mirepoix.
Dicing
Dicing is about creating uniformly sized cubes. This is a more precise cut than chopping.
- Step 1: Slice. First, make uniform slices of your desired thickness. For example, if you want ½-inch dice, make slices that are ½ inch thick.
- Step 2: Stack and Slice Again. Stack 2-3 of these slices on top of each other. Cut these stacked slices into strips of the same width as your initial slices (e.g., ½ inch).
- Step 3: Cut into Cubes. Finally, gather these strips together and cut them crosswise into cubes of the same width.
This technique requires practice but results in professional-looking ingredients that cook evenly.
Example: Dicing potatoes for a stew or peppers for fajitas.
Mincing
Mincing involves cutting food into very fine, tiny pieces.
- This is often done with ingredients like garlic, ginger, or herbs.
- Start by slicing the ingredient thinly.
- Then, chop it repeatedly using the rocking motion.
- Continue until the pieces are almost paste-like.
- You can also gather the finely chopped pieces into a pile and rock your knife back and forth over them to further mince.
Example: Mincing garlic for a sauce or ginger for a stir-fry.
Tips for Better Knife Skills
* Start Simple: Begin with softer ingredients like zucchini or bell peppers before moving to harder items like potatoes or carrots.
* Use the Right Knife: Don’t try to chop a tough squash with a paring knife. Use the appropriate tool for the job.
* Be Patient: Learning new skills takes time. Don’t get discouraged if your first few attempts aren’t perfect.
* Watch and Learn: Observe experienced cooks or watch online tutorials to see techniques in action.
* Invest in Quality: A good quality chef’s knife is an investment that will pay off in terms of performance and longevity.
Troubleshooting Common Knife Issues
* My knife keeps slipping:
* Ensure your hands and the cutting board are dry.
* Check that your cutting board is stable.
* Make sure your knife is sharp; dull knives are more prone to slipping.
* Focus on your grip; the pinch grip offers the most control.
* My cuts are uneven:
* This often comes down to practice. Try to keep the thickness of your slices consistent.
* When dicing, ensure each step is done with the same measurement.
* Slow down if you need to. Speed will come with practice.
* I’m afraid of cutting myself:
* Always use the claw grip for your guiding hand.
* Keep your fingers tucked away.
* Focus on the task at hand and minimize distractions.
* If you’re feeling rushed or tired, take a break.
Knife Maintenance: Keeping Your Blades Sharp and Clean
Proper care will make your knives last longer and perform better.
Sharpening
Knives need to be sharpened periodically. You can use a sharpening steel (honing steel) to realign the blade’s edge regularly, but this is not the same as sharpening. Sharpening actually removes a small amount of metal to create a new, sharp edge.
- Sharpening Steel: Use this after each use or before each use to keep your knife’s edge aligned. Hold the steel vertically, and draw the blade down it at an angle (usually 15-20 degrees). Repeat on both sides.
- Whetstone: For a true sharpening, a whetstone is best. It requires more practice but gives the best results. Follow the stone’s instructions, usually involving soaking and sharpening at a consistent angle.
- Electric Sharpeners: These are convenient but can remove too much metal if not used carefully.
If you’re unsure, consider having your knives professionally sharpened.
Honing
A honing steel (often called a sharpening steel) is used to straighten out the microscopic “dings” in your knife’s edge that happen with normal use. This keeps the knife feeling sharp longer between actual sharpenings.
Cleaning and Drying
As mentioned earlier, hand wash your knives immediately after use. Dry them thoroughly with a soft cloth to prevent rust and water spots.
Conclusion
Learning how to use a kitchen knife effectively is a journey, not a destination. By understanding your tools, prioritizing safety, practicing fundamental techniques, and maintaining your knives, you’ll build confidence and efficiency in the kitchen. The ability to slice, dice, and chop with precision will not only elevate your cooking but also make the entire process more enjoyable. So, pick up your knife, embrace the learning curve, and get ready to create delicious meals with skill and flair!