
Is your food processor struggling to spin or making odd noises? It might be a worn-out gear. This comprehensive guide will walk you through the simple process of replacing your food processor gear, saving you money and getting your appliance back in working order. Follow our step-by-step instructions, and you’ll be chopping and pureeing like a pro again in no time.
How to Replace Food Processor Gear
Your food processor is a workhorse in the kitchen, transforming ingredients from whole vegetables to smooth purees and perfectly chopped nuts. But like any mechanical device, its parts can wear out over time. One of the most common culprits for a malfunctioning food processor is a damaged or stripped gear. If you’ve noticed your food processor making grinding noises, struggling to spin, or simply not performing as it used to, it’s likely time to replace the gear. Don’t worry, it’s a repair you can often do yourself with a few basic tools and a little patience. This guide will walk you through the entire process, from diagnosing the problem to getting your food processor back in action.
Replacing a food processor gear might sound intimidating, but it’s a surprisingly straightforward DIY project. By following these steps, you’ll be able to save money on repair services and extend the life of your beloved kitchen appliance. We’ll cover everything you need to know, ensuring you have the confidence to tackle this repair.
Key Takeaways
- Identify the Problem: Learn to recognize the common signs of a stripped or broken food processor gear, such as unusual noises, inability to spin, or inconsistent performance.
- Gather Necessary Tools: Understand the essential tools you’ll need, typically including screwdrivers, pliers, a replacement gear, and a clean workspace.
- Safety First: Always unplug your food processor before beginning any repair to prevent electrical hazards.
- Disassemble Carefully: Follow a methodical approach to disassemble the food processor base, keeping track of screws and small parts.
- Locate and Remove Old Gear: Pinpoint the damaged gear and learn how to safely detach it from the motor shaft.
- Install New Gear: Properly seat the new gear onto the motor shaft, ensuring a secure and correct fit.
- Reassemble and Test: Reassemble the food processor base in reverse order and test its functionality to confirm the repair was successful.
Understanding Food Processor Gears
Before we dive into the repair, it’s helpful to understand what these gears do. Food processors typically have a main drive shaft that extends from the motor base. This shaft has gears that engage with other gears, usually located in the blade assembly or on the lid. When you turn on your food processor, the motor spins the drive shaft, which in turn rotates the gears to power the blades. Over time, especially with heavy use or if the appliance is forced to process tough ingredients, these gears can become worn down, stripped, or even break entirely. This is why knowing how to replace a food processor gear is a valuable skill for any home cook.
When to Replace Your Food Processor Gear
Several signs point to a failing food processor gear. Keeping an eye out for these symptoms will help you address the issue before it causes more significant damage or makes your appliance completely unusable.

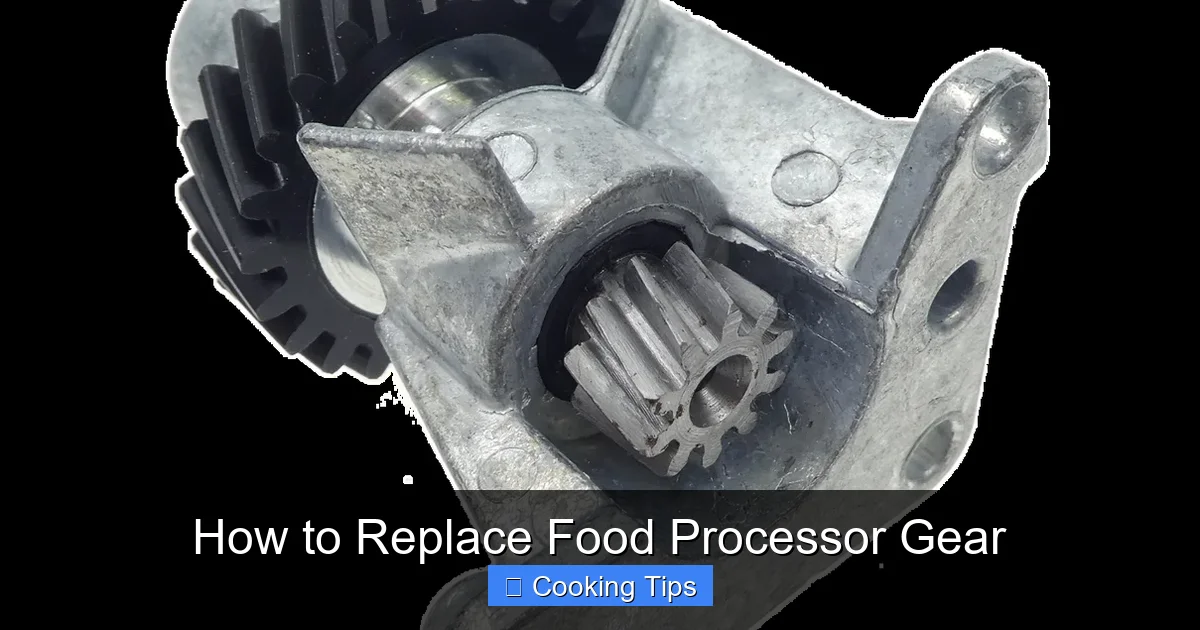
Visual guide about How to Replace Food Processor Gear
Image source: huoltopalvelu.com
Common Symptoms of a Worn Gear:
- Grinding or Clicking Noises: This is often the most obvious sign. If you hear a distinct grinding or clicking sound when the motor is running, especially when the blade assembly is engaged, it’s a strong indicator of stripped or damaged gears.
- Blade Not Spinning Consistently: If the blades spin intermittently, slow down significantly under load, or stop altogether even though the motor sounds like it’s running, the gears are likely not engaging properly.
- Motor Runs, but Blades Don’t Move: This is a classic symptom. The motor might sound normal, but if the blade assembly doesn’t rotate, it means the power isn’t being transferred due to gear failure.
- Loose Blade Assembly: While not always gear-related, a very loose blade assembly that wobbles excessively can sometimes be a symptom of a worn gear in the base.
- Difficulty Processing Food: If your food processor is no longer effectively chopping, slicing, or pureeing, and you’ve ruled out dull blades, a gear issue could be the cause.
Getting Started: Preparation and Safety
Before you begin disassembling your food processor, it’s crucial to prepare your workspace and prioritize safety. Taking these simple steps will make the repair process smoother and prevent accidents.
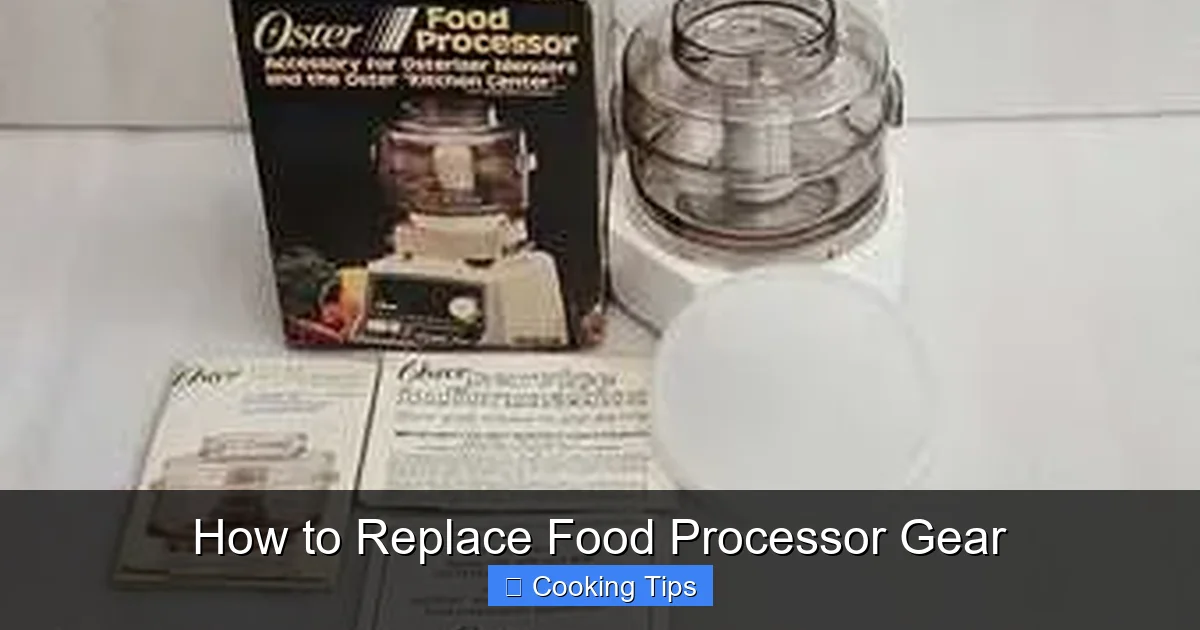
Visual guide about How to Replace Food Processor Gear
Image source: huoltopalvelu.com
Gather Your Tools and Supplies:
You won’t need a professional toolkit, but having the right items on hand will be very helpful:
- Replacement Food Processor Gear: This is the most important item! You’ll need to find the correct replacement gear specific to your food processor model. Check your appliance’s manual or the manufacturer’s website. You can often find these parts online through authorized dealers or general appliance parts retailers. Ensure you order the exact part number for your model.
- Screwdrivers: You’ll likely need a set of Phillips head screwdrivers in various sizes. Sometimes, small flathead screwdrivers are also useful for prying or loosening stubborn parts.
- Pliers: Needle-nose pliers are excellent for gripping small screws or gently pulling out components.
- Small Container or Bowl: To keep all the screws and small parts organized. This is vital to avoid losing anything.
- Clean Cloth or Paper Towels: For wiping away any dust or debris and to keep your workspace clean.
- Camera or Smartphone: To take pictures as you disassemble. This is an invaluable tool for remembering how things go back together.
- Owner’s Manual (if available): While not always necessary, your owner’s manual might have diagrams that can aid in disassembly and reassembly.
Safety Precautions:
Safety is paramount when working with any electrical appliance. Always follow these guidelines:
- Unplug the Appliance: This is the absolute first step. Ensure the food processor is completely unplugged from the wall socket before you do anything else.
- Work on a Stable Surface: Use a clean, flat, and stable surface for your repair. Avoid working on a cluttered or uneven area.
- Be Gentle: Food processor parts can be made of plastic and can be brittle. Avoid forcing components, as this can lead to breakage.
- Keep Small Parts Away from Children and Pets: If you have young children or pets, ensure they are kept away from your workspace and any small parts you’re handling.
Step-by-Step Guide to Replacing the Gear
Now that you’re prepared, let’s get down to the actual repair. We’ll break this down into manageable steps.
Visual guide about How to Replace Food Processor Gear
Image source: kitchenadvising.com
Step 1: Disconnect and Inspect
Before you start taking anything apart, ensure the food processor is unplugged. Place it on your prepared workspace. Take a moment to look at the base. Most food processor bases are secured by screws, often on the underside. You might also find clips or tabs holding parts together.
Step 2: Remove the Base Cover
This is where your screwdrivers come into play. Flip the food processor base over to access the bottom. You’ll likely see several screws holding the bottom cover in place. Carefully remove these screws, placing them immediately into your organized container. Take a picture of the screw locations if they differ in size.
H3: Undoing the Screws
Use the appropriate screwdriver size to loosen each screw. Turn them counter-clockwise. Be patient, and don’t force the screwdriver. Once all screws are removed, you should be able to gently pry off the bottom cover. Some covers may also have small plastic clips that need to be carefully released with a flathead screwdriver or by gently pulling.
H3: Taking Photos for Reassembly
As you remove the bottom cover, take a few photos. Pay attention to how the wiring is routed and how the cover fits. This will be incredibly useful when it’s time to put everything back together. You might also notice a layer of dust or grime inside; this is a good opportunity for a quick clean.
Step 3: Locate the Drive Shaft and Gear Mechanism
With the base cover removed, you’ll see the internal workings of your food processor. The motor will be visible, and connected to it will be the drive shaft. This is the component that engages with the blade assembly. The gear you need to replace is usually located at the top of this drive shaft, where it meets the blade attachment point, or it might be a part of the drive shaft itself that has broken off. Sometimes, the gear is a separate plastic piece that fits onto the shaft.
H3: Identifying the Damaged Gear
Inspect the drive shaft and any visible gears carefully. Look for any teeth that are chipped, worn down, or completely missing. If the gear is a separate piece, it might be cracked or have pieces broken off. You might also see plastic shavings around the mechanism, which is a clear sign of gear wear.
Step 4: Remove the Old Gear
This step can vary depending on the design of your food processor. Some gears simply slide off the drive shaft, while others might be press-fit or held in place by a small retaining clip or pin.
H3: Gently Detaching the Gear
If the gear is a separate component, try to gently pull it straight up and off the drive shaft. If it’s stuck, try wiggling it slightly or use a pair of needle-nose pliers to grip it and pull upwards. Be careful not to damage the motor shaft itself. If you see a small clip or pin, use your pliers to carefully remove it first.
H3: When the Gear is Part of the Shaft
In some cases, the gear might be integrated into the drive shaft. If this is the case, you might need to replace the entire drive shaft assembly. Consult your appliance’s manual or the parts supplier for instructions on how to remove and replace the complete shaft if this is the situation.
Step 5: Install the New Gear
Once the old gear is removed, clean any debris from the drive shaft. Now, take your new replacement gear.
H3: Aligning and Seating the New Gear
Carefully align the new gear with the drive shaft. There should be a specific orientation for it to fit correctly, often indicated by a keyed shape or notches. Gently push the new gear down onto the shaft until it is seated firmly and securely. You should feel it click or settle into place.
H3: Securing the Gear (If Applicable)
If your old gear was held in place by a clip or pin, make sure to reinsert it now to secure the new gear. Double-check that the gear feels stable and doesn’t wobble unnecessarily.
Step 6: Reassemble the Food Processor
This is essentially the reverse of disassembly. Refer to the photos you took earlier.
H3: Reattaching the Base Cover
Carefully position the bottom cover back onto the base. Ensure all wires are tucked away safely and not pinched. Line up the screw holes and gently press the cover into place. It should snap or fit snugly.
H3: Replacing the Screws
Reinsert all the screws you removed in Step 2. Tighten them firmly, but avoid over-tightening, which can strip the plastic threads.
Step 7: Test the Food Processor
Once everything is reassembled, it’s time for the moment of truth!
H3: Plugging In and Testing
Make sure the food processor is on a stable surface. Plug it into the wall socket. Turn it on at a low speed first. Listen for any unusual noises. Then, try a higher speed.
H3: Checking Blade Rotation
Attach your blade assembly and run the processor for a few seconds. Ensure the blades are spinning smoothly and consistently. If it sounds good and the blades are rotating correctly, congratulations! You’ve successfully replaced your food processor gear.
Troubleshooting Common Issues
Even with careful work, you might encounter a hiccup. Here are a few things to consider if your food processor isn’t working perfectly after the repair.
- Still Making Noise: If you’re still hearing grinding or clicking, double-check that the new gear is fully seated and that no other internal components have become dislodged. Ensure there isn’t any debris interfering with the gear mechanism.
- Blade Still Not Spinning: This could indicate that the issue wasn’t the gear, or that the new gear isn’t properly engaged. Re-check the connection between the drive shaft and the gear, and ensure the blade assembly is correctly placed on top. It’s also possible there’s a problem with the motor itself, which is a more complex repair.
- Cover Won’t Fit Back On: Usually, this is due to wires or components not being positioned correctly. Open the base again and ensure everything is neatly tucked away before trying to refit the cover.
When to Call a Professional or Consider a New Appliance
While replacing a gear is often a DIY-friendly repair, there are times when it might be best to seek professional help or consider a new appliance. If your food processor is very old, if multiple parts seem damaged, or if you’re uncomfortable with any part of the disassembly process, it might be wise to take it to an appliance repair shop. In some cases, the cost of repair might approach the cost of a new, comparable food processor, especially if it’s an older model with limited availability of parts.
Conclusion
Replacing a food processor gear might seem daunting at first, but with this guide, you’re equipped with the knowledge and steps to tackle the job. By carefully following these instructions, prioritizing safety, and taking your time, you can successfully revive your food processor and enjoy its convenience in your kitchen once more. This simple repair can save you money and reduce waste, making it a rewarding DIY project for any home cook. Happy processing!