
Elevate your meals with vibrant, homemade chutneys, effortlessly prepared using your mixer grinder. This guide unlocks the secrets to creating a variety of delicious chutneys, from spicy to sweet. Learn the best techniques, ingredient pairings, and tips to transform your cooking with the power of your mixer grinder. Unlock a world of flavor and impress your guests with these simple, step-by-step chutney recipes.
Chutney Recipes Using Mixer Grinder
Chutneys are more than just condiments; they are flavor powerhouses that can transform a simple meal into a culinary delight. Traditionally, making chutney involved meticulous grinding on a stone mortar and pestle, a process that is both time-consuming and labor-intensive. However, with the advent of modern kitchen appliances, particularly the humble yet mighty mixer grinder, creating these flavorful accompaniments has become incredibly easy and accessible.
This comprehensive guide will walk you through the art of making delicious chutneys using your mixer grinder. We’ll explore various popular recipes, share essential tips and tricks for optimal results, and even touch upon troubleshooting common issues. Whether you’re a seasoned cook or a beginner in the kitchen, you’ll soon be whipping up a storm of fresh, vibrant chutneys that will impress your family and friends.
Key Takeaways
- Effortless Preparation: A mixer grinder significantly reduces the time and effort required to achieve smooth or coarse chutneys, eliminating manual grinding.
- Versatility in Ingredients: Explore a wide range of base ingredients, from fresh herbs and vegetables to fruits and nuts, to create diverse flavor profiles.
- Flavor Customization: Easily adjust spice levels, tanginess, and sweetness to perfectly suit your palate and complement specific dishes.
- Smart Mixer Grinder Usage: Learn techniques like pulsing and adding liquid gradually to control the consistency and prevent overheating of your mixer grinder.
- Storage Solutions: Discover effective methods for storing chutneys to maintain their freshness and flavor for extended periods.
- Troubleshooting Common Issues: Address potential problems like watery chutneys or inconsistent textures with practical solutions.
Why Use a Mixer Grinder for Chutneys?
The mixer grinder is a kitchen workhorse, and its ability to create chutneys is one of its most valuable assets. Here’s why it’s the perfect tool:
- Speed and Efficiency: It drastically cuts down preparation time compared to traditional methods. What used to take minutes of strenuous grinding can be achieved in seconds.
- Consistency Control: With a mixer grinder, you have greater control over the final texture. Whether you prefer a smooth, paste-like chutney or a slightly coarse one, your mixer grinder can deliver.
- Effortless Grinding: It eliminates the physical strain associated with manual grinding, making chutney making accessible to everyone.
- Versatile Blade System: The sharp blades are designed to efficiently break down various ingredients, from fibrous herbs to hard nuts and seeds.
Essential Tips for Using Your Mixer Grinder for Chutneys
Before diving into recipes, let’s cover some crucial tips to ensure your chutney-making experience is smooth and successful:

Visual guide about Chutney Recipes Using Mixer Grinder
Image source: 5.imimg.com
Prepping Your Ingredients
Proper preparation is key to a good chutney. Ensure all your ingredients are washed, dried, and roughly chopped before adding them to the mixer grinder jar. This not only helps the blades grind more effectively but also prevents the mixer grinder from getting overloaded.
Adding Water (or Liquid)
The amount of water or other liquid you add is critical for achieving the desired consistency. Start with a small amount and add more gradually as needed. Too much liquid can result in a watery chutney, while too little might make it too thick and difficult to grind.
Pulsing is Your Friend
Instead of running the mixer grinder continuously, use the pulse function. This allows you to control the texture more precisely and prevents the ingredients from overheating, which can affect the flavor. Pulse a few times, check the consistency, and pulse again if necessary.
Don’t Overload the Jar
Fill the mixer grinder jar only up to two-thirds of its capacity. Overloading can strain the motor and lead to uneven grinding. If you’re making a large batch, it’s better to grind in smaller portions.
Cleanliness is Crucial
Ensure your mixer grinder jar and blades are thoroughly cleaned before and after use. This prevents cross-contamination of flavors and ensures hygiene.
Classic Tomato Chutney
This is a universally loved chutney, perfect with idlis, dosas, samosas, and practically anything else! The sweetness of tomatoes, the tang of tamarind, and the kick of chilies make it irresistible.
Visual guide about Chutney Recipes Using Mixer Grinder
Image source: 4.imimg.com
Ingredients:
- 3-4 ripe tomatoes, roughly chopped
- 2-3 dry red chilies (adjust to your spice preference)
- 1 inch ginger, roughly chopped
- 2-3 cloves garlic
- 1 tablespoon tamarind pulp (or to taste)
- 1/2 teaspoon mustard seeds
- 1/4 teaspoon asafoetida (hing)
- 1 tablespoon oil (for tempering)
- Salt to taste
- A pinch of jaggery or sugar (optional, to balance flavors)
Instructions:
- Dry Roast Spices: In a small pan, dry roast the red chilies for about a minute until fragrant. Set aside.
- Grind Base Ingredients: In your mixer grinder jar, add the chopped tomatoes, roasted red chilies, ginger, garlic, tamarind pulp, and salt.
- Pulse to Coarse Paste: Pulse the ingredients a few times to get a coarse paste. If needed, add a tablespoon of water to help it grind, but be careful not to add too much. Aim for a slightly chunky texture.
- Transfer and Temper: Transfer the chutney to a serving bowl.
- Prepare the Tempering (Tadka): In the same small pan (or a separate tadka pan), heat the oil. Once hot, add the mustard seeds. Let them splutter.
- Add Asafoetida: Add the asafoetida and switch off the heat immediately to prevent it from burning.
- Combine: Pour this hot tempering over the tomato chutney. Mix well.
- Adjust Seasoning: Taste and adjust salt. If it’s too tangy, add a pinch of jaggery or sugar.
Tip: For a smoother chutney, grind for a little longer, adding a splash more water if needed. For a smoky flavor, roast the tomatoes lightly before chopping.
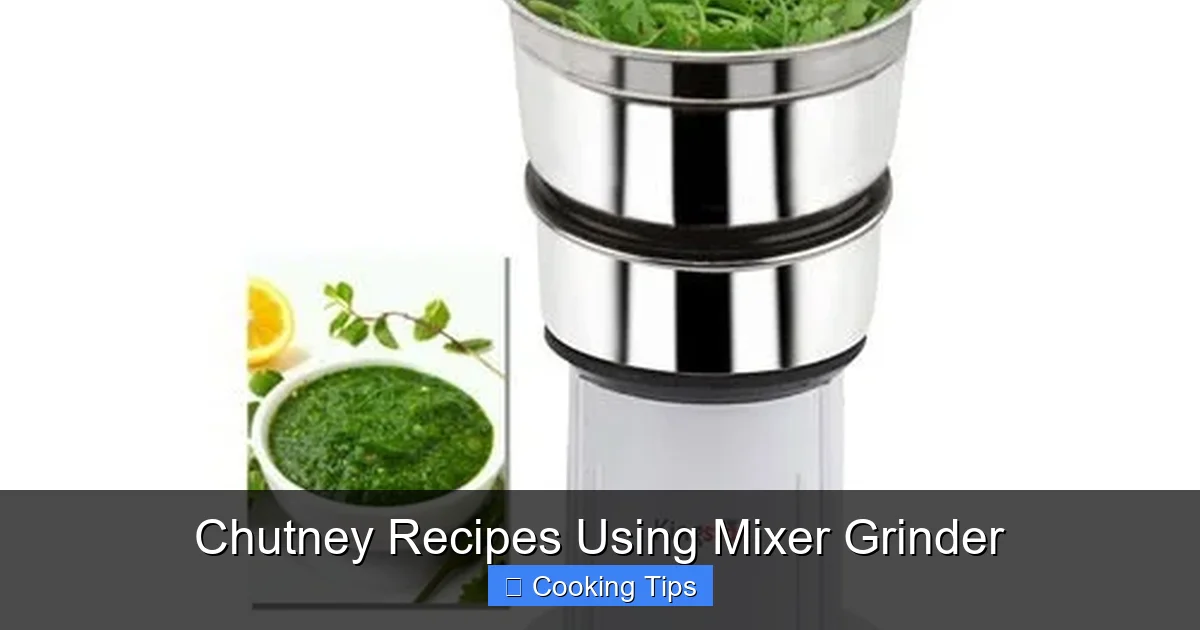
Spicy Coriander Mint Chutney (Green Chutney)
This vibrant green chutney is a staple in Indian cuisine, often served with snacks, sandwiches, and as a side to main courses. Its refreshing flavor is a perfect counterpoint to richer dishes.

Visual guide about Chutney Recipes Using Mixer Grinder
Image source: sparepartwala.in
Ingredients:
- 1 cup fresh coriander leaves (cilantro), washed and roughly chopped
- 1/2 cup fresh mint leaves, washed and roughly chopped
- 1-2 green chilies (adjust to spice preference)
- 1/2 inch ginger, roughly chopped
- 1-2 cloves garlic
- 1 tablespoon lemon juice (or to taste)
- 1/4 teaspoon cumin powder
- Salt to taste
- 2-3 tablespoons water (or as needed)
Instructions:
- Add Greens and Aromatics: In your mixer grinder jar, add the coriander leaves, mint leaves, green chilies, ginger, and garlic.
- Pulse to Coarse Paste: Pulse a few times until the ingredients start to break down.
- Add Dry Spices and Seasoning: Add cumin powder, salt, and lemon juice.
- Grind to Smooth Paste: Now, add 2 tablespoons of water and grind to a smooth, vibrant green paste. Add more water, a tablespoon at a time, if needed to achieve the desired consistency.
- Taste and Adjust: Taste the chutney and adjust salt and lemon juice as per your preference.
Tip: To keep the chutney a bright green, avoid over-grinding, and try to use freshly ground spices. Some people add a small piece of raw mango for extra tang.
Sweet Tamarind Chutney (Imli Chutney)
This sweet and tangy chutney is a perfect accompaniment to chaats, samosas, and pakoras. Its complex sweet, sour, and slightly spicy notes are incredibly addictive.
Ingredients:
- 1/2 cup tamarind pulp (seedless)
- 1/2 cup jaggery or brown sugar, grated or powdered
- 1-2 tablespoons water
- 1/4 teaspoon roasted cumin powder
- 1/4 teaspoon red chili powder (or to taste)
- 1/4 teaspoon garam masala (optional)
- A pinch of salt
- 1/4 teaspoon chaat masala (optional, for extra zing)
Instructions:
- Soak Tamarind (if using block): If you are using a block of tamarind, soak it in about 1 cup of warm water for 15-20 minutes. Squeeze out the pulp and discard the fibrous material and seeds. You should have about 1/2 cup of thick pulp.
- Combine Ingredients: In your mixer grinder jar, add the tamarind pulp, jaggery or brown sugar, and 1-2 tablespoons of water.
- Grind to Smooth Paste: Grind the mixture to a smooth, thick paste. Be careful not to add too much water at this stage.
- Add Spices: Add the roasted cumin powder, red chili powder, garam masala (if using), salt, and chaat masala (if using).
- Pulse to Combine: Pulse a few times to combine the spices evenly with the chutney.
- Adjust Consistency: If the chutney is too thick, add a tablespoon of water at a time and pulse until you reach your desired consistency.
Storage: This chutney keeps well in an airtight container in the refrigerator for up to 2 weeks.
Garlic Chutney (Lehsun Chutney)
For garlic lovers, this pungent and flavorful chutney is a must-try. It adds a robust kick to any meal and is also known for its health benefits.
Ingredients:
- 1 cup garlic cloves, peeled
- 2-3 dry red chilies (or adjust to spice level)
- 1 tablespoon tamarind pulp
- 1/4 teaspoon cumin seeds
- 1/4 teaspoon mustard seeds
- 1/4 teaspoon asafoetida (hing)
- 1 tablespoon oil (for tempering)
- Salt to taste
- 2-3 tablespoons water (as needed)
Instructions:
- Dry Roast Spices: Dry roast the dry red chilies and cumin seeds in a dry pan until fragrant. Set aside.
- Grind Base: In your mixer grinder jar, add the peeled garlic cloves, roasted red chilies, roasted cumin seeds, tamarind pulp, and salt.
- Pulse to Coarse Paste: Pulse a few times. Add 2 tablespoons of water and grind to a coarse paste. Add more water if needed to achieve a thick but spreadable consistency.
- Temper: Heat oil in a small pan. Add mustard seeds. Once they splutter, add asafoetida and switch off the heat.
- Combine: Pour the tempering over the garlic chutney. Mix well.
Tip: You can adjust the amount of garlic and chilies to your preference. This chutney can be stored in the refrigerator for about a week.
Troubleshooting Common Chutney Problems
Even with a mixer grinder, you might encounter a few hiccups. Here are some solutions:
My Chutney is too Watery
Cause: Too much liquid added during grinding, or ingredients were too watery to begin with.
Solution: Transfer the chutney to a non-stick pan and simmer on low heat for a few minutes, stirring constantly, until it thickens. You can also add a small amount of roasted gram flour (besan) or rice flour, stirring continuously to avoid lumps, until it thickens.
My Chutney is Too Dry/Not Grinding Well
Cause: Not enough liquid, or the mixer grinder is overloaded.
Solution: Add water or other liquid, a tablespoon at a time, while pulsing. Ensure you are not overcrowding the mixer grinder jar.
The Chutney Tastes Bitter
Cause: Over-roasting certain ingredients, or using ingredients that have gone bad.
Solution: For green chutneys, sometimes over-roasting chilies can cause bitterness. Next time, roast them lightly. If using vegetables, ensure they are fresh. You can sometimes balance bitterness with a touch of jaggery or sugar.
The Color of My Green Chutney Isn’t Vibrant
Cause: Over-grinding, using older coriander leaves, or the heat generated from continuous grinding.
Solution: Use fresh ingredients. Pulse rather than running the mixer grinder continuously. Adding a tablespoon of ice-cold water or a few ice cubes while grinding can help retain the vibrant green color.
Storing Your Homemade Chutneys
Once you’ve mastered the art of making chutneys with your mixer grinder, you’ll want to store them properly to enjoy them for longer.
- Refrigeration: Most fresh chutneys, especially those with herbs and vegetables, should be stored in an airtight container in the refrigerator. They typically last for 5-7 days.
- Freezing: For longer storage, you can freeze chutneys. Portion them into small ice cube trays or small airtight containers before freezing. Once frozen, you can transfer them to a freezer bag. Frozen chutneys can last for 2-3 months.
- Tempering for Preservation: Some chutneys, like tomato or garlic chutney, benefit from tempering with oil, mustard seeds, and asafoetida. This process can help preserve them for a slightly longer period, especially if you plan to store them at room temperature for a day or two (though refrigeration is always recommended for safety).
Conclusion
Your mixer grinder is a powerful ally in the kitchen, capable of unlocking a world of flavors with ease. By following these simple recipes and tips, you can effortlessly create a variety of delicious chutneys that will elevate your everyday meals. Experiment with different ingredients, adjust spice levels, and discover your own signature chutney creations. Happy chutney making!