
Maintaining your air fryer involves more than just cleaning the basket. This comprehensive guide details how to safely and effectively clean under and around the air fryer fan. By following these simple steps, you’ll ensure optimal airflow, improved cooking results, and extend the lifespan of your appliance. Let’s get your air fryer back to its best!
How to Clean Under and Around the Air Fryer Fan
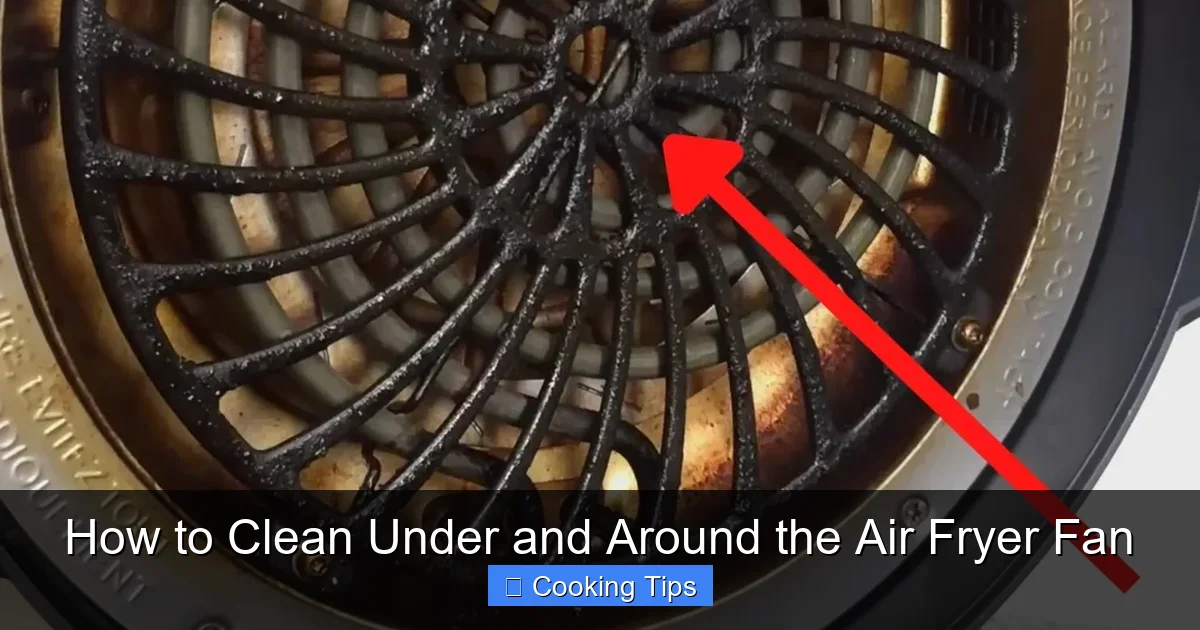
Your air fryer has become a kitchen superhero, right? It whips up crispy fries, succulent chicken wings, and delicious roasted vegetables with impressive speed and convenience. But like any hardworking appliance, it needs a little TLC to keep it performing at its peak. One area that often gets overlooked, yet is crucial for optimal function, is the air fryer fan. Over time, cooking oils, grease, and food particles can accumulate not only in the basket and on the heating element but also under and around the fan. This buildup can lead to reduced airflow, uneven cooking, strange odors, and even potential safety hazards. This guide will walk you through exactly how to clean under and around your air fryer fan, ensuring your appliance stays in top working order for years to come.
Key Takeaways
- Regular cleaning prevents oil buildup: Food residue and grease can accumulate around the fan, impacting performance and potentially causing odors.
- Safety first: Always unplug your air fryer before attempting any cleaning to avoid electrical shock.
- Disassemble with care: Many air fryer models allow for partial disassembly of the fan housing for thorough cleaning. Consult your manual.
- Gentle cleaning methods are key: Use mild dish soap, warm water, and soft cloths or brushes to avoid damaging delicate fan components.
- Thorough drying is crucial: Ensure all parts are completely dry before reassembling and plugging the air fryer back in.
- Troubleshooting common issues: Learn what to do if you notice strange noises or reduced airflow after cleaning.
- Preventative maintenance saves time: Regular, light cleaning makes deep cleaning less frequent and easier.
Why Cleaning the Air Fryer Fan Matters
You might be wondering, “Does the fan really get that dirty?” The answer is a resounding yes! The fan is responsible for circulating hot air within the air fryer chamber. As it spins, it inevitably draws in air, which carries fine particles of grease and food debris. These particles can stick to the fan blades and the surrounding housing, creating a sticky, grimy layer. This layer can:
- Hinder Airflow: A dirty fan struggles to move air effectively, leading to less crispy food and longer cooking times.
- Cause Odors: Accumulated grease can turn rancid, emitting unpleasant smells during cooking.
- Reduce Efficiency: When the fan isn’t working efficiently, your air fryer uses more energy to achieve the desired cooking results.
- Pose a Fire Risk: In extreme cases, excessive grease buildup can become a fire hazard.
Regularly cleaning the fan area is not just about aesthetics; it’s about performance, safety, and prolonging the life of your beloved air fryer. Let’s dive into how to tackle this task.
Getting Started: Safety First!
Before we grab any cleaning supplies, the most important step is to ensure your safety. Working with electrical appliances requires caution.
Visual guide about How to Clean Under and Around the Air Fryer Fan
Image source: kitchenspet.com
Unplug Your Air Fryer
This might seem obvious, but it’s the golden rule of appliance cleaning. Always, always, always unplug your air fryer from the wall outlet. Wait for the appliance to cool down completely. This could take anywhere from 30 minutes to an hour, depending on how long you’ve been using it and its size. Never attempt to clean a plugged-in or hot appliance.
Gather Your Cleaning Supplies
Having everything ready will make the process smoother. You’ll likely need:
- Mild dish soap
- Warm water
- Soft microfiber cloths
- A soft-bristled brush (an old toothbrush or a dedicated cleaning brush works well)
- Cotton swabs
- A small bowl or container
- Optional: A specialized air fryer cleaning tool (check your manual for recommendations)
- Optional: A gentle, non-abrasive all-purpose cleaner (ensure it’s food-safe if you plan to use it near food contact areas)
Avoid using harsh chemicals, abrasive scrubbers, steel wool, or solvents. These can damage the plastic components, fan blades, and any non-stick coatings within your air fryer.
Step-by-Step Guide to Cleaning the Air Fryer Fan
The exact method for accessing the fan area can vary significantly between air fryer models. Some have easily removable fan covers, while others are more integrated. Always refer to your air fryer’s user manual for specific instructions regarding disassembly and cleaning. If you can’t find your manual, most manufacturers have them available for download on their websites.
Visual guide about How to Clean Under and Around the Air Fryer Fan
Image source: kitchenspet.com
Step 1: Remove Removable Parts
Start by removing everything that can be taken out of the air fryer. This typically includes the basket, crisper plate, and any other accessories. Wash these items separately according to your manual’s instructions, usually in warm, soapy water, or in the dishwasher if they are dishwasher-safe.
Step 2: Assess Your Air Fryer’s Fan Design
Most air fryers have their fan located at the back of the appliance, often behind a protective cover. Some models might have a removable cover that you can unscrew or unclip. Others might require you to tilt the unit or access it from the bottom. Pay close attention to how your specific model is designed.
Step 3: Accessing the Fan Housing
This is where consulting your manual is most critical. Here are some common scenarios:
Scenario A: Removable Fan Cover
If your air fryer has a removable fan cover, you’ll likely find screws holding it in place. Carefully unscrew these using an appropriate screwdriver. Keep the screws in a safe place, perhaps in a small bowl, so you don’t lose them.
Once the screws are removed, gently pull the cover away. You should now have clear access to the fan and its immediate surroundings.
Scenario B: Integrated Fan Housing (Bottom or Back Access)
Some air fryers do not have a user-removable fan cover. In these cases, you might need to:
- Tilt the Unit: Carefully tilt the air fryer on its side or back (ensure it’s unplugged and cool!). You might be able to see and reach the fan area from the bottom or the rear of the appliance. This often allows access to clean away buildup without full disassembly.
- Look for Vents: The fan is usually behind ventilation slots at the back of the air fryer. You can often clean debris from these openings without taking anything apart.
Important Note: If your model requires extensive disassembly that you are uncomfortable with, or if the manual states the fan is not user-serviceable, it’s best to stick to cleaning the accessible areas or contact the manufacturer for advice.
Step 4: Cleaning the Fan Blades and Housing
Once you have access to the fan area, it’s time to get cleaning. You want to be gentle here, as fan blades can be delicate.
Using a Damp Cloth
Dip a soft microfiber cloth into your warm, soapy water. Wring it out thoroughly so it’s damp, not dripping wet. Gently wipe down the fan blades, trying to remove any grease and debris. Don’t force the blades; just a gentle wipe should suffice.
Employing a Soft Brush
For more stubborn gunk stuck between the fan blades or in tight corners of the housing, use your soft-bristled brush. Dip the brush in your soapy water, and gently scrub away the residue. You can also use a dry brush to dislodge loose particles before washing.
Reaching Tight Spots with Cotton Swabs
Cotton swabs are excellent for cleaning around the edges of the fan motor and in small crevices that a cloth or brush can’t reach. Dip the swab in soapy water and carefully clean these areas.
Cleaning the Surrounding Area
While you’re there, take the opportunity to clean the area around the fan housing. Use your damp cloth to wipe down the interior of the fan chamber and any visible grease buildup.
Step 5: Rinse and Dry Thoroughly
Rinsing is important to remove any soap residue. You can use another clean, damp cloth (rinsed with plain water) to wipe away the soap. Again, ensure the cloth is only damp, not wet.
Drying is absolutely critical. Moisture can damage the electrical components of the fan motor. Use a dry microfiber cloth to pat all the cleaned areas dry. You can also let the parts air dry completely for several hours, ensuring no moisture remains, before reassembling.
Step 6: Reassemble Your Air Fryer
Once everything is completely dry, carefully reassemble your air fryer. If you removed a fan cover, screw it back into place. Ensure all parts are secure and correctly fitted.
Step 7: Final Wipe-Down
Give the exterior of your air fryer a final wipe-down with a damp cloth and dry it. You can then reinsert the clean basket and crisper plate.
Troubleshooting Common Fan Cleaning Issues
Even with careful cleaning, you might encounter a few hiccups. Here’s how to handle them:
Visual guide about How to Clean Under and Around the Air Fryer Fan
Image source: kitchenspet.com
Issue: Stubborn Grease Buildup
Solution: For very stubborn grease, you can try a food-safe degreaser specifically designed for kitchen appliances. Apply it sparingly to a cloth or brush (never spray directly onto the fan) and gently work on the buildup. Always follow up with thorough wiping with plain water and ensure complete drying.
Issue: Strange Noises After Cleaning
Solution: If your air fryer starts making unusual grinding or rattling noises after cleaning, double-check that the fan cover and blades are properly secured. Ensure no cleaning cloths or debris were accidentally left behind. If the noise persists, there might be an issue with the fan motor itself, and you should contact the manufacturer.
Issue: Reduced Airflow or Cooking Performance
Solution: This usually indicates that either the fan wasn’t cleaned thoroughly enough, or there’s a blockage elsewhere in the air fryer (like clogged vents). Revisit the fan cleaning steps, ensuring you’ve reached all accessible areas. Also, check the air intake and exhaust vents on the exterior of your air fryer for any blockages.
Preventative Maintenance: Keeping Your Air Fryer Fan Clean Longer
The best way to deal with a dirty air fryer fan is to prevent excessive buildup in the first place. Here are some tips:
- Wipe Down After Every Use: After the air fryer has cooled, quickly wipe down the basket, crisper plate, and the interior chamber. This removes fresh grease before it hardens.
- Use Parchment Liners or Foil Sparingly: While liners can catch drips, avoid covering the entire basket as it can impede airflow. Ensure they are the correct size and not too close to the heating element.
- Don’t Overcrowd the Basket: Overcrowding can cause grease to splatter more and make it harder for air to circulate effectively, leading to more mess.
- Perform a Light Fan Clean Periodically: Every few weeks, or even monthly, check the fan area. If you see minor dust or light grease, a quick wipe with a damp cloth or a brush can prevent it from becoming a major issue.
- Check Your Manual: Most manufacturers provide specific cleaning recommendations. Stick to these to ensure you don’t void your warranty or damage the appliance.
Conclusion
Cleaning under and around the air fryer fan might seem like an intimidating task, but with the right approach and a little patience, it’s entirely manageable. By following these steps, prioritizing safety, and performing regular maintenance, you can ensure your air fryer continues to deliver delicious, crispy results for many meals to come. A clean fan means better airflow, more efficient cooking, and a healthier, safer kitchen environment. So, grab your supplies, refer to your manual, and give your air fryer the deep clean it deserves!