

Discover the essential role of safety lock features in modern blenders. This comprehensive guide will walk you through understanding, operating, and maintaining your blender, ensuring safe and efficient blending every time. Learn how these features protect you and extend the life of your appliance, making them an indispensable part of your kitchen.
Blenders with Safety Lock Features: Your Comprehensive How-To Guide
Welcome to our ultimate guide to blenders with safety lock features! Are you ready to unlock the full potential of your kitchen appliance while ensuring maximum safety? This guide is for you. Blending is a fantastic way to create delicious smoothies, creamy soups, healthy dips, and so much more. However, with great blending power comes great responsibility – and that’s where safety lock features come in.
Many people might overlook these seemingly simple mechanisms, but they are vital for both your safety and the longevity of your blender. In this comprehensive guide, we’ll delve deep into what these safety lock features are, why they are important, and how to use them correctly. We’ll cover everything from proper assembly and operation to maintenance and troubleshooting. By the end of this guide, you’ll be a blender safety expert, confidently whipping up your favorite recipes with peace of mind.
Key Takeaways
- Understanding Safety Locks: Safety lock features are designed to prevent the blender from operating unless the jar is properly secured, safeguarding against accidental startups and spills.
- Proper Assembly is Crucial: Always ensure the blender jar and lid are correctly aligned and locked into place before attempting to blend to activate the safety mechanism.
- Common Lock Types: Familiarize yourself with the different types of safety locks, such as interlocking tabs, magnetic sensors, and pressure-activated switches, to better understand your specific model.
- Maintenance for Longevity: Regularly cleaning and inspecting the safety lock components ensures they function correctly and prevents potential issues, extending the blender’s lifespan.
- Troubleshooting Common Issues: Learn to identify and resolve typical problems like the blender not starting due to misaligned locks or debris, ensuring uninterrupted use.
- Safety First Always: Never bypass or force safety lock mechanisms, as they are critical for preventing injuries and appliance damage.
What Are Blender Safety Lock Features?
At their core, blender safety lock features are designed to prevent the blender from turning on unless specific conditions are met. Think of them as the “guardians” of your blending experience. Their primary purpose is to ensure that the blender jar and its lid are correctly and securely in place before the motor can engage. This is a critical safety measure to prevent accidents and messes.
These features exist because blenders, especially powerful ones, have sharp blades that spin at high speeds. If the jar or lid isn’t properly secured, ingredients could spray out, causing injury or a significant mess. Safety locks eliminate this risk by acting as a gatekeeper – the blender simply won’t start if the gate isn’t properly closed.
Why Are Safety Lock Features Important?
The importance of safety lock features cannot be overstated. They serve several crucial functions:
- Preventing Accidental Startup: This is the most obvious benefit. A safety lock ensures that the blender doesn’t accidentally switch on while you’re assembling it, cleaning it, or if a child inadvertently presses a button.
- Containing Ingredients: High-speed blending can create pressure. If the lid is loose or the jar isn’t seated correctly, ingredients can escape, leading to splatters and spills that can be difficult to clean and potentially dangerous.
- Protecting the Motor: Running a blender with an unsecured jar can put undue stress on the motor, potentially leading to overheating or damage. Safety locks help ensure the blender operates under optimal conditions.
- Enhancing User Confidence: Knowing that your blender has built-in safety features allows you to blend with greater confidence and less worry, especially when preparing food for children or guests.
Types of Blender Safety Lock Features
Blender manufacturers use various mechanisms to implement safety locks. While the specific design might differ, the underlying principle remains the same: to ensure proper assembly before operation. Here are some of the most common types you’ll encounter:
Interlocking Tabs and Notches
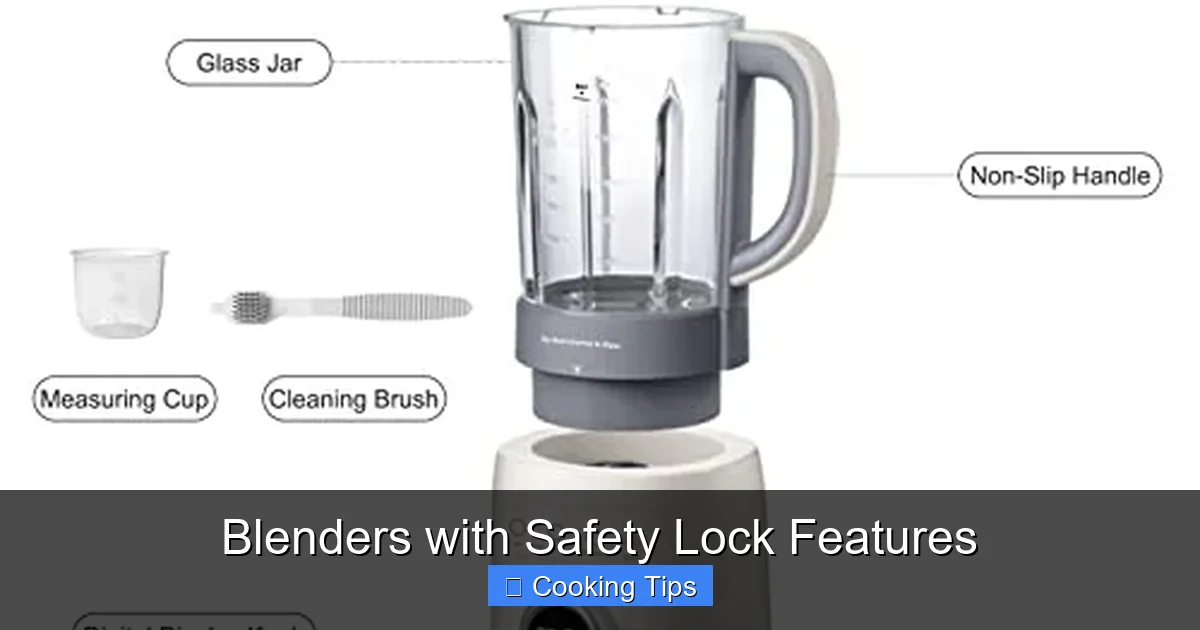
This is perhaps the most prevalent type of safety lock. You’ll notice tabs on the blender jar and corresponding notches or slots on the blender base.
- How it works: To activate the blender, you must align the tabs on the jar with the notches on the base and twist or push the jar down firmly until it clicks into place. This physical connection is what triggers the safety switch, allowing the blender to power on.
- Example: Many standard jug blenders use this system. You’ll feel a distinct “lock” when the jar is properly seated.
Magnetic Sensors
Some modern blenders utilize magnetic sensors. These are often more discreet and can be found on higher-end models.
- How it works: Magnets are embedded in both the blender base and the blender jar. When the jar is correctly positioned, the magnets align, completing a circuit that allows the blender to operate. If the jar is even slightly misaligned, the magnetic field is broken, and the blender will not start.
- Example: You might find these in personal blenders or compact countertop models where a visible tab might not be feasible.
Pressure-Activated Switches
In some designs, the weight or pressure of the blender jar sitting on the base activates a switch.
- How it works: The blender jar needs to be firmly pressed down onto the base to engage the safety switch. This is often seen in conjunction with interlocking tabs or other physical locking mechanisms.
- Example: Some immersion blenders might have a trigger lock that needs to be held down while the main power button is engaged.
Lid Detection Sensors
While not always a “lock” in the traditional sense, some blenders have sensors that detect if the lid is securely in place.
- How it works: These sensors ensure that the lid is properly fastened before the motor will start. This is particularly common in blenders with removable blades or those that have multiple lid components.
- Example: Some high-performance blenders might have a sensor that checks if the blade assembly is screwed tightly onto the jar and if the lid is properly secured before operation.
How to Use Your Blender Safely with Safety Lock Features
Using your blender safely is straightforward once you understand how the safety lock features work. It all comes down to proper assembly and mindful operation.
Step 1: Read Your User Manual
Before you even plug in your blender, take a few minutes to read the user manual that came with it. This is the best way to understand the specific safety features and assembly instructions for your particular model. Every blender is a little different, and the manual will provide precise details.
Step 2: Assemble the Blender Jar Correctly
This is the most critical step.
Ensure the Jar and Blade Assembly are Secure
- For models with interlocking tabs: Make sure the tabs on the bottom of the blender jar align with the slots on the blender base. You may need to rotate the jar slightly to find the correct position.
- For models with magnetic sensors: Position the jar directly over the base, ensuring the magnetic components align.
- For models with pressure switches: Press down firmly on the jar once it’s in position on the base.
You should hear or feel a click when the jar is properly secured and the safety lock is engaged. Do not proceed if you don’t feel a secure connection.
Secure the Lid
- Place the lid firmly onto the blender jar.
- Ensure any measuring cap or plug in the lid is also securely in place. Some lids have their own locking mechanisms or require a firm push to seal properly.
- For blenders with lid detection sensors, ensure the lid is fastened according to the manual’s instructions.
Step 3: Power On and Blend
Once you are confident that the jar and lid are securely locked in place, you can plug in your blender.
- Turn on the power switch or select your desired speed.
- The blender should now operate. If it doesn’t, double-check that all locking mechanisms are engaged.
Step 4: Adding Ingredients Safely
While blending, it’s often necessary to add more ingredients. Always do so carefully.
- Use the lid opening: Most blenders have a small opening in the lid for adding ingredients while the blender is running.
- Add gradually: Pour ingredients slowly through the lid opening to avoid splashing.
- Avoid overfilling: Never fill the blender jar beyond the maximum fill line indicated. Overfilling can cause the lid to pop off or strain the motor.
Step 5: Stopping and Unlocking
When you’re finished blending:
- Turn off the blender.
- Wait for the blades to come to a complete stop before attempting to remove the lid or the jar.
- To unlock, you will typically need to twist or lift the jar away from the base, depending on your model’s design. You may hear a release click.
Maintaining Your Blender’s Safety Lock Features
Proper maintenance is key to ensuring your blender’s safety features continue to work reliably for years to come.
Regular Cleaning
After each use, clean the blender jar, lid, and blade assembly.
- Pay attention to the base connection: When cleaning the jar, ensure that any residue or food particles around the base where it connects to the blender motor unit are thoroughly removed. This is where many safety lock mechanisms, like interlocking tabs or sensors, make contact.
- Wipe down the base: Carefully wipe down the blender base, paying attention to any sensors or locking components. Always ensure the blender is unplugged before cleaning the base.
Inspect for Damage
Periodically check the safety lock components for any signs of wear or damage.
- Look for cracks or chips: Inspect the interlocking tabs on the jar and base for any cracks, chips, or deformations.
- Check sensors: If your blender has magnetic sensors, ensure they are clean and free from debris.
If you notice any damage, consult your user manual or contact the manufacturer, as damaged safety components can compromise the blender’s safety.
Proper Storage
Store your blender in a dry place. Ensure that the jar and lid are not forced together or stored in a way that could damage the locking mechanisms.
Troubleshooting Common Safety Lock Issues
Sometimes, despite your best efforts, your blender might not start. Often, this is directly related to the safety lock feature. Here are some common problems and how to fix them:
Problem: Blender Won’t Turn On
Possible Cause: The jar or lid is not properly secured.
Visual guide about Blenders with Safety Lock Features
Image source: m.media-amazon.com
Visual guide about Blenders with Safety Lock Features
Image source: m.media-amazon.com
Visual guide about Blenders with Safety Lock Features
Image source: m.media-amazon.com
Solution:
- Unplug the blender.
- Remove the jar from the base.
- Realign the jar and base, ensuring the interlocking tabs or magnetic sensors are correctly engaged.
- Press down firmly to ensure it’s seated.
- Reattach the lid securely.
- Plug the blender back in and try again.
Problem: Blender Starts Unexpectedly (Rare, but possible with faulty mechanism)
Possible Cause: A faulty safety lock mechanism or a damaged switch.
Solution: This is a serious safety concern. Immediately unplug the blender. Do not use it. Contact the manufacturer for repair or replacement. Never attempt to bypass or disable the safety lock.
Problem: Lid Feels Loose Even When “Locked”
Possible Cause: Debris on the lid seal or the jar rim, or a worn-out lid gasket.
Solution:
- Ensure both the jar rim and the lid seal are clean and free of food residue.
- Check the lid gasket for any damage or signs of wear. If it’s cracked or flattened, it might need replacement.
- Make sure the lid is pushed down evenly all the way around.
Problem: Jar Wobbles on the Base
Possible Cause: The jar is not properly locked onto the base, or the locking mechanism itself is damaged.
Solution:
- Follow the re-assembly steps mentioned above.
- Inspect the tabs on the jar and base for damage.
- If the base connection seems loose even when properly assembled, there might be an issue with the blender’s motor housing or the locking mechanism within the base. Contact customer support.
Conclusion
Blenders with safety lock features are more than just a convenience; they are a fundamental aspect of safe kitchen appliance operation. By understanding how these features work, diligently assembling your blender, and performing regular maintenance, you can ensure a safe and enjoyable blending experience every single time.
Remember, always prioritize safety. Never force a lock, never bypass a safety feature, and always refer to your user manual for specific instructions related to your blender model. With this knowledge, you’re well-equipped to make the most of your blender, creating delicious and healthy concoctions without worry. Happy blending!
