


Is your blender’s speed control acting up? Don’t worry! This comprehensive guide will walk you through common blender speed control issues and offer practical solutions. From understanding the mechanics to identifying specific problems, you’ll learn how to diagnose and fix many common blender speed control problems yourself, saving you time and money. Get your blender back to its optimal performance with these easy-to-follow steps.
Key Takeaways
- Understanding the Basics: Learn how blender speed control mechanisms work, usually involving a motor and a speed selector switch or dial.
- Common Issues: Identify frequent problems like the blender not changing speeds, sticking at one speed, or not turning on at all.
- Safety First: Always unplug your blender before attempting any troubleshooting or cleaning to prevent electrical hazards.
- Visual Inspection: Regularly check the blender’s cord, plug, and exterior for any visible damage that might affect speed control.
- Internal Components: Understand that internal issues like worn-out motor brushes or faulty speed control boards are common causes of malfunction.
- When to Call a Pro: Recognize when a problem is too complex or dangerous to fix yourself and it’s time to seek professional repair or consider a replacement.
Troubleshooting Blender Speed Control Issues
So, your trusty blender isn’t quite keeping up with your smoothie-making needs? Maybe it’s stuck on a snail’s pace, or it refuses to go beyond the “low” setting. Don’t let a finicky blender speed control ruin your kitchen creations! This guide is here to help you navigate the common snags and get your appliance humming at the right speed again. We’ll break down the typical problems and offer practical, step-by-step solutions so you can enjoy perfectly blended results with ease.
Blenders are fantastic kitchen companions, essential for everything from silky smooth soups to perfectly pureed baby food. The ability to control the speed is crucial for achieving different textures and consistencies. When this control falters, it can be frustrating. But before you declare your blender dead and head to the store for a new one, let’s explore some common blender speed control issues and how you can troubleshoot them.
Understanding How Blender Speed Control Works
Before diving into troubleshooting, it’s helpful to understand the basic principles behind how your blender’s speed control operates. Most blenders use a combination of an electric motor and a mechanism to regulate the flow of electricity to that motor. This regulation dictates how fast the motor spins, which in turn controls the blade speed.
The most common types of speed control mechanisms are:
- Rotary Dial or Buttons: Many blenders have a dial or a set of buttons that correspond to different speed settings. Internally, these often connect to a multi-speed switch that changes the electrical resistance, thereby altering the motor’s speed. Some high-end blenders might use more sophisticated electronic controls for smoother transitions and more precise speed management.
- Pulse Function: This feature allows for short bursts of maximum power. It bypasses the normal speed regulation and directly sends full power to the motor for brief periods.
- Motor Brushes: In many blenders, especially older or simpler models, carbon brushes make contact with the motor’s armature. The speed control system can adjust the voltage or current reaching the motor, and the condition of these brushes directly impacts the motor’s ability to spin efficiently at different speeds.
Knowing these basics can help you pinpoint where a problem might lie. For instance, if your blender only works on one speed, it might suggest a problem with the speed selector switch or the internal wiring connected to it.
Common Blender Speed Control Problems and Their Solutions
Now, let’s get to the heart of the matter: the issues you might be experiencing. We’ll cover the most frequent problems and how you can address them. Remember, safety is paramount. Always unplug your blender from the power outlet before performing any inspection or repair.
Problem 1: Blender Not Changing Speeds or Stuck on One Speed
This is perhaps the most common complaint. You press a button or turn the dial, but the blender’s speed remains constant, or it only operates at a single speed.
Possible Causes and Solutions:
-
Loose or Damaged Speed Selector Switch/Dial:
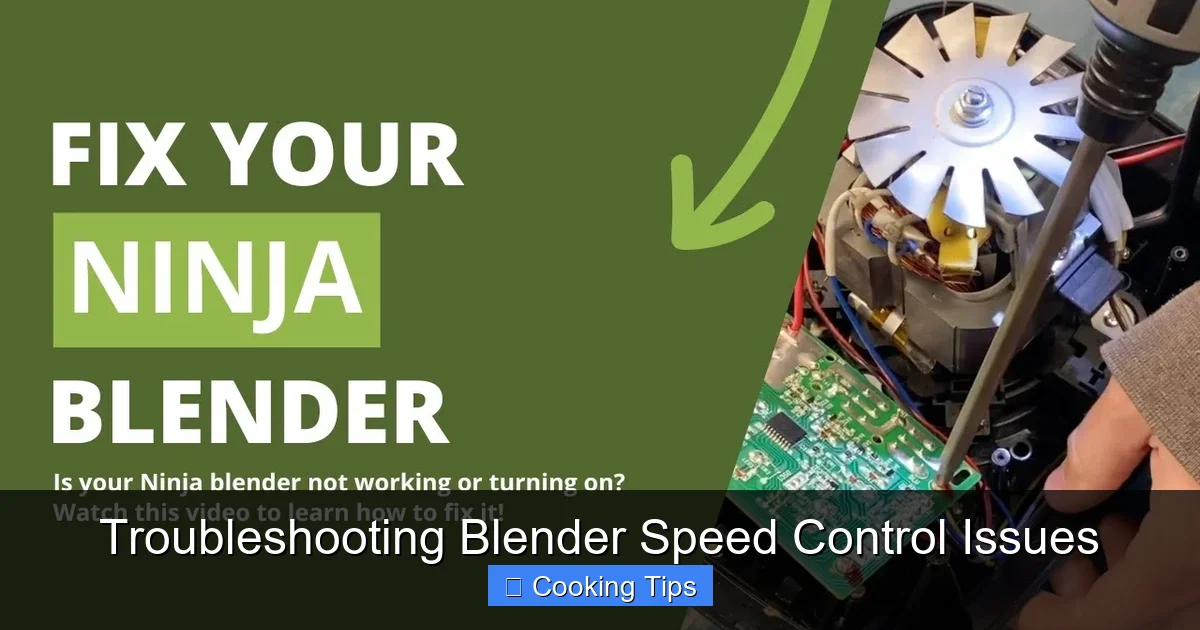
Over time, the physical switch or dial that controls the speed can become loose, dirty, or damaged. This can prevent it from making proper contact with the internal components.
Visual guide about Troubleshooting Blender Speed Control Issues
Image source: i.ytimg.com
- Step 1: Inspect the Exterior. Gently try to wiggle the speed dial or buttons. Do they feel loose? Is there any visible crack or damage?
- Step 2: Clean the Controls (If Accessible). For dial controls, sometimes dust and grime can get trapped around the mechanism. If you’re comfortable, you might be able to carefully spray a small amount of electrical contact cleaner around the dial base. *Caution: Do this sparingly and ensure the blender is unplugged.*
- Step 3: Internal Inspection (Advanced). If the exterior inspection doesn’t reveal anything, the switch itself might be faulty. This often requires disassembling the blender base. If you choose to do this, locate the screws holding the base together. Once open, you’ll see the wiring connected to the speed selector. Check for any loose wires or signs of burning around the switch terminals. If the switch appears damaged or corroded, it will likely need replacement. This can be a complex repair, and if you’re not experienced with electronics, it’s best to seek professional help.
-
Faulty Internal Wiring:
The wires connecting the speed selector to the motor might be loose, broken, or have a faulty connection. This can happen due to vibrations or general wear and tear.
- Step 1: Visual Check. After unplugging and disassembling the base (as described above), carefully examine all wires leading from the speed control to the motor. Look for any signs of fraying, cuts, or loose connections at the terminals.
- Step 2: Secure Connections. If you find a loose wire, try gently re-seating it into its terminal. If a wire is damaged, it might need to be spliced and reconnected using appropriate connectors, or the entire wire harness might need replacement. This is an advanced repair.
-
Motor Brush Issues:
In brushed DC motors (common in many blenders), the carbon brushes are crucial for transferring electricity to the motor’s spinning armature. If these brushes are worn down or not making proper contact, the motor may not function correctly at all speeds, or it might only work intermittently.
- Step 1: Access the Motor. This will require disassembling the blender base. The motor will be the largest component inside.
- Step 2: Locate and Inspect Brushes. You’ll typically find the brushes on either side of the motor, often held in place by small springs. Carefully remove them (take a picture first to remember how they were oriented).
- Step 3: Assess Wear. Are the brushes significantly worn down? Do they look cracked or broken? If they are less than half an inch in length or show significant damage, they need replacement. You can usually purchase replacement brushes online or from appliance repair shops.
- Step 4: Clean Contacts. While the brushes are out, clean the commutator (the segmented copper surface on the armature) with a soft cloth and isopropyl alcohol. Ensure the brush holders are also clean.
- Step 5: Reassemble. Reinstall the new brushes, ensuring they slide smoothly and make good contact. Then, reassemble the blender base.
Problem 2: Blender Runs, But Only at Low Speed
Your blender powers on, but it seems to be stuck in first gear, no matter what setting you choose.
Possible Causes and Solutions:
-
Problem with Higher Speed Settings on the Switch:
The contacts for the higher speed settings on your speed selector switch might be dirty, corroded, or broken. The low-speed setting might still be functioning, but the connections for faster speeds are failing.
- Step 1: Focus on the Switch. As with Problem 1, disassembling the base and inspecting the speed selector switch is key. Look closely at the internal contacts that correspond to the higher speed settings.
- Step 2: Clean Contacts. If you see any dirt or corrosion, use electrical contact cleaner to gently clean these specific contacts. Ensure they are dry before reassembling.
- Step 3: Test Connections. Using a multimeter (if you have one and know how to use it safely), you can test the continuity of the switch for each speed setting. This is an advanced step.
-
Overheating Protection Activated:
Many blenders have a thermal fuse or a motor overload protector that will shut down or reduce power to the motor if it overheats. If the blender has been used for extended periods or is struggling with thick ingredients, this might be temporarily activated.
- Step 1: Let it Cool Down. Unplug the blender and let it sit for at least 30-60 minutes.
- Step 2: Check for Blockages. Ensure the vents on the blender base are not blocked by dust or debris.
- Step 3: Use Appropriately. When you use it again, try blending for shorter periods and ensure you’re not overloading the motor. If this problem recurs frequently, the motor might be failing or there could be an issue with the cooling mechanism.
Problem 3: Blender Only Works Intermittently or Stutters
The blender turns on and off on its own, or the blades spin erratically.
Possible Causes and Solutions:
-
Loose Internal Connections:
Vibrations from the motor can loosen electrical connections over time. This can lead to an inconsistent flow of power.
- Step 1: Thoroughly Inspect All Wires. After unplugging and disassembling the base, go through every connection point. Gently tug on wires to ensure they are firmly seated. Look for any signs of corrosion or heat damage at terminals.
- Step 2: Re-secure Loose Wires. If any connections are found to be loose, press them firmly back into place. If a wire has detached, it might need to be crimped or soldered back, depending on the type of connector.
-
Worn Motor Brushes:
As mentioned before, worn brushes can cause erratic motor behavior. They might not be making consistent contact with the armature.
- Step 1: Inspect and Replace Brushes. Follow the steps outlined in “Problem 1” for inspecting and replacing motor brushes. This is a very common cause of stuttering or intermittent operation.
-
Faulty Motor Control Board (for electronic blenders):
If your blender has electronic controls rather than a simple switch, a problem with the main control board can lead to inconsistent operation.
- Step 1: Visual Inspection of the Board. If you’ve disassembled the base, look for any visible signs of damage on the circuit board, such as burnt components, blown capacitors, or discolored areas.
- Step 2: Professional Diagnosis. Repairing electronic control boards is often beyond the scope of DIY unless you have significant electronics repair experience. If the board looks damaged, it will likely need to be replaced, which can be an expensive part. In some cases, a replacement board might be difficult to find for older models.
Problem 4: Blender Won’t Turn On At All (and it’s not just the speed control)
While this might not seem directly related to speed control, a complete lack of power can sometimes be a symptom of underlying issues that also affect speed regulation.
Possible Causes and Solutions:
-
Power Cord or Plug Damage:
The most basic cause of no power is an issue with the power supply itself.
- Step 1: Check the Cord and Plug. Inspect the entire length of the power cord for any cuts, nicks, or fraying. Check the plug for bent prongs or damage.
- Step 2: Test the Outlet. Ensure the electrical outlet you’re using is working by plugging in another appliance.
- Step 3: Replacement. If the cord or plug is damaged, it needs to be replaced by a qualified technician. Do not attempt to repair a damaged power cord yourself.
-
Blown Thermal Fuse:
A thermal fuse is a safety device designed to blow and cut power if the motor overheats severely. If this fuse has blown, the blender will not turn on.
- Step 1: Locate the Fuse. This is usually found near the motor or power cord entry point. It’s a small, cylindrical component.
- Step 2: Test Continuity. With the blender unplugged, you can use a multimeter to test if the fuse has continuity. If it doesn’t, it has blown and needs replacement.
- Step 3: Replacement. Replace the fuse with one of the exact same rating. If the fuse blew, try to identify why the motor overheated to prevent it from happening again.
-
Internal Fuse:
Some blenders have an internal fuse within the motor assembly or on the control board that can blow if there’s a power surge or internal short circuit.
- Step 1: Locate and Inspect. This may require significant disassembly. Look for a fuse similar to a thermal fuse.
- Step 2: Test and Replace. If the fuse has blown, replace it with an identical one. Again, try to understand the cause of the short circuit.
General Maintenance Tips to Prevent Speed Control Issues
Preventing problems is always better than fixing them. Regular maintenance can significantly extend the life of your blender and ensure its speed control functions smoothly.
- Keep it Clean: After each use, clean the blender jar and lid thoroughly. For the base, wipe it down with a damp cloth. Avoid submerging the base in water.
- Avoid Overloading: Don’t fill the blender beyond its recommended capacity or try to blend ingredients that are too hard or too large without cutting them into smaller pieces. This puts undue stress on the motor and can lead to overheating and component wear.
- Don’t Run Continuously: Avoid running your blender for excessively long periods. Give the motor a break, especially if you’re blending thick mixtures.
- Check for Wear and Tear: Periodically inspect the power cord, plug, and the blender base for any signs of damage or wear.
- Store Properly: Store your blender in a dry place, ensuring good airflow around the base to prevent dust buildup.
When to Call a Professional or Consider Replacement
While this guide empowers you to tackle many common blender speed control issues, some problems are best left to the experts.
You should consider professional repair or replacement if:
Visual guide about Troubleshooting Blender Speed Control Issues
Image source: myelasopa441.weebly.com
- You’re uncomfortable with disassembling electrical appliances.
- You’ve tried the basic troubleshooting steps and the problem persists.
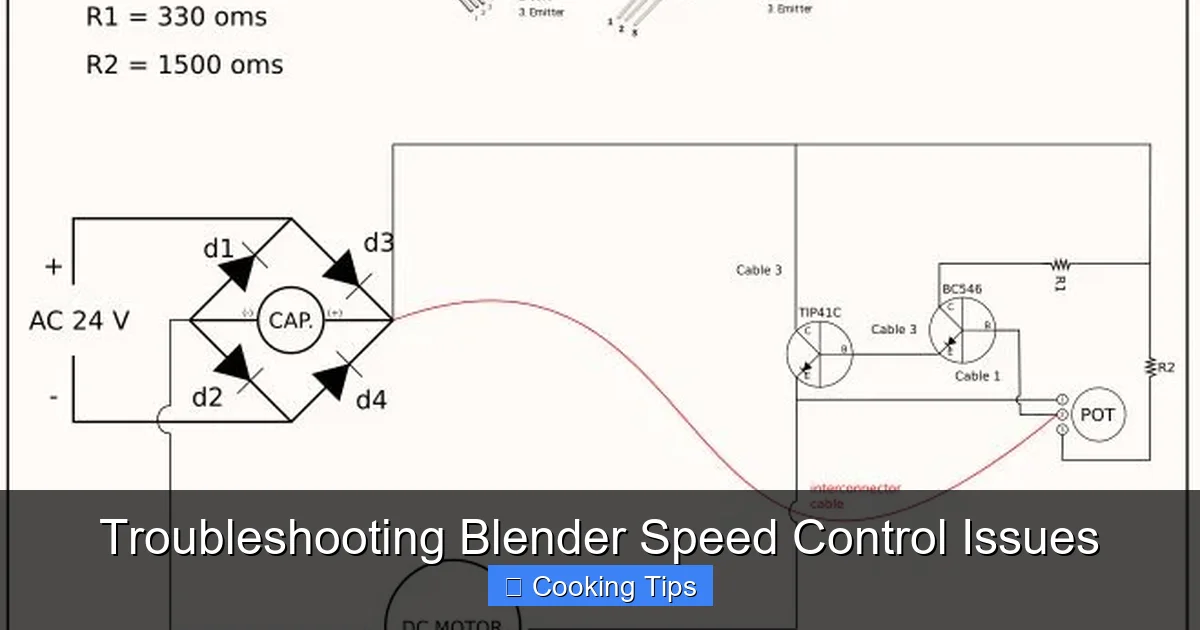
- You suspect a major component like the motor or the main control board is faulty, and replacement parts are expensive or unavailable.
- There are signs of burning, melted plastic, or a persistent electrical smell.
- The cost of repair approaches the cost of a new, comparable blender.
Sometimes, despite your best efforts, an appliance reaches the end of its lifespan. If your blender is old, has had numerous problems, or the repair cost is too high, it might be time to invest in a new model.
Conclusion
A malfunctioning blender speed control can be a real kitchen nuisance, but often, the solution is within your reach. By understanding the basic mechanics of your blender and systematically troubleshooting common issues, you can often diagnose and fix the problem yourself. Remember to always prioritize safety by unplugging your appliance before any inspection or repair. From checking for loose wires and worn motor brushes to cleaning contacts and ensuring proper cooling, these steps can bring your blender back to its full blending potential. So, next time your blender misbehaves, don’t despair – grab this guide and get to work! Happy blending!
