

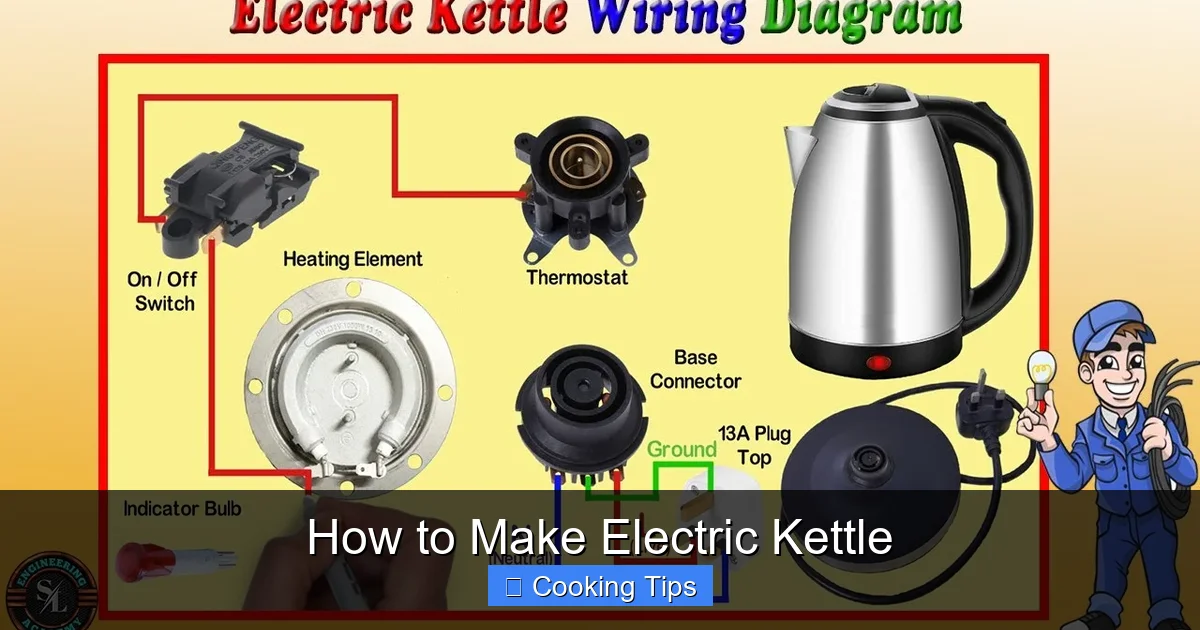
This guide provides a detailed look into creating your own electric kettle. You’ll learn about the essential components, from the heating element to the casing and safety features. We’ll walk you through the assembly process with clear steps, emphasizing safety and functionality. By the end, you’ll understand the inner workings and how to safely construct a basic electric kettle, perfect for the adventurous DIYer.
How to Make Electric Kettle
Welcome to our comprehensive guide on how to make an electric kettle! If you’ve ever been curious about the inner workings of this kitchen staple, or if you’re a DIY enthusiast looking for your next project, you’ve come to the right place. While making a fully certified and safe commercial electric kettle at home is a complex undertaking due to stringent safety regulations and specialized components, this guide will walk you through the fundamental principles and assembly of a basic, functional electric kettle. We’ll focus on understanding the key components, the assembly process, and most importantly, the crucial safety considerations involved in working with electricity and heating elements. Get ready to demystify your electric kettle and gain valuable insights into its construction!
Key Takeaways
- Understanding Components: Familiarize yourself with the essential parts like the heating element, thermostat, power cord, and casing.
- Safety First: Prioritize electrical safety throughout the entire building process, using appropriate materials and techniques.
- Step-by-Step Assembly: Follow a logical sequence for connecting components, ensuring proper insulation and secure mounting.
- Testing for Functionality: Safely test your creation to ensure it heats water effectively and that all safety mechanisms are operational.
- Troubleshooting Common Issues: Learn to identify and resolve potential problems that may arise during or after construction.
- DIY vs. Commercial: Recognize the significant differences in safety standards and complexity between a homemade and a commercially manufactured electric kettle.
Why Build Your Own Electric Kettle?
The primary motivation for building your own electric kettle is often curiosity and the satisfaction of creating something functional. It’s a fantastic way to learn about basic electrical engineering principles, thermodynamics, and material science. For hobbyists, it’s a rewarding project that combines hands-on building with practical application. However, it’s essential to understand that a homemade kettle will likely not meet the same safety standards as a commercially produced one. This guide is for educational purposes and aims to illustrate the concepts, not to replace a certified appliance for everyday use.
Essential Components of an Electric Kettle
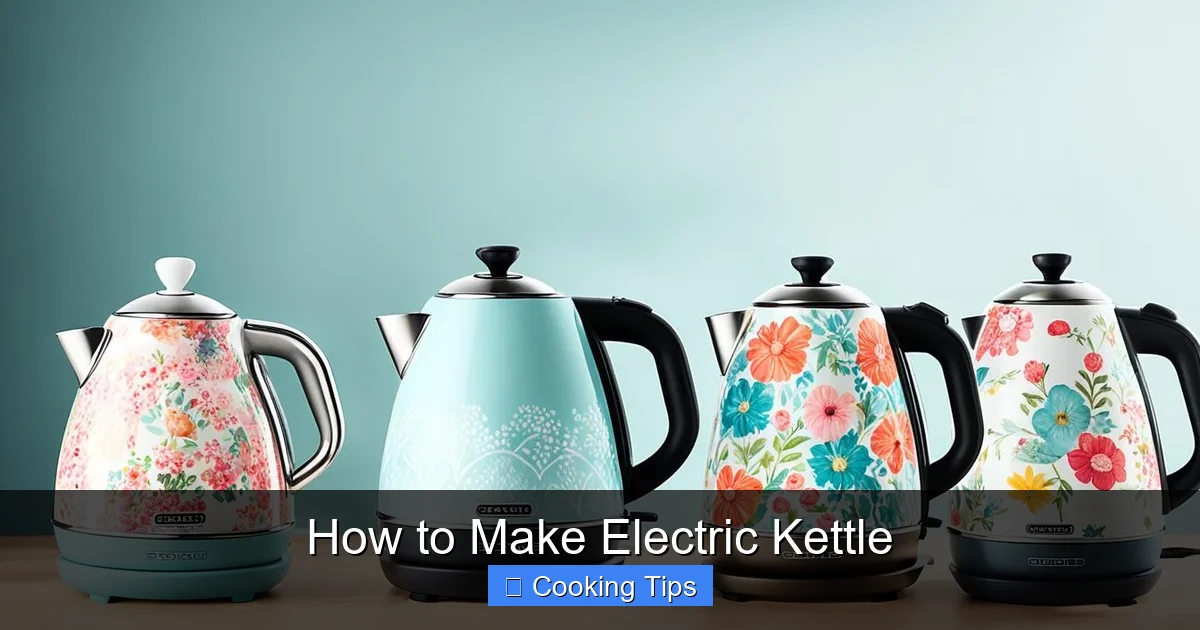
Visual guide about How to Make Electric Kettle
Image source: stainlesssteelteakettles.com
Before we dive into the assembly, let’s break down the core components you’ll need. Each part plays a critical role in the kettle’s function and safety.
1. Heating Element
The heart of any electric kettle is its heating element. This is typically a resistive wire coil (often Nichrome) encased in a metal tube. When electricity flows through the wire, its resistance generates heat, which then transfers to the water. For safety and efficiency, this element is usually concealed beneath the kettle’s base.
2. Thermostat and Auto Shut-off Mechanism
This is a vital safety feature. A thermostat, often a bimetallic strip, senses the water temperature. When the water reaches boiling point, the steam or heat causes the bimetallic strip to bend, breaking the electrical circuit and shutting off the heating element. This prevents the kettle from overheating or boiling dry.
3. Power Cord and Plug
This is how the kettle connects to the electrical supply. It must be rated for the wattage of the heating element and the voltage of your region. The plug should have a ground pin for added safety, especially with metal casings.
4. Kettle Body (Casing)
This is the main container that holds the water. It can be made of various materials like stainless steel, plastic, or glass. The material choice affects heat retention, durability, and aesthetics. The casing also houses and protects the internal components.
5. Base Unit
This is where the power is transmitted to the kettle. It typically contains the electrical contacts that connect to the heating element when the kettle is placed on it. The base also houses some of the control circuitry, like the thermostat.
6. Lid and Spout
These are for user interface. The lid allows you to fill the kettle and access the water. The spout is designed for easy and safe pouring.
7. Water Level Indicator
Many kettles have a transparent window or markings to show the minimum and maximum water levels. This is important to prevent damage from boiling dry or overflowing.
Safety Precautions: The Paramount Importance
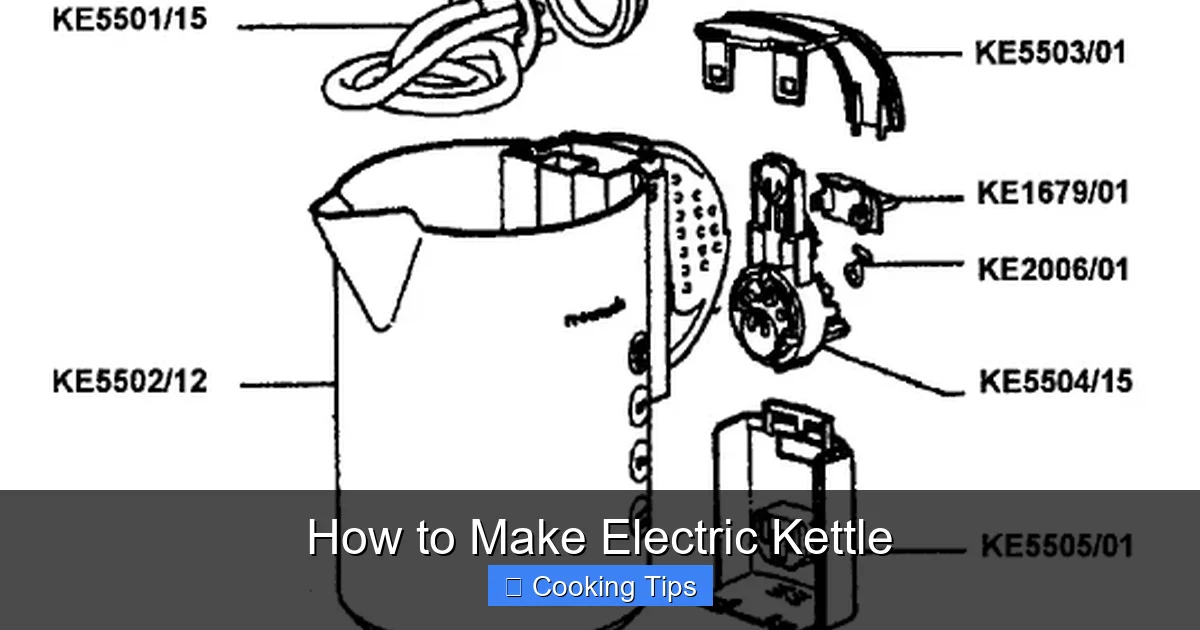
Visual guide about How to Make Electric Kettle
Image source: buyspares.co.uk
Working with electricity and hot water requires extreme caution. This cannot be stressed enough.
* Always disconnect power before working on any part of the circuit.
* Use appropriately rated components. Ensure your heating element, wiring, and power cord are designed for the intended voltage and current.
* Proper insulation is crucial. All electrical connections must be securely insulated to prevent short circuits or electric shock.
* Grounding is essential for metal casings. This diverts any stray electrical current safely to the ground.
* Understand your local electrical codes and regulations.
* Never operate a homemade appliance without thorough testing and understanding of its safety features. For everyday use, a certified commercial kettle is always the safest option.
Step-by-Step Assembly Guide
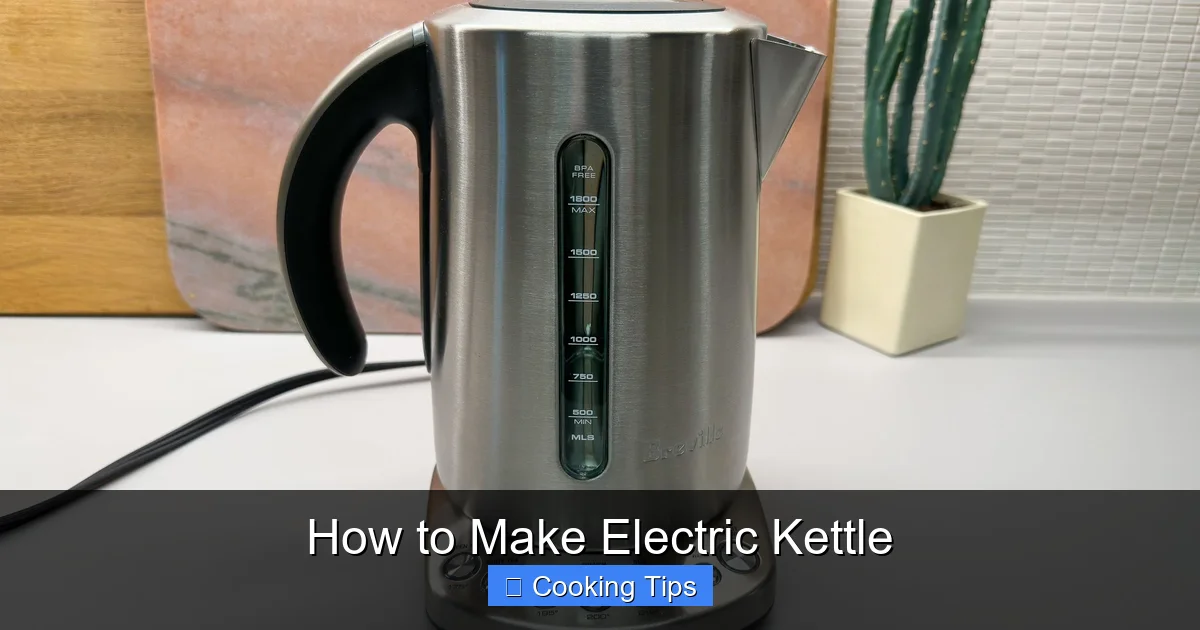
Visual guide about How to Make Electric Kettle
Image source: cdn.thewirecutter.com
This section outlines a conceptual assembly. The exact placement and method will depend on the specific components you source.
Step 1: Preparing the Kettle Body and Base
First, you need to prepare your kettle body and the base unit. If you are repurposing an existing kettle, carefully disassemble it, noting how each component is attached. If you’re building from scratch, you’ll need a suitable container for the water and a separate base.
1.1 Choosing and Modifying the Kettle Body
Select a heat-resistant material for your kettle body. Stainless steel is a good choice for its durability and heat conductivity. Ensure there’s a way to securely mount the heating element at the bottom, either inside or beneath the main chamber. You’ll also need to create an opening for the power connection from the base and for the lid and spout.
1.2 Designing and Preparing the Base Unit
The base unit will house the electrical connection mechanism. It needs to securely connect to the power cord and transmit power to the heating element when the kettle is seated. If you are integrating a thermostat, it will likely be part of the base or the heating element assembly.
Step 2: Installing the Heating Element
The heating element is a critical component that needs to be securely installed.
2.1 Mounting the Heating Element
If your heating element is designed to be mounted from beneath the kettle’s chamber, ensure it is firmly secured to the base of the kettle body. Use heat-resistant seals or gaskets to prevent water leaks. If it’s an immersion type element, it needs to be submerged in the water chamber.
2.2 Wiring the Heating Element
Connect the wires from the heating element to the electrical contacts in the base unit. Ensure these connections are robust and insulated. If you have a thermostat, it will be wired in series with the heating element. The thermostat’s sensor should be positioned to accurately measure the water temperature, typically near the heating element.
Step 3: Integrating the Thermostat and Auto Shut-off
The thermostat is your primary safety mechanism.
3.1 Connecting the Thermostat
Wire the thermostat in series with the heating element. This means the electrical current must pass through the thermostat before reaching the heating element. When the thermostat trips, it breaks this circuit.
3.2 Testing the Thermostat Mechanism
Before final assembly, it’s crucial to understand how your thermostat works. For a bimetallic strip thermostat, ensure it’s positioned so that rising steam or heat from boiling water will reliably cause it to bend and disconnect the power.
Step 4: Wiring the Power Cord and Base Contacts
This step involves connecting the kettle to the mains electricity.
4.1 Attaching the Power Cord
Securely attach the power cord to the designated terminals on the base unit. Use appropriate connectors and ensure the insulation is intact. If your design includes a ground wire (highly recommended for metal casings), connect it to the ground terminal on the base and to the metal body of the kettle.
4.2 Connecting Base Contacts to Heating Element
These contacts are what connect to the heating element when the kettle is placed on the base. Ensure they are aligned correctly and provide a solid electrical connection.
Step 5: Assembling the Lid, Spout, and Other Features
Add the user-facing components.
5.1 Attaching the Lid and Spout
Ensure the lid fits snugly to prevent steam escape before boiling. The spout should be designed for easy pouring without dripping.
5.2 Installing the Water Level Indicator (Optional)
If you’re including a water level indicator, install it according to its design, ensuring it is watertight.
Step 6: Final Assembly and Insulation
Put all the pieces together and ensure everything is secure and insulated.
6.1 Securing All Components
Ensure all wires are tucked away safely and are not exposed. Secure the kettle body to the base, if they are separate components. Use screws or other fasteners designed for the materials.
6.2 Insulating Electrical Connections
Double-check that all electrical connections are properly insulated using heat-shrink tubing, electrical tape, or appropriate junction boxes. This is critical for preventing shorts and shocks.
Testing Your Homemade Electric Kettle
This is the most crucial and potentially dangerous step. Proceed with extreme caution.
Step 1: Initial Visual Inspection
Before plugging anything in, visually inspect every connection. Look for any loose wires, exposed metal, or potential points of failure. Ensure the kettle is stable and all parts are securely attached.
Step 2: Testing the Auto Shut-off Feature (Without Power)
Manually test the thermostat. If it’s a mechanical type, you might be able to simulate the tripping action. For example, with some designs, applying heat to the sensor might mechanically disengage a switch. Understand how yours is meant to work.
Step 3: First Power-Up Test (With Extreme Caution)
Fill the kettle with a small amount of water (enough to cover the heating element but not fill it completely). Place it on the base. Using a GFCI (Ground Fault Circuit Interrupter) outlet for this test is highly recommended. Plug in the kettle.
* Observe if the heating element begins to heat the water.
* Monitor for any unusual noises, smells, or sparks.
* Crucially, observe if the auto shut-off mechanism engages when the water boils.
If anything seems amiss, immediately unplug the kettle and disconnect power. Do not proceed if there are any signs of malfunction.
Step 4: Functionality and Performance Testing
If the initial power-up is successful, gradually increase the water volume to the desired level. Test boiling times and the reliability of the auto shut-off. Always supervise the kettle during operation.
Troubleshooting Common Issues
Even with careful construction, you might encounter issues.
Issue 1: Kettle Not Heating
* Possible Cause: Loose wire connection to the heating element or thermostat.
* Solution: Disconnect power and carefully check all wiring. Ensure connections are secure and insulated.
* Possible Cause: Faulty thermostat or heating element.
* Solution: This would require replacing the component. Testing the resistance of the heating element can indicate if it’s burnt out.
Issue 2: Auto Shut-off Not Working
* Possible Cause: Thermostat sensor not positioned correctly to detect steam or heat.
* Solution: Adjust the position of the thermostat’s sensor.
* Possible Cause: Faulty thermostat.
* Solution: The thermostat will need to be replaced.
Issue 3: Leaking Water
* Possible Cause: Improper sealing around the heating element or spout.
* Solution: Disassemble the affected area and reapply appropriate heat-resistant sealant or gasket. Ensure all fittings are tightened correctly.
Issue 4: Electric Shock or Short Circuit
* Immediate Action: Unplug the kettle immediately and disconnect power at the source.
* Possible Cause: Poor insulation, exposed wires, or a faulty component.
* Solution: This is a serious safety hazard. You must thoroughly re-inspect all wiring and insulation. If the cause cannot be identified and safely rectified, the kettle should not be used.
Conclusion
Building your own electric kettle is an ambitious project that offers a deep dive into the practical application of electrical principles. By understanding each component’s role, carefully planning your assembly, and, above all, prioritizing safety at every step, you can create a functional electric kettle. Remember, this guide is for educational purposes, and for everyday use, commercially manufactured and certified electric kettles offer the highest level of safety and reliability. Embrace the learning process, be meticulous in your work, and always put safety first. Happy building!
