
Discover how to make perfect hard-boiled eggs using just your electric kettle. This guide offers a simple, quick, and efficient method, ideal for busy kitchens or when you don’t want to use your stovetop. You’ll learn the essential steps, from preparing the eggs to chilling them, ensuring consistently delicious results every time. Effortless cooking and minimal cleanup are the hallmarks of this innovative technique.
How to Make Hard Boiled Eggs in an Electric Kettle
Welcome to the ultimate guide on making perfect hard-boiled eggs using an everyday kitchen hero – your electric kettle! If you’ve ever found yourself short on stovetop space, craving a quick and easy boiled egg for breakfast, or simply looking for a more energy-efficient way to cook, then you’re in the right place. We’ll walk you through a straightforward method that guarantees consistently delicious hard-boiled eggs with minimal fuss. Forget messy pots and pans; your electric kettle is about to become your new favorite egg-cooking appliance.
This guide is designed for anyone, from seasoned cooks to complete beginners. We’ll cover everything you need to know, from selecting your eggs to achieving that perfect, firm yolk. Get ready to discover a surprisingly simple technique that will change the way you think about preparing this classic culinary staple.
Key Takeaways
- Effortless Cooking: Utilize your electric kettle for a hands-off, simple method to cook hard-boiled eggs, freeing up your stovetop.
- Perfect Results Consistently: Achieve reliably cooked hard-boiled eggs with yolks that are fully set and whites that are firm, every single time.
- Time-Saving Solution: This method is significantly faster than traditional boiling, making it perfect for quick breakfasts or meal prep.
- Easy Cleanup: With minimal equipment and no pots or pans to scrub, the cleanup process is a breeze.
- Ideal for Small Spaces: An electric kettle is a fantastic tool for dorm rooms, small apartments, or any kitchen with limited space.
- Safety First: Understand safe operating procedures for using an electric kettle with water and eggs to prevent accidents.
- Versatile Application: Learn how to adapt the method for different egg sizes and achieve desired levels of doneness beyond just hard-boiled.
Why Use an Electric Kettle for Hard-Boiled Eggs?
Before we dive into the how-to, let’s quickly touch upon the advantages of this method. Electric kettles are designed to heat water rapidly and efficiently. By leveraging this power, you can cook your eggs in a fraction of the time it might take on the stovetop. Plus, it’s a fantastic way to keep your stove free for other dishes. It’s also a great option for those living in dorms or small apartments where space is at a premium. The process is incredibly hands-off, meaning you can set it and forget it until the timer goes off.
What You’ll Need
Gathering your supplies is the first step to success. Thankfully, you won’t need much!
- Fresh eggs (any size, but medium to large are recommended for consistency)
- Your electric kettle
- A heat-safe bowl or container for cooling the eggs
- Cold water
- Optional: Ice for an ice bath
Step-by-Step Guide: Making Hard Boiled Eggs
Let’s get cracking (pun intended)! Follow these simple steps to achieve perfectly cooked hard-boiled eggs using your electric kettle.
Step 1: Prepare Your Eggs
Start with fresh eggs. It’s often recommended to use eggs that are at least a few days old. Very fresh eggs can sometimes be harder to peel. Gently place your eggs into the electric kettle. Be careful not to overcrowd the kettle. If you have a standard-sized kettle, usually 3-5 eggs fit comfortably without touching too much.
Step 2: Add Water
Now, carefully add cold water to the electric kettle. The water level should be sufficient to completely cover the eggs by about an inch. This ensures that the eggs cook evenly and the water boils efficiently. Don’t fill the kettle beyond its maximum fill line, as this can be a safety hazard.
Step 3: Bring Water to a Boil
Close the lid of your electric kettle and plug it in. Switch it on. The kettle will heat the water until it reaches a rolling boil. Once the water boils, most electric kettles will automatically shut off or switch to a “keep warm” mode.
Step 4: Let the Eggs Cook
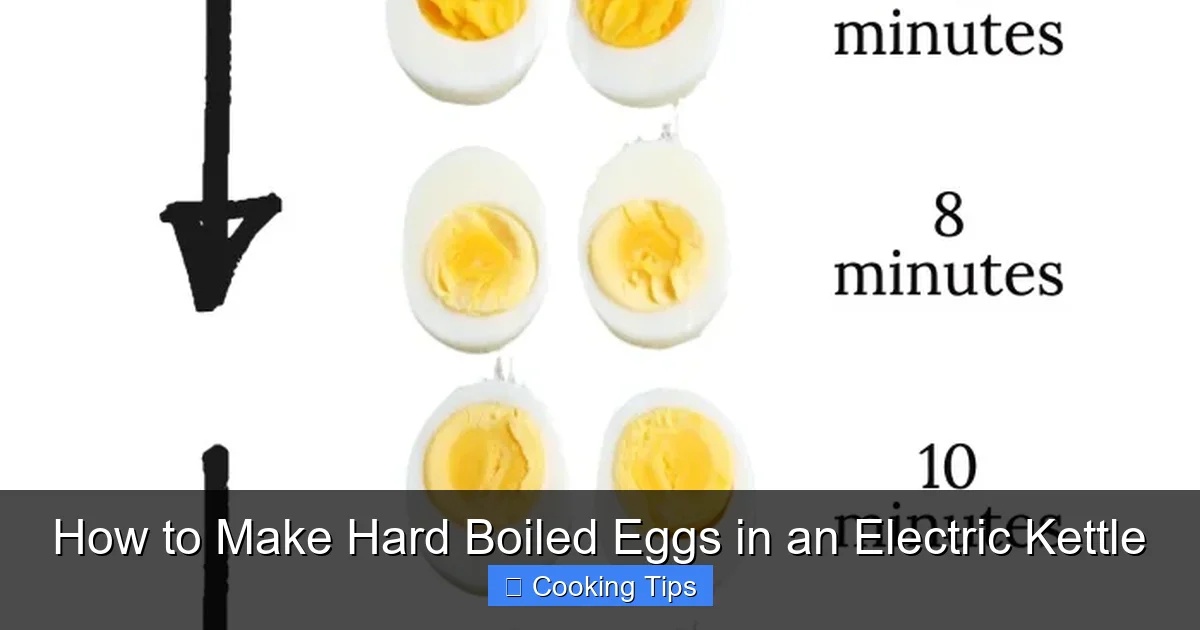
This is where the magic happens! Once the kettle has boiled and switched off (or entered its keep-warm phase), leave the eggs submerged in the hot water. The residual heat is enough to cook them to a hard-boiled consistency. The exact timing can vary slightly depending on your kettle and how vigorously it boiled.
For perfectly hard-boiled eggs, a general guideline is to let them sit in the hot water for **10-12 minutes**. If you prefer a slightly softer yolk, you can reduce this time to 8-10 minutes.
Tip for Timing:
It’s helpful to use a timer on your phone or a kitchen timer. Once the kettle clicks off after boiling, start your timer for your desired cooking duration (10-12 minutes for hard-boiled).
Visual guide about How to Make Hard Boiled Eggs in an Electric Kettle
Image source: rachlmansfield.com
Visual guide about How to Make Hard Boiled Eggs in an Electric Kettle
Image source: thefoodieaffair.com
Step 5: Cool the Eggs
Once your timer goes off, it’s time to stop the cooking process. This is crucial for preventing overcooking and ensuring the eggs are easy to peel. Carefully unplug the kettle. You can then carefully pour out the hot water, leaving the eggs in the kettle, or you can carefully remove the eggs using a slotted spoon.
Option A: Ice Bath Method (Recommended for Easiest Peeling)
Prepare a bowl filled with cold water and ice cubes. This creates an “ice bath.” Carefully transfer the cooked eggs from the hot water into the ice bath. Let them sit for at least 5-10 minutes. The rapid cooling helps to contract the egg white away from the shell, making peeling much easier.
Option B: Cold Running Water Method
If you don’t have ice readily available, you can run cold water directly over the eggs in the kettle or in a bowl until they are cool to the touch. This method is effective but may not be quite as efficient for peeling as a full ice bath.
Step 6: Peel and Enjoy!
Once the eggs have cooled sufficiently, it’s time to peel them. Gently tap the wider end of the egg on a hard surface and then roll it gently to crack the shell all over. Start peeling from the wider end, as there’s usually an air pocket there that makes it easier to get started. Rinse the egg under cool water to remove any small shell fragments.
Your perfectly hard-boiled eggs are now ready to be enjoyed! They can be eaten as is, sliced for sandwiches, or used in your favorite salads and recipes.
Troubleshooting Common Issues
While this method is generally foolproof, here are a few common issues and how to address them:
Problem: Eggs are Overcooked (Green Ring Around the Yolk)
Cause: The eggs were left in the hot water for too long, or the residual heat was too intense.
Solution: Reduce the “sitting time” in the hot water. If your kettle tends to stay very hot for a long time, try reducing the sitting time to 8-10 minutes. Always cool the eggs immediately and thoroughly in an ice bath.
Visual guide about How to Make Hard Boiled Eggs in an Electric Kettle
Image source: storables.com
Problem: Eggs are Undercooked (Runny Yolk or Soft White)
Cause: The eggs didn’t sit in the hot water long enough, or the initial boil wasn’t robust enough.
Solution: Increase the “sitting time” in the hot water. For hard-boiled, aim for the full 10-12 minutes. Ensure the kettle has reached a full rolling boil before starting the timer for the sitting period.
Problem: Eggs are Difficult to Peel
Cause: This is often due to using very fresh eggs, or not cooling them quickly and thoroughly enough.
Solution: Try using eggs that are at least a week old. Always use an ice bath for at least 5-10 minutes. Some people find that cracking the egg all over and then peeling under cool running water can help.
Problem: Kettle Shutting Off Too Quickly
Cause: Some kettles have very sensitive thermostats and might shut off immediately after boiling, before sufficient residual heat is generated.
Solution: If your kettle shuts off and cools down too rapidly, you may need to re-boil the water briefly. Once the eggs have sat for about 5 minutes, if the water feels less than very hot, you can briefly switch the kettle back on until it just starts to boil again, then let it sit for the remainder of your cooking time.
Tips for Success
* Use Room Temperature Eggs: While not strictly necessary, using eggs that are closer to room temperature can prevent them from cracking when introduced to hot water. You can take them out of the fridge about 20-30 minutes before you plan to cook them.
* Don’t Overcrowd: Ensure there’s enough space for the water to circulate around each egg. Overcrowding can lead to uneven cooking.
* Experiment with Timing: Every electric kettle is slightly different. After your first batch, you’ll have a better idea of the perfect timing for your specific appliance and preference.
* Storage: Store your hard-boiled eggs in the refrigerator. Unpeeled eggs will last for about a week. Peeled eggs are best consumed within a day or two.
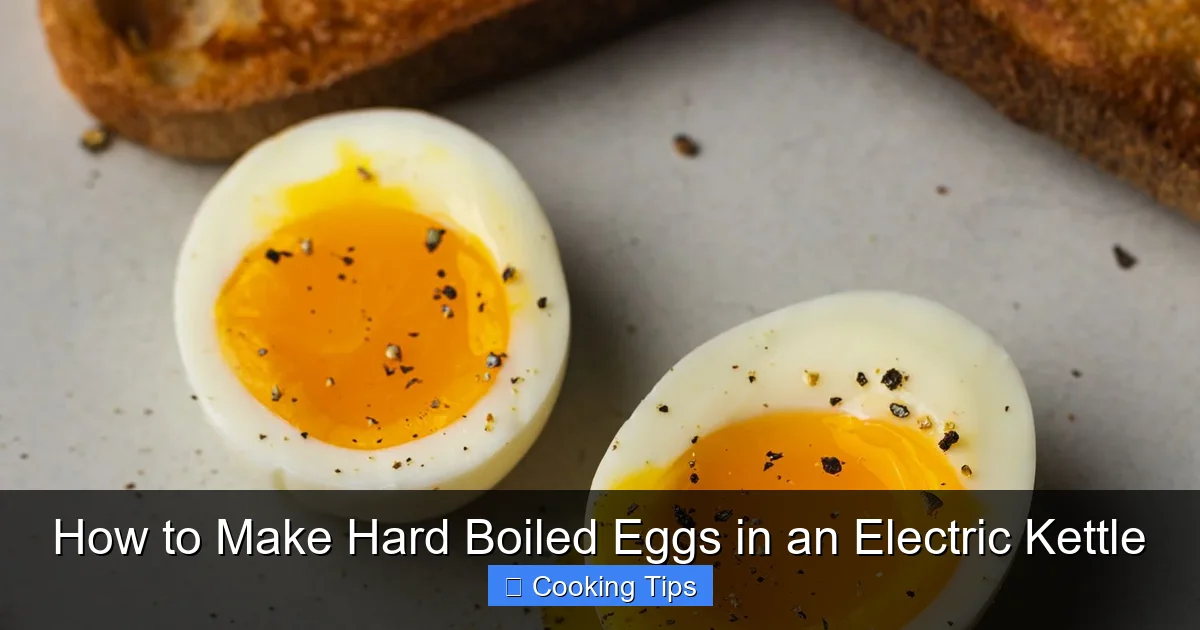
Beyond Hard-Boiled: Soft-Boiled Eggs in an Electric Kettle?
While this guide focuses on hard-boiled eggs, you can adapt this method for softer yolks! For soft-boiled eggs with a jammy yolk, reduce the sitting time in the hot water to **4-6 minutes** after the initial boil. You’ll still want to plunge them into an ice bath immediately to stop the cooking process. The whites should be set, but the yolks will remain delightfully runny.
Conclusion
Making hard-boiled eggs in an electric kettle is a revelation! It’s a simple, efficient, and incredibly convenient method that requires minimal effort and cleanup. Whether you’re a student in a dorm, a busy parent, or just someone who appreciates clever kitchen hacks, this technique is sure to become a go-to. So, the next time you crave a perfectly cooked hard-boiled egg, skip the stovetop and reach for your electric kettle. You’ll be amazed at how easy and effective it is! Enjoy your perfectly cooked eggs, knowing you’ve mastered a new, clever way to prepare them.