

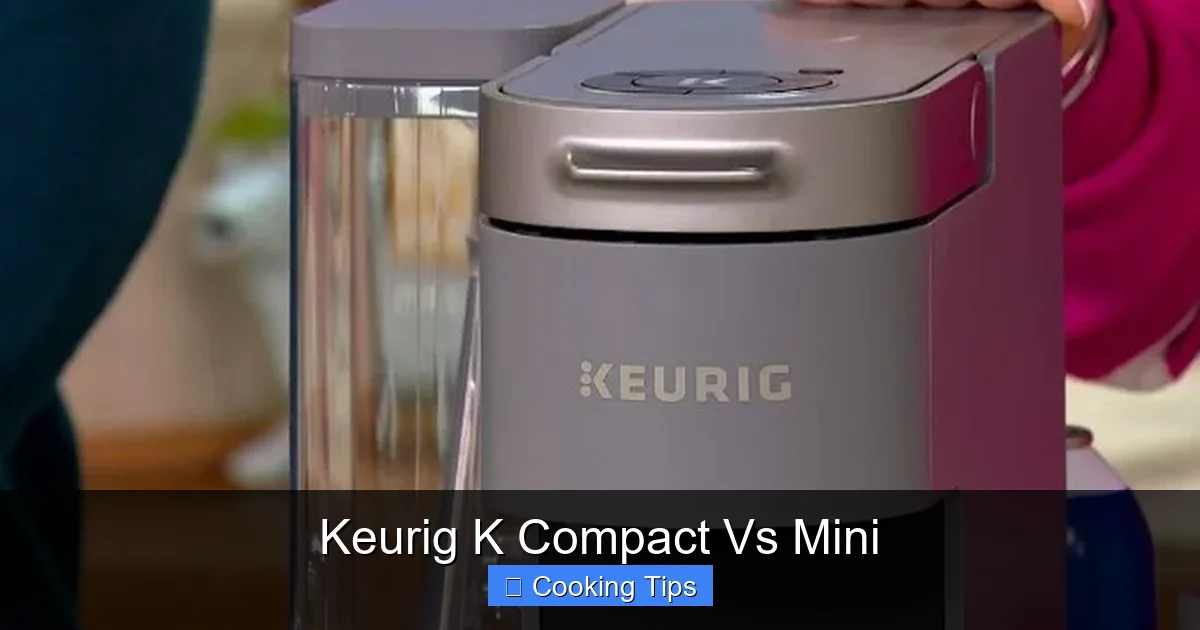
Choosing between the Keurig K Compact and the Keurig Mini can be tough, but this guide breaks down their features. We’ll help you understand the key differences in size, brew strength, water reservoir, and brewing options to make an informed decision. Find the best Keurig for your kitchen and lifestyle!
Welcome, coffee lovers! Are you standing at the crossroads of single-serve brewing, trying to decide between the ever-popular Keurig K Compact and the undeniably cute Keurig K-Mini? You’re not alone. Both offer that quick, convenient cup of joe that so many of us crave. But what truly sets them apart? And more importantly, which one is the perfect fit for *your* kitchen and *your* lifestyle?
This comprehensive guide is designed to be your ultimate resource. We’ll dive deep into the nuances of each machine, from their physical dimensions to their brewing capabilities and everything in between. By the end, you’ll have a crystal-clear understanding of the Keurig K Compact vs. Mini, empowering you to make a confident purchase. Let’s get brewing!
Key Takeaways
- Size Matters: The K-Mini is significantly smaller, making it ideal for limited counter space or travel, while the K-Compact offers a slightly larger footprint but more brewing versatility.
- Brew Strength Control: The K-Compact generally offers more control over brew strength, allowing for a stronger cup of coffee, whereas the K-Mini typically has a more straightforward, single-strength brew.
- Water Reservoir Capacity: The K-Mini uses a direct-to-brew system, meaning you add water for each cup, while the K-Compact features a removable water reservoir that holds multiple servings, reducing refill frequency.
- Brewing Options: While both are single-serve brewers, the K-Compact may offer more size options for your brew (e.g., 6, 8, 10 oz), whereas the K-Mini is primarily focused on a single, standard cup size.
- Portability: The K-Mini’s compact design and simplicity make it a more portable option if you frequently move it or take it on the go, compared to the K-Compact.
- Price Point: Generally, the Keurig K-Mini tends to be more budget-friendly than the K-Compact, reflecting its simpler feature set.
Understanding Your Needs: The First Step
Before we even look at the machines, let’s think about you. What are your coffee-drinking habits?
* How much counter space do you have? This is a big one. If your kitchen is a cozy nook, space is a precious commodity.
* How many cups of coffee do you drink a day? Do you need to brew for yourself and then quickly for a partner or guest? Or is it just you and your morning ritual?
* Do you like a strong cup of coffee? Some prefer a bold kick-start, while others enjoy a milder brew.
* How important is portability? Do you want to bring your brewer to the office, or is it a permanent fixture on your counter?
* What’s your budget? Both are great options, but there are price differences.
Answering these questions will make the comparison much easier. Now, let’s get down to the machines themselves.
Keurig K-Mini: The Ultra-Compact Champion
The Keurig K-Mini is all about minimalism and space-saving. It’s the smallest coffee maker in Keurig’s lineup, designed for those who have very little space or who prioritize extreme portability.
Design and Footprint
* Dimensions: Typically, the K-Mini measures around 12.1″ H x 4.8″ W x 11.3″ D. This is impressively narrow!
* **Visual Appeal:** It often comes in a range of vibrant colors, adding a pop of personality to your kitchen. Its slim profile means it can tuck away neatly on even the most crowded countertops.
Brewing Process
The K-Mini’s brewing process is intentionally simple and direct.
* **Water Reservoir:** This is where the K-Mini truly distinguishes itself. It *doesn’t* have a traditional water reservoir. Instead, you pour a specific amount of fresh water (between 6-12 ounces) directly into the brewing chamber for *each cup* you make.
* Tip: Use the included scoop to measure your water, or simply fill your favorite mug with the desired amount and pour it into the machine.
* **K-Cup Pods:** Like all Keurigs, it uses K-Cup pods. You simply pop one in, close the lid, and brew.
* **Brew Sizes:** The K-Mini typically brews a single cup size, usually between 6 to 12 ounces, depending on how much water you add. There’s no option to select different cup sizes on the machine itself; your water amount dictates your brew size.
* **Brew Strength:** Generally, the K-Mini does not offer a dedicated brew strength control. The strength of your coffee will primarily be determined by the K-Cup pod you choose and the amount of water you use. Less water means a more concentrated (stronger) brew, while more water will result in a milder cup.
Portability and Storage
* **Ease of Movement:** Its lightweight design and small size make it incredibly easy to move. This is perfect for dorm rooms, small apartments, RVs, or even taking to your office.
* **Storage:** When not in use, it can be easily stored in a cupboard or tucked behind other appliances.
Pros of the Keurig K-Mini
* Extremely Compact: The biggest advantage. It takes up minimal counter space.
* **Highly Portable:** Easy to move around or travel with.
* **Simple Operation:** Very straightforward to use, perfect for beginners.
* **Visually Appealing:** Often available in fun colors to match your decor.
* **Budget-Friendly:** Typically one of the most affordable Keurig models.
Cons of the Keurig K-Mini
* **No Water Reservoir:** You have to add water for every single cup, which can be time-consuming if you drink multiple cups.
* **Limited Brew Sizes:** You can’t select different cup sizes; it’s directly tied to the water you add.
* **Basic Brew Strength:** No dedicated strength control means you rely on K-Cup selection and water volume.
* **Single Serve Only:** As the name suggests, it’s designed for one cup at a time.
Keurig K-Compact: The Space-Saving Versatile Brewer
The Keurig K-Compact aims to strike a balance. It’s still relatively small and designed for kitchens where space might be a concern, but it offers a few more features and convenience than the K-Mini.
Design and Footprint
* Dimensions: The K-Compact is a bit larger than the K-Mini, typically around 12.5″ H x 6.5″ W x 9.2″ D. While wider, it’s often a bit more shallow.
* **Visual Appeal:** Usually comes in more neutral colors like black or red, fitting into most kitchen aesthetics.
Brewing Process
The K-Compact offers a more traditional Keurig brewing experience with added convenience.
* **Water Reservoir:** This is a key difference. The K-Compact features a removable water reservoir, usually around 36 ounces. This means you can brew multiple cups (typically 3-4 cups, depending on size) before needing to refill.
* **Tip:** Remove the reservoir and fill it at the sink. Place it back securely to ensure proper brewing.
* **K-Cup Pods:** Again, it uses standard K-Cup pods.
* **Brew Sizes:** The K-Compact generally offers a few different brew size options, commonly 6, 8, and 10 ounces. You select your desired size directly on the brewer’s interface.
* **Example:** If you want a larger mug of coffee, select the 10oz option. For a more concentrated shot, opt for the 6oz.
* **Brew Strength:** Some K-Compact models may offer a brew strength selector. This allows you to choose between a regular or strong brew setting, giving you more control over the intensity of your coffee.
* **Tip:** If you prefer a bolder taste without compromising on volume, experiment with the strong brew setting.
Portability and Storage
* **Less Portable than K-Mini:** While still relatively compact, the presence of the water reservoir makes it less “grab-and-go” than the K-Mini. It’s designed more for a permanent spot on your counter.
* **Storage:** It can still fit in smaller kitchens but might require a dedicated corner rather than being easily stashed in a cabinet.
Pros of the Keurig K-Compact
* **Removable Water Reservoir:** Brew multiple cups without constant refilling.
* **Multiple Brew Sizes:** Offers more flexibility in cup size selection.
* **Potential Brew Strength Control:** Some models allow for a stronger brew option.
* **Convenient for Multiple Cups:** Great if you or others in your household drink coffee regularly.
* **Good Balance:** Offers more features than the K-Mini while still being relatively space-conscious.
Cons of the Keurig K-Compact
* **Larger Footprint than K-Mini:** Takes up more counter space.
* **Less Portable:** Not ideal for frequent moving or travel.
* **Potentially Higher Price Point:** Generally more expensive than the K-Mini.
Keurig K Compact Vs. Mini: Direct Comparison
Now, let’s put them side-by-side for a clear comparison of the Keurig K Compact vs. Mini.
| Feature | Keurig K-Mini | Keurig K-Compact |
| :——————- | :———————————————– | :————————————————– |
| **Dimensions** | Ultra-slim (approx. 4.8″ wide) | Slimmer than standard, but wider than K-Mini |
| **Water Reservoir** | Direct-to-brew (pour water for each cup) | Removable reservoir (approx. 36 oz) |
| **Brew Sizes** | 6-12 oz (determined by water poured) | Multiple options (e.g., 6, 8, 10 oz) |
| **Brew Strength** | Basic (relies on pod and water volume) | May offer a “strong” brew option |
| **Portability** | Very High (lightweight, no reservoir) | Moderate (designed for counter placement) |
| **Counter Space** | Minimal | Less than standard, more than K-Mini |
| **Convenience** | Simple, but requires frequent water refills | More convenient for multiple cups, less refilling |
| **Price** | Generally Lower | Generally Higher |
| **Best For** | Extremely small spaces, single users, portability| Small kitchens, moderate daily use, brew flexibility|
How to Brew with Your Keurig: A Universal Guide (with minor K-Mini/K-Compact variations)
While the specific steps might have slight differences, the core brewing process is the same for both machines.
Step 1: Set Up Your Brewer
* **Unpack and Clean:** Before the first use, unpack your Keurig and wash the removable parts (like the drip tray or water reservoir, if applicable) with warm, soapy water. Rinse and dry thoroughly.
* **Placement:** Place your brewer on a flat, stable surface near an electrical outlet. Ensure there’s enough space above for the lid to open and for steam to escape.
Step 2: Add Water
* **For the Keurig K-Mini:**
* Open the K-Mini brewer.
* Pour your desired amount of fresh, filtered water (between 6 and 12 ounces) into the brewing chamber. Do not overfill.
* Close the brewer lid.
* **For the Keurig K-Compact:**
* Lift the lid of the water reservoir (usually located at the back or side).
* Fill the reservoir with fresh, filtered water up to the maximum fill line. Do not use hot water.
* Ensure the reservoir is securely in place.
* Close the brewer lid.
Step 3: Insert a K-Cup Pod
* **Open the Pod Holder:** Lift the handle of your Keurig brewer.
* **Insert the Pod:** Place a K-Cup pod into the holder. Ensure it’s seated correctly.
* **Close the Handle:** Firmly close the handle. This pierces the K-Cup pod.
Step 4: Select Your Brew Size (K-Compact Only) and Start Brewing
* **For the Keurig K-Mini:**
* Place your mug under the dispenser.
* Press the brew button. The brewer will automatically brew the amount of water you added.
* **For the Keurig K-Compact:**
* Place your mug under the dispenser.
* Select your desired brew size (e.g., 6, 8, 10 oz) using the buttons on the brewer.
* If your model has a brew strength option, select it now.
* Press the brew button.
Step 5: Enjoy Your Coffee!
* Once brewing is complete, carefully remove your mug.
* Dispose of the used K-Cup pod. You can often open the pod holder to eject it.
* Clean up any drips and enjoy your delicious, freshly brewed coffee!
Troubleshooting Common Keurig Issues
Even the best brewers can sometimes have hiccups. Here are a few common problems and their solutions:
Coffee is too weak or watery.
* **K-Mini:** You might be using too much water for the K-Cup pod. Try using less water for a stronger brew. Ensure you’re using a K-Cup designed for a standard brew.
* **K-Compact:** Select a smaller brew size or use the “strong” brew option if available. Make sure you haven’t accidentally selected a larger brew size than intended.
* **Both:** Ensure you’re using a fresh K-Cup pod. Old pods can lose flavor. Consider trying a different brand or flavor of K-Cup.
Brewer is not brewing or is making strange noises.
* **Check Water Level:** For the K-Mini, ensure you’ve added enough water. For the K-Compact, check the water reservoir; it might be empty or not seated correctly.
* **Check for Clogs:** The needle that pierces the K-Cup pod might be clogged. Try running a descaling cycle or a brew cycle with just water and no K-Cup pod. Keurig also sells descaling solutions.
* **Power Check:** Ensure the brewer is plugged in and the power button is on.
Coffee tastes bad or burnt.
* **Descale Your Brewer:** Mineral buildup can affect taste. Descale your brewer regularly following the manufacturer’s instructions.
* **Cleanliness:** Ensure the brew head and drip tray are clean. Coffee grounds can accumulate and affect flavor.
* **K-Cup Quality:** Try a different brand or flavor of K-Cup. Some pods may not be as fresh as others.
Leaking brewer.
* **Drip Tray:** Ensure the drip tray is properly seated and not overflowing.
* **Water Reservoir (K-Compact):** Check that the reservoir is correctly attached and that the seal at the bottom is intact.
* **K-Cup Placement:** Ensure the K-Cup is properly seated and the lid is fully closed.
Conclusion: Which Keurig is Right for You?
The decision between the Keurig K Compact and the Keurig K-Mini ultimately boils down to your personal priorities and kitchen setup.
* If **extreme space-saving and portability** are your absolute top concerns, and you don’t mind adding water for each cup, the **Keurig K-Mini** is likely your winner. It’s perfect for dorm rooms, small apartments, or for those who want a backup brewer that takes up minimal space.
* If you have a bit more counter space, **value the convenience of brewing multiple cups without refilling** constantly, and appreciate having options for brew size (and possibly strength), the **Keurig K-Compact** offers a more robust and convenient single-serve experience. It’s a great all-around choice for many households.
Both machines deliver the quintessential Keurig convenience: a hot cup of coffee, tea, or hot chocolate at the touch of a button. By understanding their core differences, you can confidently choose the Keurig that will become your favorite morning companion. Happy brewing!
