
Is your blender shaking and rattling? Don’t discard it! This guide provides a comprehensive, step-by-step approach to identifying and fixing loose parts or a shaking base. Learn to tighten screws, inspect seals, and address common issues to restore your blender’s stability and ensure safe, efficient blending for years to come.
Key Takeaways
- Identify the Source of the Shake: First, determine if the issue stems from the blade assembly, the jar, or the motor base itself before attempting any fixes.
- Safety First: Always Unplug: Before any inspection or repair, ensure your blender is completely unplugged from the power source to prevent accidental activation and injury.
- Tighten Blade Assembly: Most shaking is caused by a loose blade assembly at the bottom of the blender jar. Learn how to safely remove and re-secure it.
- Check Jar Sealing Ring and Gasket: A worn or improperly seated sealing ring or gasket can cause leaks and contribute to instability. Inspect and replace if necessary.
- Inspect the Motor Base Connections: Loose screws or a damaged coupling on the motor base can also lead to excessive shaking. Learn how to check and tighten these components.
- Regular Maintenance Prevents Problems: Simple, routine cleaning and checks can prevent many common loose part issues from developing in the first place.
Fixing Loose Parts or Shaking Base in Blenders
Does your blender sound like a miniature construction site every time you try to whip up a smoothie? A loose part or a shaking motor base can turn a simple kitchen task into a noisy, potentially dangerous ordeal. In 2026, with our reliance on kitchen gadgets, a well-functioning blender is essential. Fortunately, most blender shaking issues are not terminal. They are often fixable with a little patience and the right approach. This guide will walk you through diagnosing and repairing the common culprits behind a wobbly blender, helping you restore its smooth operation and extend its lifespan.
We’ll cover everything from identifying the source of the wobble to tightening crucial components. You’ll learn how to safely disassemble, inspect, and reassemble your blender, ensuring it’s as stable and efficient as the day you bought it. Get ready to say goodbye to that unnerving rattle and hello to perfectly blended creations!
Understanding Why Your Blender is Shaking
Before diving into fixes, it’s crucial to understand the common reasons behind a shaking blender. Most often, the problem lies with how the components connect to each other or to the motor base.
* Loose Blade Assembly: This is perhaps the most frequent offender. The blade assembly, which screws onto the bottom of the blender jar, can loosen over time due to vibrations during blending. If it’s not snug, it will cause the jar to wobble on the base.
* Worn or Damaged Gasket/Sealing Ring: The rubber ring or gasket that creates a seal between the blade assembly and the jar is vital. If it’s old, cracked, or not seated properly, it can allow ingredients to leak and affect the stability of the blade assembly.
* Cracked or Damaged Jar: While less common, a cracked blender jar itself can cause instability and dangerous leaks.
* Loose Motor Base Screws: The housing of the motor base is often held together by screws. If these loosen, the entire base can feel unstable and vibrate excessively.
* Damaged Drive Coupling: The drive coupling is the part on the motor base that connects to the blade assembly. If it’s chipped or broken, it won’t engage properly, leading to wobbling and inefficient blending.
Safety First: Essential Precautions
Before you attempt any troubleshooting or repair on your blender, safety must be your top priority.
* Unplug the Blender: ALWAYS unplug your blender from the power outlet. This is the single most important step to prevent accidental starts and potential injuries. Do not skip this, even for a quick check.
* Let it Cool Down: If you’ve recently used the blender, allow all components, especially the motor and blades, to cool down completely. Hot surfaces can cause burns.
* Work on a Stable Surface: Choose a well-lit, clean, and stable surface to work on, like your kitchen counter. Avoid working on a slippery or cluttered area.
* Handle Blades with Care: Blender blades are extremely sharp. When handling the blade assembly, always grasp the plastic base and keep your fingers away from the cutting edges. Consider wearing protective gloves if you’re concerned.
Step-by-Step Guide to Fixing Loose Parts and Shaking Bases
Now that we’ve covered the basics and safety, let’s get down to fixing that wobbly blender. We’ll start with the most common issues and work our way to more complex ones.
Step 1: Inspect the Blade Assembly and Jar
The most common cause of shaking is a loose blade assembly at the bottom of the blender jar.
1.1 Remove the Blender Jar
Carefully lift the blender jar off the motor base. Place it on your prepared work surface.
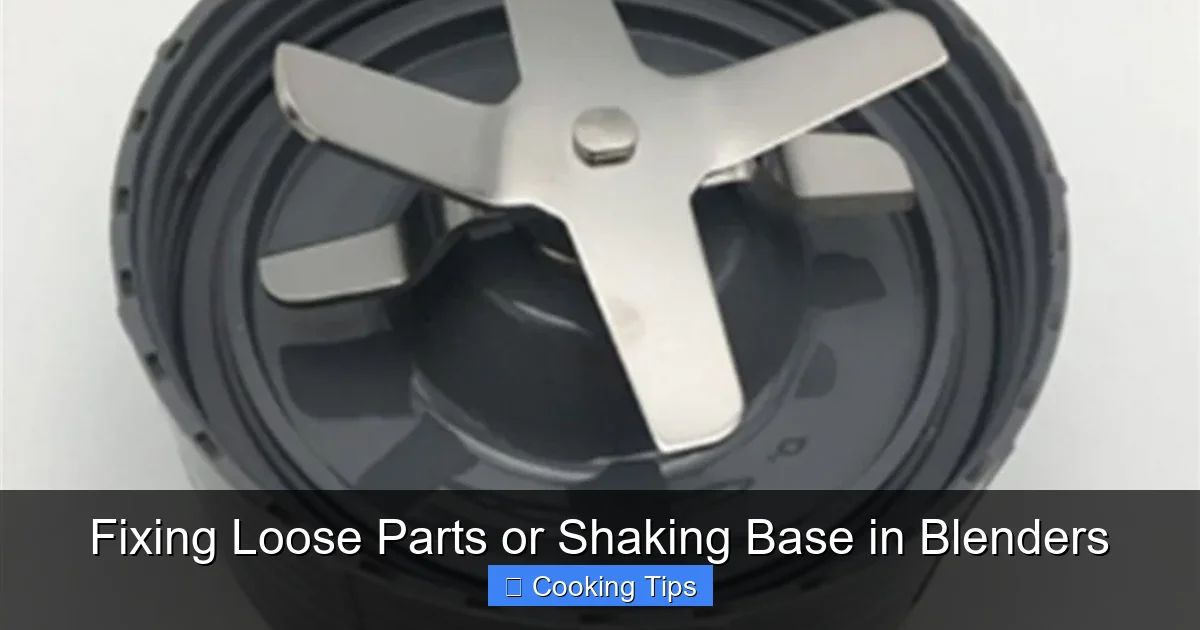
Visual guide about Fixing Loose Parts or Shaking Base in Blenders
Image source: images.nexusapp.co
1.2 Examine the Bottom of the Jar
Turn the jar upside down. Look at the blade assembly that is screwed into the bottom. Does it look loose? Can you spin it easily with your fingers? This is often the primary culprit.
1.3 Tighten the Blade Assembly
Many blade assemblies can be tightened by hand. Grip the plastic part of the blade assembly firmly and twist it clockwise. You may hear or feel it click into place. Ensure it is snug, but don’t overtighten to the point where you fear breaking the plastic.
Tip: If your blender came with a tool for removing the blade assembly (often a plastic wrench or key), and it feels extremely loose, you might need to use this to get a better grip and tighten it securely. Consult your blender’s manual if you’re unsure about specific tools.
1.4 Check the Sealing Ring and Gasket
While the jar is upside down, carefully inspect the rubber sealing ring or gasket that sits between the blade assembly and the jar. Is it present? Is it worn, cracked, or brittle? A damaged gasket can cause leaks and contribute to instability.
If the gasket looks damaged or is missing, you will need to replace it. You can usually find replacement parts on the manufacturer’s website or through reputable online retailers. To replace it, gently pry off the old one and press the new one firmly into place.
1.5 Reassemble and Test
Once you’ve tightened the blade assembly and checked/replaced the gasket, carefully place the jar back onto the motor base. Ensure it sits evenly and securely. Plug the blender in and run it on a low setting for a few seconds. Listen and feel for any excessive shaking or rattling.
Step 2: Inspect the Motor Base and Drive Coupling
If tightening the blade assembly didn’t solve the problem, the issue might be with the motor base itself.
2.1 Check the Drive Coupling
Look at the top of the motor base where the blender jar sits. You’ll see a small plastic or metal piece that rotates – this is the drive coupling. This piece is designed to engage with the blade assembly. Is it cracked, chipped, or significantly worn? If it appears damaged, it might not be making proper contact with the blade assembly, leading to shaking.
Example: Imagine a gear that’s missing a tooth. It won’t turn smoothly, and it will likely wobble. The drive coupling works similarly.
2.2 Tighten Motor Base Screws (If Accessible)
Some blender motor bases have screws on the underside or back that hold the housing together. If you are comfortable and have the right screwdriver (often a Phillips head or Torx driver), you can attempt to tighten these screws. Ensure the blender is unplugged.
Caution: Be careful not to overtighten these screws, as you could strip the threads or crack the plastic housing. If you’re unsure about this step, it’s best to consult a professional or your blender’s manual.
2.3 Inspect the Jar Seating Area
On the motor base, examine the area where the bottom of the blender jar sits. Is there any debris, residue, or damage? Sometimes, a build-up of dried food particles can prevent the jar from seating properly, causing it to wobble.
Clean this area thoroughly with a damp cloth. Ensure there are no obstructions that might prevent a secure fit.
Step 3: Troubleshooting Persistent Shaking
If you’ve gone through the above steps and your blender is still shaking, here are a few more things to consider.
* **Is the Blender Jar Damaged?** Carefully inspect the blender jar itself for any cracks or signs of damage. A damaged jar is a safety hazard and should be replaced.
* **Uneven Load Distribution:** While not a repair, sometimes heavy or unbalanced loads can cause a blender to vibrate more. Try blending smaller quantities or ensuring ingredients are distributed more evenly around the blades.
* **Worn Motor Mounts:** In some high-end or older blenders, the internal motor mounts can wear out, leading to excessive vibration. This is a more complex repair that may require professional service.
When to Consider Replacement
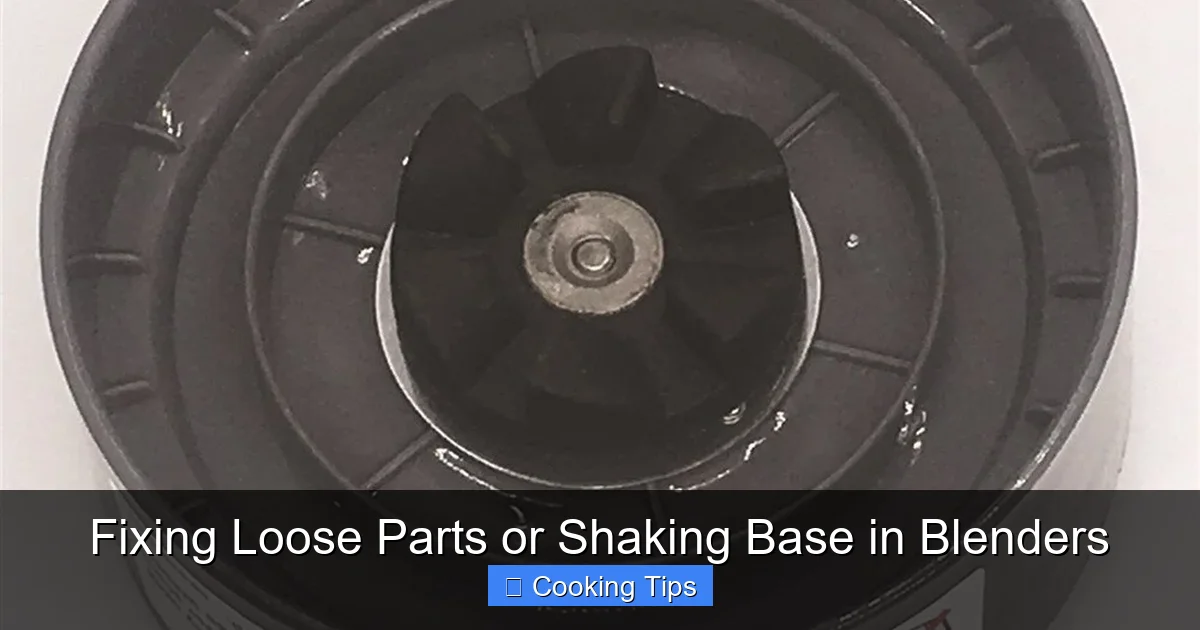
Visual guide about Fixing Loose Parts or Shaking Base in Blenders
Image source: images.nexusapp.co
While this guide covers many common blender fixes, there comes a point where repair might not be feasible or safe.
* **Motor Issues:** If you hear grinding noises, smell burning, or the motor struggles significantly even after ensuring all parts are tight, there may be an internal motor problem.
* **Cracked or Damaged Jar/Base:** Any significant cracks in the blender jar or the motor base housing are serious safety concerns.
* **Irreparable Drive Coupling:** If the drive coupling on the motor base is badly damaged and cannot be replaced, the blender might be beyond repair.
For most common issues, however, a quick check and tightening of the blade assembly or motor base screws can bring your blender back to life.
Conclusion
A shaky blender doesn’t have to mean a trip to the landfill. By following these simple, step-by-step instructions, you can often identify and fix the loose parts or wobbly base that are causing the problem. Remember to always prioritize safety by unplugging the appliance before you begin. With a little effort, you can restore your blender’s stability, ensure safer operation, and enjoy perfectly blended smoothies, sauces, and more for a long time to come. Happy blending in 2026!