
Discover the art of making a delicious, flaky pie crust entirely by hand! This comprehensive guide will walk you through each step, from choosing the right ingredients to achieving that perfect texture. You’ll learn how to create a tender and buttery crust that’s ideal for all your favorite pies, even if you don’t have a food processor.
Making a homemade pie crust is a rewarding culinary skill that can elevate any pie from ordinary to extraordinary. Many home bakers believe that a food processor is essential for achieving a perfectly flaky and tender crust. However, this simply isn’t true! With a few simple techniques and readily available tools, you can create a delicious pie crust by hand that rivals any made with a machine. This guide will show you exactly how to make pie crust without a food processor, demystifying the process and empowering you to bake with confidence.
We’ll cover everything from selecting your ingredients to the final chilling and rolling stages. You’ll learn the “why” behind each step, helping you understand how to achieve that coveted flaky texture. Whether you’re a beginner baker or looking to refine your skills, this guide is for you. Get ready to impress yourself and your loved ones with your beautiful, homemade pie crust!
Key Takeaways
- Cold Ingredients Are Crucial: Using ice-cold butter and water is the secret to creating flaky layers in your pie crust by preventing the fat from melting too soon.
- Don’t Overwork the Dough: Mixing and handling the dough minimally is key to preventing a tough crust, allowing gluten to develop just enough for structure.
- The “Pea-Sized” Crumb: Aim for a mixture that resembles coarse cornmeal with some pea-sized pieces of butter remaining. This indicates the right balance for flakiness.
- Gentle Handling is Paramount: When bringing the dough together, be gentle. Over-kneading or pressing too hard will result in a tough, unyielding crust.
- Resting is Essential: Allowing the dough to rest in the refrigerator for at least 30 minutes (or longer) is vital for relaxing the gluten and making it easier to roll.
- Blind Baking for Crispy Bottoms: For pies with wet fillings, blind baking (pre-baking the crust) ensures a perfectly crisp bottom crust that won’t be soggy.
Understanding the Fundamentals of Pie Crust
Before we dive into the “how,” let’s briefly touch on the “why.” A great pie crust is all about creating layers of fat within a flour structure. When the pie bakes, the water in the dough turns to steam, and the pieces of fat melt. This creates pockets, resulting in that wonderful flakiness we all love. The key to achieving this without a food processor is to keep the fat (usually butter or shortening) in small, distinct pieces throughout the dough.
Gathering Your Ingredients and Tools
Having the right ingredients and tools at hand makes the process much smoother.
Essential Ingredients:
- All-Purpose Flour: This is the foundation of your crust.
- Fat (Butter, Shortening, or a Combination): Cold is key! We’ll discuss options below.
- Ice Water: Again, very cold water is crucial.
- Salt: Enhances flavor.
- (Optional) Sugar: A small amount can add a hint of sweetness and help with browning, especially for sweet pies.
Essential Tools:
- Large Mixing Bowl: For combining your ingredients.
- Pastry Blender or Two Knives: These are your workhorses for cutting in the fat.
- Measuring Cups and Spoons: For accurate measurements.
- Fork: For whisking and bringing the dough together.
- Plastic Wrap: For chilling the dough.
- Rolling Pin: For shaping the crust.
- Pie Plate: To bake your pie in.
Choosing Your Fat: Butter vs. Shortening vs. Combination
The type of fat you use significantly impacts the flavor and texture of your pie crust.
Butter:
Butter offers the best flavor. It has a rich, nutty taste that is incomparable. However, butter has a lower melting point than shortening, meaning it can melt more quickly during the process. This requires a bit more speed and attention to keep it cold.
Shortening:
Vegetable shortening is very easy to work with because it stays solid at room temperature longer than butter. It creates a very tender crust. The downside is that it has a more neutral flavor.
Combination:
Many bakers swear by a combination of butter and shortening. This allows you to get the best of both worlds: the flavor of butter and the tenderizing ease of shortening. A common ratio is half butter and half shortening.
Step-by-Step: Making Your Pie Crust by Hand
Now, let’s get down to business!
Step 1: Prepare Your Cold Ingredients
This is arguably the most important step for a flaky crust.
H3: Chill Your Fat
Cube your butter or shortening and place it back in the refrigerator or freezer for at least 15-30 minutes before you start. You want it to be very cold and firm.

Visual guide about How Do You Make Pie Crust Without a Food Processor
Image source: nofrillskitchen.com
Visual guide about How Do You Make Pie Crust Without a Food Processor
Image source: queensleeappetit.com
Visual guide about How Do You Make Pie Crust Without a Food Processor
Image source: queensleeappetit.com
H3: Prepare Ice Water
Fill a small bowl or cup with water and add several ice cubes. Let it sit while you prepare the dry ingredients. You’ll use this cold water gradually.
Step 2: Combine Dry Ingredients
In your large mixing bowl, whisk together the flour, salt, and sugar (if using). This ensures even distribution of the seasonings.
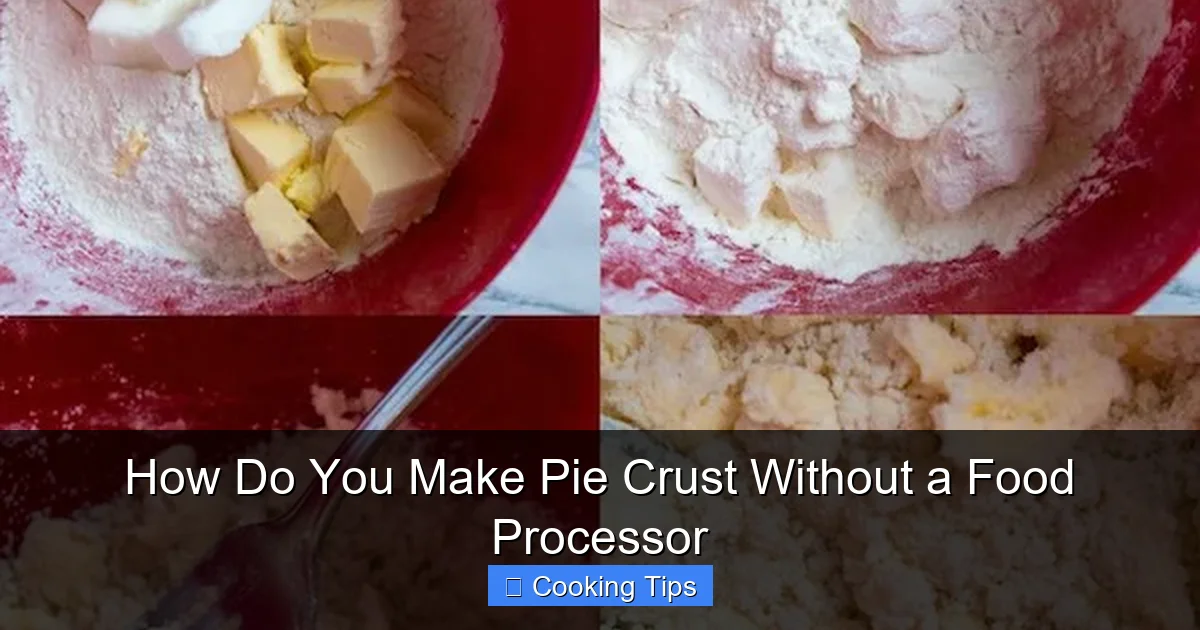
Step 3: Cut in the Fat
This is where your pastry blender or knives come into play. The goal is to cut the cold fat into the flour until the mixture resembles coarse crumbs with some larger, pea-sized pieces of fat still visible.
H3: Using a Pastry Blender
Work the pastry blender in a rocking motion, pressing down into the flour mixture. Rotate the bowl as you go, ensuring all the fat is incorporated. Continue until you reach the desired consistency.
H3: Using Two Knives
Hold one knife in each hand, crossing them over the flour-fat mixture. Chop and cut the fat into the flour. Again, aim for a coarse, crumbly texture with some visible pieces of fat.
Tip: If your kitchen is warm, you may need to pop the bowl of flour and fat mixture into the freezer for 5-10 minutes to keep the fat cold.
Step 4: Add Ice Water
Now it’s time to bring the dough together. Add the ice water one tablespoon at a time, mixing gently with a fork after each addition.
H3: Mix Until Just Combined
Continue adding water and mixing until the dough just begins to come together. You’re looking for a consistency where the dry bits are mostly moistened, and the dough will clump when squeezed. Be careful not to add too much water, as this can lead to a tough crust.
The “Squeeze Test”: Pinch a bit of the mixture between your fingers. If it holds together, you’ve likely added enough water. If it crumbles easily, add another tablespoon of ice water.
Step 5: Form the Dough into a Disc
Once the dough is mostly combined, turn it out onto a lightly floured surface. Gently bring the dough together with your hands. Do not knead it! Simply press it together until it forms a cohesive ball.
H3: Gentle Handling is Key
Overworking the dough will develop the gluten too much, resulting in a tough crust. Think of it as coaxing it together, not forcing it.
Once it’s a ball, flatten it into a disc about 1-inch thick. This shape makes it easier to roll out later.
Step 6: Chill the Dough
Wrap the disc tightly in plastic wrap and refrigerate for at least 30 minutes, or up to 2 days.
H3: Why Chilling is Important
Chilling serves several purposes: it allows the gluten to relax (preventing shrinkage when baking), it solidifies the fat (ensuring those flaky layers), and it makes the dough easier to handle and roll without sticking.
Step 7: Roll Out the Dough
When you’re ready to bake, unwrap the chilled dough and place it on a lightly floured surface.
H3: Rolling Technique
Start rolling from the center of the disc outwards, rotating the dough frequently to prevent sticking. If the dough cracks, gently press the edges back together. If it becomes too soft, pop it back in the refrigerator for a few minutes.
Roll the dough into a circle about 12 inches in diameter for a standard 9-inch pie plate. The thickness should be about 1/8 inch.
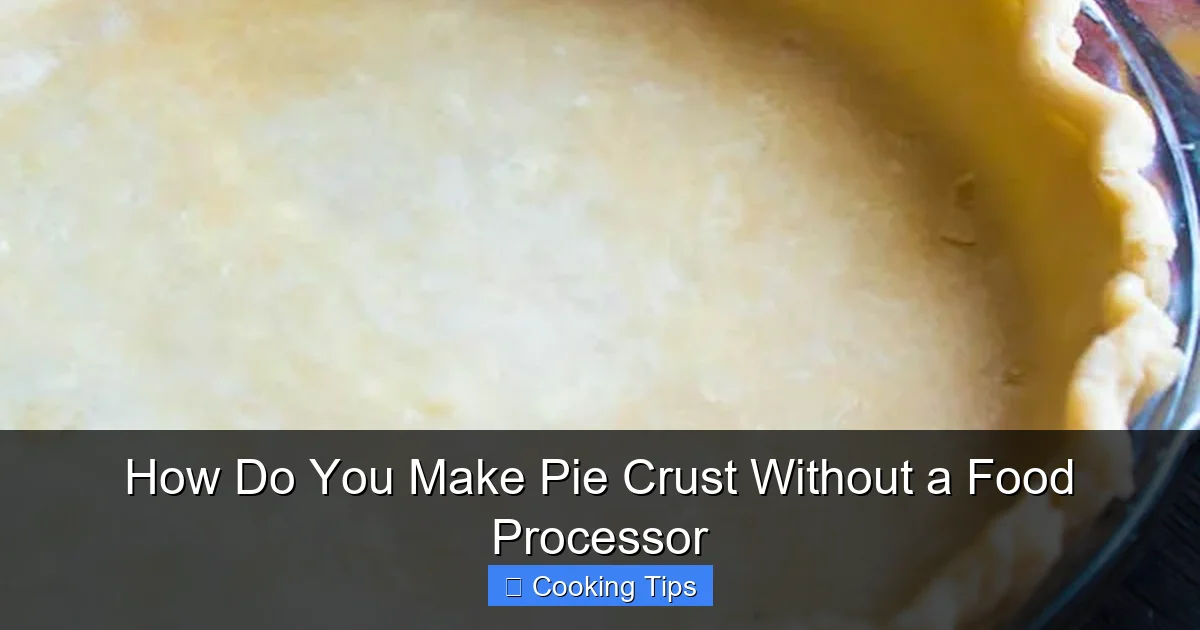
Step 8: Transfer to Pie Plate
Carefully transfer the rolled-out dough to your pie plate. You can do this by gently folding it in half or in quarters, then unfolding it once it’s in the plate. Alternatively, you can roll the dough around your rolling pin and then unroll it over the pie plate.
H3: Trimming and Crimping
Trim any excess dough, leaving about a 1-inch overhang. Fold this overhang under and crimp the edges decoratively with your fingers or a fork. This not only looks nice but also helps seal the crust.
Step 9: Blind Baking (If Necessary)
For pies with no-bake fillings or fillings that don’t require extensive baking (like custard or cream pies), you’ll often need to “blind bake” the crust. This means pre-baking it before adding the filling.
H3: How to Blind Bake
Line the unbaked pie shell with parchment paper or aluminum foil. Fill it with pie weights, dried beans, or rice. Bake according to your recipe’s instructions (usually around 15-20 minutes at 375-400°F or 190-200°C).
Remove the weights and parchment/foil and bake for an additional 5-10 minutes, or until the crust is lightly golden brown. This ensures a crisp bottom crust.
Troubleshooting Common Pie Crust Issues
Even with the best intentions, sometimes things don’t go perfectly. Here are some common problems and how to fix them.
Problem: Tough Crust
Cause: Overworking the dough, too much water, or not enough fat.
Solution: Be gentler when mixing and rolling. Measure your ingredients accurately, especially the water. Ensure you have visible pieces of fat after cutting it in.
Problem: Crumbly Dough That Won’t Come Together
Cause: Not enough water or fat has been overworked.
Solution: Add water a teaspoon at a time until it just holds together. If the fat was overworked, you might have a less flaky crust, but it can still be salvaged by gently pressing it together.
Problem: Crust Shrinks When Baking
Cause: Not chilling the dough long enough, or not relaxing the gluten before rolling.
Solution: Always chill your dough for at least 30 minutes. When rolling, if the dough resists or springs back, let it rest for 10-15 minutes before continuing.
Problem: Soggy Bottom Crust
Cause: Not blind baking for wet fillings, or filling is too moist.
Solution: Always blind bake when recommended. Consider adding a thin layer of melted chocolate or cookie crumbs to the bottom of the crust before adding a very wet filling.
Conclusion: Enjoy Your Homemade Pie Crust!
You’ve done it! You’ve successfully made a beautiful, flaky pie crust without a food processor. The key takeaways are to keep your ingredients cold, handle the dough gently, and give it enough time to chill. This basic technique can be used for sweet pies, savory pies, tarts, and quiches.
Don’t be discouraged if your first attempt isn’t perfect. Like any skill, making pie crust takes a little practice. With each pie you make, you’ll become more comfortable with the feel of the dough and more confident in your abilities. So, preheat your oven, gather your favorite pie filling, and get ready to bake something truly delicious. Happy baking!