
Unlock the secret to perfectly cooked rice with our easy, step-by-step guide for using a rice cooker. We cover everything from selecting the right rice and rinsing it properly to achieving fluffy, delicious results every time. Stop guessing and start enjoying consistently perfect rice with this simple, foolproof method.
Cook Rice In Rice Cooker Step By Step
Welcome to the ultimate guide to cooking rice in your trusty rice cooker! If you’ve ever dreamed of perfectly fluffy, never-mushy, consistently delicious rice without the guesswork, you’ve come to the right place. Gone are the days of scorched bottoms, gummy textures, or undercooked kernels. Your rice cooker is a magical appliance, and with these simple steps, you’ll master the art of effortless rice preparation. Whether you’re a seasoned chef or a kitchen newbie, this guide will walk you through every stage, ensuring your rice is always a triumph.
We’ll cover everything from selecting the right rice and preparing it correctly to achieving that ideal texture. You’ll learn the importance of rinsing, the magic of the correct water ratio, and the simple steps that turn raw grains into fluffy perfection. Get ready to impress yourself and your loved ones with rice that’s as good as it gets. Let’s dive in and start cooking!
Key Takeaways
- Perfectly Rinsed Rice: Rinsing removes excess starch, preventing sticky or gummy rice and leading to fluffy, separate grains.
- Accurate Water Ratios: Using the correct water-to-rice ratio is crucial for the right texture; always consult your rice cooker’s manual or general guidelines.
- “Rinse and Cook” Function: Many modern rice cookers have a dedicated “rinse” cycle, simplifying the process and ensuring proper cleaning.
- Resting is Key: Allowing the rice to steam and rest after cooking finishes helps distribute moisture evenly for a superior texture.
- Versatile Appliances: Rice cookers aren’t just for white rice; they can handle brown rice, sushi rice, quinoa, and even some grains like oats.
- Troubleshooting Common Issues: Understand why your rice might be too wet or too dry and how to fix it for future batches.
Step 1: Choose Your Rice
The first step to perfect rice is choosing the right type of rice for your needs. Different varieties of rice have different cooking times and water requirements. Understanding your rice will set you up for success.
Common Rice Varieties
- Long-grain white rice: This is a staple for many dishes. Think basmati and jasmine. They tend to be fluffy and separate well.
- Medium-grain white rice: This includes arborio rice, often used for risotto, and regular medium-grain white rice, which is a bit chewier.
- Short-grain white rice: This is the go-to for sushi and sticky rice. It’s plump and holds together.
- Brown rice: This is whole grain rice, meaning it still has its bran and germ. It has a nuttier flavor and chewier texture. It requires more water and a longer cooking time than white rice.
- Specialty rice: This includes wild rice, red rice, black rice, and more. Each has unique textures and cooking needs.
For this guide, we’ll focus primarily on cooking common long-grain or medium-grain white rice, as it’s the most frequently used. However, the principles apply to most varieties, with adjustments to water and cooking time as noted in your rice cooker’s manual.
Step 2: Measure Your Rice
Precision is key in cooking, and measuring your rice accurately is no exception. Using the measuring cup that came with your rice cooker is ideal, as it’s designed to work with the cooker’s measurements. If you don’t have it, a standard U.S. measuring cup works, but be aware that rice cooker cups are typically smaller.
Visual guide about Cook Rice In Rice Cooker Step By Step
Image source: familychoice.com.ph
How to Measure
- Use a dry measuring cup.
- Fill the cup loosely with rice, then level off the top with a straight edge (like the back of a knife or a spatula).
- Do not pack the rice down.
Tip: A good starting point for most meals is 1 cup of uncooked rice per person, though this can vary. Cook only as much as you need to ensure freshness and avoid waste.
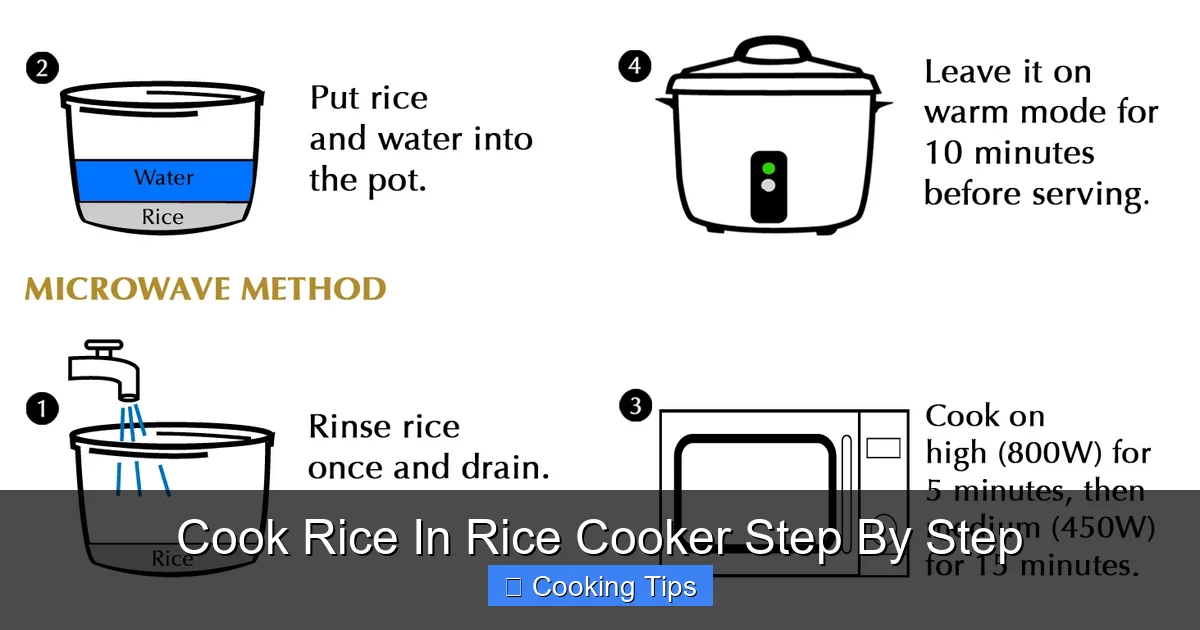
Step 3: Rinse the Rice
This is arguably the most important step for achieving fluffy, separate grains. Rinsing removes excess surface starch, which is what makes rice turn gummy or clumpy when cooked. Don’t skip this!
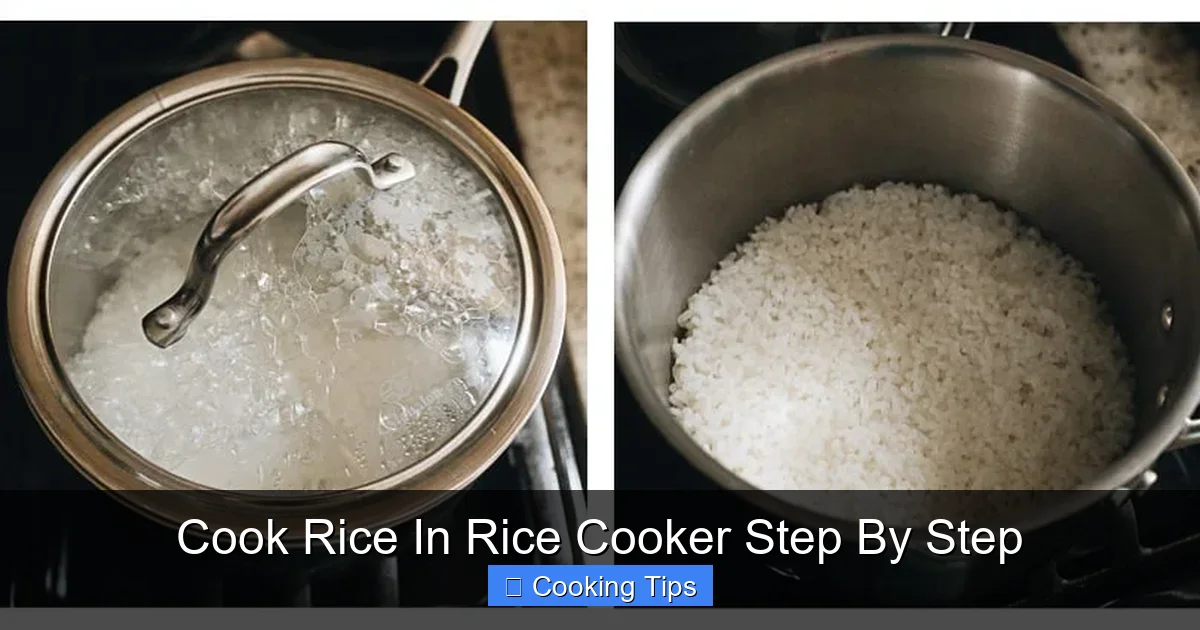
Visual guide about Cook Rice In Rice Cooker Step By Step
Image source: omnivorescookbook.com
The Rinsing Process
- Place the measured rice into your rice cooker pot.
- Add cold water to the pot. You’ll want enough water to generously cover the rice.
- Swirl the rice gently with your hand. You’ll notice the water immediately turns cloudy and milky. This is the starch washing off.
- Carefully drain the cloudy water. You can do this by tilting the pot and letting the water pour out, holding the rice in with your hand or a sieve. Be careful not to lose any grains.
- Repeat the rinsing and draining process. Continue until the water runs mostly clear. For most white rice, this takes about 3-5 rinses. Brown rice might need fewer rinses, while very starchy rice like sushi rice might need more.
Why it matters: Think of it like washing your lettuce. You want to remove any unwanted residue. For rice, that residue is starch.
Modern Rice Cooker Feature: Some advanced rice cookers have a “rinse” function or come with a special inner pot that has a mesh pattern for rinsing directly in the pot without transferring. Check your manual to see if yours offers this convenience.
Step 4: Add the Correct Amount of Water
This is where many people stumble. The water-to-rice ratio is crucial for the perfect texture. Too much water, and your rice will be mushy. Too little, and it will be dry and undercooked.
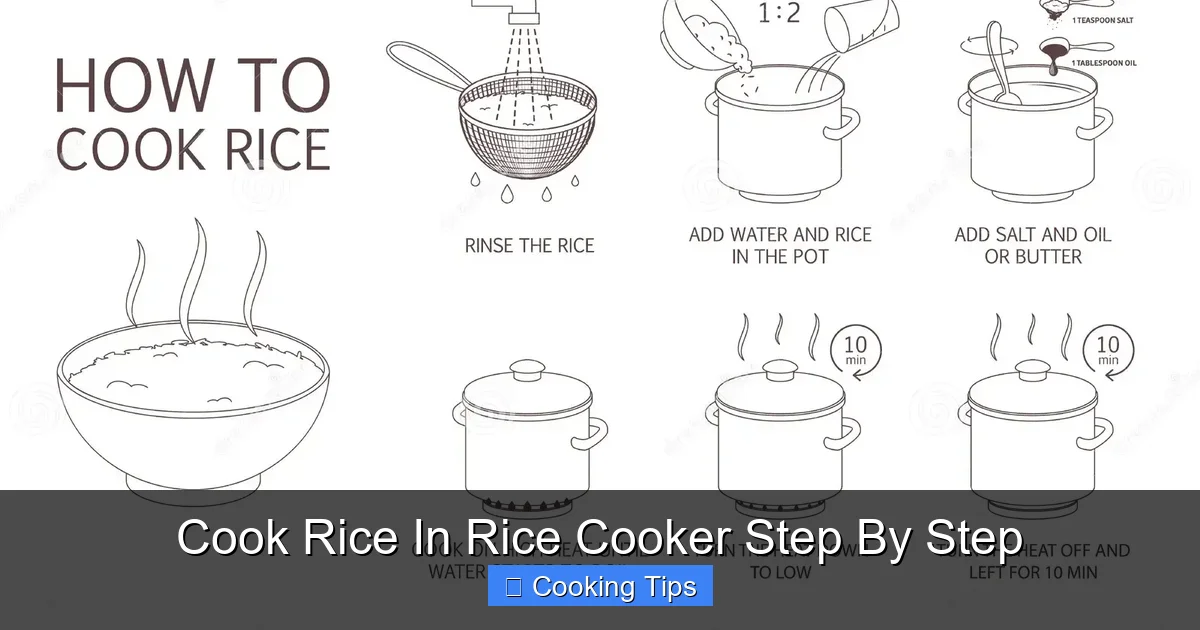
Visual guide about Cook Rice In Rice Cooker Step By Step
Image source: thumbs.dreamstime.com
Understanding Water Ratios
- Your Rice Cooker’s Markings: The easiest method is to use the markings inside your rice cooker pot. These lines correspond to the number of cups of rice you’ve added. After rinsing and draining, add the correct amount of fresh water up to the line that matches the number of rice cups you used. For example, if you cooked 2 cups of rice, fill the water to the “2” line.
- General Guidelines (if no markings): If your rice cooker lacks these helpful markings or you’re using a different type of rice than what the markings are calibrated for, you’ll need to use general guidelines. These can vary slightly, but a common starting point for long-grain white rice is a 1:1.5 to 1:1.75 ratio of rice to water (by volume). So, for 1 cup of rice, you’d add 1.5 to 1.75 cups of water.
- Brown Rice Needs More Water: Brown rice generally requires more water. A common ratio for brown rice is 1 cup of rice to 2 to 2.5 cups of water.
Always check your rice cooker manual: This is the best resource. Different rice cooker models and heating technologies can influence the ideal water ratio. Your manual will provide specific recommendations for the types of rice your cooker is designed to handle.
Consider the rice type: If you’re using a different type of rice, like basmati or jasmine, you might need slightly less water than for standard long-grain white rice. For sushi rice, a 1:1 ratio is often used. Experimentation might be needed!
Step 5: Add Optional Seasonings
While not essential for basic rice cooking, this is a great time to add flavor if you desire.
Flavor Boosters
- Salt: A pinch of salt enhances the natural flavor of the rice.
- Butter or Oil: A tablespoon of butter or oil can add richness and help prevent sticking.
- Broth or Stock: For extra savory rice, replace some or all of the water with low-sodium chicken, vegetable, or beef broth.
- Aromatics: A clove of garlic, a slice of ginger, or a bay leaf can infuse subtle flavors into the rice.
How to add: Simply add your chosen seasonings directly into the pot with the rice and water before cooking.
Step 6: Close the Lid and Cook
Once everything is in the pot, it’s time to let the magic happen. Your rice cooker is designed to do all the work from here.
Starting the Cook Cycle
- Ensure the inner pot is clean and dry on the outside. Place it back into the rice cooker base.
- Close the lid securely. Most rice cookers have a locking mechanism or a distinct “click” when the lid is properly closed.
- Select the appropriate cooking setting. For most white rice, the “Cook” or “White Rice” setting is standard. If you’re cooking brown rice, select the “Brown Rice” setting if your cooker has one, as it typically adjusts cooking time and temperature for this denser grain.
- Press the start button.
What happens next: The rice cooker will heat the water and rice. It monitors the temperature and moisture levels. When the water is absorbed and the rice reaches the correct temperature, it will automatically switch to “Keep Warm” mode.
Resist the urge to peek! Opening the lid during the cooking cycle releases steam and heat, which can disrupt the cooking process and lead to unevenly cooked rice.
Step 7: Let the Rice Rest
This is another crucial step that many people overlook, but it makes a significant difference in the final texture of your rice.
The Resting Period
- Once the rice cooker switches to “Keep Warm,” do not open the lid immediately.
- Let the rice rest (steam) in the pot for 10-15 minutes. This allows the moisture to redistribute evenly throughout the rice grains, ensuring every grain is perfectly cooked and fluffy.
Why rest? Imagine it like letting a cake cool before slicing. The residual heat and steam continue to work their magic, finishing the cooking process gently. This step prevents a watery bottom and dry top.
Step 8: Fluff the Rice
The final step before serving is to fluff the rice. This separates the grains and makes it light and airy.
Fluffing Technique
- Open the lid after the resting period. You’ll see steam escape.
- Use a rice paddle or fork. Gently fluff the rice by lifting and separating the grains from the bottom of the pot upwards.
- Be gentle. You don’t want to mash the rice. The goal is to loosen it up.
Your perfectly cooked rice is now ready to be served!
Troubleshooting Common Rice Cooker Problems
Even with a rice cooker, sometimes things don’t go perfectly. Here are a few common issues and how to fix them:
Rice is too Wet or Mushy
Possible causes:
- Too much water was used.
- The rice was not rinsed properly, leaving too much starch.
- The lid was opened too many times during cooking.
How to fix:
- If the rice is still very wet, spread it on a baking sheet and let it air dry for a short while, or place it back in the rice cooker on the “Keep Warm” setting for a few minutes with the lid slightly ajar to allow excess moisture to evaporate.
- For future batches, reduce the water by 1-2 tablespoons per cup of rice or rinse the rice more thoroughly.
Rice is Dry and Undercooked
Possible causes:
- Not enough water was used.
- The lid was not sealed properly, allowing steam to escape.
- The rice cooker is malfunctioning.
How to fix:
- Add a couple of tablespoons of hot water to the rice, stir gently, close the lid, and let it cook on the “Keep Warm” setting for another 10-15 minutes.
- For future batches, add a little more water (1-2 tablespoons per cup of rice). Ensure the lid is sealed properly and don’t open it during cooking.
Rice is Burnt on the Bottom
Possible causes:
- Too little water was used, causing the bottom layer to scorch.
- The “Cook” cycle ran for too long without enough moisture.
- The heating element or pot might be faulty.
How to fix:
- Carefully scrape off the burnt portion. The rest of the rice may still be edible.
- For future batches, ensure you’re using the correct water ratio and that the rice cooker is functioning properly.
Conclusion
Congratulations! You’ve successfully learned how to cook rice in a rice cooker, step by step. From rinsing away excess starch to the crucial resting period, each stage plays a vital role in achieving that perfect fluffy texture. Your rice cooker is an incredibly simple yet powerful tool, and by following these guidelines, you can confidently produce delicious, perfectly cooked rice every single time. Say goodbye to rice-related kitchen stress and hello to a world of effortless, consistent results. Enjoy your perfectly cooked rice!