
Discover how to effectively remove mold from your electric kettle with easy-to-follow steps. This guide will walk you through safe and efficient cleaning methods to ensure your kettle is hygienic and ready for brewing. Restore your kettle’s cleanliness and enjoy healthier hot beverages by following these simple instructions.
How to Get Rid of Mold in Electric Kettle
An electric kettle is a staple in many kitchens, making it incredibly easy to boil water for your morning coffee, evening tea, or a quick cup of soup. But what happens when you notice a fuzzy, greenish-black or gray growth inside? Mold in your electric kettle is not only unsightly but can also pose a health risk. The good news is that getting rid of it is usually a straightforward process. This comprehensive guide will walk you through everything you need to know to safely and effectively clean your electric kettle and prevent mold from returning.
Key Takeaways
- Identify the Mold: Recognize the signs of mold, such as fuzzy patches or musty odors, to address the issue promptly.
- Safety First: Always unplug your electric kettle before cleaning to prevent electric shock.
- Gentle Cleaning Agents: Utilize natural and safe cleaning solutions like white vinegar or baking soda, avoiding harsh chemicals that could damage the kettle or contaminate your water.
- Thorough Rinsing: Ensure all cleaning residue is completely rinsed away to prevent any lingering taste or smell in your boiled water.
- Drying is Crucial: Properly dry all parts of the kettle after cleaning to prevent mold from returning.
- Regular Maintenance Prevents Mold: Establish a routine cleaning schedule to keep your electric kettle mold-free and functioning optimally.
Why Does Mold Grow in Electric Kettles?
Before we dive into the cleaning process, it’s helpful to understand why mold might appear in your kettle in the first place. Mold thrives in damp, dark environments with a food source. In an electric kettle, the conditions are often perfect for mold growth:
- Moisture: Water is obviously present, and residual moisture after boiling or rinsing can create the damp environment mold loves.
- Organic Matter: Tiny food particles, mineral deposits (limescale), or even dust can serve as a food source for mold.
- Lack of Airflow: Kettles, especially when left with the lid closed, don’t always get adequate airflow, which helps keep things dry.
- Infrequent Cleaning: If your kettle isn’t cleaned regularly, these conditions can persist, giving mold the chance to take hold.
Identifying Mold in Your Electric Kettle
Mold can manifest in various ways. You might notice:
- Visible fuzzy patches: These can be black, green, gray, or even white.
- Discoloration: Stains on the interior surfaces that don’t seem to be limescale.
- Musty or earthy odor: Even if you don’t see it, a peculiar smell when you open the kettle or boil water can be a telltale sign.
- Slimy residue: A slippery or sticky film on the inside surfaces.
If you spot any of these signs, it’s time to take action.
Safety First: Unplug Your Kettle!
This cannot be stressed enough. Before you begin any cleaning process, **always unplug your electric kettle from the power outlet**. This is crucial for your safety to prevent any risk of electric shock.
Step-by-Step Guide to Removing Mold
Here’s how to get your electric kettle sparkling clean again:
Step 1: Empty and Inspect
Start by emptying any water from the kettle. Give it a quick visual inspection to assess the extent of the mold growth.
Step 2: Prepare Your Cleaning Solution
You have several safe and effective options for your cleaning solution. Avoid using harsh chemicals like bleach, as these can be difficult to rinse out completely and can leave harmful residues.
Option A: White Vinegar (The Most Popular Choice)
White vinegar is a natural disinfectant and a fantastic descaler. Its acidity helps to break down mold and limescale.
Option B: Baking Soda Paste
Baking soda is a mild abrasive and a deodorizer, which can be effective for scrubbing away mold.
Option C: Lemon Juice
Lemon juice is another natural acidic cleaner that can help kill mold and leave a fresh scent.
Step 3: Cleaning the Interior
This is where the magic happens. Choose one of the solutions above and follow these steps.
Using White Vinegar:
This is often the most effective method for both mold and limescale removal.
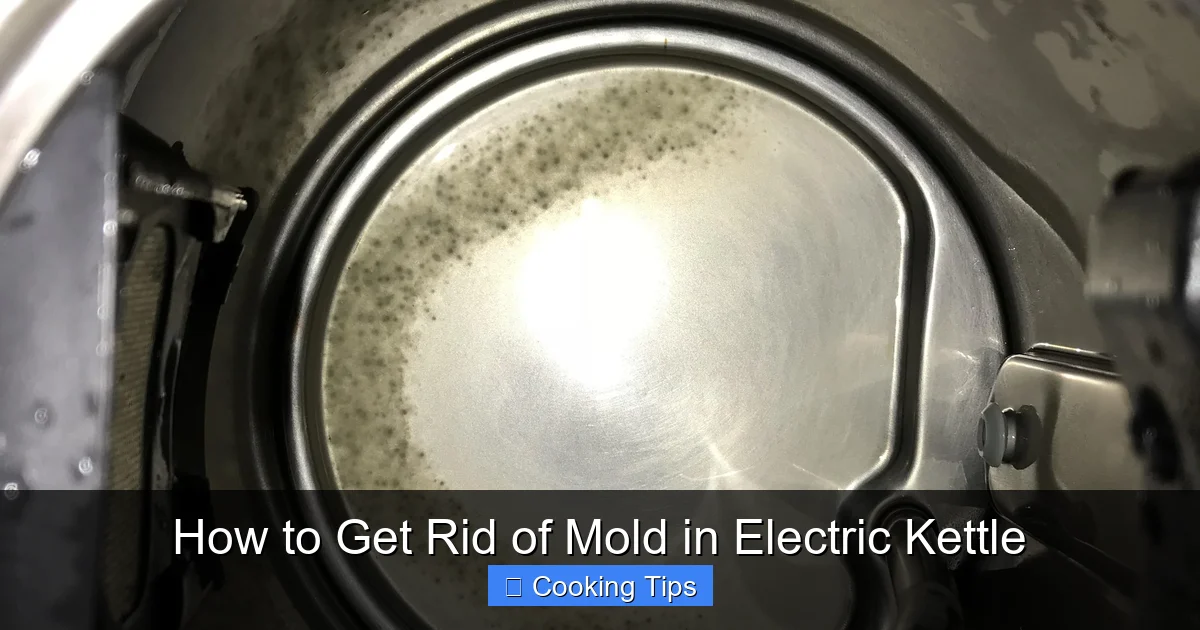
Visual guide about How to Get Rid of Mold in Electric Kettle
Image source: i.redd.it
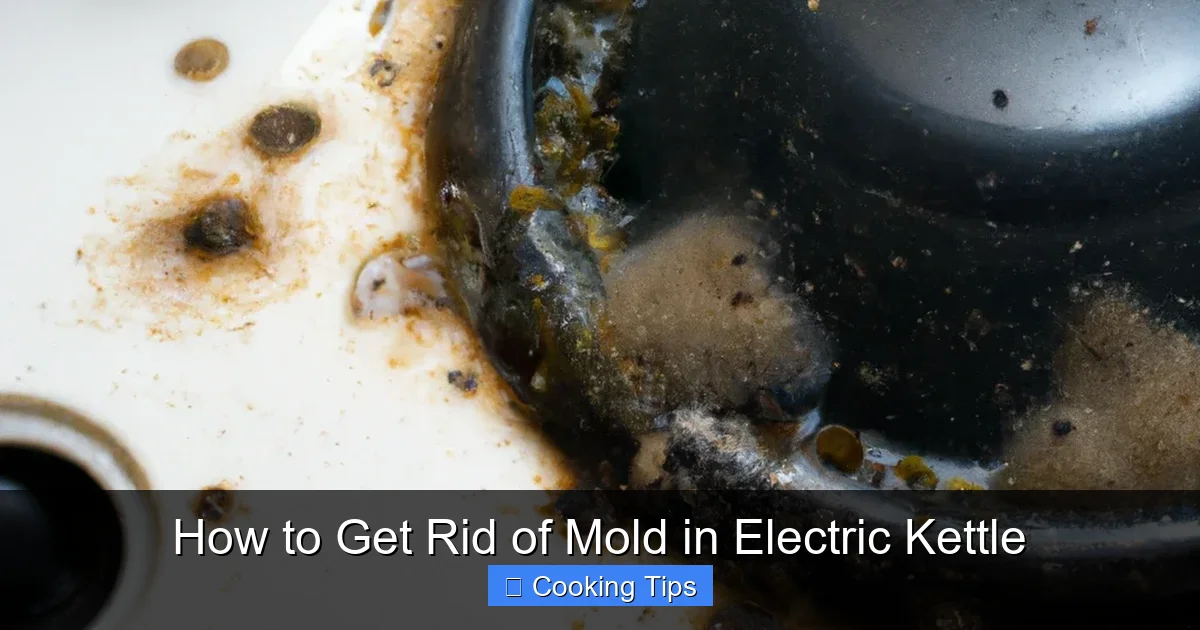
Visual guide about How to Get Rid of Mold in Electric Kettle
Image source: lilyhealth.co.uk
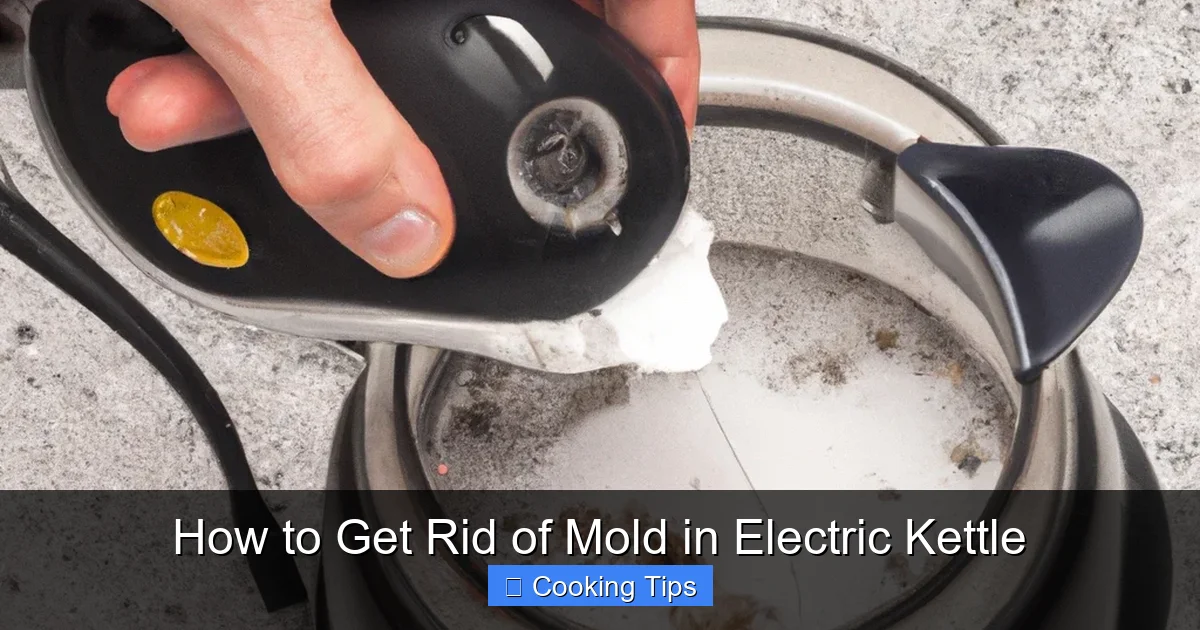
Visual guide about How to Get Rid of Mold in Electric Kettle
Image source: lilyhealth.co.uk
- Mix the solution: Fill your kettle about halfway with equal parts white vinegar and water. For a heavily molded kettle, you might opt for a stronger vinegar-to-water ratio, like 2 parts vinegar to 1 part water.
- Boil the solution: Place the kettle back on its base (make sure the exterior is dry if it got wet) and boil the mixture.
- Let it soak: Once it boils, turn off the kettle (or let it boil and then unplug it). Let the vinegar-water solution sit inside the kettle for at least 1-2 hours, or even overnight if the mold is stubborn. This allows the vinegar to work its magic on the mold and any limescale.
- Scrub if needed: After soaking, carefully pour out the vinegar solution. Use a soft-bristled brush or a non-abrasive sponge to gently scrub any remaining moldy areas. You might be surprised how easily it comes off after soaking.
Using Baking Soda:
This method is great if you want to avoid the strong smell of vinegar or if you have minor mold issues.
- Create a paste: Mix baking soda with a small amount of water to form a thick paste.
- Apply the paste: Use a soft cloth or sponge to apply the baking soda paste to the moldy areas inside the kettle.
- Let it sit: Allow the paste to sit on the mold for about 15-30 minutes.
- Scrub gently: Use a soft brush or sponge to gently scrub away the mold.
- Rinse thoroughly: After scrubbing, you’ll need to rinse. You can then fill the kettle with fresh water and boil it to help remove any baking soda residue.
Using Lemon Juice:
This is a good option for a pleasant scent and mild cleaning.
- Fill with water and lemon: Fill your kettle with about 2 cups of water and the juice of half a lemon (or about 2 tablespoons of bottled lemon juice).
- Boil and soak: Boil the mixture, then unplug and let it sit for about an hour.
- Scrub and rinse: Pour out the lemon-water solution and scrub any remaining spots with a soft cloth or sponge. Rinse thoroughly.
Step 4: Rinsing is Key
Once you’ve scrubbed away the mold, it’s vital to rinse the kettle thoroughly.
- Rinse with clean water: Fill the kettle with fresh, clean water and rinse it out. Repeat this process at least 2-3 times to ensure all traces of the cleaning solution and any loosened mold are gone.
- Boil fresh water (optional but recommended): For an extra layer of assurance, fill the kettle with fresh water and boil it. Discard this water. This helps to remove any lingering odors or tastes from the cleaning agents.
Step 5: Cleaning the Exterior and Lid
Don’t forget the outside and the lid!
- Exterior: Wipe down the exterior of the kettle with a damp cloth. For stubborn marks, you can use a little mild dish soap and water. Ensure the exterior is completely dry before plugging it back in.
- Lid: The lid often collects moisture and can harbor mold too. Detach it if possible or clean it thoroughly with warm, soapy water and a soft brush. Rinse and dry it completely. Pay special attention to any crevices or seals.
Step 6: Drying and Reassembly
Thorough drying is crucial to prevent mold from returning.
- Air dry: Leave the kettle lid open and allow the interior to air dry completely. You can also turn the kettle upside down (after ensuring the exterior is dry) over a sink to help drain any residual water.
- Wipe dry: Use a clean, dry cloth to wipe down all accessible interior surfaces and the exterior.
Troubleshooting Common Issues
* Stubborn Mold Stains: If some stains persist after the initial cleaning, you can try repeating the vinegar soak or using a baking soda paste and letting it sit for a longer period. A soft brush designed for cleaning bottles can reach tight spots.
* Lingering Odors: If you still detect a faint odor after cleaning and rinsing, try boiling a fresh batch of water with a few slices of lemon or a tablespoon of vanilla extract. Discard the water afterward. Ensure the kettle is completely dry and aired out.
* Mold in Hard-to-Reach Areas: For very intricate designs or areas you can’t access with a brush, try filling the kettle with the cleaning solution and then using a long, thin implement like a chopstick (wrapped in a cloth) to gently dislodge any mold.
Preventing Mold from Returning
The best way to deal with mold is to prevent it from growing in the first place. Here are some tips for ongoing maintenance:
* Empty After Each Use: Don’t leave water sitting in the kettle overnight. Empty any leftover water after you’re done using it.
* Dry Thoroughly: Always leave the lid open after use to allow the interior to dry out completely. Wipe down the exterior.
* Regular Cleaning: Make it a habit to clean your electric kettle regularly, even if you don’t see any mold. A quick clean with vinegar or lemon juice once a month can prevent buildup.
* Address Limescale Promptly: Limescale can provide a surface for mold to cling to. Clean your kettle for limescale buildup regularly using the vinegar method.
* Store Properly: If you store your kettle for an extended period, ensure it is completely dry and kept in a well-ventilated area.
Conclusion
Seeing mold in your electric kettle can be disheartening, but it’s a manageable problem. By following these simple, safe, and effective cleaning steps, you can banish mold and ensure you’re enjoying clean, healthy, and great-tasting hot beverages every time. Remember that regular maintenance and proper drying are your best defenses against future mold growth. So, unplug your kettle, gather your supplies, and get ready to restore its pristine condition!