
Discover an accessible method for creating distilled water using a common household appliance: an electric kettle. This guide provides a step-by-step process to purify water by separating it from impurities through evaporation and condensation. Perfect for various uses where pure water is essential, this technique offers a convenient and surprisingly effective way to achieve distilled water without specialized equipment.
How to Make Distilled Water with an Electric Kettle
Are you looking for a way to create pure, distilled water right in your own kitchen? Perhaps you need it for a specific appliance, like a CPAP machine or a steam iron, or maybe you’re interested in its use in science experiments or for sensitive plants. While dedicated water distillers exist, you might be surprised to learn that you can achieve a decent amount of distilled water using a common household item: an electric kettle.
This guide will walk you through the process of making distilled water with an electric kettle. We’ll break down the science behind it, provide clear, step-by-step instructions, and offer tips to ensure you get the best results. You’ll learn what you need, how to set it up safely, and how to collect your pure water.
Key Takeaways
- Understanding Distillation: Distillation is a purification process that involves boiling water, collecting the steam, and then cooling it back into liquid form, leaving impurities behind.
- Electric Kettle as a Tool: An electric kettle is suitable for small-scale distillation due to its rapid heating and self-shutoff features, though it requires careful setup to collect the condensed steam.
- Essential Equipment: Beyond the electric kettle, you’ll need a collection vessel, a cooling mechanism, and potentially some tubing to guide the steam effectively.
- Safety First: Always prioritize safety by ensuring proper ventilation, avoiding overfilling the kettle, and handling hot components with care.
- Step-by-Step Process: The guide outlines a clear sequence of preparing the setup, boiling the water, collecting the distilled product, and proper cleanup.
- Limitations and Alternatives: Be aware of the limitations of using an electric kettle for distillation, such as yield volume and efficiency, and consider when commercial distillers might be a better choice.
What is Distilled Water and Why Make It?
Before we dive into the “how,” let’s understand the “what” and “why.” Distilled water is water that has been boiled into vapor and then condensed back into liquid in a separate container. This process removes minerals, salts, and other impurities that are naturally present in tap water. Think of it as water that has gone through a very thorough cleaning.
Why would you want distilled water?
- Appliance Longevity: Minerals in tap water can build up as scale in appliances like steam irons, humidifiers, and CPAP machines. Using distilled water prevents this buildup, extending the life of your devices and ensuring they function efficiently.
- Scientific Applications: In laboratories and for certain scientific experiments, pure water is crucial to avoid contamination that could skew results.
- Beauty and Health: Some people prefer distilled water for facial steaming, homemade skincare products, or even for drinking if they have specific health concerns.
- Plant Care: Certain sensitive plants, like carnivorous plants or orchids, thrive better with distilled water as they are not accustomed to the mineral content in tap water.
Making your own distilled water with an electric kettle is a resourceful way to get this pure water when you need it, without the ongoing cost of purchasing bottled distilled water.
The Science Behind the Method
Visual guide about How to Make Distilled Water with an Electric Kettle
Image source: irrorwxhiqijjr5q.ldycdn.com
The principle behind making distilled water is simple: evaporation and condensation.
1. Evaporation: When you heat water, it turns into steam (water vapor). Impurities like minerals, salts, and most microorganisms do not evaporate with the water. They are left behind in the original container.
2. Condensation: This steam rises. If you can capture this steam and cool it down, it will turn back into liquid water, but this time, it will be pure water, free from the original impurities.
An electric kettle is excellent for the evaporation part because it heats water efficiently and quickly. The challenge lies in effectively capturing and condensing the steam.
What You’ll Need

Visual guide about How to Make Distilled Water with an Electric Kettle
Image source: images.pexels.com
To make distilled water with an electric kettle, you’ll need a few key items:
- Electric Kettle: Your primary tool. A standard electric kettle will work.
- A Larger Pot or Bowl: This needs to be large enough to sit around the spout of your kettle and act as a collection vessel for the distilled water. It should be heat-resistant.
- A Smaller, Heat-Resistant Collection Container: This will sit inside the larger pot or bowl to catch the condensed steam. It needs to be shorter than the walls of the larger pot. Glass or ceramic bowls work well.
- Ice or Cold Water: To help cool the steam and speed up condensation.
- Tongs or Oven Mitts: For handling hot items.
- Optional: Tubing (Food-Grade Silicone): If you want to be more precise in guiding the steam.
- Water Source: Tap water is fine to start with.
Step-by-Step Guide to Making Distilled Water
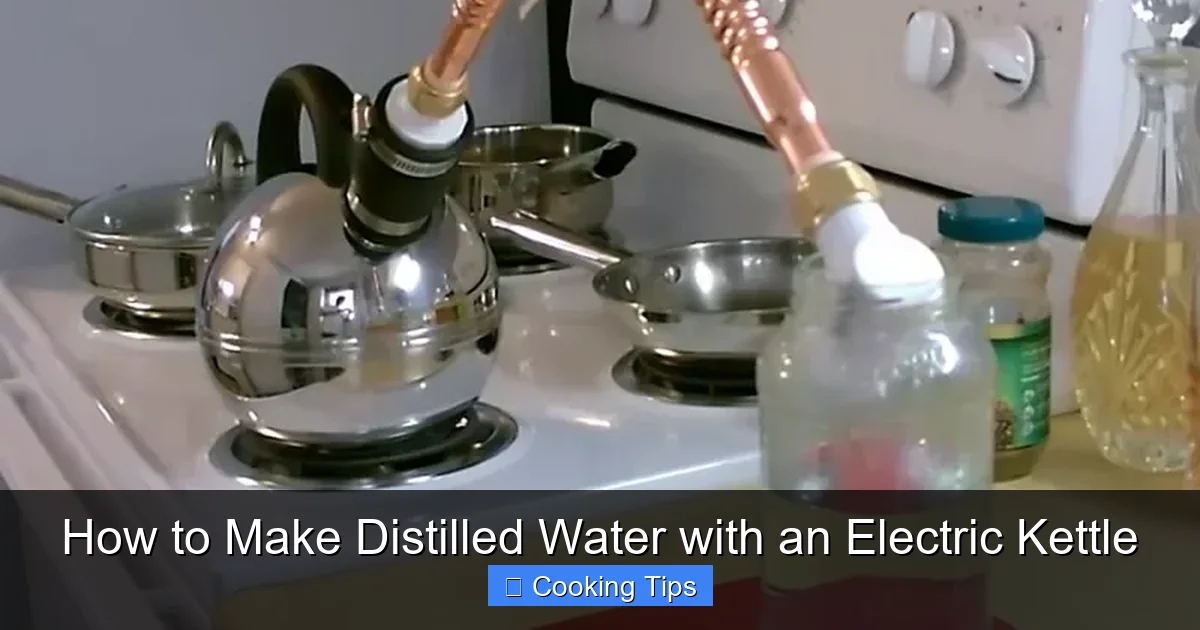
Visual guide about How to Make Distilled Water with an Electric Kettle
Image source: simplecleaningtips.com
Let’s get started! This process involves a bit of careful setup to ensure safety and efficiency.
Step 1: Prepare Your Setup
This is where you assemble the components to capture the steam.
1.1 Place the Kettle
Place your electric kettle on a stable, heat-resistant surface. Ensure it’s near an electrical outlet.
1.2 Position the Collection Vessels
This is the crucial part. You need to create a system where steam from the kettle can be directed into a cooler area where it condenses.
* **Method A: Using a Large Pot and Small Bowl:**
* Place the larger pot or bowl on a stable surface.
* Carefully place the smaller collection container (e.g., a glass bowl or ceramic ramekin) inside the larger pot. The top rim of the small container should be *below* the rim of the larger pot. You don’t want water from the condensation process to drip back into the kettle.
* Place your electric kettle so that its spout can direct steam towards the opening of the small collection container. You might need to prop the kettle slightly or position it carefully.
* **Method B: Using Tubing (More Advanced)**
* If you have food-grade silicone tubing, you can attach one end securely to the kettle’s spout.
* Position the other end of the tubing so it leads into your smaller collection container. This container should be placed within a larger, cooled vessel.
1.3 Add Water to the Kettle
Fill your electric kettle with the water you want to distill. Do not overfill it. Leave enough space for boiling and to prevent water from splashing into the collection system. About two-thirds full is usually a good amount.
1.4 Cool the Collection Area
This step significantly improves efficiency.
* Fill the larger pot (the outer one) with ice or very cold water. This creates a cold surface that will encourage the steam to condense quickly when it comes into contact. Make sure the water level in the outer pot is *not* so high that it could seep into the inner collection container.
Step 2: Start the Distillation Process
Now, it’s time to let the magic happen.
2.1 Turn on the Kettle
Plug in your electric kettle and turn it on. It will begin to heat the water.
2.2 Monitor Steam Production
As the water heats up, it will start to produce steam. You’ll see it coming out of the kettle’s spout.
2.3 Guide the Steam (If Necessary)
If you’re not using tubing, you might need to gently adjust the kettle’s position to direct the steam towards the opening of your smaller collection container. Be very careful as the kettle and steam are hot.
2.4 Condensation Begins
The hot steam will rise and come into contact with the cooler air and the sides of the collection area. As it cools, it will turn back into liquid water – your distilled water. This condensed water will drip from the cooler surfaces into your smaller collection container.
2.5 Replenish Ice (If Needed)
As the ice melts or the cold water warms up, the condensation process might slow down. If you notice this, carefully add more ice or cold water to the outer pot to maintain a low temperature.
Step 3: Collect the Distilled Water
The process can take some time, depending on the size of your kettle and the efficiency of your setup.
3.1 Observe the Collection
You’ll see water accumulating in your smaller collection container. This is your distilled water.
3.2 Kettle Auto Shut-Off
Most electric kettles have an auto shut-off feature that turns them off when the water boils. Once your kettle turns off, the steam production will stop.
3.3 Let it Cool Slightly
Before attempting to remove anything, allow the entire setup to cool down for a few minutes. The kettle, the collection vessels, and the condensed water will be very hot.
Step 4: Harvest and Store Your Distilled Water
Once cooled, you can carefully collect your prize.
4.1 Carefully Remove Components
Using tongs or oven mitts, carefully remove the inner collection container with the distilled water. Be mindful of any residual hot water in the outer pot.
4.2 Pour and Store
Pour your collected distilled water into a clean, airtight container. Glass or food-grade plastic bottles are ideal. Label the container clearly as “Distilled Water.”
4.3 Dispose of Remaining Water
The water left in the electric kettle will contain all the impurities. Dispose of this water safely.
Practical Tips for Success
* Ventilation is Key: Always perform this process in a well-ventilated area. While you’re not burning anything, steam can humidify a room quickly, and you want to avoid inhaling concentrated steam for extended periods.
* Patience is a Virtue: Making distilled water this way is not instantaneous. The yield might be small, but it’s a rewarding process. Don’t expect large quantities quickly.
* Cleanliness Matters: Ensure all your collection vessels are thoroughly cleaned and rinsed before use to avoid introducing contaminants into your distilled water.
* Experiment with Setup: You might need to try a few different arrangements of your pots and bowls to find what works best for directing steam without losing too much.
* Consider the Kettle Size: Larger kettles will produce more steam, potentially leading to a higher yield, but also require larger collection vessels.
Troubleshooting Common Issues
* Low Yield:
* Problem: Not much water is collecting.
* Solution: Ensure your cooling mechanism (ice/cold water) is sufficient and that steam is being effectively directed into the collection area. Check for steam leaks around the kettle spout. You might also need to run the kettle for a longer period if it has a manual shut-off or if you need to restart it.
* Water Dripping Back:
* Problem: Water from the condensation is dripping back into the kettle or onto the collection vessel’s rim, not into the collection container.
* Solution: Adjust the angle of your setup. Ensure the collection container is lower than the condensation point. For tubing, ensure it’s angled downwards towards the collection vessel.
* Kettle Overheating or Not Shutting Off:
* Problem: The kettle seems to be running too hot or not switching off automatically.
* Solution: This is a safety concern. If your kettle is malfunctioning, do not use it for this purpose. Always supervise the process. Never leave a boiling kettle unattended.
Limitations of the Electric Kettle Method
While this method is accessible and can produce distilled water, it’s important to understand its limitations:
* Volume: You’ll likely only be able to produce small amounts of distilled water at a time. This is not suitable for large-scale needs.
* Efficiency: Compared to commercial distillers, this method is less efficient in terms of water produced per unit of energy.
* Purity: While it removes many impurities, it might not achieve the same level of absolute purity as a high-end commercial distiller. For critical scientific or medical applications, a dedicated distiller is recommended.
* Safety: Managing hot steam and components requires constant vigilance.
Conclusion
Making distilled water with an electric kettle is a practical and achievable DIY project. By understanding the basic principles of distillation and carefully setting up your equipment, you can produce pure water for various household needs. Remember to always prioritize safety, be patient, and enjoy the satisfaction of creating your own distilled water!