
Replacing food processor blades is a straightforward process that ensures your appliance continues to function effectively. This guide provides step-by-step instructions, safety precautions, and helpful tips for a smooth blade replacement. By following these easy steps, you can extend the life of your food processor and enjoy perfectly processed ingredients every time.
How to Replace Food Processor Blades
Your food processor is a kitchen workhorse, effortlessly tackling tasks from chopping vegetables to pureeing sauces. But like any hardworking tool, its blades can eventually become dull, damaged, or even lost. Don’t let this culinary companion gather dust! Replacing food processor blades is a surprisingly simple DIY task that can revive your appliance’s performance and save you money on buying a new one. This comprehensive guide will walk you through every step, ensuring you can safely and effectively replace your food processor blades.
Key Takeaways
- Identify the correct replacement blade: Always ensure you have the exact blade model for your specific food processor to guarantee proper fit and function.
- Prioritize safety: Disconnect the appliance from the power source and handle blades with extreme caution due to their sharpness.
- Consult your manual: Your food processor’s instruction manual is the best resource for specific disassembly and reassembly instructions.
- Clean thoroughly: While replacing the blades, take the opportunity to thoroughly clean the bowl, lid, and other removable parts.
- Proper reassembly is crucial: Ensure all parts are correctly aligned and secured to prevent accidents and ensure efficient operation.
- Test after replacement: Always perform a brief test run with a small amount of food to confirm the new blades are working correctly.
Why Replace Your Food Processor Blades?
Over time, the sharp edges of your food processor blades can dull from regular use. This leads to less efficient processing, uneven results, and can even strain your appliance’s motor. You might notice your food processor struggling to chop or blend ingredients as it once did. Other reasons for replacement include accidental damage, such as a bent or broken blade, or even losing a blade during cleaning. Replacing the blades is a cost-effective solution that restores your food processor to its former glory.
Before You Begin: What You’ll Need
Before diving into the blade replacement process, gather a few essential items:
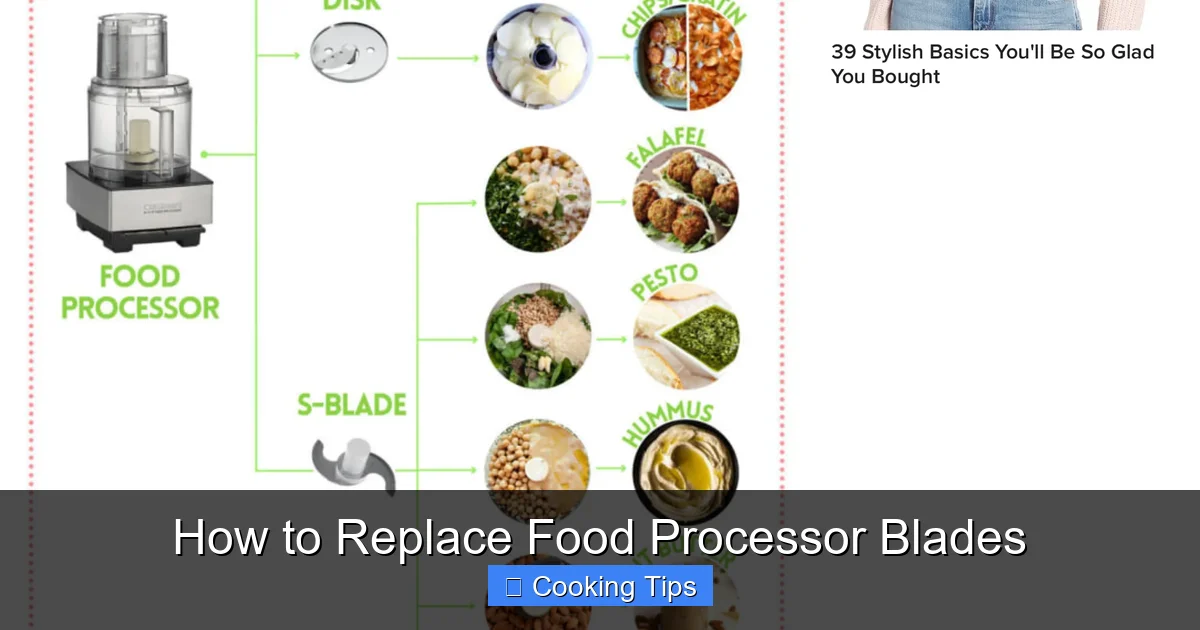
Visual guide about How to Replace Food Processor Blades
Image source: i.pinimg.com
- Replacement Blades: This is the most crucial item! Ensure you have the correct replacement blade for your specific food processor model. Refer to your appliance’s manual or the manufacturer’s website for part numbers.
- Dish Soap and Water: For cleaning disassembled parts.
- A Soft Cloth or Sponge: For gentle cleaning.
- Your Food Processor’s Manual: This is invaluable for model-specific instructions.
- A Stable Work Surface: A clean, flat area to work on.
- A Small Brush (Optional): To clean nooks and crannies.
Step-by-Step Guide to Replacing Food Processor Blades
Replacing your food processor blades is a straightforward process if you follow these steps carefully. Always prioritize safety and consult your appliance’s manual if you encounter any difficulties.
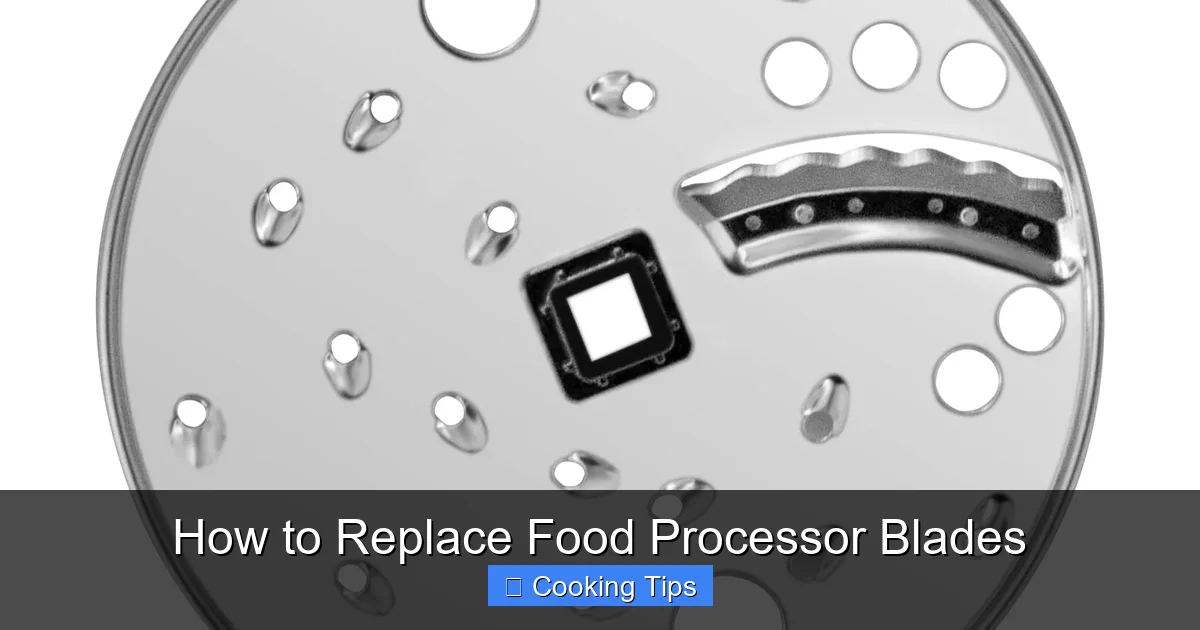
Visual guide about How to Replace Food Processor Blades
Image source: m.media-amazon.com
Step 1: Ensure Safety First – Disconnect Power
This is the absolute first and most important step. Before you even think about touching the blades or disassembling your food processor, make sure it is completely disconnected from its power source. Unplug the appliance from the wall outlet. Never attempt to replace blades while the unit is plugged in, as this poses a serious risk of electric shock or accidental activation.
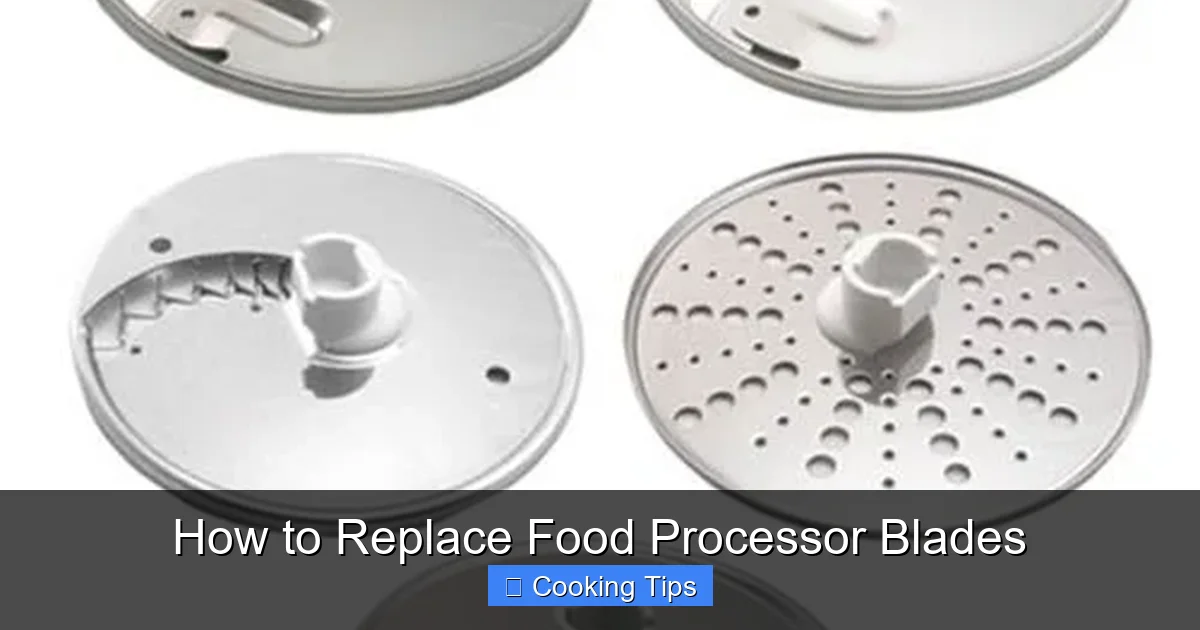
Visual guide about How to Replace Food Processor Blades
Image source: m.media-amazon.com
Step 2: Disassemble the Food Processor Bowl
Most food processors consist of a base unit, a bowl, a lid, and the blade assembly. You’ll need to separate these components.
Remove the Lid
Gently lift the lid off the food processor bowl. Some lids may have latches or locking mechanisms; consult your manual if you’re unsure how to release them.
Remove the Blade Assembly
This is where you’ll encounter the sharp blades. Handle the blade assembly with extreme care. It usually lifts directly out of the bowl. In some models, the blade might be attached to a central spindle that you’ll need to unscrew or detach. If there’s a locking ring or nut at the base of the spindle, you may need to twist it counter-clockwise to loosen and remove the blade. Always grip the central part of the blade assembly, avoiding contact with the sharp edges.
Remove the Bowl
Once the lid and blade assembly are out of the way, the bowl should lift easily from the base. Place the bowl on your clean work surface.
Step 3: Clean the Bowl and Related Parts
While you have everything disassembled, it’s the perfect opportunity to give your food processor’s bowl, lid, and any other removable parts a thorough cleaning. This not only ensures hygiene but also helps you inspect these parts for any wear or damage that might affect performance.
Wash by Hand
Use warm, soapy water and a soft cloth or sponge to gently wash the bowl and lid. Pay attention to any crevices where food particles might hide. Rinse them thoroughly and allow them to air dry completely or dry them with a clean, soft towel.
Dishwasher Safe Parts
Check your manual to see if your food processor’s bowl and lid are dishwasher safe. If they are, you can place them in the dishwasher for an easy clean. However, always be cautious when handling sharp blades, and it’s generally safer to wash them by hand.
Step 4: Identify and Prepare the New Blades
Once the old blades are removed and the bowl is clean, it’s time to introduce your new set of blades. Ensure the replacement blades you purchased are the correct ones for your model. They should look identical to the original blades in shape and size, with the correct spindle or attachment mechanism.
Inspect the New Blades
Before installation, briefly inspect the new blades for any manufacturing defects. Ensure they are clean and free of any protective packaging. Handle them by their central hub to avoid any cuts.
Step 5: Install the New Blades
Installing the new blades is essentially the reverse of removing the old ones.
Align the Blade Assembly
Carefully pick up the new blade assembly. Locate the central spindle or attachment point inside the food processor bowl. Align the blade assembly with this opening. If your blade has a specific orientation, ensure it’s positioned correctly.
Secure the Blades
Gently lower the blade assembly into the bowl. If your model uses a locking ring or nut, carefully place it over the spindle and twist it clockwise until it is securely tightened. Do not overtighten, as this can damage the components. If the blade simply slots into place, ensure it is seated firmly.
Place the Bowl Back on the Base
Carefully lift the bowl containing the newly installed blades and place it back onto the food processor base. Ensure it is properly seated and locked into place according to your model’s design.
Attach the Lid
Position the lid back onto the bowl. Make sure any latches or locking mechanisms engage correctly. The lid usually won’t allow the food processor to operate unless it’s securely in place.
Step 6: Test the New Blades
After reassembling your food processor, it’s essential to test the new blades to ensure everything is working correctly and safely.
Perform a Dry Run (Optional but Recommended)
With the bowl, lid, and blades properly secured, plug the food processor back into the power outlet. Turn the appliance on for a few seconds. Listen for any unusual noises or vibrations. If everything sounds and feels normal, turn it off.
Test with Food
Gather a small amount of a common ingredient you’d typically process, like a few carrots or a piece of bread. Place it in the bowl, secure the lid, and process as usual. Observe the results. Are the ingredients chopped or pureed effectively? Is the appliance running smoothly? This test will confirm that your new blades are installed correctly and performing as expected.
Troubleshooting Common Issues
While blade replacement is generally straightforward, you might encounter a few hiccups. Here are some common issues and how to address them:
The Blades Won’t Fit
Problem: The new blades don’t seem to fit into the bowl or attach to the spindle.
Solution: Double-check that you have the correct replacement blade model for your specific food processor. Even slight variations can prevent proper fitting. Consult your appliance’s manual to confirm the part number and installation method. Ensure there are no obstructions in the bowl or on the spindle.
The Food Processor Still Isn’t Processing Effectively
Problem: Even with new blades, the food processor struggles or produces uneven results.
Solution: Ensure the blades are correctly seated and secured. Check that the bowl and lid are properly locked into place. Sometimes, the motor itself might be nearing the end of its life, or there could be an issue with other internal components. If you’ve verified the blades are installed correctly, and the issue persists, you may need to contact the manufacturer for further assistance.
Unusual Noises or Vibrations During Operation
Problem: The food processor makes strange noises or vibrates excessively after blade replacement.
Solution: This often indicates that the blades are not properly secured or are misaligned. Power off and unplug the appliance immediately. Carefully remove the lid and check if the blade assembly is firmly in place. Ensure any locking rings or nuts are tightened correctly. If the issue persists after rechecking, there might be a defect with the new blades or a more significant issue with the appliance.
Tips for Extending Blade Life
Once you’ve successfully replaced your blades, here are some tips to keep them in optimal condition for as long as possible:
- Avoid Overloading: Don’t stuff your food processor beyond its capacity. Overloading strains the motor and can put excessive pressure on the blades.
- Cut Large Items First: If you’re processing large ingredients, cut them into smaller, more manageable pieces before placing them in the bowl.
- Use the Right Blade for the Job: Different blades are designed for different tasks. Ensure you’re using the appropriate blade for chopping, slicing, shredding, or pureeing.
- Clean Immediately After Use: Food particles can dry and become difficult to remove if left to sit. Cleaning promptly makes the job easier and prevents buildup.
- Handle with Care: Always handle blades by their central hub. Never place them directly in a drawer with other utensils where they can be damaged or cause injuries.
- Store Properly: If your food processor comes with a storage solution for the blades, use it. Otherwise, store them safely in their bowl or in a dedicated blade container.
Conclusion
Replacing your food processor blades is a simple yet impactful maintenance task. By following these detailed steps, prioritizing safety, and ensuring you have the correct replacement parts, you can easily restore your appliance’s efficiency and continue enjoying its many culinary benefits. Don’t underestimate the power of sharp blades – they are the heart of your food processor’s performance. With a little care and attention, your trusty kitchen companion will be ready to tackle all your food processing needs for years to come.