
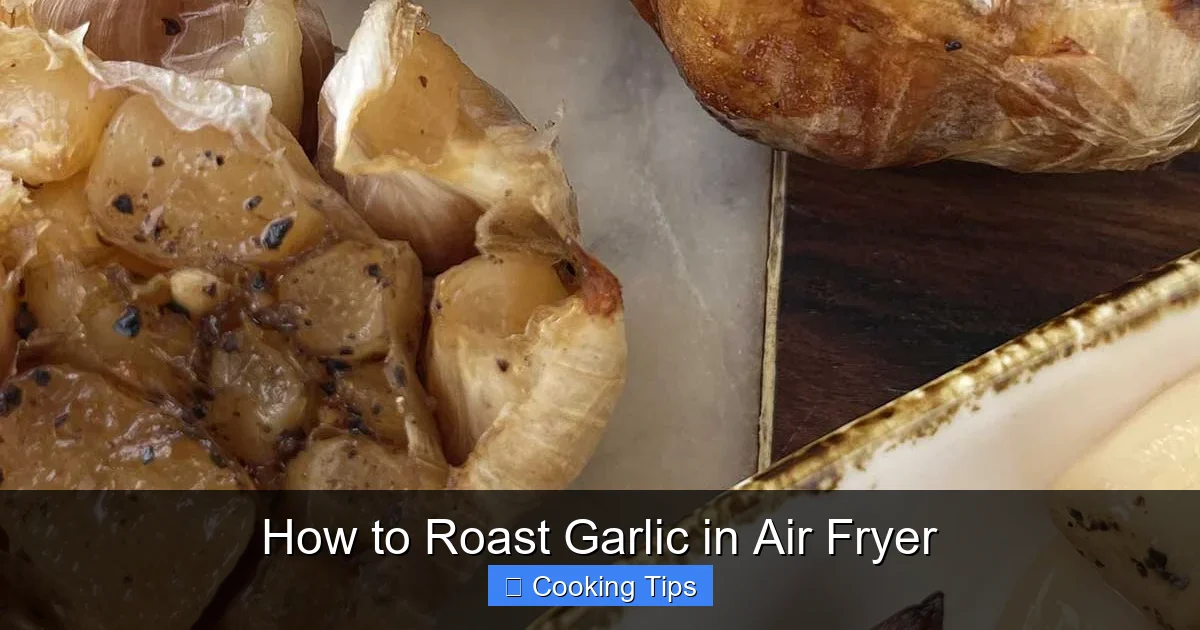
Learn how to roast garlic in your air fryer for a quick, easy, and incredibly flavorful result. This method yields sweet, spreadable garlic perfect for dips, sauces, or spreading on toast. Forget the long oven times; your air fryer is ready to deliver delicious roasted garlic in minutes!
How to Roast Garlic in Air Fryer
Garlic is a staple ingredient in kitchens around the world. Its pungent, sharp flavor can transform bland dishes into culinary masterpieces. But have you ever experienced roasted garlic? It’s a whole different ballgame! Roasted garlic is incredibly sweet, mellow, and creamy. It loses all its sharp bite and becomes a delightful, spreadable treat. Traditionally, roasting garlic involves a long stint in a conventional oven, which can take an hour or more. But what if I told you there’s a way to achieve that same delicious, creamy roasted garlic in a fraction of the time? Enter the air fryer!
In this comprehensive guide, you’ll learn how to effortlessly roast garlic using your air fryer. We’ll cover everything from selecting the right garlic to getting that perfect sweet, caramelized result. Get ready to unlock a new level of flavor for all your favorite meals. This method is so simple, you’ll wonder why you didn’t try it sooner!
Key Takeaways
- Easy and Fast: Air frying significantly reduces the roasting time compared to a traditional oven, making it a convenient option for busy cooks.
- Deliciously Sweet and Creamy: The air fryer’s hot air circulation caramelizes the garlic’s natural sugars, transforming it into a sweet, spreadable paste.
- Minimal Prep: Roasting garlic in the air fryer requires very little preparation, usually just a bit of oil and seasoning.
- Versatile Ingredient: Roasted garlic can be used in countless recipes, from enhancing savory dishes to adding depth to simple spreads and dips.
- Customizable Flavor: You can easily experiment with different herbs and spices to infuse your roasted garlic with unique flavor profiles.
- Space-Saving Solution: For smaller kitchens or when you don’t need to roast a large batch, the air fryer is a perfect alternative to a full-sized oven.
Why Roast Garlic in an Air Fryer?
Before we dive into the “how,” let’s talk about the “why.” Why choose your air fryer for roasting garlic?
- Speed: This is the biggest advantage. Instead of waiting an hour or more for your oven to do its magic, an air fryer can roast garlic in as little as 15-20 minutes. This is a game-changer when you need flavor fast.
- Convenience: Air fryers are compact and preheat quickly. For smaller households or when you only need a few heads of garlic, the air fryer is more efficient than firing up a large oven.
- Energy Efficiency: Using an air fryer can be more energy-efficient for small cooking tasks compared to a full-sized oven.
- Perfect Texture: The circulating hot air in an air fryer does a fantastic job of evenly caramelizing the garlic, resulting in a soft, creamy interior and slightly crisped edges.
- Minimal Mess: Roasting garlic in the air fryer often means less cleanup. You can often roast it right in its foil or parchment paper pouch.
Ingredients You’ll Need
The beauty of air fryer roasted garlic is its simplicity. You don’t need much to achieve incredible flavor.
- Garlic: One or more heads of fresh garlic. Choose firm, plump heads with no soft spots.
- Olive Oil: Extra virgin olive oil is perfect, but any cooking oil you prefer will work.
- Salt: Kosher salt or sea salt is ideal.
- Black Pepper (Optional): Freshly ground black pepper adds a little zing.
- Herbs (Optional): Fresh rosemary, thyme, or sage sprigs can be added for extra aromatic flavor.
Equipment You’ll Need
* **Air Fryer:** Of course!
* **Sharp Knife:** For trimming the garlic.
* **Aluminum Foil or Parchment Paper:** To wrap the garlic.
* **Small Bowl:** For mixing oil and seasonings.
* **Tongs or Spoon:** For handling the hot garlic.
Step-by-Step Guide: How to Roast Garlic in Your Air Fryer
Ready to get started? Follow these simple steps for perfectly air-fried roasted garlic.
Step 1: Prepare the Garlic
This is the most crucial step to ensure even cooking and prevent the garlic from drying out.
Trim the Garlic Head
Take a whole head of garlic. Using a sharp knife, carefully slice off the top 1/4 to 1/2 inch of the garlic head. You want to expose the tips of the individual cloves without cutting them all the way through. This will allow the heat to penetrate and the oil to reach the cloves.
Visual guide about How to Roast Garlic in Air Fryer
Image source: mybigfatgrainfreelife.com

Visual guide about How to Roast Garlic in Air Fryer
Image source: sustainablecooks.com
Visual guide about How to Roast Garlic in Air Fryer
Image source: famfoodery.com
Tip: Don’t discard the trimmed top piece! You can still use the exposed parts of the cloves. Some people prefer to leave the top on and just loosen the outer papery layers. Experiment to see what works best for you.
Loosen the Outer Layers (Optional but Recommended)
Gently peel away any loose, papery outer skin from the garlic head. Be careful not to dislodge the individual cloves. Leaving some of the skin on helps to hold the head together and prevents the cloves from falling out during cooking.
Step 2: Season the Garlic
Now it’s time to add flavor and moisture.
Drizzle with Olive Oil
Place the trimmed garlic head on a piece of aluminum foil or parchment paper. Drizzle about 1-2 teaspoons of olive oil over the exposed cloves. Make sure the oil seeps down between the cloves. You can also use a brush to gently coat the exposed surfaces.
Add Salt and Pepper
Sprinkle a pinch of salt and freshly ground black pepper (if using) over the oiled cloves. The salt helps to draw out moisture and enhance the sweetness of the garlic.
Add Herbs (Optional)
If you’re using fresh herbs like rosemary or thyme, tuck a few sprigs around the base of the garlic head or between the cloves. This will infuse the garlic with lovely aromatic notes as it roasts.
Step 3: Wrap the Garlic
This step is essential for trapping moisture and ensuring the garlic roasts rather than bakes or fries.
Create a Pouch
Gather the edges of the aluminum foil or parchment paper together to form a sealed pouch around the garlic head. Ensure it’s tightly sealed so no steam escapes. If you’re using parchment paper, you might want to place it inside a small air fryer-safe baking dish or tin foil for extra security and easier handling.
Note: While parchment paper is convenient, aluminum foil is often preferred for its sturdiness and ability to create a very tight seal, which is key for roasting.
Step 4: Air Fry the Garlic
It’s time to let the air fryer work its magic!
Preheat Your Air Fryer (Optional but Recommended)
While not always strictly necessary, preheating your air fryer can lead to more consistent results. Preheat it to 375°F (190°C) for about 3-5 minutes.
Place Garlic in the Air Fryer Basket
Carefully place the wrapped garlic pouch directly into the air fryer basket. Make sure there’s enough space around it for air to circulate.
Set the Temperature and Time
Air fry at 375°F (190°C) for 15-25 minutes. The exact time will depend on the size of your garlic head and your specific air fryer model.
How to tell if it’s done: The garlic should be very soft when squeezed through the foil. You can gently remove the pouch from the air fryer (using tongs!) and carefully poke one of the cloves with a toothpick or skewer. If it pierces easily and the garlic is creamy, it’s done.
Check for Doneness
Around the 15-minute mark, carefully open the pouch (watch out for steam!) and check the tenderness of the garlic cloves. If they are still firm, re-seal the pouch and continue air frying in 5-minute increments until they are soft and easily mashable.
Step 5: Cool and Serve
Almost there! Just a little patience needed.
Remove from Air Fryer and Let Cool
Once the garlic is tender and beautifully roasted, carefully remove the pouch from the air fryer basket. Let it cool for a few minutes. This is important because the garlic will be very hot inside the pouch.
Extract the Roasted Garlic
Once slightly cooled, open the pouch. The cloves should slide out easily with a gentle squeeze, or you can use a small fork or spoon to scoop them out. The roasted garlic will be a soft, golden-brown paste.
How to Use Your Air Fryer Roasted Garlic
The possibilities are endless! Roasted garlic is incredibly versatile.
- Spread: Mash it with butter or cream cheese for a delicious spread on toast, crackers, or baguette.
- Dips: Blend it into hummus, aioli, or a creamy salad dressing for an instant flavor boost.
- Sauces: Stir it into pasta sauces, marinades, or gravies for a richer, sweeter garlic flavor.
- Soups: Whisk it into creamy soups like potato or broccoli soup for added depth.
- Vegetables: Toss roasted garlic cloves with roasted vegetables for an extra layer of savory goodness.
- Mashed Potatoes: Mix it into your mashed potatoes for an irresistible garlicky kick.
Tips for the Best Air Fryer Roasted Garlic
* Don’t Overcrowd: If you’re roasting multiple heads of garlic, ensure there’s enough space in the air fryer basket for air to circulate around each pouch. You might need to do it in batches.
* Adjust Time for Size: Smaller garlic heads will cook faster than larger ones. Always start checking for doneness earlier.
* Experiment with Oils: While olive oil is classic, you can also try avocado oil, or even a drizzle of balsamic glaze before roasting for a different flavor profile.
* Spice it Up: Add a pinch of red pepper flakes to your oil mixture for a touch of heat.
* Keep it Moist: Make sure you’ve trimmed enough of the top off and drizzled enough oil so the cloves don’t dry out.
* Store Leftovers: Store any leftover roasted garlic in an airtight container in the refrigerator for up to a week. You can also freeze it in small portions.
Troubleshooting Common Issues
While air fryer roasted garlic is pretty foolproof, here are a few things that might come up and how to fix them:
Garlic is still too firm or raw.
Solution: This usually means it needs more time. Re-seal the pouch and continue air frying in 5-minute increments. Make sure your air fryer is set to the correct temperature (375°F / 190°C).
Garlic is burnt or dried out.
Solution: This can happen if the time is too long or the temperature is too high, or if the pouch wasn’t sealed properly and moisture escaped. For future attempts, reduce the cooking time slightly or ensure the pouch is well-sealed. If some cloves are burnt but others are fine, you can still salvage the good ones.
Cloves are falling out of the head.
Solution: Ensure you didn’t trim too much off the top. You can try to gently tuck them back in or press them together before sealing the pouch. Loosening the outer papery skin too much can also cause this. For future attempts, be gentler when removing the skin.
Conclusion
Roasting garlic in the air fryer is a revelation! It’s a quick, easy, and incredibly satisfying way to transform a common ingredient into something truly special. The sweet, mellow, spreadable garlic you get from this method is far superior to raw garlic and can elevate so many of your favorite dishes. Whether you’re a seasoned chef or just starting out in the kitchen, this air fryer roasted garlic technique is a must-try. So, grab a few heads of garlic, fire up your air fryer, and prepare to be amazed by the delicious simplicity! Enjoy your wonderfully roasted garlic!