
Learn the art of knife sharpening with a whetstone! This guide provides step-by-step instructions to achieve a razor-sharp edge on your kitchen knives, making cooking more enjoyable and efficient. With the right technique and patience, you’ll transform dull blades into precision tools.
How to Use a Whetstone to Sharpen a Kitchen Knife
Dull knives are frustrating. They make food preparation slow and can even be dangerous because they require more force, increasing the risk of slipping. Fortunately, you don’t need to be a professional chef or a blacksmith to restore your kitchen knives to their former glory. Using a whetstone is a skill that anyone can learn. In this comprehensive guide, we’ll walk you through everything you need to know to effectively use a whetstone and achieve a razor-sharp edge on your kitchen knives. Get ready to transform your cooking experience!
Key Takeaways
- Understand Whetstone Grit: Whetstones come in various grits, from coarse for repairing edges to fine for polishing, crucial for achieving the desired sharpness.
- Proper Water/Oil Soaking: Ensure your whetstone is adequately soaked in water (for water stones) or oiled (for oil stones) before use to prevent clogging and ensure smooth sharpening.
- Maintain a Consistent Angle: Holding a consistent angle (typically 15-20 degrees for most kitchen knives) is the most critical factor for effective sharpening.
- Develop a Sharpening Stroke: Learn the correct motion of moving the blade across the stone, applying even pressure, to create a sharp and durable edge.
- Sharpen Both Sides: It’s essential to sharpen both sides of the knife blade to create a symmetrical and effective cutting edge.
- Deburr the Edge: After sharpening, a burr will form, which needs to be removed through gentle stropping or light passes on a fine grit stone to reveal the true sharpness.
- Regular Maintenance: Consistent, light sharpening with a fine grit whetstone will maintain your knife’s edge, reducing the need for heavy work.
Why Sharpen Your Knives?
Before we dive into the “how,” let’s touch on the “why.” Sharpening a knife isn’t just about aesthetics; it’s about functionality and safety. A sharp knife cuts through food with ease, requiring less pressure. This means cleaner cuts, better-tasting food (as cells aren’t bruised), and a significantly reduced risk of accidental cuts. A dull knife forces you to push harder, which can cause the knife to slip and injure you.
Understanding Whetstones
Whetstones, also known as sharpening stones, are blocks of abrasive material used to sharpen blades. They come in various types and grits.
Types of Whetstones
The two most common types of whetstones for kitchen knives are:
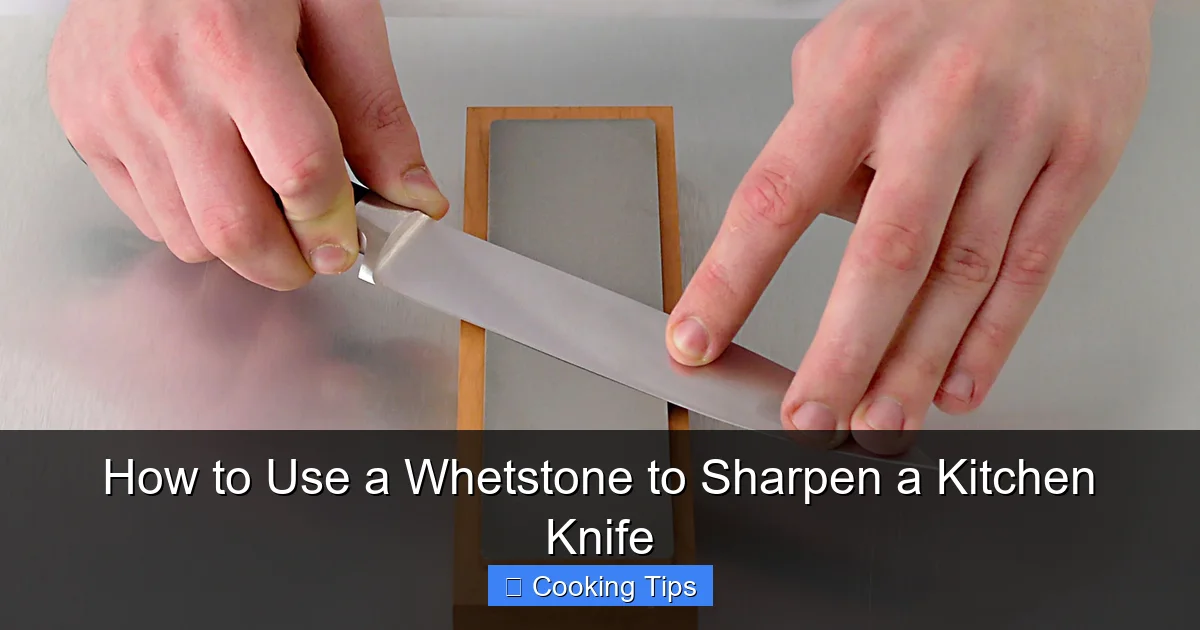
Visual guide about How to Use a Whetstone to Sharpen a Kitchen Knife
Image source: fthmb.tqn.com
- Water Stones: These are made from ceramic or synthetic materials and are designed to be used with water. They create a slurry (a paste of water and stone particles) that helps to lubricate the stone and carry away metal filings. Water stones are generally faster cutting than oil stones.
- Oil Stones: Traditionally made from Novaculite (Arkansas stones) or synthetic materials, these require oil (like honing oil or mineral oil) for lubrication. They tend to be slower cutting but can offer a very refined edge.
For most home cooks, water stones are a popular and effective choice due to their ease of use and cutting speed.
Whetstone Grit Explained
The “grit” of a whetstone refers to the size of the abrasive particles. Higher grit numbers mean finer particles and a smoother finish, while lower grit numbers mean coarser particles and more aggressive material removal.
- Coarse Grit (e.g., 200-600 grit): Used for repairing heavily damaged or very dull knives, fixing chips, or reshaping the edge. You’ll remove a lot of metal with these stones.
- Medium Grit (e.g., 800-2000 grit): This is your workhorse grit for general sharpening. It removes scratches from the coarse stone and refines the edge. Most of your sharpening will likely be done here.
- Fine Grit (e.g., 3000-8000 grit and higher): Used for polishing the edge, removing microscopic serrations, and creating a razor-sharp, smooth finish. This is where you get that “scary sharp” edge.
A common setup for home use includes a combination stone with a medium grit on one side and a fine grit on the other (e.g., 1000/6000 grit). If you have very damaged knives, you might also consider a coarse grit stone.
What You’ll Need
Before you start, gather your tools:
- Whetstone(s): Choose the grit(s) appropriate for your knives’ condition.
- Water or Honing Oil: Depending on your stone type.
- Stone Holder or Non-Slip Surface: To keep the stone stable while you work. A damp cloth can also work in a pinch.
- Your Kitchen Knife: The one that needs sharpening!
- Towel: For wiping hands and knives.
- Optional: Magnetic Angle Guide: These clip onto the spine of your knife to help you maintain a consistent angle.
Getting Started: Preparing Your Whetstone
Proper preparation of your whetstone is crucial for effective sharpening and stone longevity.
Soaking Water Stones
Most water stones need to be soaked before use. Follow these steps:
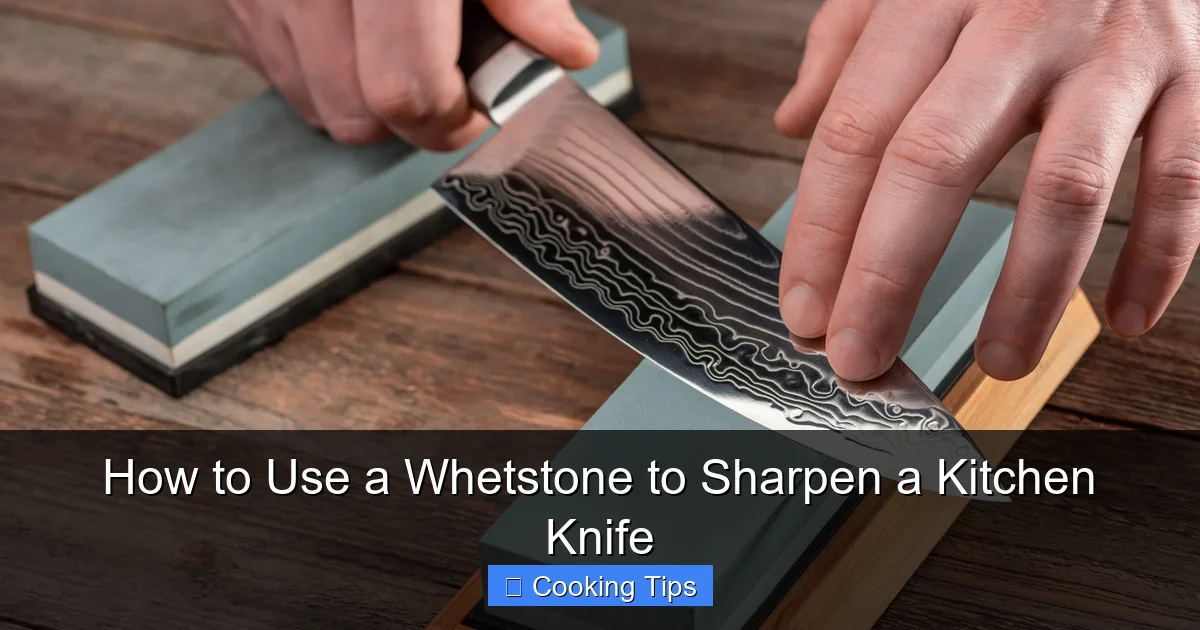
Visual guide about How to Use a Whetstone to Sharpen a Kitchen Knife
Image source: msbutcherequipment.co.uk
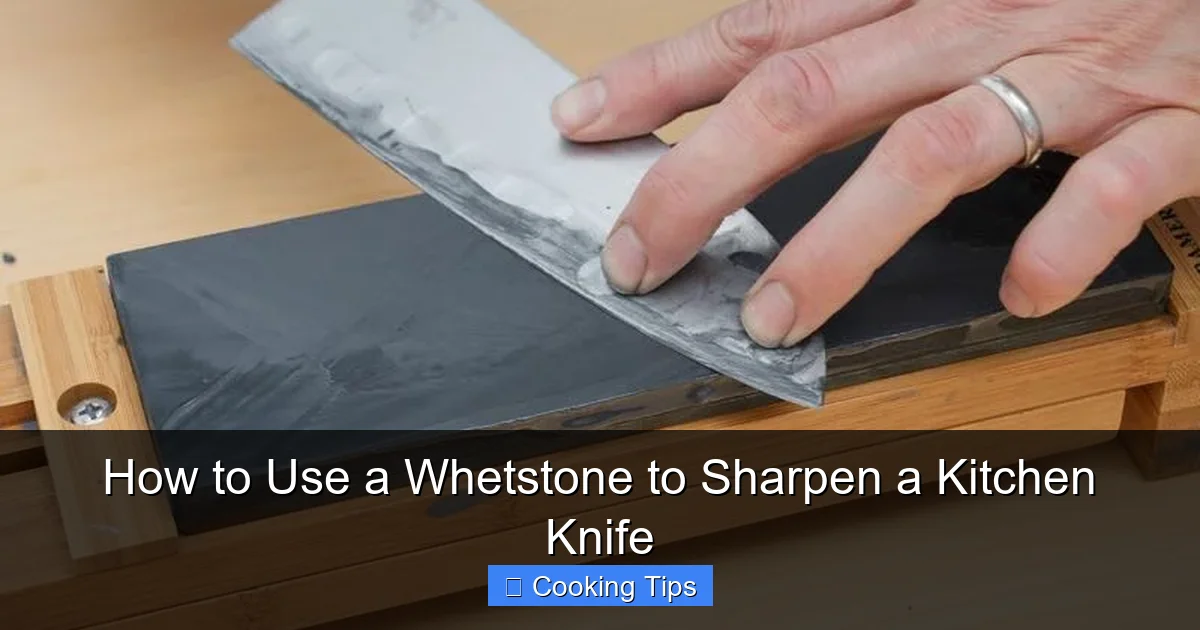
Visual guide about How to Use a Whetstone to Sharpen a Kitchen Knife
Image source: protoolreviews.com
- Fill a basin or sink with enough cool water to submerge the stone completely.
- Place the whetstone in the water. You’ll notice small bubbles rising from it. This indicates the stone is absorbing water.
- Let the stone soak until the bubbling stops. This usually takes 5-15 minutes, but check the manufacturer’s instructions as some stones may require longer soaking.
- Once soaked, remove the stone from the water. It’s ready to use. Keep a bowl of water nearby to splash onto the stone as it dries out during sharpening.
Oiling Oil Stones
If you’re using an oil stone, you’ll need honing oil or light mineral oil.
- Apply a thin, even layer of oil to the surface of the stone.
- Work the oil into the stone with your fingers or a cloth until the surface is slick.
- You may need to reapply oil periodically during sharpening if the stone begins to feel dry.
The Sharpening Process: Step-by-Step
Now for the main event! Patience and a consistent technique are key.
Step 1: Stabilize Your Whetstone
A slippery whetstone is a recipe for disaster. Place your prepared whetstone on a stable surface.
- Stone Holder: The most secure option is a dedicated whetstone holder that grips the stone firmly.
- Non-Slip Mat: Some stones come with or can be purchased with a rubber base.
- Damp Cloth: For a quick fix, fold a damp dish towel and place it flat on your counter. Lay the whetstone on top of the damp cloth. This provides enough friction to prevent it from sliding.
Ensure the stone is positioned so you have ample room to move the knife across its entire surface.
Step 2: Determine the Correct Angle
This is arguably the most critical step. Most Western-style kitchen knives have an edge angle of about 15-20 degrees per side. Japanese knives often have a sharper angle, around 10-15 degrees.
- Visual Estimation: Imagine slicing a thin layer off the top of the stone. The angle between your knife and the stone should be small. You can hold the knife flat on the stone, then lift the spine about the height of two quarters.
- Angle Guides: For beginners, magnetic angle guides that clip onto the spine of the knife are invaluable. They ensure you maintain the correct angle consistently throughout the stroke.
- The “Marker Trick”: To visually check your angle, use a permanent marker to color the very edge bevel of your knife. Sharpen a few strokes. If you’re removing the marker evenly from the apex (the very top edge), your angle is good. If the marker is only removed from the heel or tip, your angle is off.
Consistency is more important than hitting an exact number, especially when you’re starting. Aim for a consistent angle throughout the entire sharpening stroke.
Step 3: The Sharpening Stroke (Coarse/Medium Grit First)
We’ll start with the medium grit side of your stone (or your coarse grit stone if you have significant damage). Keep the stone wet by splashing water on it periodically.
Sharpening One Side
- Place the heel (the part of the blade closest to the handle) of your knife on the far end of the whetstone at your chosen angle.
- Apply light to moderate, even pressure. You want to feel the stone abrading the metal.
- With a smooth, controlled motion, push the knife forward and across the stone, as if you were trying to slice a thin layer off the stone. Imagine you’re moving the metal from the edge of the stone towards you.
- As you push forward, slide the knife sideways so that by the end of the stroke, the tip of the knife has moved across the entire width of the stone.
- Lift the knife, return to the starting position (heel on the stone), and repeat the motion. Aim for about 10-20 strokes per side to start.
- Keep your strokes fluid and consistent. Avoid sawing back and forth; it’s more of a gliding motion.
Sharpening the Other Side
- Once you’ve completed your strokes on one side, flip the knife over.
- Maintain the same angle and repeat the sharpening process on the other side of the blade.
- Aim for the same number of strokes on this side. The goal is to remove metal evenly from both sides to create a symmetrical edge.
Step 4: Check for a Burr
After sharpening both sides, you need to check for a “burr.” A burr is a tiny flap of metal that forms on the opposite side of the edge you were just sharpening. It’s a sign that you’ve sharpened all the way to the apex.
- Carefully run your fingertip *away* from the edge (never towards it!) along the length of the blade on both sides. You should feel a slight roughness or catch on one side as you move your finger. This is the burr.
- If you don’t feel a burr, continue with a few more strokes on each side, focusing on the areas where you might have missed.
Step 5: Refine the Edge (Fine Grit)
Once you have a burr along the entire length of the blade, it’s time to move to your finer grit stone. This step refines the edge and makes it much sharper.
- Prepare your fine grit stone as you did the coarser one (soak or oil).
- Repeat the sharpening process (Steps 3 and 4) on the fine grit stone. Use lighter pressure this time.
- Aim for fewer strokes – perhaps 5-10 per side. The goal here is not to remove much metal but to polish and align the very apex of the edge.
Step 6: Deburr the Edge
The burr needs to be removed to reveal the true sharpness. This is often done with lighter strokes on the fine grit stone or by moving to an even finer stone or strops.
- Light Strokes: On your finest grit stone, perform a few very light, alternating strokes on each side of the blade, maintaining your angle. The idea is to gently break off the burr.
- Stropping (Optional but Recommended): For an exceptionally sharp edge, you can use a leather strop (often loaded with a fine abrasive compound). Strop by pulling the blade *away* from the edge on the strop, alternating sides. This polishes the edge and removes any lingering burr.
Step 7: Test Your Sharpness
Time to see your hard work pay off!
- The Paper Test: Hold a sheet of paper vertically. A truly sharp knife should slice through the paper cleanly with very little pressure, without snagging or tearing.
- The Tomato Test: A sharp knife will easily bite into the skin of a ripe tomato and slice through it smoothly. A dull knife will skid across the surface or crush the tomato.
Be careful when testing! The knife should be very sharp at this point.
Step 8: Clean Up
Once you’re done, thoroughly rinse your whetstone under running water (if it’s a water stone) to remove any metal filings and slurry. Let it air dry completely before storing it. Clean your knife with soap and water, dry it thoroughly, and store it safely.
Tips for Success
- Start Slow: Don’t rush the process. Take your time with each step.
- Consistency is King: Maintaining a consistent angle is more important than the exact angle itself.
- Listen to the Stone: You should hear a consistent, subtle “hissing” or “grinding” sound as you sharpen. If it’s too loud or inconsistent, your angle might be off.
- Use Light Pressure: Excessive force can damage the stone, the knife edge, and make it harder to maintain your angle.
- Don’t Sharpen Every Knife: Focus on your most-used knives first.
- Practice Makes Perfect: Your first few attempts might not be perfect, but with practice, you’ll get faster and achieve better results.
- Consider a Ceramic Rod: A ceramic honing rod is excellent for *maintaining* an edge between sharpenings but does not remove significant metal like a whetstone.
Troubleshooting Common Issues
- No Burr Forming: You’re likely not sharpening long enough on one side, or your angle is inconsistent. Ensure you are getting to the very apex of the edge.
- Edge Feels Rough After Sharpening: You may not have refined the edge enough on your fine grit stone, or you haven’t properly deburred. Ensure your final strokes are light and alternating.
- Knife Still Feels Dull: You might need to start with a coarser grit stone if the knife is very dull or chipped. Also, double-check that you’re maintaining your angle throughout the stroke.
- Stone Clogging: If using a water stone, ensure it’s adequately soaked. If using an oil stone, make sure there’s enough oil. For water stones, splashing more water on the surface during sharpening helps create the slurry.
Conclusion
Sharpening your kitchen knives with a whetstone is a rewarding skill that will elevate your culinary experience. It takes a little practice, but by following these steps and focusing on maintaining a consistent angle, you’ll soon be enjoying the effortless glide of a razor-sharp blade through your ingredients. So, embrace the process, be patient, and enjoy the satisfaction of a perfectly sharpened knife!