
Keep your kitchen safe and your appliances running smoothly by learning how to inspect the plug and cord for wear or damage. This guide provides simple, step-by-step instructions to identify common issues like frayed wires, cracked insulation, and damaged prongs. Regular inspection is crucial for preventing electrical hazards and extending the life of your cooking appliances.
Welcome to a crucial aspect of kitchen safety! In our kitchens, we rely on a variety of electrical appliances to create delicious meals. From blenders and toasters to stand mixers and electric kettles, these tools make our cooking lives easier. However, with frequent use, the cords and plugs that power them can unfortunately suffer wear and tear. Ignoring this can lead to serious safety risks, including electrical shocks and fires. This guide will walk you through exactly how to inspect the plug and cord for wear or damage, ensuring your kitchen remains a safe and functional space. You’ll learn what to look for, how to identify potential problems, and what steps to take if you find any issues.
Key Takeaways
- Regular visual checks are your first line of defense against electrical hazards.
- Pay close attention to the entire length of the cord, not just the ends.
- Look for any signs of exposed wires, frayed insulation, or cuts on the cord.
- Examine the plug itself for bent, broken, or discolored prongs.
- Check the point where the cord meets the plug and the appliance for strain or damage.
- Immediately discontinue use and consider replacement if any damage is found.
Why Inspecting Plugs and Cords Matters
Before we dive into the “how-to,” let’s quickly touch on “why.” Electrical cords are more than just simple wires; they are the lifeline for your appliances. The insulation around the wires protects you from direct contact with electricity. The plug allows for a safe connection to the power source. When this system is compromised, the risk of electrical accidents skyrockets. Frayed cords can expose live wires, leading to shocks. Damaged plugs might not make proper contact, causing sparks or overheating. By regularly inspecting the plug and cord for wear or damage, you are actively preventing these dangerous scenarios and protecting yourself, your family, and your home. It’s a simple habit that can have a profound impact on safety.
Step-by-Step Inspection Process
Inspecting your appliance plugs and cords is a straightforward process that doesn’t require any special tools. All you need is a good light source and a few minutes of your time for each appliance.
Step 1: Safety First – Unplug the Appliance
This is the absolute most important first step. Never, ever inspect a cord or plug while it is connected to a power outlet.
Why it’s crucial:
Electricity is invisible and can be dangerous. Inspecting a live cord is asking for trouble. Always ensure the appliance is completely disconnected from the wall socket before you begin any inspection.
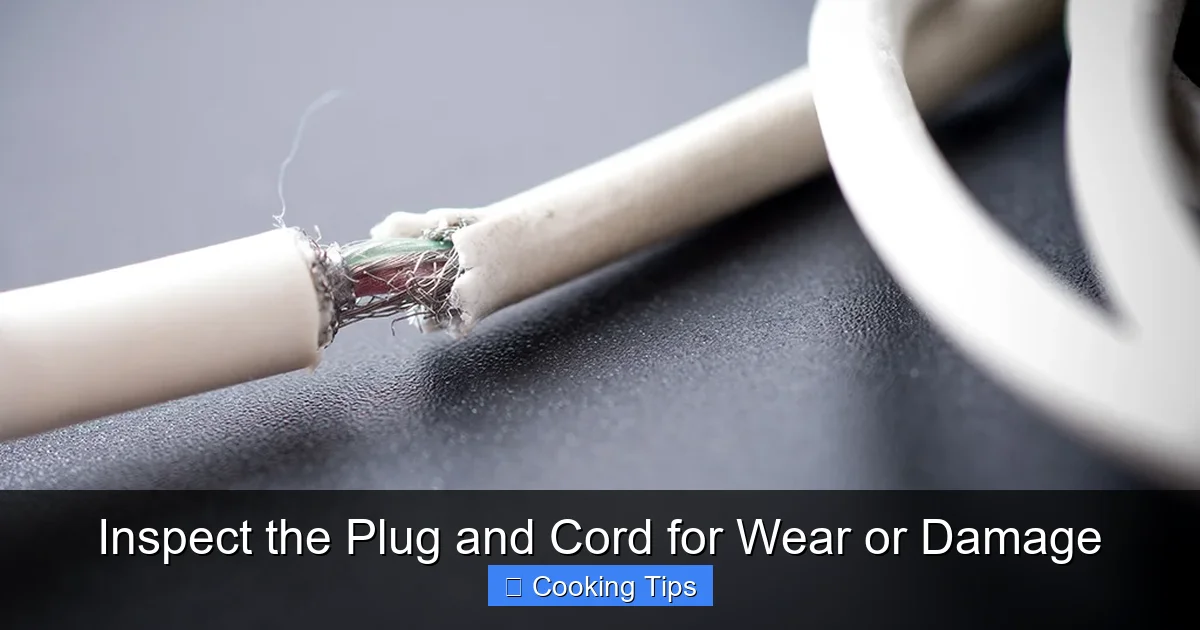
Visual guide about Inspect the Plug and Cord for Wear or Damage
Image source: contentgrid.homedepot-static.com
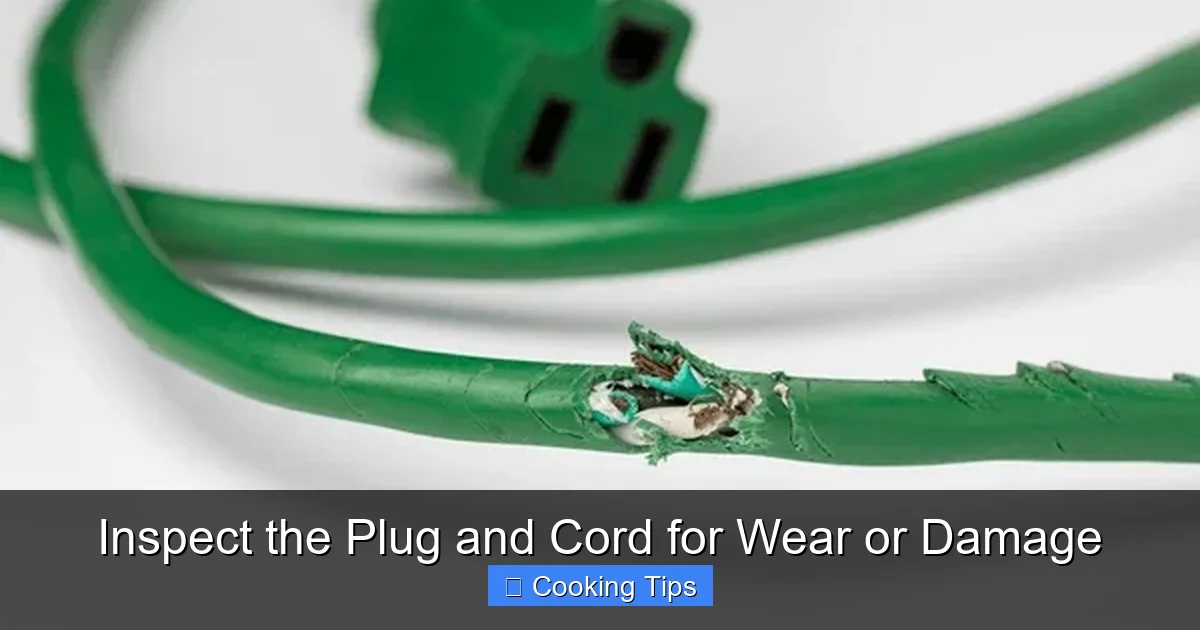
Visual guide about Inspect the Plug and Cord for Wear or Damage
Image source: shutterstock.com
How to do it:
Gently pull the plug itself from the wall outlet. Avoid yanking on the cord, as this can damage the connection point. Once unplugged, move the appliance to a safe space where you have good lighting.
Step 2: Examine the Cord’s Entire Length
Now that the appliance is safely unplugged, it’s time to give the cord a thorough once-over. Don’t just glance at it; really look at it.
What to look for:
- Frayed wires or exposed conductors: This is one of the most serious issues. You might see individual strands of metal wire sticking out from the cord’s outer jacket.
- Cracked, split, or hardened insulation: The plastic or rubber covering of the cord should be smooth and flexible. If it’s brittle, cracked, or has splits, it’s a sign of age or damage.
- Cuts or nicks: Any deep cuts or gouges that go into the cord’s insulation are cause for concern.
- Burn marks or discoloration: If you notice any black marks, melting, or unusual discoloration on the cord, it indicates overheating, which is a fire hazard.
- Kinks or knots: While not always dangerous, excessively tight kinks or knots can put stress on the internal wires and insulation over time.
Practical tips:
Bend and flex the cord gently as you inspect it. Pay particular attention to areas that might have been stressed, such as where the cord might have been run under furniture or repeatedly bent.
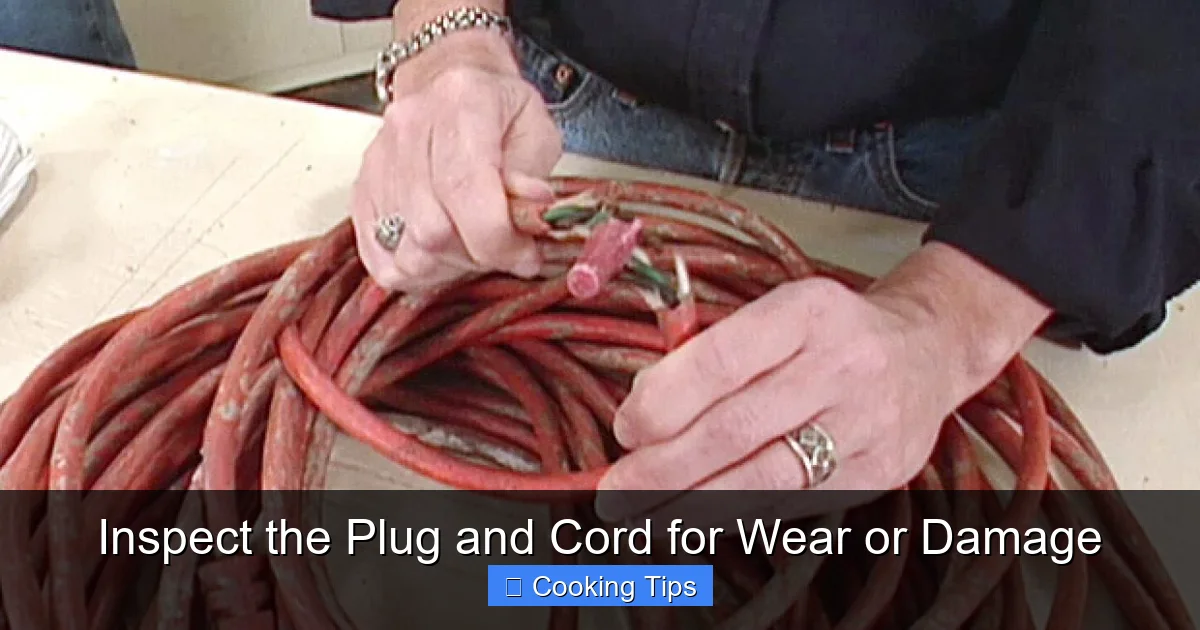
Visual guide about Inspect the Plug and Cord for Wear or Damage
Image source: diy.sndimg.com
Step 3: Inspect the Plug
The plug is the gateway for electricity, and it can also be a point of failure. Examine it carefully.
What to look for:
- Bent or broken prongs: The metal prongs that insert into the outlet should be straight and intact. Bent prongs can cause poor contact and overheating. Broken prongs mean the plug can’t be safely used.
- Cracked or broken plastic casing: The plastic housing of the plug should be solid. If it’s cracked or pieces are missing, it can expose electrical components.
- Loose prongs: Gently try to wiggle each prong. If they feel loose or wobbly, the connection inside the plug might be compromised.
- Discoloration or burn marks: Similar to the cord, any signs of melting, scorching, or dark discoloration on the plug indicate overheating.
Troubleshooting the plug:
Sometimes, prongs can get slightly bent if an appliance has been pulled out of an outlet incorrectly. For minor bends, you might be able to *carefully* straighten them with a pair of pliers, but if the prong is severely bent, cracked, or the plastic casing is damaged, it’s best to replace the plug or the entire appliance cord.
Step 4: Check the Strain Relief Points
This is a often-overlooked but critically important area. Strain relief is the part of the cord that connects to both the plug and the appliance. It’s designed to absorb stress so the wires inside aren’t pulled directly.
What to look for:
- At the plug end: Look where the cord enters the plug. There should be a flexible rubber or plastic piece that covers the connection. Check this area for cracks, tears, or signs that the cord is pulling out of the plug.
- At the appliance end: Many appliances have a similar strain relief where the cord attaches to the body of the appliance. Inspect this area for the same signs of damage, wear, or loosening.
Why it’s important:
If the strain relief fails, the internal wires of the cord can be directly pulled and damaged, leading to exposed wires, shorts, and a significant fire or shock hazard.
Step 5: Consider the Appliance’s Usage
Think about how you use the appliance. Does it get moved around a lot? Is the cord often coiled tightly?
Factors to consider:
- Frequent movement: Appliances that are moved often, like hand mixers or portable fans, are more prone to cord damage.
- Tight coiling: Consistently coiling cords very tightly can stress the internal wires and insulation over time, leading to cracks or breaks.
- Proximity to heat or moisture: Cords that are near heat sources or are frequently exposed to moisture are also more susceptible to degradation.
If you notice wear on an appliance that sees heavy use or is subjected to harsher conditions, it’s a good reminder to be extra diligent with your inspections.
What to Do If You Find Damage
Discovering damage to a plug or cord isn’t the end of the world, but it does require immediate action.
If the damage is minor:
For very minor cosmetic issues on the cord that haven’t compromised the insulation (like superficial scuffs), you might be able to continue using the appliance with caution. However, it’s always better to err on the side of safety.
If the damage is significant:
This includes any exposed wires, deep cuts, cracked insulation, melted plastic, or damaged plugs. If you find any of these issues, you must stop using the appliance immediately.
Options for repair or replacement:
- Replace the appliance: For many smaller, inexpensive appliances, the safest and often most cost-effective solution is to simply replace the entire unit. The cost and risk of attempting a repair might outweigh the cost of a new appliance.
- Professional repair: If it’s a valuable or specialized appliance, you might consider professional repair. An electrician or a qualified appliance repair technician can safely replace a damaged cord.
- DIY cord replacement (with caution): For experienced DIYers comfortable with electrical work, it’s possible to replace a cord yourself. However, this should only be done if you are absolutely confident in your abilities, understand electrical safety, and use the correct replacement parts. Improperly replacing a cord can create a new and serious hazard.
Never attempt to repair a damaged cord by simply wrapping it with tape. Electrical tape is not designed to insulate live wires and can easily fail, leading to shocks or fires.
Preventative Measures for Cord Longevity
Beyond regular inspections, there are simple habits you can adopt to help your appliance cords last longer and reduce the likelihood of damage.
Proper handling:
- Unplug by the plug: Always grip the plug, not the cord, when unplugging an appliance.
- Avoid yanking: Pull the plug straight out from the outlet.
- Store cords loosely: When storing appliances, coil the cord loosely. Avoid tight bends or wrapping it tightly around the appliance.
- Protect cords: If a cord needs to run across a high-traffic area, use a cord protector or runner to prevent it from being stepped on or tripped over.
- Keep away from hazards: Store appliances and their cords away from water, heat sources, and sharp objects.
By implementing these practices, you significantly reduce the daily stress on your appliance cords.
Conclusion
Taking a few moments to inspect the plug and cord for wear or damage might seem like a minor chore, but it’s a vital part of kitchen safety. These simple checks can prevent serious accidents and ensure your appliances serve you well for years to come. Make it a habit to perform these inspections regularly, especially for appliances that see a lot of use or are prone to being moved. A safe kitchen is a happy kitchen, and understanding the condition of your appliance cords is a fundamental step towards achieving that.