
Unlock the secret to vibrant, flavorful chutneys and pastes with the right kitchen grinder. This comprehensive guide explores the various types of grinders available, from traditional mortar and pestles to modern electric options, detailing their pros, cons, and best uses. You’ll learn step-by-step how to achieve the perfect consistency and flavor for your homemade condiments, along with practical tips for maintenance and troubleshooting. Elevate your cooking with freshly ground ingredients and discover the art of homemade pastes.
Kitchen Grinders for Making Chutneys and Pastes
Are you tired of bland, store-bought condiments? Do you dream of infusing your meals with the vibrant, fresh flavors of homemade chutneys and pastes? If so, you’ve come to the right place! Making your own chutneys and pastes is a rewarding culinary adventure that allows you to control ingredients, customize flavors, and achieve unparalleled freshness. The secret weapon in this flavorful pursuit? The humble kitchen grinder.
In this comprehensive guide, we’ll delve into the world of kitchen grinders specifically for creating delicious chutneys and pastes. We’ll explore the different types of grinders available, guiding you through their strengths and weaknesses. You’ll learn the step-by-step process of using these tools effectively, from preparing your ingredients to achieving your desired texture and taste. Get ready to transform your kitchen into a flavor-generating powerhouse!
Key Takeaways
- Understanding Grinder Types: Familiarize yourself with the different kitchen grinders suitable for pastes and chutneys, including mortar and pestles, electric spice grinders, food processors, and immersion blenders, each offering unique advantages.
- Ingredient Preparation is Key: Learn the importance of proper ingredient preparation, such as chopping, toasting, or pre-softening, to ensure your grinder operates efficiently and produces the desired texture.
- Achieving Perfect Consistency: Discover techniques for controlling the texture of your chutneys and pastes, from coarse and chunky to ultra-smooth, by adjusting grinding time, adding liquids gradually, and choosing the right grinder.
- Flavor Enhancement Techniques: Explore how to maximize flavor through ingredient selection, toasting spices, and adding complementary aromatics before or during the grinding process.
- Maintenance and Cleaning: Understand the best practices for cleaning and maintaining your chosen grinder to ensure its longevity, prevent flavor contamination, and maintain optimal performance.
- Troubleshooting Common Issues: Learn how to identify and resolve common problems like uneven grinding, overcrowding the grinder, or difficulty achieving a smooth paste.
Why Use a Kitchen Grinder for Chutneys and Pastes?
Before we dive into the “how,” let’s understand the “why.” Freshly ground ingredients release essential oils and aromas that simply cannot be replicated by pre-ground spices or commercial pastes. Grinding at home allows you to:
- Unleash Maximum Flavor: Grinding breaks down cell walls, releasing more volatile flavor compounds.
- Control Texture: You can achieve the exact consistency you desire, from chunky to silky smooth.
- Customize Ingredients: Tailor your recipes to your taste preferences and dietary needs.
- Ensure Freshness: Avoid preservatives and stale flavors found in many store-bought options.
- Cost-Effectiveness: Grinding your own can be more economical in the long run.
Types of Kitchen Grinders for Chutneys and Pastes
The world of grinders is diverse. Here are the most popular and effective options for making chutneys and pastes:
1. The Traditional Mortar and Pestle
This is the oldest and arguably the most esteemed method. A mortar is the bowl, and a pestle is the grinding tool.
Pros:
- Unmatched control over texture.
- Develops deep flavors through bruising rather than just cutting.
- No electricity required; portable and quiet.
- Beautiful and durable, often made from stone or ceramic.
Cons:
- Requires significant physical effort, especially for hard ingredients.
- Can be time-consuming.
- Best for smaller batches.
Best for: Spices, herbs, garlic, ginger, small amounts of chilies, creating very coarse pastes. Think classic pesto or grinding whole spices before adding them to your chutney.
2. Electric Spice Grinders (Coffee Grinders)
These are small, powerful appliances designed primarily for grinding coffee beans or spices.
Pros:
- Fast and efficient for small batches of dry ingredients.
- Affordable.
- Easy to operate.
Cons:
- Not ideal for wet ingredients or large volumes.
- Can overheat if used for too long, affecting flavor.
- Texture control is limited; can easily over-grind into powder.
- Not suitable for fibrous ingredients like ginger or tougher herbs.
Best for: Grinding dry spices like cumin, coriander, or chili flakes that will be added to a chutney. It’s not typically the primary tool for making a chutney paste itself, but for creating spice blends.
3. Food Processors
These are versatile kitchen workhorses that can handle a variety of chopping, pureeing, and grinding tasks.
Pros:
- Can handle larger quantities than spice grinders.
- Good for both dry and wet ingredients.
- Offers more control over texture than spice grinders.
- Versatile for many other kitchen tasks.
Cons:
- Can be bulky to store.
- Cleaning can sometimes be a bit cumbersome.
- May struggle with very hard ingredients or achieving an ultra-fine paste without prolonged processing.
Best for: Larger batches of chutneys and pastes, incorporating a variety of ingredients like fruits, vegetables, herbs, and nuts. Great for chunky relishes or smoother sauces.
4. Immersion Blenders (Hand Blenders)
These stick-like blenders are ideal for pureeing directly in pots or containers.
Pros:
- Extremely convenient for small to medium batches.
- Easy to clean, often dishwasher-safe attachments.
- Minimal cleanup and less counter space needed.
- Excellent for achieving smooth purees.
Cons:
- Not suitable for dry ingredients or very hard items.
- Limited control over chunky textures; tend to produce smooth results.
- Can splash if not used carefully.
Best for: Blending cooked vegetables or fruits into smooth pastes, creating creamy sauces, or emulsifying ingredients. Think smooth tomato pastes or blended pepper dips.
5. Blenders (Countertop Blenders)
Standard high-powered blenders are excellent for liquefying and pureeing.
Pros:
- Powerful motors can handle a wide range of ingredients.
- Excellent for achieving very smooth, silky textures.
- Good for larger quantities.
Cons:
- Can be difficult to control texture for chunky pastes.
- May require adding liquid to facilitate blending, which can alter the paste’s consistency.
- Cleaning can be challenging if ingredients stick to the blades.
Best for: Smooth fruit chutneys, pureed vegetable pastes, and sauces. If you want a super smooth consistency, a blender is your friend.
How to Make Chutneys and Pastes: A Step-by-Step Guide
Regardless of the grinder you choose, a few fundamental steps apply. We’ll use a common scenario: making a ginger-garlic paste, which is a staple in many cuisines.
Step 1: Prepare Your Ingredients
Proper preparation is crucial for efficient grinding and the best results.
H3: Select Fresh Ingredients
- Choose firm, fresh ginger and garlic for the best flavor and texture.
- Peel the garlic cloves and ginger. For ginger, you can peel it with a spoon or a vegetable peeler.
H3: Chop Ingredients for Easier Grinding
- Roughly chop the peeled ginger and garlic into smaller, uniform pieces. This helps your grinder work more efficiently, especially if you’re using a food processor or a less powerful grinder. Aim for pieces that are roughly 1/2 inch to 1 inch in size.
H3: Consider Pre-Treatments (Optional but Recommended)
- For Ginger: If your ginger is particularly fibrous or tough, you might want to lightly steam it for a few minutes or soak it in hot water for about 15-20 minutes. This softens it and makes it easier to grind.
- For Garlic: Some people like to lightly roast garlic cloves before making a paste to mellow the sharp bite and add a sweet, nutty flavor.
Step 2: Choose and Use Your Grinder
The method will vary slightly depending on your chosen appliance.
H3: Using a Mortar and Pestle
This is a labor of love, but the results are worth it.
Visual guide about Kitchen Grinders for Making Chutneys and Pastes
Image source: shailjatomar.files.wordpress.com
Visual guide about Kitchen Grinders for Making Chutneys and Pastes
Image source: shailjatomar.files.wordpress.com
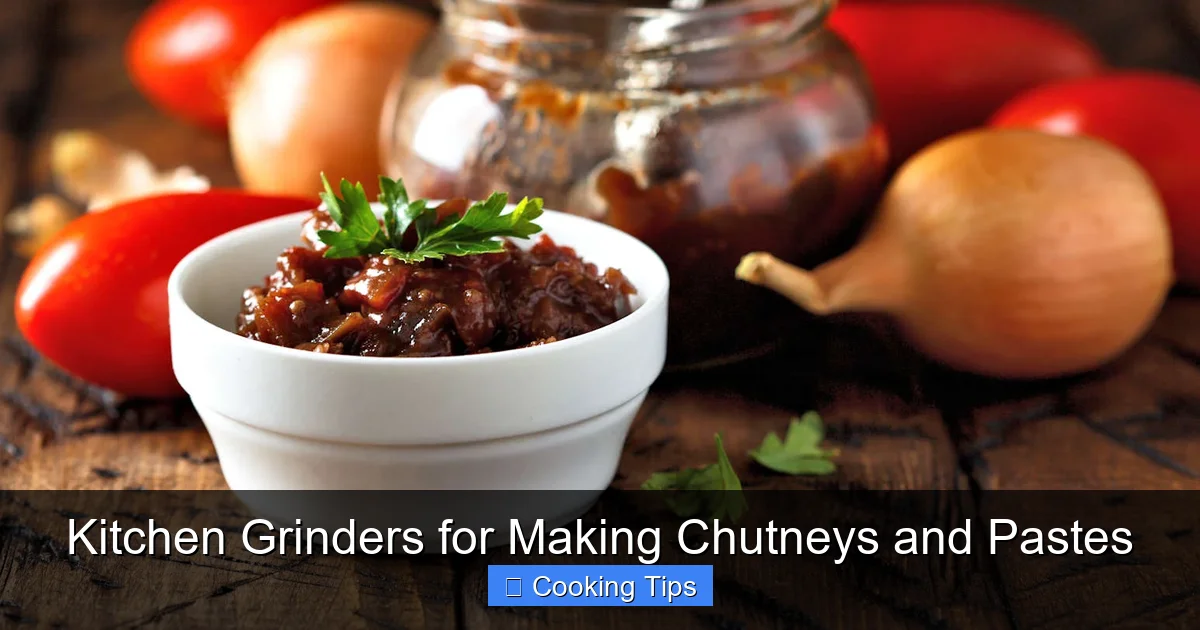
Visual guide about Kitchen Grinders for Making Chutneys and Pastes
Image source: tgkitchen.com.au
- Add the chopped ginger and garlic to the mortar.
- Start by pressing down with the pestle, then begin to grind in a circular motion, pressing outwards against the sides of the mortar.
- Continue grinding and pounding, scraping down the sides as needed, until you reach your desired consistency. This might take 5-10 minutes or longer.
- Add a tiny pinch of salt as you grind; it acts as an abrasive and helps break down the ingredients.
H3: Using an Electric Spice Grinder
This is best for very small amounts of dry spices that will be added to a chutney, not for making a ginger-garlic paste.
- Add your dry ingredients (e.g., whole coriander seeds) to the grinder.
- Pulse the grinder in short bursts.
- Shake the grinder between pulses to ensure even grinding.
- Continue until you achieve a coarse or fine powder. Be careful not to over-grind, as this can heat the spices and affect their flavor.
H3: Using a Food Processor
This is a great mid-range option for larger batches.
- Place the chopped ginger and garlic into the food processor bowl.
- Secure the lid and process.
- Start with short pulses, then switch to continuous processing.
- Scrape down the sides of the bowl periodically to ensure all ingredients are incorporated.
- Continue processing until you achieve your desired consistency. You may need to add a tablespoon or two of neutral oil (like vegetable or canola oil) or water to help it along, especially if the ingredients are very dry.
- For a smoother paste, process for a longer duration. For a coarser paste, process for less time.
H3: Using an Immersion Blender
Excellent for creating smooth pastes directly in a container.
- Place the chopped ginger and garlic into a tall, narrow container or jar.
- Add a small amount of liquid (a tablespoon of water or oil) to help it start blending.
- Insert the immersion blender, ensuring the head is fully submerged.
- Blend in short bursts, then continuously, moving the blender up and down to incorporate all ingredients.
- Continue until the mixture is smooth.
H3: Using a Countertop Blender
Ideal for smooth, pureed textures.
- Add the chopped ginger and garlic to the blender jar.
- Add a small amount of liquid (1-2 tablespoons of oil or water) to facilitate blending.
- Start on a low speed and gradually increase to high.
- Blend until the mixture is completely smooth.
- You may need to use the tamper (if your blender has one) to push ingredients towards the blades.
- Be patient; a very smooth paste may take a minute or two of continuous blending.
Step 3: Season and Adjust
Once you have your base paste, it’s time to refine the flavor and texture.
H3: Add Salt and Spices
- Taste your paste. Add salt as needed.
- For ginger-garlic paste, you might not need many additional spices, but for other chutneys, this is where you’d add your toasted and ground spices, herbs, or other flavorings.
H3: Adjust Consistency
- If the paste is too thick, add more liquid (oil, water, vinegar, lemon juice, etc., depending on your recipe) a teaspoon at a time until it reaches your desired consistency.
- If the paste is too thin, you can try adding a binding ingredient like a bit of soaked bread (for some chutneys), a small amount of ground nuts, or simply reduce the liquid content through gentle simmering if your recipe allows for cooking.
Practical Tips for Grinding Chutneys and Pastes
- Don’t Overcrowd: Whether using a mortar and pestle or a food processor, it’s better to work in smaller batches than to overload your grinder. Overcrowding leads to uneven grinding and can strain your appliance.
- Add Liquids Gradually: When making wet pastes or smooth chutneys, add liquids slowly. It’s easier to add more liquid than to remove it.
- Toast Dry Spices: For an extra layer of flavor in your spice blends, toast whole spices in a dry pan until fragrant before grinding them.
- Ingredient Order Matters: For complex pastes, start with harder ingredients like ginger and garlic, then add softer elements like herbs or tomatoes.
- Clean Immediately: The easiest time to clean your grinder is right after use, before ingredients dry and stick.
- Storage is Key: Store homemade pastes and chutneys in airtight containers in the refrigerator. Many will last for a week or two. For longer storage, freezing in small portions is a great option.
Troubleshooting Common Grinding Issues
Even with the best intentions, you might encounter a few hiccups.
Problem: Uneven Grinding (Chunks and Powders Mixed)
Cause: Ingredients are not uniform in size, or the grinder is overcrowded.
Solution: Chop ingredients into smaller, more consistent pieces. Work in smaller batches. For mortar and pestles, ensure you are grinding with consistent pressure and motion.
Problem: Grinder is Straining or Not Grinding Effectively
Cause: Ingredients are too tough, too dry, or too much is in the grinder.
Solution: Chop ingredients smaller. Add a small amount of liquid (oil or water) to help the grinding process, especially for food processors and blenders. Reduce the quantity of ingredients.
Problem: Paste is Too Watery
Cause: Too much liquid was added, or ingredients released a lot of moisture.
Solution: If you’re making a cooked chutney, simmer it gently to reduce the liquid. For uncooked pastes, try adding a thicker ingredient like a bit of cooked potato, ground nuts, or breadcrumbs (if appropriate for the recipe) to absorb excess moisture.
Problem: Flavor Contamination (Previous Ingredients Lingering)
Cause: Grinder was not cleaned thoroughly.
Solution: Clean your grinder immediately after each use. For stubborn odors or flavors, try grinding a small amount of rice or baking soda, then discard, and wash again. For electric grinders, some users dedicate one to spices and another to coffee.
Conclusion
Mastering the art of making chutneys and pastes with kitchen grinders opens up a world of culinary possibilities. Whether you prefer the tactile experience of a mortar and pestle or the speed of an electric appliance, the key lies in understanding your tools, preparing your ingredients thoughtfully, and being patient with the process.
By following the steps and tips outlined in this guide, you’ll be well on your way to creating fresh, vibrant, and incredibly flavorful homemade condiments that will elevate your everyday meals. So, grab your ingredients, choose your grinder, and embark on your delicious journey into the world of homemade pastes and chutneys!