
Keep your air fryer working its best with our comprehensive deep cleaning guide. Learn how to effectively tackle grease, grime, and baked-on food from the basket, tray, and interior. A clean air fryer ensures healthier, tastier meals every time, extending its lifespan and preventing unwanted odors.
Are you tired of that lingering smell when you turn on your air fryer? Does your once-non-stick basket seem to be sticking more than ever? It’s time for a deep clean! Air fryers have become a kitchen staple for a reason – they deliver crispy, delicious food with less oil. But, like any cooking appliance, they need a little TLC to perform at their best.
This comprehensive guide will walk you through the process of deep cleaning your air fryer, step by step. We’ll cover everything from the removable basket and tray to the often-neglected interior. By the end, you’ll have a sparkling clean air fryer that cooks efficiently, healthier, and without any off-putting odors. Let’s get started!
Key Takeaways
- Regular Cleaning is Key: While a deep clean is essential periodically, consistent wiping after each use prevents major build-up.
- Safety First: Always ensure your air fryer is unplugged and completely cool before attempting any cleaning.
- Dish Soap is Your Friend: For most parts, warm water and dish soap are the most effective cleaning agents.
- Stubborn Grime Needs Soak Time: For baked-on residue, soaking the basket and tray in hot, soapy water is highly effective.
- Avoid Abrasive Materials: Steel wool and harsh scrubbers can damage the non-stick coating of your air fryer basket.
- Don’t Forget the Exterior: Wiping down the outside of your air fryer keeps it looking good and prevents dust accumulation.
- Proper Drying is Crucial: Ensure all parts are thoroughly dry before reassembling to prevent rust or mold.
Why Deep Clean Your Air Fryer?
You might be wondering if a quick wipe-down is enough. While daily cleaning is important, a deep clean is essential for several reasons:
Hygiene: Food particles and grease can accumulate over time, creating a breeding ground for bacteria. A deep clean ensures your food is cooked in a sanitary environment.
Performance: Baked-on grease and food residue can affect the air circulation within your air fryer. This can lead to uneven cooking and less crispy results.
Odor Prevention: Lingering food smells can transfer to your next meal. A thorough cleaning eliminates these odors, ensuring your food tastes as it should.
Longevity: Regular maintenance, including deep cleaning, helps extend the lifespan of your air fryer, saving you money in the long run.
Health: By removing old grease and food bits, you ensure you’re not re-heating or cooking with remnants of previous meals, leading to healthier food.
Gather Your Cleaning Supplies
Before you begin, make sure you have everything you need. This will make the process smoother and more efficient.
- Mild dish soap
- Warm water
- Soft sponge or cloth
- Non-abrasive scrubbing brush (optional, for stubborn spots)
- Microfiber cloths for drying and polishing
- Baking soda (for tougher grime)
- White vinegar (optional, for deodorizing)
- Old toothbrush (for tight corners)
- Paper towels
Step-by-Step Deep Cleaning Guide
Now that you’re prepared, let’s dive into the cleaning process.
Step 1: Safety First – Unplug and Cool Down
This is the most crucial first step. Never attempt to clean your air fryer while it’s plugged in or still hot.
Unplug: Locate the power cord and unplug it from the electrical outlet.
Visual guide about Step by Step Guide to Deep Clean Your Air Fryer
Image source: airfryanytime.com
Visual guide about Step by Step Guide to Deep Clean Your Air Fryer
Image source: airfryanytime.com

Visual guide about Step by Step Guide to Deep Clean Your Air Fryer
Image source: allguiderecipes.info
Cool Down: Allow your air fryer to cool down completely. This can take anywhere from 30 minutes to an hour, depending on how recently you used it. Touching a hot appliance can cause serious burns.
Step 2: Remove and Disassemble Removable Parts
Most air fryers have a basket and a tray that are removable. These are typically the dirtiest parts.
Carefully pull out the air fryer basket. If your air fryer has a separate tray or drawer, remove that as well.
Some air fryer baskets have a detachable plate at the bottom. If yours does, remove it according to your air fryer’s manual.
Step 3: Soak the Basket and Tray
This is where we tackle the most stubborn grease and food particles.
For Light Grime
If your air fryer basket and tray aren’t excessively dirty, you might be able to get away with a good scrub in warm, soapy water.
For Stubborn, Baked-On Grime
For tougher jobs, soaking is your best friend.
- Fill your sink or a large basin with hot water.
- Add a generous amount of mild dish soap.
- Submerge the air fryer basket and tray in the soapy water.
- Let them soak for at least 15-30 minutes. For very stubborn residue, you can let them soak for an hour or even longer.
Tip: Don’t use harsh chemicals or abrasive cleaners during the soaking stage, as they can damage the non-stick coating.
Step 4: Scrub the Basket and Tray
After soaking, it’s time to scrub away the loosened grime.
Using a soft sponge or a non-abrasive scrubbing brush, gently scrub the inside and outside of the basket and tray.
Pay special attention to any nooks, crannies, or perforated areas where food particles might be hiding.
If you encounter particularly stubborn spots that won’t budge, you can create a paste of baking soda and water.
- Mix baking soda with a little water to form a thick paste.
- Apply the paste to the stubborn spots.
- Let it sit for 10-15 minutes.
- Gently scrub again with your sponge or brush.
Important Note: Avoid using steel wool, abrasive scouring pads, or harsh brushes, as these can scratch and damage the non-stick coating of your air fryer basket. A damaged coating can lead to food sticking and can leach chemicals into your food.
Step 5: Rinse Thoroughly
Once you’ve scrubbed away all the grime, it’s essential to rinse the basket and tray thoroughly.
Rinse them under warm running water until all soap suds and food particles are completely washed away.
Ensure there are no traces of soap left, as this can affect the taste of your food in future uses.
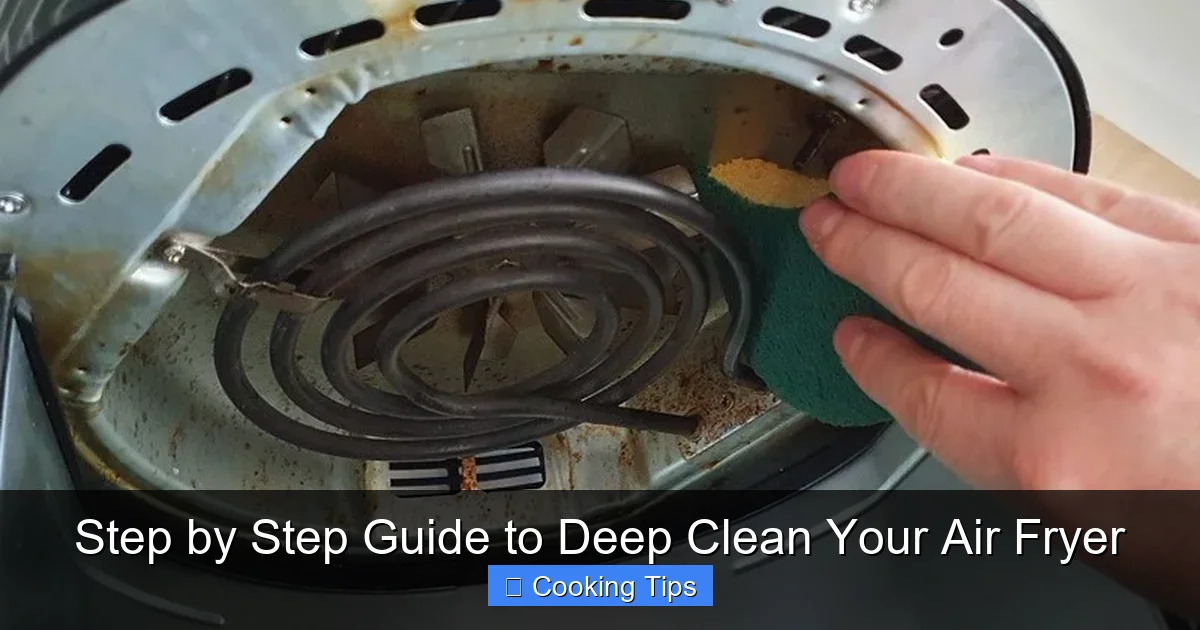
Step 6: Clean the Interior of the Air Fryer
Now, let’s move on to the inside of your air fryer. This area can accumulate grease splatters and crumbs.
Wipe Down: Dampen a soft cloth or sponge with warm, soapy water. Gently wipe down the interior walls, heating element (if accessible and cooled), and the bottom of the air fryer.
Be Gentle with the Heating Element: The heating element is delicate. If you can reach it, use a damp cloth to wipe away any visible debris. Never spray water or cleaning solutions directly onto the heating element.
Tackle Greasy Spots: For any particularly greasy spots inside the air fryer, you can use a small amount of the baking soda paste you made earlier, or a microfiber cloth with a bit of vinegar diluted in water (about a 1:1 ratio).
- Apply the paste or damp cloth to the greasy area.
- Gently rub until the grease is lifted.
- Wipe clean with a fresh damp cloth to remove any residue.
Use an Old Toothbrush: For those hard-to-reach corners or around the edges of the interior, an old toothbrush can be very effective.
Step 7: Clean the Exterior
Don’t forget the outside of your air fryer! A clean exterior not only looks better but also prevents dust build-up.
Dampen a soft cloth with warm, soapy water and wipe down the exterior surfaces.
For stainless steel exteriors, you can use a stainless steel cleaner or a mixture of vinegar and water to wipe and polish. Always wipe in the direction of the grain if applicable.
Use a dry microfiber cloth to buff the exterior dry and remove any streaks.
Step 8: Dry Everything Completely
This is a critical step that is often overlooked. All parts must be completely dry before reassembling your air fryer.
Air Dry: The best way to ensure everything is dry is to let the basket, tray, and any other removable parts air dry completely. You can place them on a drying rack.
Towel Dry: You can also use clean, dry microfiber cloths to thoroughly dry all components.
Ensure there is no moisture remaining, especially in any crevices or openings, to prevent rust or the growth of mold and mildew.
Step 9: Reassemble and Store
Once all parts are completely dry, it’s time to put your air fryer back together.
Place the dried basket and tray back into the air fryer.
If you have a detachable plate, reattach it according to your manufacturer’s instructions.
Your air fryer is now deep cleaned and ready for its next culinary adventure!
Troubleshooting Common Air Fryer Cleaning Issues
Even with the best intentions, you might encounter a few cleaning challenges.
Persistent Odors
If your air fryer still smells after cleaning, try this deodorizing trick:
- Place a small oven-safe bowl inside the air fryer.
- Fill the bowl with equal parts water and white vinegar.
- Run the air fryer on a low temperature (around 200°F or 90°C) for about 15-20 minutes.
- Let it cool completely, then wipe down the interior again.
Damaged Non-Stick Coating
If you notice significant damage to the non-stick coating, it might be time to consider replacing the basket or drawer. Using damaged non-stick surfaces can be unhealthy.
Rust Spots
Rust can sometimes appear if parts are left wet for too long or if the non-stick coating has been compromised. You can try to gently scrub away minor rust spots with a baking soda paste, but if it’s extensive, it may indicate a deeper issue.
How Often Should You Deep Clean?
The frequency of deep cleaning depends on how often you use your air fryer and what you cook in it.
- Daily: Wipe down the basket and exterior after each use.
- Weekly: For regular users, a more thorough wipe-down of the interior and a quick wash of the basket and tray is recommended.
- Monthly (or Bi-Monthly): This is when a full deep clean, as described in this guide, is ideal to prevent significant build-up and maintain optimal performance. If you frequently cook fatty or sticky foods, you might need to deep clean more often.
Conclusion
Deep cleaning your air fryer might seem like a chore, but it’s a vital part of maintaining your appliance and ensuring the health and quality of your food. By following these simple, step-by-step instructions, you can effortlessly restore your air fryer to its former glory. A clean air fryer not only cooks better and tastes better but also lasts longer. So, roll up your sleeves, gather your supplies, and give your trusty kitchen companion the deep clean it deserves. Happy air frying!