
Discover the effortless way to make delicious Curry Rice with Chickpeas right in your rice cooker. This guide provides a foolproof method for a flavorful, healthy, and satisfying one-pot meal with minimal cleanup. Perfect for busy weeknights, this recipe focuses on simplicity and delicious results, ensuring you can enjoy a hearty curry without the fuss.
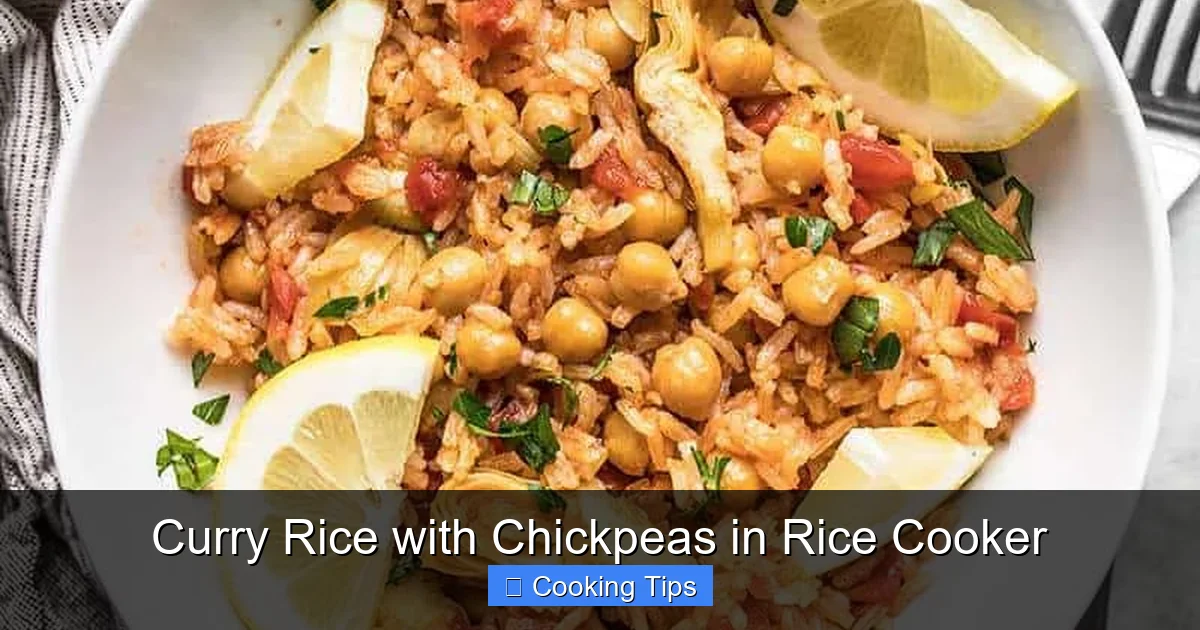
Curry Rice with Chickpeas in Rice Cooker
Are you tired of complicated cooking methods that leave your kitchen in a state of culinary chaos? Do you crave a flavorful, comforting meal that’s both healthy and incredibly easy to make? If you’ve answered “yes” to any of these questions, then get ready to revolutionize your weeknight dinners! This guide will walk you through the simple, step-by-step process of creating mouthwatering Curry Rice with Chickpeas, all cooked conveniently in your trusty rice cooker.
Imagine a world where a delicious, fragrant curry dish, packed with hearty chickpeas and perfectly cooked rice, comes together with just a few simple steps and minimal cleanup. That’s the magic of cooking this curry rice in a rice cooker. It’s a fantastic way to create a satisfying meal without standing over a hot stove. We’ll cover everything from selecting your ingredients to the final, flavorful outcome. You’ll learn how to achieve that perfect balance of spice and creaminess, all while your rice cooker does the heavy lifting.
Whether you’re a seasoned cook looking for a shortcut or a complete beginner venturing into the kitchen, this guide is designed for you. We’ll break down the process into manageable steps, offering practical tips and advice to ensure your curry rice is a roaring success. Get ready to impress yourself and your loved ones with this simple yet sophisticated one-pot wonder!
Key Takeaways
- Effortless One-Pot Meal: Prepare a complete, flavorful curry rice dish entirely within your rice cooker, minimizing dishes and cooking time.
- Customizable Flavor Profile: Easily adjust the spice level and curry flavor to suit your personal preferences by modifying the amount and type of curry powder and spices.
- Nutrient-Rich Ingredients: Benefit from the protein and fiber of chickpeas, combined with the convenience of a rice cooker for perfectly cooked rice.
- Simple Steps for Success: Follow clear, straightforward instructions that even beginner cooks can manage, ensuring delicious results every time.
- Versatile Serving Options: Learn how to enhance your curry rice with optional additions like vegetables and proteins for a more complete and varied meal.
- Smart Rice Cooker Usage: Understand how to best utilize your rice cooker’s features for this specific dish, including proper liquid ratios and settings.
Why Cook Curry Rice with Chickpeas in a Rice Cooker?
Before we dive into the cooking, let’s talk about why this method is so brilliant. Your rice cooker is often thought of as just a rice-making machine, but it’s so much more versatile! Using it for curry rice offers several advantages:
- Simplicity: It truly is a one-pot wonder. You add most of your ingredients directly into the rice cooker pot.
- Time-Saving: While the rice cooker does its thing, you have hands-free time to relax or prepare any side dishes.
- Consistent Results: Rice cookers are programmed to cook at a precise temperature, ensuring your rice is perfectly cooked every time, and your curry base is gently simmered.
- Minimal Cleanup: With most of the cooking happening in a single pot, you significantly reduce the number of dishes to wash.
- Flavor Infusion: The gentle, consistent heat of the rice cooker allows the flavors to meld beautifully, creating a deep and satisfying curry.
Gather Your Ingredients
The beauty of this recipe is its flexibility. You can adjust ingredients based on what you have on hand and your taste preferences. However, here’s a solid foundation to get you started for a typical 3-4 cup rice cooker capacity:
Visual guide about Curry Rice with Chickpeas in Rice Cooker
Image source: budgetbytes.com
For the Rice and Base:
- 1.5 cups of long-grain white rice (like Basmati or Jasmine), rinsed thoroughly
- 2.5 cups of liquid (see options below)
- 1 tablespoon of vegetable oil or coconut oil
- 1 medium onion, finely chopped
- 2 cloves of garlic, minced
- 1 teaspoon of grated fresh ginger (or ½ teaspoon ground ginger)
For the Curry Flavor:
- 2-3 tablespoons of curry powder (adjust to your spice preference)
- ½ teaspoon of ground turmeric
- ½ teaspoon of ground cumin
- ¼ teaspoon of cayenne pepper (optional, for extra heat)
- Salt to taste
For the Chickpeas and Creaminess:
- 1 can (15 ounces) of chickpeas, rinsed and drained
- ½ cup of full-fat coconut milk (canned, not the carton beverage)
- ½ cup of water or vegetable broth
Optional Additions for Extra Flavor and Nutrition:
- ½ cup of frozen peas or diced carrots
- A handful of fresh spinach, added in the last 5 minutes of cooking
- A squeeze of lemon or lime juice at the end
- Fresh cilantro or parsley for garnish
Liquid Options for Your Rice Cooker
The liquid is crucial for both cooking the rice and creating the curry base. Here are your best options:

Visual guide about Curry Rice with Chickpeas in Rice Cooker
Image source: c8.alamy.com
- Water: The simplest and most neutral choice.
- Vegetable Broth: Adds a subtle savory depth to the rice and curry.
- Chicken Broth: If you’re not vegetarian, this adds a richer flavor.
- Coconut Milk (diluted): For an extra creamy and tropical curry. You might use 1.5 cups coconut milk and 1 cup water, for example. Adjust the total liquid to match the rice cooker’s recommendation for 1.5 cups of rice.
Tip: Always check your rice cooker’s manual for the recommended liquid-to-rice ratio for the type of rice you are using. The 1.5 cups rice to 2.5 cups liquid is a general guideline, but it’s always best to confirm with your appliance’s specifications.
Step-by-Step Instructions
Now, let’s get cooking! This process is designed to be straightforward and efficient.

Visual guide about Curry Rice with Chickpeas in Rice Cooker
Image source: thumbs.dreamstime.com
Step 1: Prepare the Aromatics and Spices
This initial step is key to building a deep flavor base for your curry rice. Even though the rice cooker will do the cooking, sautéing the aromatics first will make a significant difference.
Sub-step 1.1: Sautéing Aromatics
Turn on your rice cooker and select the “Sauté” or “Brown” function if it has one. If your rice cooker doesn’t have a sauté function, you can perform this step in a separate pan on the stovetop and then transfer the sautéed ingredients to the rice cooker pot before adding the rice.
Add the tablespoon of oil to the rice cooker pot. Once the oil is shimmering, add the finely chopped onion. Sauté the onion for about 3-5 minutes until it becomes softened and translucent.
Add the minced garlic and grated ginger to the pot. Cook for another minute until fragrant, being careful not to burn the garlic.
Sub-step 1.2: Toasting the Spices
Now, it’s time to add your dry spices. Sprinkle the curry powder, turmeric, cumin, and cayenne pepper (if using) directly into the pot with the sautéed aromatics. Stir them around for about 30 seconds to a minute. This step, called “blooming” the spices, toasts them and releases their essential oils, intensifying their flavor and aroma.
The mixture should smell incredibly fragrant at this point. Season with salt to your liking.
Step 2: Add the Rice and Chickpeas
Once your aromatics and spices are fragrant, it’s time to add the main ingredients.
Sub-step 2.1: Incorporating the Rice
Add your thoroughly rinsed and drained long-grain rice to the rice cooker pot. Give it a gentle stir to coat the rice grains with the spiced onion and garlic mixture. This helps ensure every grain is infused with flavor from the start.
Sub-step 2.2: Adding the Chickpeas
Add the rinsed and drained chickpeas to the pot. Stir them in with the rice and aromatics.
Step 3: Add Liquids and Optional Vegetables
This is where we bring everything together to cook.
Sub-step 3.1: Pouring in the Liquids
Pour your chosen liquid (water, broth, or diluted coconut milk) into the rice cooker pot. Add the ½ cup of coconut milk for creaminess. Ensure the liquid level reaches the appropriate mark for 1.5 cups of rice according to your rice cooker’s manual. Stir everything gently to combine.
Sub-step 3.2: Adding Optional Vegetables
If you’re using frozen peas or diced carrots, you can add them now. They will cook along with the rice and absorb the delicious curry flavors.
Step 4: Cook the Curry Rice
Now, let your rice cooker work its magic!
Sub-step 4.1: Setting the Rice Cooker
Close the lid of your rice cooker securely. Select the standard “White Rice” setting. If your rice cooker has a “Mixed Grain” or “Porridge” setting, you might consider using that for a softer rice texture, but the “White Rice” setting is usually sufficient and reliable.
Press the start button. The rice cooker will automatically switch to the “Keep Warm” setting once the cooking cycle is complete.
Sub-step 4.2: The Waiting Game
Resist the urge to open the lid while the rice cooker is in operation. This can disrupt the cooking process and lead to unevenly cooked rice.
The cooking time will vary depending on your rice cooker, typically ranging from 20 to 45 minutes.
Step 5: Rest and Finish
Once the rice cooker signals that it’s done, a short resting period is essential.
Sub-step 5.1: Resting the Rice
Allow the curry rice to rest, with the lid closed, for about 10-15 minutes after the cooking cycle finishes. This allows the steam to redistribute, ensuring fluffy and perfectly cooked rice.
Sub-step 5.2: Finishing Touches
Open the lid. If you’re adding fresh spinach, stir it in now; the residual heat will wilt it perfectly. Fluff the rice and curry mixture gently with a fork or rice paddle.
Taste and adjust seasoning if needed. A squeeze of fresh lemon or lime juice at this stage can really brighten up the flavors. Stir in fresh cilantro or parsley if you’re using them.
Serving Your Curry Rice with Chickpeas
Your delicious, no-fuss curry rice is ready to be served! It’s a complete meal on its own, but here are some ideas to take it to the next level:
- Garnish: Top with extra fresh cilantro, a dollop of plain yogurt or vegan sour cream, or a sprinkle of toasted slivered almonds for crunch.
- Protein Boost: Add cooked chicken, shrimp, or tofu towards the end of the cooking cycle or stir in some shredded rotisserie chicken.
- Side Dishes: Serve with a simple cucumber salad, some steamed green beans, or a side of naan bread.
- Spice it Up: Offer some hot sauce or chili flakes on the side for those who like extra heat.
Troubleshooting Common Issues
Even with a rice cooker, occasional issues can arise. Here are some common problems and how to fix them:
Problem: Rice is too wet or mushy.
Cause: Too much liquid was used, or the wrong liquid-to-rice ratio was followed. Your rice cooker might also be older and retain excess moisture.
Solution: Next time, slightly reduce the liquid. If it’s already too wet, carefully spread the rice and curry mixture on a baking sheet and let it air dry for a bit, or try cooking it on a stovetop on low heat for a few minutes with the lid slightly ajar to allow excess moisture to escape.
Problem: Rice is too dry or crunchy.
Cause: Not enough liquid was used, or the rice cooker’s heating element isn’t functioning optimally.
Solution: Add a few tablespoons of hot water or broth to the pot, stir gently, and let it sit on the “Keep Warm” setting for another 10-15 minutes with the lid closed. For future cooking, increase the liquid slightly.
Problem: Curry flavor is too mild.
Cause: Not enough curry powder or spices were used, or the spices weren’t fresh.
Solution: Stir in an additional teaspoon or two of curry powder and any other desired spices. You can also add a dash of garam masala for extra depth. Ensure your spices are not expired for the best flavor.
Problem: Spices are overpowering or bitter.
Cause: Too much spice was used, or the spices were burned during the initial sautéing.
Solution: You can try to balance bitterness with a touch of sweetness (like a teaspoon of sugar or a squeeze of honey) or a little acidity (lemon/lime juice). If the spice level is too high, adding more plain cooked rice or a bit of plain yogurt or coconut cream can help dilute it.
Conclusion
There you have it! A simple, flavorful, and satisfying Curry Rice with Chickpeas, made effortlessly in your rice cooker. This recipe proves that healthy and delicious meals don’t have to be complicated or time-consuming. By harnessing the power of your rice cooker, you can achieve fantastic results with minimal effort and even less cleanup.
This one-pot wonder is perfect for busy weeknights, lazy weekends, or anytime you need a comforting and nutritious meal. Feel free to experiment with different vegetables, spices, and even proteins to make it your own. The possibilities are endless! So, the next time you’re wondering what to cook, remember the humble rice cooker and this delightful curry rice recipe. Happy cooking!