
Discover the secrets to perfectly cooked kielbasa in your air fryer with this comprehensive guide. We’ll cover the ideal cooking times and temperatures for various types of kielbasa, ensuring crispy edges and a juicy interior. Follow our simple, step-by-step instructions and practical tips to achieve delicious results in minutes, making air fryer kielbasa your new go-to weeknight meal.
How Long to Cook Kielbasa in Air Fryer
The air fryer has revolutionized home cooking, offering a faster, healthier, and more convenient way to achieve deliciously crispy results. If you’ve ever wondered how to get that perfect sear and satisfying crunch on your favorite kielbasa, you’ve come to the right place. This comprehensive guide will walk you through everything you need to know about cooking kielbasa in your air fryer. We’ll cover the essential cooking times, temperatures, and share practical tips to ensure your kielbasa turns out perfectly every single time. Get ready to elevate your weeknight dinners and appetizer platters with this incredibly simple yet remarkably effective cooking method.
Key Takeaways
- Perfect Crispy Texture: Air frying kielbasa creates wonderfully crispy edges and a tender, juicy interior, a delightful contrast that’s hard to achieve with other methods.
- Variable Cooking Times: The exact time needed to cook kielbasa in the air fryer depends on its thickness, whether it’s pre-cooked or raw, and your specific air fryer model.
- Temperature is Key: Aiming for a temperature between 375°F (190°C) and 400°F (200°C) is generally optimal for achieving both safe internal temperatures and desired crispiness.
- Pre-cooked vs. Raw: Pre-cooked kielbasa mainly needs reheating and crisping, requiring less time than raw kielbasa, which needs to cook through to a safe internal temperature.
- Slice for Even Cooking: Slicing kielbasa into uniform pieces, whether rounds or diagonal cuts, promotes more even cooking and faster results in the air fryer.
- Shake for Perfection: Shaking the basket halfway through the cooking time is crucial for ensuring all sides of the kielbasa get exposed to the hot air, leading to uniform browning and crispiness.
- Internal Temperature Matters: Always use a meat thermometer to verify the kielbasa has reached a safe internal temperature of 165°F (74°C) for raw varieties.
Why Air Fry Kielbasa?
Before we dive into the “how,” let’s briefly touch on the “why.” Air frying kielbasa offers several advantages over traditional cooking methods like pan-frying or baking. The high-speed circulating hot air effectively crisps up the exterior of the sausage, creating those irresistible browned bits and a delightful snap with every bite. It requires minimal to no added oil, making it a healthier option. Plus, the cooking time is significantly reduced, making it ideal for busy evenings. You get all the flavor and texture without the mess of splattering oil on the stovetop.
Understanding Your Kielbasa
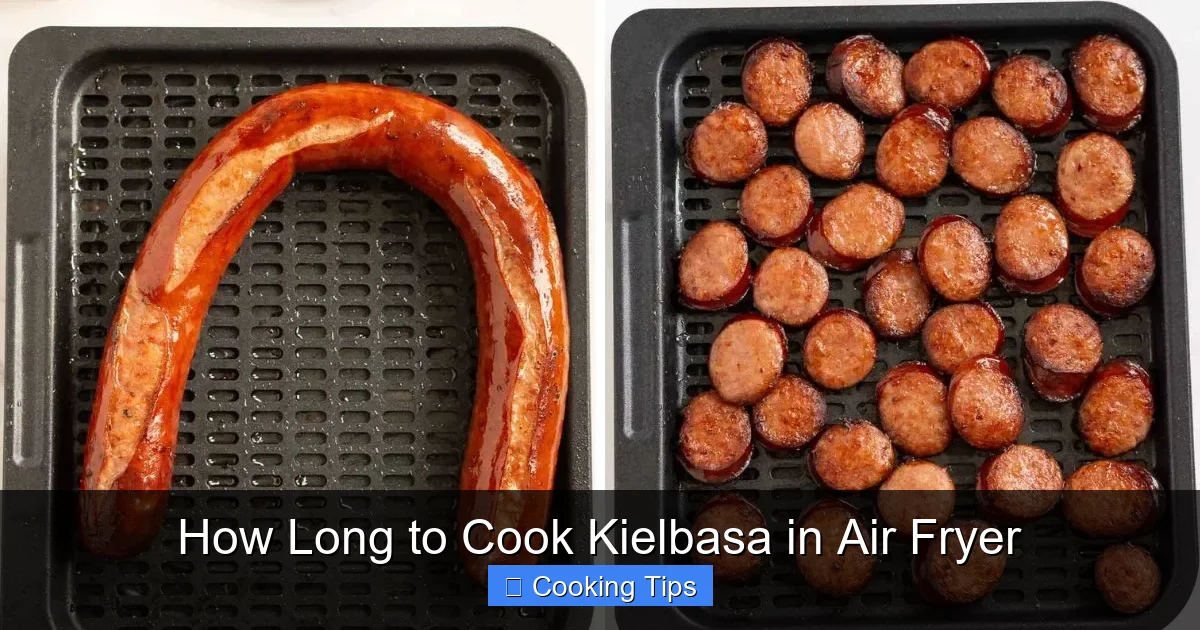
Visual guide about How Long to Cook Kielbasa in Air Fryer
Image source: babaganosh.org
The first step to perfectly air-fried kielbasa is to understand the type you’re working with. Kielbasa generally falls into two main categories:
- Pre-cooked Kielbasa: This is the most common type found in supermarkets. It’s already fully cooked during its manufacturing process. When you air fry pre-cooked kielbasa, you’re primarily reheating it and aiming for that delicious crispy exterior.
- Raw Kielbasa: This type is less common but available. Raw kielbasa needs to be cooked through to a safe internal temperature, in addition to achieving a crispy texture.
The cooking time and temperature will vary slightly depending on whether your kielbasa is pre-cooked or raw.
Preparing Your Kielbasa for the Air Fryer

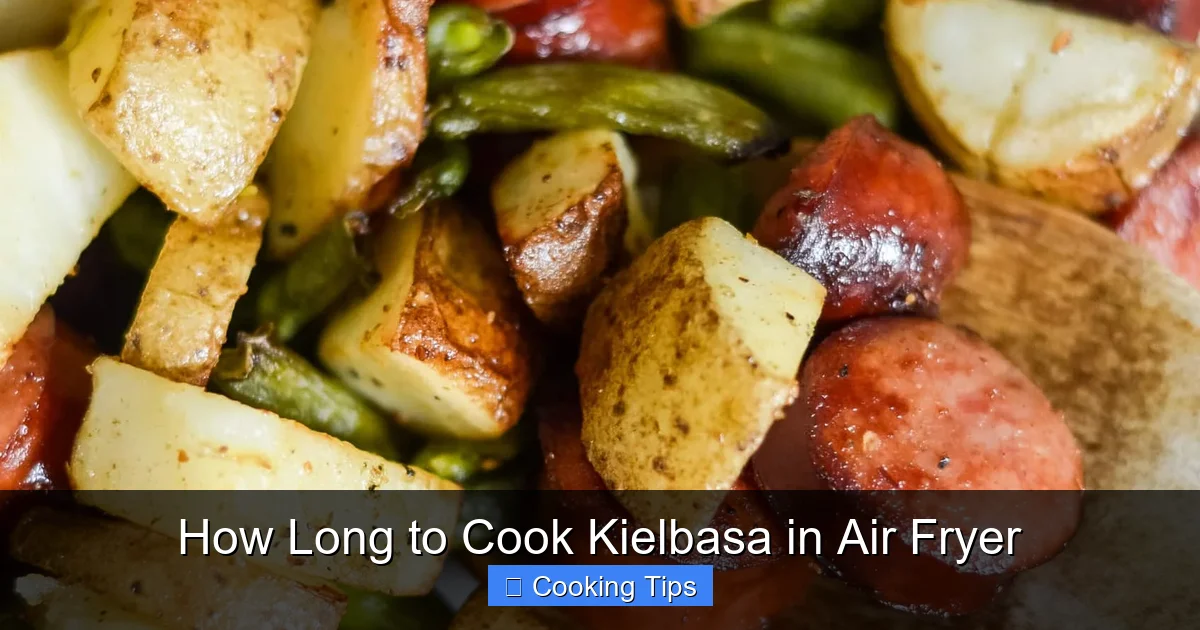
Visual guide about How Long to Cook Kielbasa in Air Fryer
Image source: simplyairfryer.com
Proper preparation is key to even cooking and the best texture.
Slicing the Kielbasa
For optimal results, you’ll want to slice your kielbasa. This increases the surface area exposed to the hot air, promoting crispiness and allowing for more even cooking. The thickness of your slices will affect the cooking time.
- For Reheating (Pre-cooked): Slices of about ½ inch (1.25 cm) thick are ideal. You can also cut it into slightly thicker pieces, but they might take a minute or two longer.
- For Cooking Through (Raw): ½ inch to ¾ inch (1.25 cm to 2 cm) thick slices are good. If you prefer bite-sized pieces, you can cut them smaller, but be mindful of the shorter cooking time.
You can slice them into uniform rounds or go for diagonal cuts, which can look quite appealing. The most important thing is consistency in thickness so that each piece cooks at a similar rate.
Optional: Marinating or Seasoning
While kielbasa is already flavorful, you can certainly enhance it!
- Pre-cooked: If you’re just reheating, you might not need much. A light brush of olive oil or a sprinkle of your favorite herbs can add an extra layer of flavor.
- Raw: You can toss raw kielbasa slices with a little oil and seasonings like paprika, garlic powder, onion powder, or a pinch of chili flakes before air frying. This is a great way to customize the flavor profile.
The Perfect Air Fryer Settings: Time and Temperature
Visual guide about How Long to Cook Kielbasa in Air Fryer
Image source: airfryerfanatics.com
Now, let’s get to the heart of the matter: how long and at what temperature should you air fry your kielbasa?
For Pre-cooked Kielbasa (Reheating & Crisping)
This is the most common scenario. You want to heat it through and get those lovely crispy edges.
Recommended Settings
* Temperature: 375°F (190°C)
* Time: 7 to 12 minutes
Step-by-Step Instructions
1. Preheat the Air Fryer: Preheat your air fryer to 375°F (190°C) for about 3-5 minutes. Preheating ensures your kielbasa starts cooking immediately and evenly.
2. Arrange the Kielbasa: Place the sliced kielbasa in a single layer in the air fryer basket. Do not overcrowd the basket; this is crucial for air circulation and achieving crispiness. Cook in batches if necessary.
3. Cook and Shake: Air fry for 7 minutes.
4. Check and Continue: After 7 minutes, carefully open the air fryer and give the basket a good shake. This helps to flip the pieces and expose them to the hot air from all sides. Continue to cook for another 2-5 minutes, depending on your desired level of crispiness. Keep an eye on it during the final minutes to prevent burning.
5. Serve: Once the kielbasa is heated through and nicely browned and crispy, carefully remove it from the basket and serve immediately.
Tip: If you like your kielbasa extra crispy, lean towards the higher end of the cooking time and give it an extra shake or two.
For Raw Kielbasa (Cooking Through & Crisping)
If you have raw kielbasa, you need to ensure it cooks to a safe internal temperature.
Recommended Settings
* Temperature: 390°F (200°C)
* Time: 12 to 18 minutes (depending on thickness)
Step-by-Step Instructions
1. Preheat the Air Fryer: Preheat your air fryer to 390°F (200°C) for about 3-5 minutes.
2. Arrange the Kielbasa: Place the sliced raw kielbasa in a single layer in the air fryer basket, ensuring there’s space between the pieces.
3. Cook and Shake: Air fry for 6 minutes.
4. Check Temperature and Shake: Open the air fryer. At this point, the kielbasa will start to brown. Shake the basket to redistribute the pieces.
5. Continue Cooking and Check Temperature: Continue to air fry for another 6-12 minutes, shaking the basket every 3-4 minutes. The total cooking time will depend on the thickness of your slices.
6. Verify Internal Temperature: This is the most critical step for raw kielbasa. Use an instant-read meat thermometer to check the internal temperature. The kielbasa is safe to eat when it reaches 165°F (74°C). Insert the thermometer into the thickest part of several slices.
7. Serve: Once the kielbasa has reached the safe internal temperature and has achieved a nice browned and crispy exterior, remove it from the air fryer and serve hot.
Important Note: If your kielbasa is very thick, you might need to reduce the temperature slightly after the initial browning to ensure it cooks through without burning. For example, you could cook at 390°F for 8-10 minutes, then reduce to 375°F for the remaining time.
Tips for Air Fryer Kielbasa Success
Here are some extra tips to help you achieve kielbasa perfection every time:
- Don’t Overcrowd the Basket: This is a golden rule for air frying. Air needs to circulate freely around the food to cook evenly and get crispy. If your basket is too full, the kielbasa will steam rather than fry. Cook in batches if necessary.
- Shake, Shake, Shake: Seriously, don’t forget to shake the basket halfway through (or even more frequently). This ensures all sides get beautifully browned and crispy.
- Watch for Burning: Kielbasa, especially when sliced thin, can go from perfectly browned to burnt very quickly. Keep an eye on it during the last few minutes of cooking.
- Adjust to Your Air Fryer: Every air fryer is a little different. These times and temperatures are great starting points, but you may need to adjust them slightly based on your specific model and how it heats.
- Use a Timer: Set a timer for the initial cooking period and then for shorter intervals as you get closer to the desired crispiness or internal temperature.
- Leftovers: If you have leftover air-fried kielbasa, it’s best reheated in the air fryer for a few minutes to regain its crispiness.
Troubleshooting Common Kielbasa Air Frying Issues
Even with the best intentions, sometimes things don’t go as planned. Here are a few common issues and how to fix them:
Issue: Kielbasa is not crispy enough.
* Solution: You likely didn’t cook it long enough, or the basket was overcrowded. Try cooking for a few more minutes, ensuring there’s space between the slices. Shaking the basket more frequently can also help. For future batches, consider slicing slightly thinner or increasing the temperature by 10-15°F (5-8°C) for the last few minutes.
Issue: Kielbasa is burnt on the outside but not cooked through (especially raw kielbasa).
* Solution: This often happens with raw kielbasa if the temperature is too high for too long. Next time, try reducing the initial temperature to 375°F (190°C) and increase the cooking time, or cook at a higher temperature for a shorter initial period and then reduce the temperature for the remainder of the cooking to ensure it cooks through safely. Always check the internal temperature with a thermometer.
Issue: Kielbasa is unevenly cooked.
* Solution: This is usually due to overcrowding the basket or not shaking/flipping the pieces sufficiently. Ensure you’re cooking in a single layer and give that basket a good shake to promote even air circulation.
Serving Your Air Fryer Kielbasa
Air fryer kielbasa is incredibly versatile! Enjoy it:
- As a standalone snack or appetizer
- In sandwiches or subs
- With scrambled eggs or omelets for breakfast
- As part of a larger meal with roasted vegetables or potatoes
- On skewers with peppers and onions
- On pasta dishes or in stews
The possibilities are endless, and the delicious, crispy texture makes it a welcome addition to almost any meal.
Conclusion
Mastering how to cook kielbasa in the air fryer is a simple yet incredibly rewarding skill for any home cook. By understanding the differences between pre-cooked and raw kielbasa, preparing it correctly, and utilizing the right temperature and time settings, you can achieve consistently delicious results. The key is to experiment slightly with your own air fryer to find the perfect sweet spot. Remember to preheat, don’t overcrowd, and shake that basket! With these tips, you’re well on your way to enjoying perfectly crispy, juicy kielbasa in a fraction of the time. Happy air frying!