
Don’t let a malfunctioning mixer grinder disrupt your kitchen routine! This comprehensive guide empowers you to diagnose and resolve common issues like motor failures, leaking jars, and dull blades. With easy-to-follow, step-by-step instructions, you can get your appliance back in working order and continue enjoying effortless food preparation.
Key Takeaways
- Motor Overheating or Not Starting: Often caused by overload, lack of ventilation, or worn-out carbon brushes. Basic checks and cleaning can often resolve these.
- Leaking Jars: Typically due to damaged gaskets, loose lids, or incorrect assembly. Replacing the gasket or ensuring proper tightness usually fixes this.
- Dull Blades: Blades lose their sharpness with regular use. Sharpening them with appropriate methods or replacing them restores optimal grinding performance.
- Unusual Noises: Grinding sounds can indicate loose blades, worn-out bearings, or foreign objects. Careful inspection and tightening are key.
- Smoke from the Motor: This is a serious sign and often points to motor burnout or electrical issues. Safety first – unplug immediately and seek professional help.
- Jar Lid Not Locking: This can be due to a damaged locking mechanism or debris. Cleaning and checking for cracks are important steps.
- Preventative Maintenance is Key: Regular cleaning, proper usage, and timely replacement of worn parts significantly extend the life of your mixer grinder.
How to Fix Common Mixer Grinder Issues
Your mixer grinder is a workhorse in the kitchen. From grinding spices to making chutneys and purees, it handles a lot of our daily cooking tasks. But like any appliance, it can sometimes act up. A malfunctioning mixer grinder can be incredibly frustrating, especially when you’re in the middle of cooking. Fortunately, many common mixer grinder issues are surprisingly easy to fix yourself, saving you time and money on repairs.
In this comprehensive guide, we’ll walk you through the most frequent problems you might encounter with your mixer grinder. We’ll cover everything from motors that refuse to start to jars that leak and blades that have lost their edge. You’ll learn simple troubleshooting steps, practical tips, and when it’s time to call in a professional. Get ready to bring your trusty appliance back to life!
1. The Motor Isn’t Starting or is Overheating
This is perhaps the most common and concerning issue. Your mixer grinder suddenly refuses to switch on, or it starts and then stops, perhaps with a burning smell. Several factors can contribute to this problem.
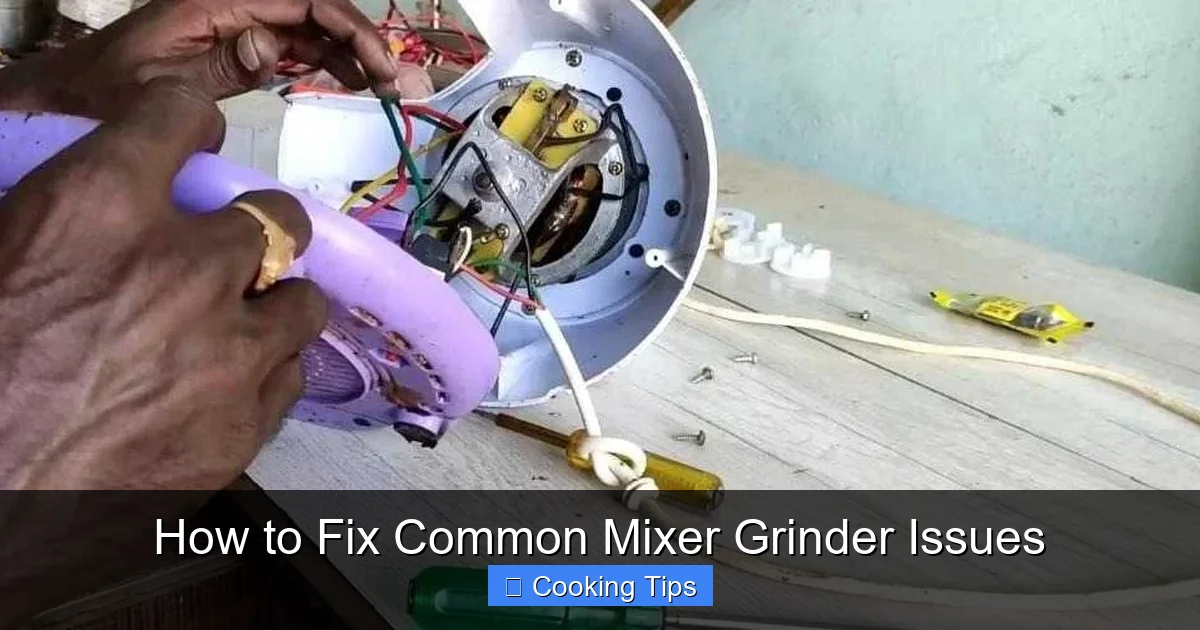
Visual guide about How to Fix Common Mixer Grinder Issues
Image source: kitchenadvising.com
1.1 Check the Power Supply
This might sound obvious, but it’s always the first thing to check. Is the mixer grinder plugged in securely? Is the power outlet working? Try plugging in another appliance to confirm the outlet is functional. If you’re using an extension cord, ensure it’s rated for the power requirements of your mixer grinder.
1.2 Overload Protection (Thermal Cut-out)
Many modern mixer grinders come with an overload protector. This safety feature cuts off power to the motor if it gets too hot, usually due to prolonged use or grinding very thick/hard ingredients. If the motor stops abruptly, it might have tripped the thermal cut-out.
- Solution: Unplug the mixer grinder. Let it cool down completely for at least 15-20 minutes. Ensure you weren’t overloading the jar. Remove some ingredients if necessary, and then try turning it on again.
1.3 Clean the Air Vents
The motor needs ventilation to prevent overheating. Dust, food particles, and grime can block the air vents, restricting airflow and causing the motor to overheat.
- Solution: With the mixer grinder unplugged, use a soft brush or a vacuum cleaner with a brush attachment to gently clean around the air vents on the base unit. Ensure all vents are clear and unobstructed.
1.4 Worn-Out Carbon Brushes
Carbon brushes are small, consumable parts that transfer electricity to the motor’s commutator. Over time, they wear down and can cause the motor to lose power or stop working altogether. This is a common reason for older mixer grinders to fail.
- Solution: This is a more involved repair. If you’re comfortable with basic electrical repairs, you can often find replacement carbon brushes for your specific mixer grinder model online or at an appliance repair shop. You’ll need to open the base unit (ensuring it’s unplugged!) and carefully replace the old brushes with new ones. If you’re not confident, it’s best to take it to a repair professional.
1.5 Check the Coupler
The coupler is a small plastic or rubber piece that connects the motor shaft to the blade assembly in the jar. If this part is damaged, cracked, or worn out, the motor will spin, but it won’t turn the blades. You might hear the motor running, but nothing gets ground.
- Solution: Unplug the unit. Remove the jar and inspect the coupler on both the motor base and the bottom of the jar. If it looks damaged, you can usually purchase a replacement coupler and snap it into place.
2. The Mixer Grinder Jar is Leaking
A leaking jar is messy and can be a fire hazard if liquid gets into the motor base. Leaks usually occur around the lid or the bottom of the jar where the blade assembly is attached.

Visual guide about How to Fix Common Mixer Grinder Issues
Image source: rapidhvactn.com
2.1 Check the Gasket/Seal
The rubber gasket or seal between the blade assembly and the jar is crucial for preventing leaks. Over time, this seal can become worn, cracked, or displaced.
- Solution: Unplug the mixer grinder. Detach the blade assembly from the jar. Carefully inspect the gasket for any damage, signs of wear, or debris. Clean the gasket and the area where it sits. If the gasket is damaged or flattened, it’s best to replace it with a new one that fits your jar model. You can often buy replacement gasket sets for common brands.
2.2 Ensure Proper Assembly
Sometimes, leaks happen simply because the blade assembly or lid wasn’t tightened correctly.
- Solution: Make sure the blade assembly is screwed on tightly to the bottom of the jar. Similarly, ensure the lid is securely locked in place before operating the mixer grinder.
2.3 Inspect the Jar for Cracks
While less common, the jar itself could have a small crack, especially if it’s made of plastic. This crack would lead to a leak.
- Solution: Visually inspect the entire jar, both inside and out, for any signs of cracks or damage. If the jar is cracked, it needs to be replaced.
3. The Mixer Grinder Blades are Dull or Not Grinding Effectively
If your mixer grinder is struggling to grind ingredients into a fine powder or smooth paste, it’s likely that the blades have become dull.

Visual guide about How to Fix Common Mixer Grinder Issues
Image source: kenstar.in
3.1 Regular Sharpening
Blades lose their sharpness with continuous use. Regular sharpening can restore their effectiveness.
- Solution: You can sharpen the blades using coarse salt or small ice cubes. Fill the jar partially with coarse salt or a few ice cubes, add a small amount of water to make a paste, and run the mixer grinder for a minute or two. This can help hone the edges of the blades. Alternatively, you can try running the mixer grinder with a few tablespoons of baking soda and a little water.
3.2 Check for Obstructions
Sometimes, ingredients might get stuck around the blades, hindering their movement and grinding efficiency.
- Solution: Unplug the mixer grinder. Detach the blade assembly and inspect it for any food particles or foreign objects that might be obstructing the blades. Clean them thoroughly.
3.3 Replace Worn-Out Blades
If sharpening doesn’t seem to help, or if the blades appear visibly chipped or bent, they might need to be replaced.
- Solution: Blade assemblies are usually replaceable. You can purchase a new blade assembly unit designed for your specific mixer grinder model. Unscrew the old one from the jar and screw on the new one.
4. Unusual Noises During Operation
A mixer grinder should make a consistent whirring sound. Grinding, rattling, or screeching noises can indicate a problem.
4.1 Loose Blades
If the blade assembly is not properly tightened to the jar, it can cause rattling noises as it spins.
- Solution: Ensure the blade assembly is screwed on tightly to the bottom of the jar before operation.
4.2 Worn-Out Bearings
The motor has bearings that allow the shaft to spin smoothly. If these bearings are worn or damaged, they can produce a grinding or whining sound.
- Solution: This is a more complex repair that typically requires professional attention. If you suspect worn bearings, it’s best to take your mixer grinder to an authorized service center.
4.3 Foreign Objects
Occasionally, a small, hard object like a stone or a piece of bone might have accidentally gotten into the jar and can cause a loud grinding noise.
- Solution: Immediately switch off and unplug the mixer grinder. Carefully remove the jar and empty its contents to check for any foreign objects. Remove them and try again.
5. Smoke Coming from the Motor
If you see smoke emanating from the motor base, it’s a serious sign and requires immediate action.
5.1 Immediate Power Disconnection
Smoke usually indicates that the motor is overheating severely, potentially due to internal damage, a short circuit, or burnout.
- Solution: Immediately unplug the mixer grinder. Do not attempt to use it again. Do not try to diagnose or fix this yourself unless you have extensive electrical repair experience. The risk of electric shock or further damage is high.
5.2 Seek Professional Repair
Smoke from the motor is almost always indicative of a major internal problem.
- Solution: Contact the manufacturer’s customer support or take your mixer grinder to an authorized service center. The motor likely needs to be replaced or repaired by a qualified technician.
6. Jar Lid Not Locking Properly
The lid not locking securely can prevent the mixer grinder from starting (as most have safety interlocks) and can also lead to ingredients splashing out.
6.1 Check for Debris
Food particles or dried ingredients can prevent the lid from seating properly and locking into place.
- Solution: Clean the rim of the jar and the inside of the lid thoroughly. Ensure there’s no residue preventing a snug fit.
6.2 Inspect the Locking Mechanism
The locking tabs on the lid or the corresponding slots on the jar might be damaged or warped.
- Solution: Examine the lid and the jar for any signs of cracks, bends, or missing parts in the locking mechanism. If the lid or jar is damaged, you may need to replace them.
Preventative Maintenance for Longevity
While fixing issues is important, a little preventative maintenance goes a long way in keeping your mixer grinder in top condition and preventing problems in the first place.
- Clean Regularly: After each use, wash the jars, lids, and blade assemblies thoroughly. Wipe down the motor base with a damp cloth, ensuring no water gets into the vents.
- Don’t Overload: Avoid filling the jars beyond their recommended capacity. Overloading strains the motor and can lead to overheating.
- Use Appropriate Ingredients: For hard ingredients, use the appropriate jar and speed setting. Don’t try to grind extremely hard items like whole coconuts unless your mixer grinder is specifically designed for it.
- Check for Wear and Tear: Periodically inspect the gaskets, blades, and couplers for any signs of damage or wear. Replace them as soon as you notice issues.
- Store Properly: Store your mixer grinder in a clean, dry place. Ensure the jars and lids are dry before storing to prevent mold or mildew.
Conclusion
A mixer grinder is an indispensable kitchen companion, and learning to troubleshoot common issues can save you a lot of hassle. From simple power checks and cleaning to replacing worn-out parts like gaskets or carbon brushes, most problems are manageable with a little effort. Always prioritize safety by unplugging the appliance before any inspection or repair. For more complex issues like motor burnout or bearing problems, don’t hesitate to seek professional help. By understanding these common mixer grinder issues and their solutions, you can ensure your appliance continues to serve you efficiently for years to come.