

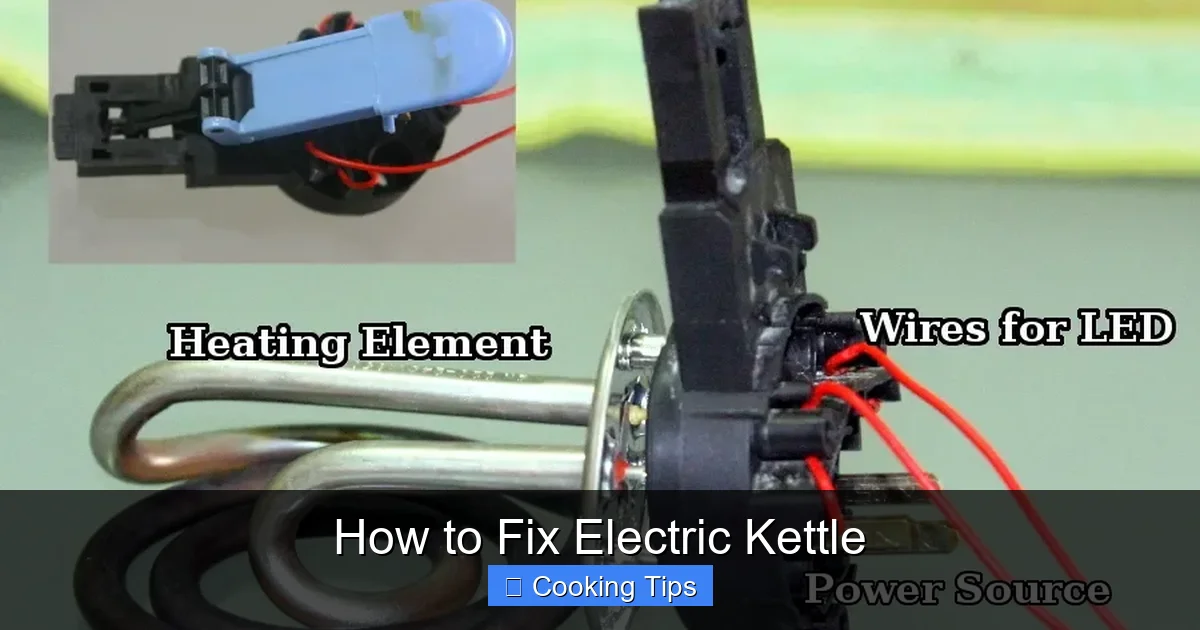
Don’t discard that malfunctioning electric kettle just yet! This comprehensive guide will walk you through common electric kettle problems and provide step-by-step instructions for fixing them. From basic cleaning to more involved electrical checks, learn how to get your kettle back to boiling water efficiently and safely. With simple tools and a little patience, you can save money and reduce waste by repairing your electric kettle yourself.
Key Takeaways
- Safety First: Always unplug the electric kettle and ensure it’s completely cool before attempting any repairs to avoid electric shock or burns.
- Common Issues: Many electric kettle problems, like slow boiling or not switching off, stem from simple issues such as limescale buildup or a dirty thermostat.
- Troubleshooting Basics: Start with the easiest fixes, like checking the power outlet and cord, before moving to more complex internal components.
- Cleaning is Key: Regular descaling with vinegar or citric acid is crucial for maintaining performance and preventing common faults.
- Thermostat and Switch: These are common culprits for kettles not turning on or off; understanding their function is key to troubleshooting.
- When to Call a Pro: If you’re uncomfortable with electrical components or the issue persists after troubleshooting, it’s safer to seek professional help or consider replacement.
How to Fix Electric Kettle
Is your trusty electric kettle acting up? Perhaps it’s taking forever to boil, not switching off automatically, or worse, not turning on at all. Before you resign yourself to a life without quick cups of tea or instant coffee, know that many common electric kettle problems are surprisingly easy to fix. This guide will empower you to troubleshoot and repair your electric kettle, saving you money and reducing waste.
We’ll cover everything from simple cleaning techniques that can revive a sluggish kettle to more in-depth checks of internal components. You’ll learn about the most frequent issues people encounter with electric kettles and how to address them safely and effectively. By the end of this guide, you’ll have the knowledge and confidence to tackle most electric kettle repairs right in your own kitchen.
Understanding Your Electric Kettle
Before we dive into repairs, it’s helpful to understand the basic components of your electric kettle. While designs vary, most share a common structure:
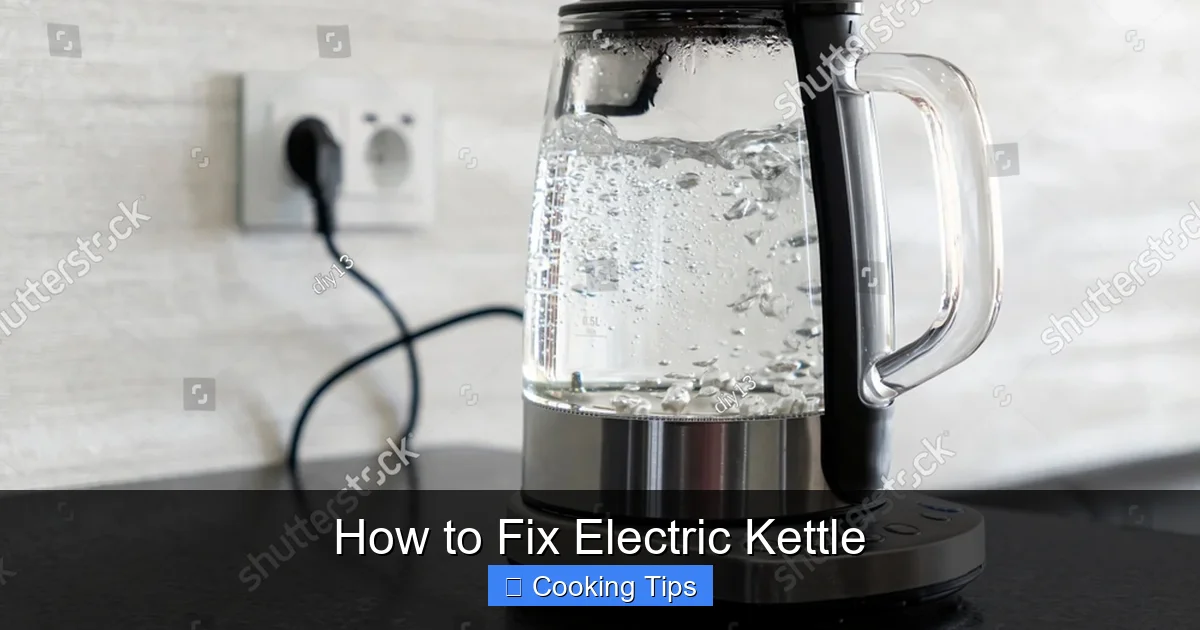
Visual guide about How to Fix Electric Kettle
Image source: shutterstock.com
- Body: The main container that holds the water.
- Heating Element: Usually concealed at the bottom, this electric coil heats the water.
- Power Base: Connects to the mains electricity and houses the switch mechanism.
- Cord and Plug: For powering the kettle.
- Thermostat/Cut-off Switch: This crucial safety feature detects when the water has boiled and automatically switches off the kettle. It also prevents the kettle from boiling dry.
- Indicator Light: Shows when the kettle is powered on.
When your electric kettle malfunctions, it’s often one of these components that’s at fault.
Safety First: Essential Precautions
Working with any electrical appliance requires caution. Before you begin any troubleshooting or repair, please follow these safety guidelines:
Visual guide about How to Fix Electric Kettle
Image source: seriouseats.com
- Unplug the Kettle: Always disconnect the power cord from the wall socket before you touch any part of the kettle or its base.
- Cool Down: Ensure the kettle and its components are completely cool to the touch. Steam and hot water can cause severe burns.
- Dry Hands: Never handle electrical components with wet hands.
- Inspect the Cord: Check the power cord and plug for any signs of damage like fraying, cuts, or exposed wires. If the cord is damaged, it’s often best to replace the entire kettle, as replacing the cord can be complex and dangerous if not done correctly.
- Water and Electricity: Keep water away from the electrical connections and the power base.
Common Electric Kettle Problems and Solutions
Let’s tackle the most common issues people face with their electric kettles and how to fix them.
Issue 1: Kettle Not Turning On
This is perhaps the most frustrating problem. Your kettle is plugged in, but nothing happens when you press the switch. Let’s troubleshoot.
Step 1: Check the Power Source
- Verify the Outlet: Plug in another small appliance (like a lamp or phone charger) into the same wall socket to confirm it’s working. If the socket is dead, you might have a tripped circuit breaker or a blown fuse.
- Test the Kettle on a Different Outlet: Try plugging your kettle into a different, known-working socket in your home.
Step 2: Inspect the Power Cord and Plug
- Visual Check: Carefully examine the entire length of the power cord and the plug for any visible damage. Look for cuts, kinks, or signs of melting. If you find any damage, stop here; the cord needs professional replacement or a new kettle is recommended.
- Connection to Base: Ensure the plug is firmly seated in the socket.
Step 3: Clean the Power Base Contacts
The metal contacts on the bottom of the kettle and inside the power base can accumulate residue, hindering the electrical connection.
- Kettle Contacts: With the kettle unplugged and cool, gently wipe the metal rings on the bottom of the kettle with a dry, soft cloth. If there’s grime, use a cotton swab dipped in a small amount of rubbing alcohol (ensure it evaporates completely before use).
- Base Contacts: Inspect the metal prongs inside the power base. If they appear dirty or corroded, use a cotton swab with a tiny bit of rubbing alcohol to clean them. Be very careful not to let any liquid drip into the base’s internal workings.
Step 4: Check the Kettle’s Internal Switch/Thermostat (Advanced)
If the above steps don’t work, the problem might be internal, often related to the thermostat or the on/off switch mechanism within the base. This is a more advanced repair and requires careful disassembly. Proceed with extreme caution.
- Disassemble the Base: Many kettle bases have screws hidden under rubber feet or labels. Carefully remove these screws to separate the base from the jug. Note how each part comes apart to aid reassembly.
- Inspect the Switch: Locate the on/off switch. Check for any obvious damage, debris, or loose connections. Sometimes, a simple jiggle or cleaning can fix a stuck switch.
- Examine Thermostat: The thermostat is a small component, often a bimetallic strip. If it looks burnt or damaged, it needs replacement.
- Check Internal Wiring: Look for any loose or broken wires connecting the power cord to the switch and thermostat.
Note: If you are not comfortable working with internal electrical components, it’s safer to replace the kettle at this stage.
Issue 2: Kettle Boils But Doesn’t Switch Off Automatically
This is a critical safety issue. A kettle that continues to boil indefinitely can be a fire hazard. The most common cause is a faulty thermostat or a blocked steam vent.
Step 1: Check for Limescale Buildup
Limescale, or mineral deposits from hard water, can insulate the thermostat, preventing it from sensing the boiling temperature. This is the most frequent culprit.
- Vinegar Descaling: Fill the kettle about halfway with white vinegar. Add an equal amount of water (so it’s half vinegar, half water). Let it sit for at least an hour, or overnight for heavy buildup.
- Boil and Rinse: Pour out the vinegar solution. Fill the kettle with fresh water and boil it. Discard the boiled water. You may need to boil and discard water a couple of times to remove any lingering vinegar smell.
- Citric Acid Method: Alternatively, you can use citric acid. Dissolve 1-2 tablespoons of citric acid in a full kettle of water. Boil, let it sit for 30 minutes, then discard and rinse thoroughly.
After descaling, test your kettle. If it now switches off correctly, you’ve solved the problem!
Step 3: Ensure Steam Vent is Clear
Some kettles have a small steam vent near the lid. If this gets blocked, steam can’t escape properly, affecting the thermostat’s function. Ensure the vent is clear of any debris.
Step 4: Inspect the Thermostat (Advanced)
If descaling doesn’t help, the thermostat itself may be faulty. As mentioned in Issue 1, this involves disassembling the kettle base. You’ll need to locate the thermostat (often a small disc or probe) and check its connections or for signs of damage. Replacement of a thermostat is possible but often complex.
Issue 3: Kettle Switches Off Too Soon (Doesn’t Reach a Full Boil)
Your kettle turns off before the water is fully boiled, leaving you with lukewarm drinks. This can also be due to limescale or a malfunctioning thermostat.
Step 1: Descale Thoroughly
Start with the descaling process outlined in Issue 2. Limescale buildup can trick the thermostat into thinking the water has reached boiling point prematurely.
Step 2: Check Water Level
Ensure you are filling the kettle with an adequate amount of water. If the water level is too low, it might heat up too quickly, and the thermostat might engage before a proper boil is achieved.
Step 3: Inspect Thermostat (Advanced)
Again, if descaling doesn’t resolve the issue, the thermostat might be the problem. It could be overly sensitive or failing. This requires internal inspection as described earlier.
Issue 4: Kettle Leaking Water
A leaking kettle is not only messy but can also be dangerous if water comes into contact with electrical components.
Step 1: Check the Lid Seal
Ensure the lid is properly closed and latched. Some lids have rubber seals; check if these are intact and correctly positioned.
Step 2: Inspect the Spout and Pouring Area
Sometimes, water might appear to be leaking from the base but is actually condensation or water dripping from the spout after pouring. Ensure the spout is not damaged.
Step 3: Examine the Kettle Body
Look for cracks or damage to the kettle’s body, especially around the seam where the body might be joined to the base or handle. If the body is cracked, the kettle is usually irreparable and needs to be replaced.
Step 4: Check the Base Connection (for Cordless Kettles)
Ensure the kettle is sitting correctly on its base. Sometimes a poor connection can lead to water pooling, which might be mistaken for a leak.
Step 5: Internal Sealing (Advanced)
In rare cases, the seal between the heating element and the kettle body might have failed. This is an internal issue that is difficult to repair and usually means replacing the kettle.
Issue 5: Kettle Smells or Tastes of Plastic or Metal
A new kettle might have a slight plastic smell, but an persistent odd taste or smell can be concerning.
Step 1: Initial Boiling Cycles
For new kettles, manufacturers often recommend boiling a few full kettles of water and discarding them to get rid of any manufacturing residues or plastic smells. Do this a few times.
Step 2: Thorough Descaling
Even if you don’t have hard water, mineral deposits can sometimes impart strange tastes. A good descaling (as described in Issue 2) can help.
Step 3: Check for Internal Damage
If the smell persists after thorough cleaning and initial boiling cycles, there might be an issue with the internal materials of the kettle, or the heating element itself might be degrading. This often indicates a faulty kettle that needs replacement.
Troubleshooting Summary Table
Here’s a quick reference for common issues and their likely solutions:
| Problem | Likely Cause(s) | Primary Solution(s) | Advanced Check(s) |
|---|---|---|---|
| Not Turning On | Power outlet, damaged cord, dirty contacts | Test outlet, inspect cord, clean contacts | Internal switch/thermostat |
| Doesn’t Switch Off | Limescale, blocked vent, faulty thermostat | Descale thoroughly, clear vent | Inspect thermostat |
| Switches Off Too Soon | Limescale, low water level, faulty thermostat | Descale, check water level | Inspect thermostat |
| Leaking Water | Loose lid, damaged seal, cracked body | Check lid/seals, inspect body | Internal seals |
| Bad Smell/Taste | Manufacturing residue, limescale, internal issue | Initial boils, descale | Internal materials/element |
When to Consider Replacement
While many electric kettle issues are fixable, there are times when it’s best to let go and buy a new one. Consider replacement if:
- The power cord is visibly damaged (frayed, cut, or melted).
- The kettle body has cracks or significant physical damage.
- You’ve attempted repairs on internal electrical components and are unsure of your work, or the issue persists.
- The cost of potential replacement parts and your time outweighs the cost of a new kettle.
- The kettle is very old and showing signs of general wear and tear.
Safety should always be your top priority. If you have any doubts about the integrity or safety of your electric kettle after attempting repairs, it’s time for a new one.
Conclusion
Fixing your electric kettle can be a rewarding experience, allowing you to save money and contribute to a more sustainable lifestyle. By understanding the common problems and following these step-by-step guides, you can revive your sputtering appliance and enjoy perfectly boiled water for your favorite beverages. Remember to always prioritize safety by unplugging the kettle and ensuring it’s cool before you begin any work. With a little patience and these handy tips, your electric kettle can be back in tip-top shape in no time!
