
Is your food processor’s dough blade dull or damaged? This comprehensive guide will walk you through the simple process of replacing it. You’ll learn how to identify the right replacement blade and safely remove and install it, ensuring your food processor is ready for all your baking needs. Get back to effortless dough making with these easy-to-follow steps.
Key Takeaways
- Identify the Correct Replacement Blade: Always ensure the new dough blade is compatible with your specific food processor model to avoid performance issues or damage.
- Safety First: Disconnect the food processor from the power source and handle the blade with extreme care due to its sharpness.
- Simple Removal Process: Most dough blades are designed for easy removal, often involving a twist-and-lift mechanism.
- Thorough Cleaning: Clean both the old and new blade areas to ensure optimal performance and hygiene.
- Secure Installation: Properly seat the new dough blade to prevent it from dislodging during operation.
- Test Before Use: Briefly run the empty processor to confirm the new blade is correctly installed and functioning smoothly.
How to Replace Dough Blade for Food Processor
Welcome to our complete guide on replacing your food processor’s dough blade! If you’re an avid baker, you know how crucial a sharp and well-functioning dough blade is for achieving perfect bread, pizza dough, and more. Over time, even the best dough blades can become dull, bent, or chipped, impacting their efficiency and potentially your results. But don’t worry! Replacing a food processor dough blade is a surprisingly simple task that you can easily do yourself.
In this guide, we’ll cover everything you need to know to successfully replace your dough blade. We’ll start by helping you identify the right replacement part, move on to safely removing the old blade, and then guide you through installing the new one. By the end, your food processor will be as good as new, ready to tackle all your baking adventures in 2026 and beyond!
Why Replace Your Food Processor Dough Blade?
Before we dive into the “how,” let’s quickly touch on the “why.” A dull dough blade can lead to several issues:
- Ineffective Dough Mixing: It won’t properly combine ingredients, leaving you with unevenly mixed dough or requiring much longer processing times.
- Overheating the Motor: When the blade struggles, the motor has to work harder, potentially leading to overheating and reduced lifespan.
- Poor Dough Texture: The gluten development might be compromised, resulting in dense or tough baked goods.
- Safety Hazards: A bent or chipped blade can become loose during operation, posing a risk of damage to the processor or even injury.
Regularly inspecting your dough blade and replacing it when it shows signs of wear is essential for maintaining your food processor’s performance and ensuring your culinary creations are always top-notch.
Step 1: Identify the Correct Replacement Dough Blade
This is perhaps the most critical step. Using the wrong blade can lead to poor performance, damage to your food processor, or even safety issues.
A. Check Your Food Processor’s Manual
The best place to start is your food processor’s original manual. It will list the exact model number of your appliance and often provide part numbers for accessories like the dough blade. If you no longer have the physical manual, a quick search online for “[Your Food Processor Brand and Model Number] manual” should bring up a digital copy.
B. Look for the Model Number on the Appliance
If the manual is nowhere to be found, you can usually find the model number directly on the food processor itself. Look for a sticker or plate on the base of the unit, often on the bottom. This number is key to finding compatible parts.
C. Search Online Retailers or Manufacturer’s Website
Once you have your model number, you can search for replacement dough blades on the manufacturer’s official website or reputable online retailers specializing in kitchen appliance parts. Use the model number in your search query. For example, “Cuisinart DLC-8S dough blade replacement” or “KitchenAid KFP1470 dough blade.”
D. Compare Blade Shapes and Features
Dough blades vary slightly in design between brands and even models within the same brand. Carefully examine images of replacement blades and compare them to your current one. Pay attention to the overall shape, the number of prongs, and any distinctive curves or angles. If in doubt, contact the retailer or manufacturer for assistance before purchasing.
Step 2: Prepare for Blade Replacement
Safety and a clear workspace are paramount before you begin swapping out parts.
A. Unplug the Food Processor
This is a non-negotiable safety step. Always ensure your food processor is completely unplugged from the power outlet before attempting to remove or install any blades. Do not rely on the machine being “off”; physical disconnection is essential.
B. Clear Your Workspace
Find a clean, flat surface to work on. This will prevent small parts from getting lost and ensure you have enough room to maneuver the blade safely. Lay down a towel or mat if you prefer a softer surface.
C. Gather Your Tools (If Any)
Most dough blade replacements require no tools at all. They are designed for easy, tool-free removal. However, in rare cases, some older or specialized models might require a specific wrench or screwdriver. Always refer to your manual if you’re unsure.
Step 3: Remove the Old Dough Blade
This step varies slightly depending on your food processor model, but the general principle is usually the same.
A. Remove the Food Processor Bowl
Carefully lift the food processor bowl off the base. Most bowls simply lift straight up, but some might have a locking mechanism that requires a slight twist.
B. Locate the Dough Blade
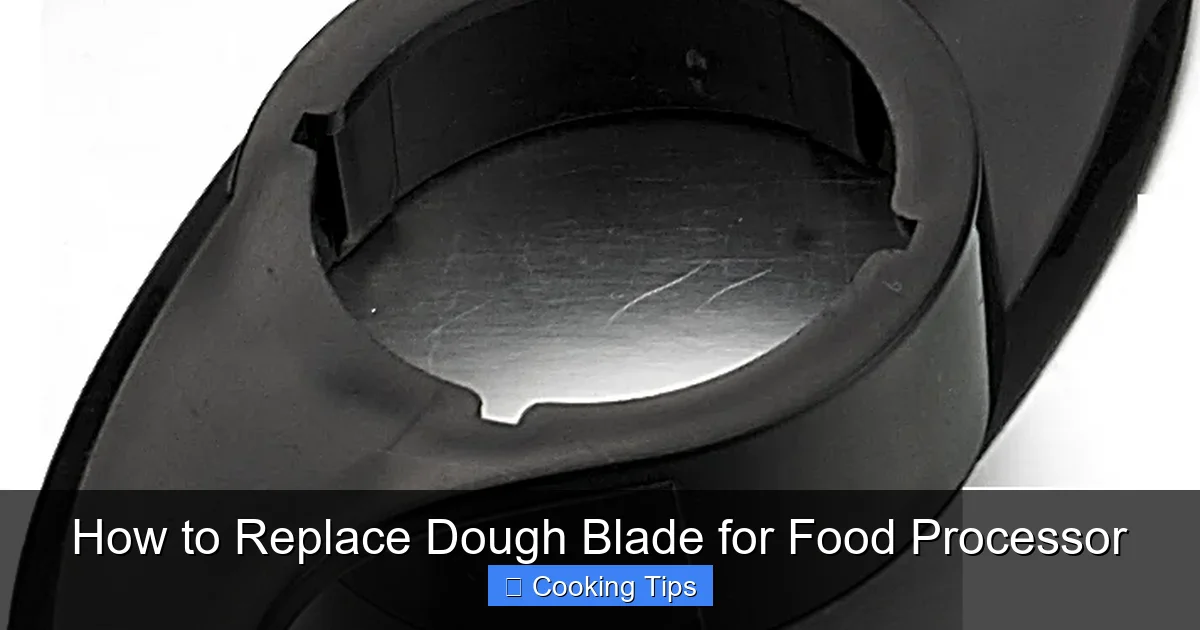
The dough blade is typically the largest and most distinctive blade designed for mixing and kneading. It often has a curved, S-shaped design with blunt edges meant to process dough without overworking it. It sits directly on the central spindle or shaft inside the bowl.
C. Detach the Dough Blade
This is where the method can differ.
- Twist-and-Lift Method: For many models, the dough blade is secured by simply being pushed down onto the central shaft. To remove it, grasp the top of the blade firmly and twist it counter-clockwise. Once it’s loose, lift it straight up and off the shaft.
- Locking Mechanism: Some blades might have a small locking tab or ring at the base. You may need to press this tab or twist a collar while lifting the blade. Again, consult your manual if you encounter resistance.
- Handle with Care: Remember, even if it’s a “dough” blade, the edges can still be sharp enough to cause nicks. Grip the thickest part of the blade or the central hub whenever possible.
D. Inspect and Clean the Old Blade and Bowl
Take this opportunity to inspect your old dough blade for any signs of damage, wear, or dullness. Clean the old blade and the inside of the bowl thoroughly. Residue from previous use can impact the performance of the new blade. A good wash with warm, soapy water is usually sufficient. Ensure everything is completely dry before proceeding.
Step 4: Install the New Dough Blade
Installing the new blade is essentially the reverse of removing the old one.
A. Position the New Blade
Take your new, compatible dough blade. Orient it so that it aligns with the central spindle or shaft inside the food processor bowl. There’s usually a specific way it needs to sit on the shaft, often indicated by a notched opening or a specific flat side on the shaft.
B. Secure the Blade
Once positioned correctly on the shaft, push the blade down firmly.
- Twist-and-Lock: For twist-and-lock mechanisms, you’ll typically twist the blade clockwise until you feel it lock into place. You might hear or feel a click.
- Simple Seating: For blades that just push on, ensure it’s seated all the way down on the shaft and feels stable.
C. Test for Security
Gently try to wiggle the dough blade. It should feel firmly attached and should not spin freely or feel loose. A secure fit is crucial for safe and effective operation.
Step 5: Reassemble and Test
Putting it all back together and running a quick test ensures everything is working correctly.
A. Reattach the Food Processor Bowl
Place the bowl back onto the food processor base. Ensure it’s properly seated and locked if your model has a locking mechanism for the bowl.
B. Plug In and Test
Plug the food processor back into the power outlet. Without any ingredients, turn the food processor on for a few seconds. Listen for any unusual noises, vibrations, or wobbling. The blade should spin smoothly and quietly. If you hear grinding or see excessive movement, immediately turn it off and unplug it to re-check the blade installation.
Troubleshooting Common Issues
Even with clear instructions, you might encounter a minor hiccup. Here are a few common issues and how to address them:
Issue: New blade doesn’t fit.
Solution: Double-check that you purchased the correct replacement blade for your specific food processor model. Re-examine your appliance’s model number and compare it to the specifications of the blade you bought. Contact the seller for a return or exchange if it’s indeed the wrong part.

Visual guide about How to Replace Dough Blade for Food Processor
Image source: i.pinimg.com

Visual guide about How to Replace Dough Blade for Food Processor
Image source: needapart.co.nz
Visual guide about How to Replace Dough Blade for Food Processor
Image source: magiccos.co
Issue: Blade feels loose after installation.
Solution: Unplug the processor. Remove and re-install the blade, ensuring it’s fully seated and twisted/locked into place according to your model’s design. Make sure there isn’t any debris preventing it from seating properly.
Issue: Strange noises or excessive vibration during testing.
Solution: Unplug the processor. Remove the bowl and the blade. Inspect the central shaft and the blade for any obstructions or damage. Reinstall the blade carefully, ensuring it’s aligned correctly and fully secured. If the problem persists, there might be an issue with the processor’s motor or shaft, and you may need to contact customer support.
Conclusion
Replacing a dough blade for your food processor is a straightforward maintenance task that can significantly extend the life and enhance the performance of your appliance. By following these simple steps, you can confidently swap out a dull or damaged blade for a new one, getting your food processor back to its prime condition. Remember to always prioritize safety by unplugging the unit and handling the blade with care. Happy baking, and enjoy your perfectly mixed dough with your newly revitalized food processor!