
Don’t let missing screws stop your food processing! This guide offers a straightforward approach to replacing lost or damaged screws and bolts in your food processor. We’ll cover identifying the right replacements, the simple steps for removal and installation, and essential maintenance tips to ensure your appliance runs smoothly for years to come. With these easy-to-follow instructions, you’ll restore your food processor’s functionality in no time.
How to Replace Food Processor Screws and Bolts
Is your trusty food processor looking a little worse for wear? Perhaps you’ve noticed a screw or bolt has gone missing, or maybe one is looking a bit stripped. Don’t despair! A few missing fasteners might seem like a small issue, but they can impact your appliance’s stability and safety. This comprehensive guide will walk you through the simple steps of replacing food processor screws and bolts, ensuring your kitchen workhorse is back in tip-top shape. We’ll cover everything from identifying the right replacement parts to safely installing them, empowering you to handle minor repairs with confidence. By the end of this guide, you’ll be well-equipped to tackle these common food processor maintenance tasks.
Key Takeaways
- Identify the Need Early: Regularly inspect your food processor for loose, missing, or damaged screws and bolts to prevent further issues.
- Source the Correct Replacements: Understanding screw types (metric, imperial, thread pitch) is crucial for finding compatible parts.
- Gentle Disassembly is Key: Use the right tools and apply careful pressure to avoid stripping screw heads or damaging the appliance.
- Proper Installation Prevents Problems: Ensure screws are seated correctly and tightened to the appropriate level to maintain structural integrity.
- Keep a Spare Parts Kit: Having a small collection of common screw types can be a lifesaver for quick repairs.
- Regular Maintenance Extends Life: Proper cleaning and checking for loose fasteners will keep your food processor in optimal working condition.
Why Replace Food Processor Screws and Bolts?
Food processors are assembled with various screws and bolts to hold their components together securely. Over time, these fasteners can loosen due to vibration during operation, improper cleaning, or accidental impacts. A missing or loose screw can lead to:
- Instability: The appliance might wobble or feel less secure during use.
- Performance Issues: Loose parts can affect how the blades spin or how the lid seals.
- Safety Hazards: In extreme cases, loose components could detach, posing a risk.
- Water Ingress: Gaps created by missing screws can allow liquid to seep into the motor housing, causing damage.
It’s always better to address these issues promptly. Replacing a few screws is a much simpler and less expensive solution than dealing with a malfunctioning or damaged food processor.
Step 1: Assess the Damage and Identify the Missing Fastener
Before you can replace a screw or bolt, you need to know exactly what you’re looking for. Take a close look at the area where the fastener is missing or damaged.
Identify the Location
Note precisely where the screw or bolt was located. Is it on the base unit, the lid, the handle, or another part of the food processor? This will help you understand the size and type of fastener you need.
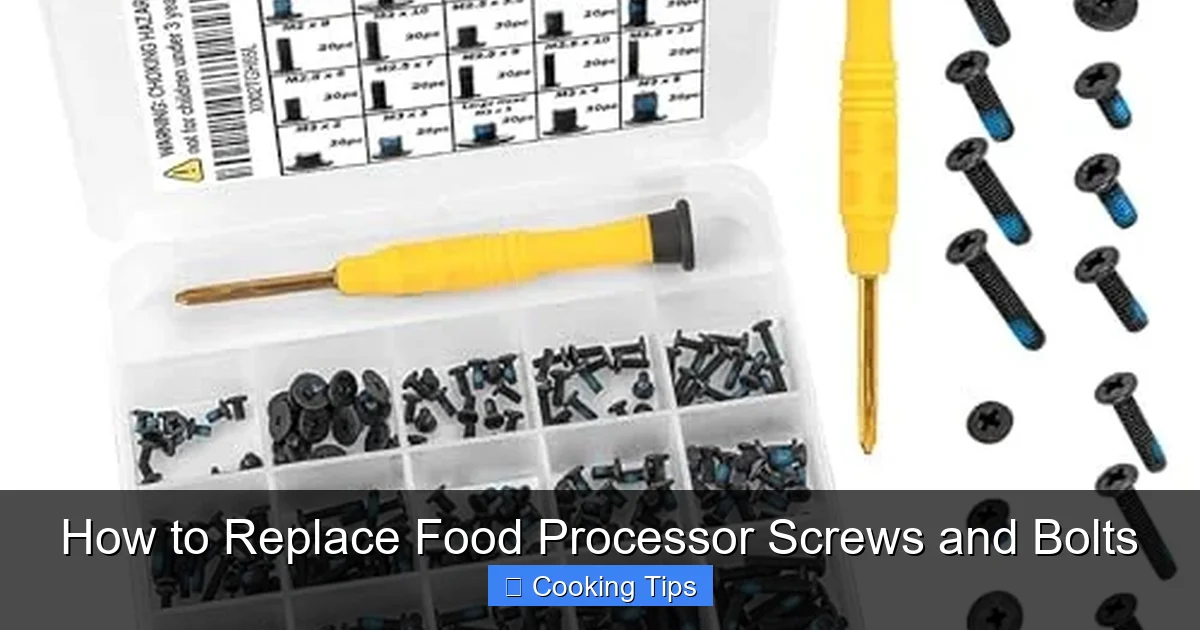
Visual guide about How to Replace Food Processor Screws and Bolts
Image source: kitchenably.com
Determine the Type of Fastener
Most food processors use standard machine screws or sometimes small bolts. Observe any remaining screws in the vicinity for clues:
- Head Type: Is it a Phillips head (cross shape), a flathead (single slot), or perhaps a Torx (star shape) or Allen (hexagonal) head? Phillips and flathead are most common in home appliances.
- Thread Type: Are the threads fine or coarse? Most appliance screws have machine threads.
- Length: Estimate the length of the missing screw. You can often measure the depth of the hole or compare it to a similar screw.
- Diameter: Visually estimate the diameter of the screw shaft.
Check for Stripped Screws
If a screw is stripped, the head has been damaged, and your screwdriver can no longer grip it. In this case, you’ll need to carefully extract the stripped screw before you can replace it with a new one. We’ll cover this in the troubleshooting section.
Step 2: Sourcing the Correct Replacement Screws and Bolts
This is a crucial step. Using the wrong type of screw can damage your food processor or not hold the parts together properly.
Option 1: Check Your Appliance Manual
Some manufacturers include a parts list or diagrams in the user manual. If you’re lucky, it might even specify the exact screw sizes used. Look for model-specific documentation on the manufacturer’s website if you’ve lost your physical copy.
Visual guide about How to Replace Food Processor Screws and Bolts
Image source: 64.media.tumblr.com
Option 2: Contact the Manufacturer or Authorized Service Center
This is often the most reliable method. Provide your food processor’s model number and a description of the missing part. They can often supply you with the exact OEM (Original Equipment Manufacturer) replacement screws.
Option 3: Visit a Hardware Store or Online Retailer
If direct manufacturer support isn’t an option, you’ll need to find compatible screws. Bring a similar, intact screw from your food processor (if available) to the store for comparison. If not, measure the hole and try to determine the thread size and pitch.
Understanding Screw Specifications
Screws are often identified by:
- Diameter: Measured in millimeters (e.g., M3, M4) or inches (e.g., #6, #8).
- Length: Measured from the underside of the head to the end of the screw.
- Thread Pitch: The distance between threads. For metric screws, this is often specified (e.g., M4 x 0.7 means a 4mm diameter screw with a 0.7mm thread pitch). Standard imperial threads are counted as threads per inch (TPI).
- Head Type: Phillips, flat, etc.
For food processors, you’re likely looking for small metric machine screws (e.g., M3 or M4) or their imperial equivalents. Many hardware stores have small bins of assorted screws, and you can often find what you need by comparing.
Tip for Hardware Store Shopping:
If you can’t bring a sample, take clear photos of the area and any remaining screws. Note down the approximate length and diameter. Most hardware store staff are very knowledgeable and can help you select the right type.
Step 3: Safely Removing Damaged or Remaining Screws
Once you have your replacement screws, it’s time to prepare for installation. This involves removing any old, damaged, or loose screws.
Gather Your Tools
You’ll likely need:
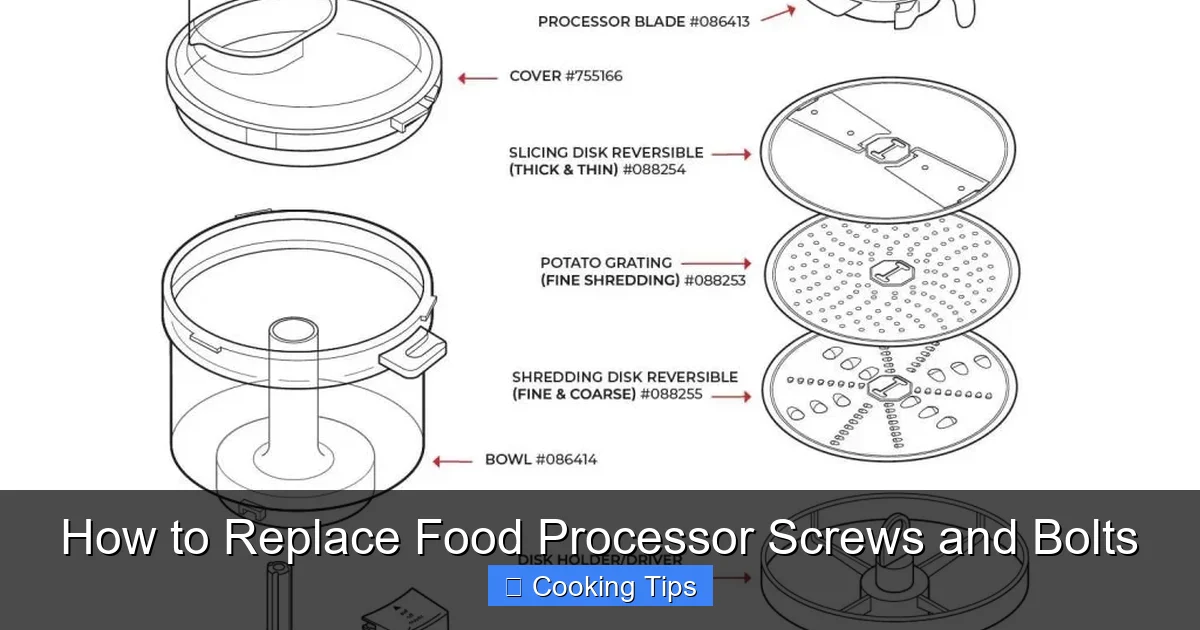
Visual guide about How to Replace Food Processor Screws and Bolts
Image source: kitchenadvising.com
- The correct screwdriver (Phillips, flathead, etc.) that fits the screw head snugly.
- A pair of needle-nose pliers (useful for grasping small screws or loose parts).
- A small container to hold removed screws.
- (Optional) A small dab of penetrating oil if a screw is stuck.
Remove Loose or Damaged Screws
For loose screws, simply unscrew them. For stripped screws, refer to the troubleshooting section below.
Important Note on Tightening
When you’re putting screws back in, remember that food processors are often made of plastic. Overtightening can strip the plastic threads or crack the housing. Aim for a snug fit, not extreme force.
Step 4: Installing the New Screws
With the old screws removed and your new ones ready, it’s time for the final step.
Align the Parts
Ensure the parts that the screw will connect are properly aligned. If you’re replacing a screw on the base, make sure the housing pieces are flush.
Insert the New Screw
Carefully insert the new screw into the hole. If it doesn’t thread easily, don’t force it. Remove it and try again, ensuring it’s not cross-threaded. You might need to hold the mating part in place with your other hand or a pair of pliers.
Tighten Gradually
Start by turning the screw a few times to establish the threads. Then, use your screwdriver to tighten it. Work in a back-and-forth motion – tighten a bit, then loosen a bit – to help the screw settle into the threads smoothly. Stop when the screw is snug and the parts are held firmly together. Do not overtighten.
Repeat for All Missing Fasteners
If you had multiple screws to replace, repeat the process for each one. Once all new screws are in place, gently test the integrity of the assembly.
Step 5: Test and Clean
After replacing the screws, it’s good practice to test your food processor and clean it.
Operational Test
With the screws replaced, assemble your food processor as usual (lid, bowl, blade). Turn it on for a brief period to ensure everything feels stable and secure. Listen for any unusual noises or vibrations.
Cleaning
Now is a great time to give your food processor a thorough cleaning. This will remove any dust or debris that might have accumulated during the repair process. Always unplug the appliance before cleaning any parts.
Troubleshooting Common Issues
Even with the best intentions, you might encounter a few bumps in the road. Here are solutions to common problems.
The Screw Won’t Go In
Possible Cause: Wrong screw size, cross-threading, or damaged threads in the appliance.
Solution: Double-check that you have the correct screw. Try backing it out and re-inserting it at a slightly different angle. If the threads in the appliance seem damaged, you might need to carefully re-tap them or contact a repair service.
The Screw Head is Stripped
Possible Cause: Using the wrong size screwdriver, excessive force, or wear and tear.
Solution: Try placing a wide rubber band between the screwdriver tip and the stripped screw head for added grip. If that doesn’t work, you might need a screw extractor kit, available at hardware stores. For very stubborn stripped screws, you may need to carefully drill out the screw head.
I Can’t Find the Exact Replacement Screw
Possible Cause: Obsolete model, proprietary parts.
Solution: Focus on finding a screw with the exact diameter, thread pitch, and length. The head type can sometimes be adapted if necessary (e.g., if you can only find a hex head, you might need a corresponding Allen key). However, using the correct head type is always preferable for ease of use.
Preventative Maintenance: Keeping Your Food Processor in Shape
Replacing screws is a reactive measure. To avoid needing this guide again soon, incorporate these preventative steps into your routine:
- Regular Inspections: Before and after each use, give your food processor a quick visual check. Look for any loose screws or wobbling parts.
- Gentle Cleaning: When cleaning your food processor, avoid immersing the base unit in water. Wipe it down with a damp cloth. If screws are located near washing areas, ensure they are dry afterwards.
- Proper Storage: Store your food processor in a stable location where it’s less likely to be knocked over or have things fall on it.
- Don’t Force It: If a lid or bowl isn’t fitting correctly, don’t try to force it. This can put undue stress on the appliance and its fasteners.
Conclusion
Replacing food processor screws and bolts is a simple yet important maintenance task that can extend the life of your appliance and ensure its safe operation. By carefully identifying the correct replacement parts and following these straightforward steps, you can easily overcome this common issue. Remember to always work with the right tools, be patient, and avoid overtightening. With a little care and attention, your food processor will continue to be a reliable kitchen companion for years to come. Happy processing!