

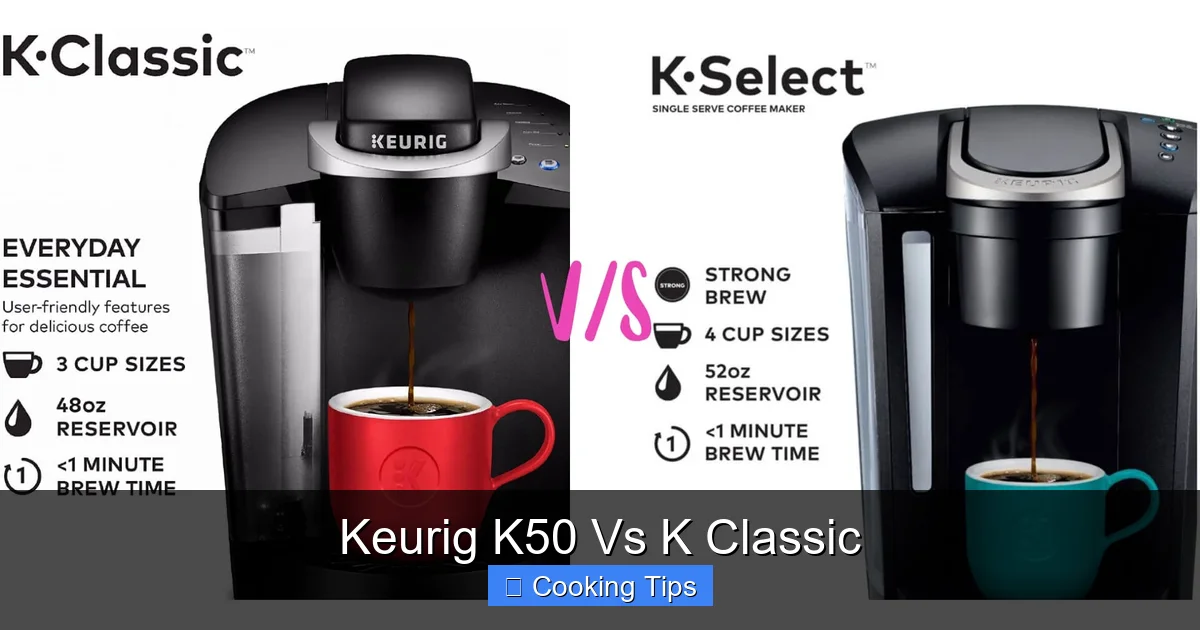
This guide provides a comprehensive comparison between the Keurig K50 and the Keurig K Classic (often referred to as the K55). We delve into their features, functionalities, and key distinctions to help you make an informed decision. Whether you’re a first-time Keurig owner or looking to upgrade, understanding these subtle yet important differences will ensure you choose the brewer that best suits your coffee-drinking habits and kitchen space.
Hello, coffee lovers! Are you on the hunt for a new Keurig brewer and feeling a bit overwhelmed by all the options? You’ve probably seen names like the Keurig K50 and the Keurig K Classic popping up. What’s the difference between them? Is one better than the other? Well, you’ve come to the right place!
In this comprehensive guide, we’re going to break down everything you need to know about the Keurig K50 and the Keurig K Classic. We’ll explore their features, highlight any subtle distinctions (or lack thereof), and help you figure out which one, if any, is the right fit for your kitchen and your daily caffeine ritual. Get ready to become a Keurig comparison pro!
Key Takeaways
- Model Naming Nuances: The Keurig K50 and K Classic are essentially the same brewer, often marketed under different names for different retailers or promotional periods. The K55 is the most common designation for this generation of Keurig.
- Core Functionality: Both the K50 and K Classic offer the fundamental Keurig single-serve brewing experience, allowing you to brew a fresh cup of coffee, tea, or hot cocoa using K-Cup pods.
- Simplicity and Ease of Use: These models are celebrated for their straightforward operation. A few button presses are all it takes to brew your desired beverage.
- Brew Size Options: Typically, these brewers offer multiple brew sizes, commonly 6, 8, and 10 ounces, allowing for customization based on your preference.
- Water Reservoir: They feature a removable water reservoir, making refilling and cleaning significantly easier. The capacity is generally around 48 ounces.
- Indicator Lights: Simple indicator lights signal when the brewer is heating, ready to brew, and when descaling is needed, enhancing user-friendliness.
- No Advanced Features: Unlike newer models, the K50/K Classic lack features like strength control, temperature control, or connectivity options, focusing on reliable, basic brewing.
Understanding the Keurig K50 and K Classic: A Deep Dive
Before we get into the nitty-gritty of comparing these two models, it’s important to understand a common point of confusion: the naming convention. In the world of Keurig, sometimes different names are used for essentially the same brewer. This can be due to different retailers, promotional bundles, or minor updates that don’t significantly alter the core product.
When people talk about the Keurig K50 and the Keurig K Classic, they are very often referring to the same or a very similar brewer. The Keurig K55 is frequently the model name that encompasses what people mean by both the K50 and K Classic. For the purposes of this guide, we will treat the K50 and K Classic as largely interchangeable, focusing on the core features and characteristics of this generation of Keurig brewers. If you see a specific K50 or K Classic model, it will likely share the vast majority of features we’ll discuss.
What Do the Keurig K50 and K Classic Do?
At their heart, both the Keurig K50 and K Classic are designed to do one thing exceptionally well: brew a single cup of your favorite beverage quickly and conveniently. They are part of Keurig’s line of brewers that utilize K-Cup pods. This means you can pop in a K-Cup pod of coffee, tea, hot cocoa, or even a specialty beverage, select your brew size, and in under a minute, you’ll have a steaming hot cup ready to enjoy.
These machines are built for simplicity. They are not packed with the advanced features you might find on newer, higher-end models like the K-Elite or K-Supreme series. Instead, they focus on reliability, ease of use, and delivering a consistently good cup of coffee without fuss.
Key Features Shared by the K50 and K Classic
Since these models are so similar, let’s first look at the features you can expect to find on either the Keurig K50 or the Keurig K Classic. These are the building blocks of their functionality.
H3: Simple, Intuitive Controls
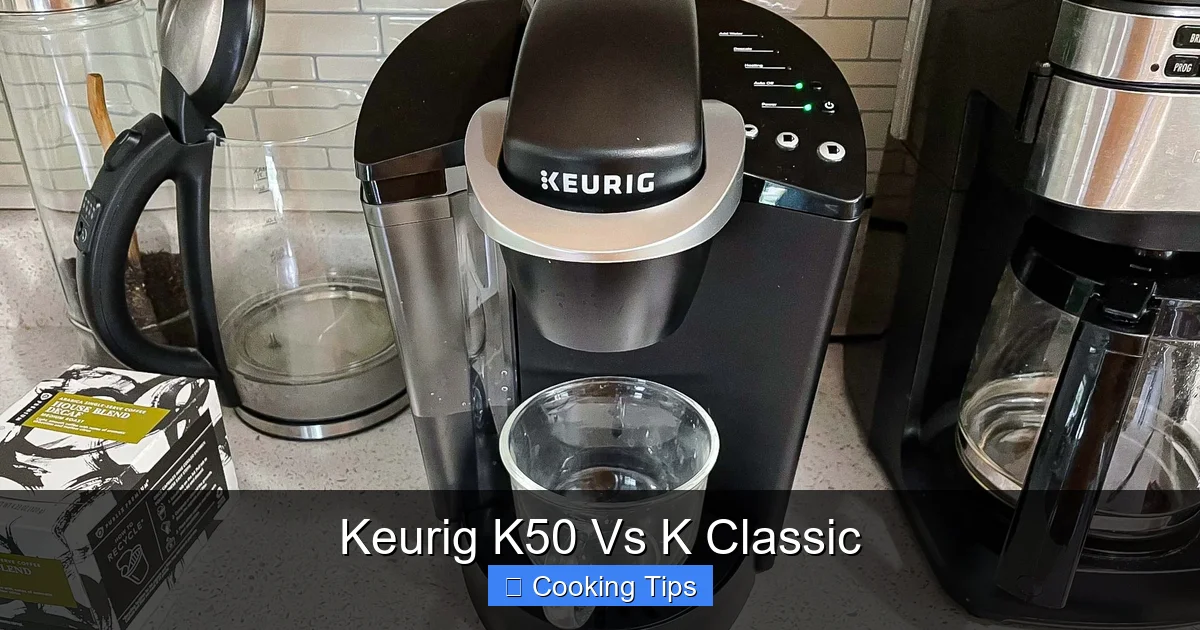
One of the biggest selling points of the K50/K Classic is how easy they are to operate. You won’t find a complex digital display or a multitude of settings. Instead, you’ll have a few clearly labeled buttons. Typically, these include a power button and buttons for selecting your brew size.
How it works:
Visual guide about Keurig K50 Vs K Classic
Image source: d3j17a2r8lnfte.cloudfront.net
Visual guide about Keurig K50 Vs K Classic
Image source: cdn.mos.cms.futurecdn.net
- Power On: Press the power button. The brewer will indicate when it’s heating the water.
- Insert K-Cup: Lift the handle and place your K-Cup pod into the holder. Close the handle firmly.
- Select Brew Size: Choose your desired brew size from the available options (usually 6, 8, or 10 ounces).
- Brew: Press the “Brew” button. The brewing process will begin.
This straightforward approach makes them ideal for anyone who wants a cup of coffee without a learning curve.
H3: Multiple Brew Size Options
While they are simple, they do offer a degree of customization. The K50 and K Classic typically allow you to choose from several brew sizes. The most common options are:
- 6 oz: For a stronger, more concentrated cup.
- 8 oz: A standard mug size.
- 10 oz: For a larger serving.
Practical Tip: Experiment with the different brew sizes to find your perfect strength. If you prefer a bolder taste, try the 6 oz option. For a milder flavor, the 10 oz might be more to your liking.
H3: Removable Water Reservoir
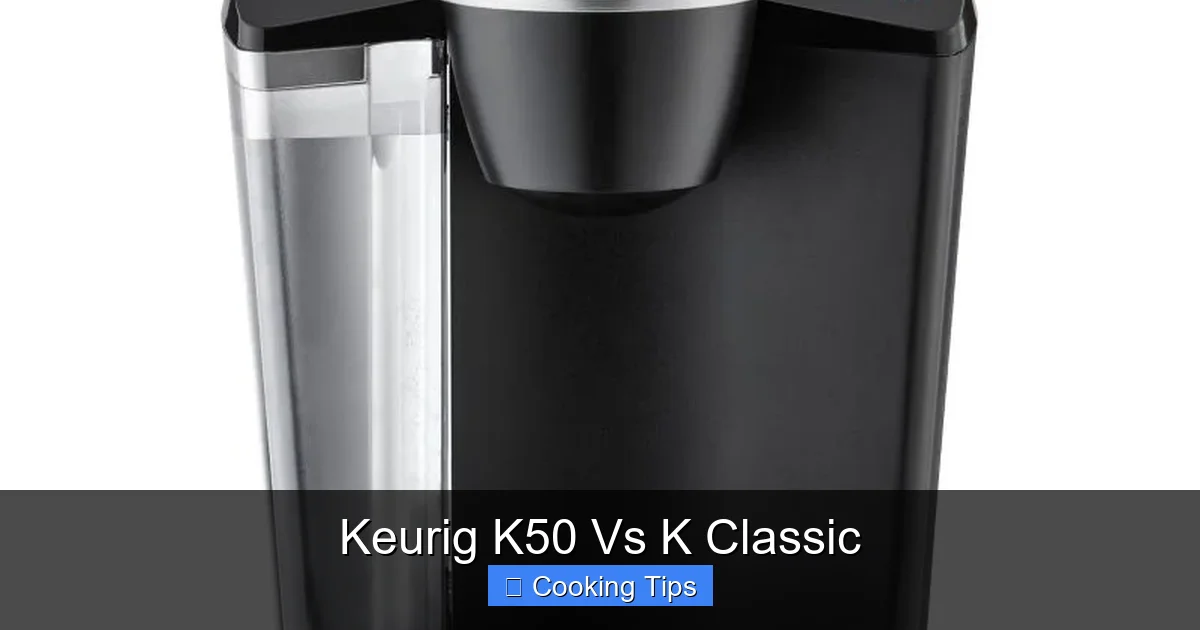
Forget about pouring water into a small opening every time you want a cup. The K50 and K Classic come equipped with a decent-sized, removable water reservoir. This makes refilling incredibly convenient.
Capacity: The reservoir typically holds around 48 ounces of water. This is enough to brew several cups before needing a refill, which is great for busy mornings or if you have multiple coffee drinkers in the household.
Cleaning: The removable nature of the reservoir also makes it much easier to clean. You can simply detach it, wash it thoroughly with soap and water, and reattach it. This is crucial for maintaining the quality of your coffee and the longevity of your brewer.
H3: Indicator Lights
To further simplify operation and maintenance, these brewers feature simple indicator lights. These lights provide visual cues for important functions:
- Heating Indicator: Lets you know when the water is heating up.
- Ready Indicator: Signals when the water has reached the optimal brewing temperature and the brewer is ready for you to select your brew size.
- Descale Indicator: This is a very important light! It will illuminate when the brewer needs to be descaled. Regular descaling is essential for maintaining performance and taste.
H3: Drip Tray Design
The drip tray on these models is usually removable. This is a practical feature for a couple of reasons:
- Accommodating Taller Mugs: You can often remove the drip tray entirely to fit taller travel mugs or larger beverage containers underneath the dispenser. This is a lifesaver if you’re often brewing coffee to go.
- Easy Cleaning: A removable drip tray is also much easier to clean, preventing coffee spills from becoming a sticky mess.
Are There Any Differences Between the K50 and K Classic?
As we’ve established, the Keurig K50 and Keurig K Classic are remarkably similar, often being the same machine marketed differently. However, in the rare instance that there might be a very minor distinction, it could lie in:
H3: Minor Aesthetic Variations
Sometimes, different model numbers or names are associated with slightly different color accents or finishes. For example, one might have a brushed nickel trim while the other has a plain black trim. These are purely cosmetic and do not affect the brewing performance.
H3: Retailer-Specific Bundles or Features
Occasionally, a retailer might have an exclusive version of a Keurig brewer. This could mean a slightly different package, perhaps including a few starter K-Cup pods, or a very minor firmware difference if applicable. However, for the K50/Classic generation, these differences are almost always superficial.
What’s Missing from the K50 and K Classic?
To truly understand these brewers, it’s also important to know what they *don’t* have, especially when compared to newer Keurig models. This helps set expectations and understand their place in the Keurig lineup.
- Strength Control: Newer models often have a “strong” brew button that allows you to adjust the brew cycle for a bolder taste. The K50/Classic does not have this feature. Your brew strength will be determined solely by the K-Cup pod itself and the brew size you select.
- Temperature Control: You cannot adjust the brewing temperature on these models. They are designed to heat water to an optimal brewing temperature automatically.
- Brew Over Ice Function: Some advanced brewers have a specific setting for brewing over ice to create iced beverages without dilution. This is absent on the K50/Classic.
- Smart Features (Wi-Fi, App Connectivity): These are basic brewers and do not connect to Wi-Fi or have any associated mobile app functionality.
- Multiple Brew Styles (e.g., Iced Coffee, Hot Cocoa Button): They focus on one primary brewing function.
The absence of these features means these brewers are focused on core functionality, making them simpler but less versatile than their more advanced counterparts.
Visual guide about Keurig K50 Vs K Classic
Image source: antsll.com
How to Set Up and Use Your Keurig K50/K Classic
Getting your new Keurig up and running is a breeze. Follow these simple steps:
H2: Step 1: Unboxing and Initial Setup
Carefully remove your Keurig brewer from its packaging. Ensure all protective films and packing materials are removed from the machine.
H2: Step 2: Filling the Water Reservoir
Remove the water reservoir from the back of the brewer. Rinse it thoroughly with warm water. Fill it with fresh, cold water up to the “MAX FILL” line. Do not use hot water.
Important: Always use filtered or bottled water for the best-tasting coffee and to prolong the life of your brewer. Tap water can contain minerals that can cause scale buildup.
H2: Step 3: Priming the Brewer
This is a crucial step to flush out any residual manufacturing materials and ensure the system is ready for brewing.
- Place a mug on the drip tray.
- Ensure the water reservoir is filled.
- Close the handle, but do not insert a K-Cup pod.
- Select any brew size (e.g., 8 oz) and press the brew button.
- Discard the hot water from the mug.
- Repeat this priming process 2-3 times.
H2: Step 4: Brewing Your First Cup
Now you’re ready to brew!
- Ensure the water reservoir is filled and the brewer is plugged in and turned on.
- Lift the handle and insert your chosen K-Cup pod into the holder.
- Close the handle firmly.
- Select your desired brew size (6, 8, or 10 oz).
- Press the brew button.
- Your delicious, fresh cup of coffee will be ready in under a minute!
- After brewing, lift the handle to eject the used K-Cup pod. You can discard it or place it in a K-Cup pod recycling program if available.
Maintaining Your Keurig K50/K Classic
Proper maintenance is key to enjoying your Keurig for years to come.
H2: Regular Cleaning
Daily cleaning is simple and effective.
- Exterior: Wipe down the outside of the brewer with a damp cloth.
- Drip Tray: Remove and wash the drip tray regularly with warm, soapy water.
- K-Cup Holder: Remove the K-Cup holder and rinse it under running water. You can use a damp cloth to wipe away any grounds. Ensure the exit needle (the small pointy bit at the bottom of the K-Cup holder) is clear of debris. A paperclip can often be used to gently clear it if needed.
H2: Descaling Your Keurig
The “Descale” indicator light will remind you when it’s time to descale. This process removes mineral buildup from the inside of the brewer, which can affect brewing temperature, taste, and flow rate.
You will need:
- A large ceramic mug
- White vinegar or a Keurig descaling solution
- Fresh water
Step-by-step descaling:
- Empty the Reservoir: Empty the water reservoir and remove any K-Cup pod from the holder.
- Add Vinegar/Solution: Fill the water reservoir to the top with a mixture of one part white vinegar and one part water. Alternatively, follow the instructions on your Keurig descaling solution packaging.
- Place Mug: Place a large ceramic mug on the drip tray.
- Run Brew Cycles: Turn on the brewer and run multiple brew cycles using the largest brew size option (10 oz). Continue running cycles until the reservoir is empty.
- Let it Sit: After the reservoir is empty, let the brewer sit for at least 30 minutes to allow the vinegar/solution to work on the internal components.
- Rinse the Reservoir: Empty and rinse the water reservoir thoroughly with fresh water.
- Fill with Fresh Water: Fill the reservoir with fresh, cold water.
- Rinse Brew Cycles: Run fresh water through the brewer by selecting the largest brew size and brewing until the reservoir is empty. Repeat this rinse cycle at least 12 times, or until the smell of vinegar is gone.
- Normal Brewing: Your Keurig is now descaled and ready for normal brewing!
Troubleshooting Tip: If the “Descale” light remains on after descaling, you may need to perform a hard reset. Unplug the brewer for at least 30 minutes, then plug it back in. If it persists, consult your Keurig manual or customer support.
Troubleshooting Common Issues
Even the most reliable machines can have occasional hiccups. Here are some common issues and how to resolve them:
H2: Brewer Not Turning On
- Check Power Cord: Ensure the power cord is securely plugged into a working electrical outlet and into the brewer.
- Outlet Test: Try plugging another appliance into the same outlet to confirm the outlet is functioning.
- Circuit Breaker: Check your home’s circuit breaker to ensure it hasn’t tripped.
H2: Coffee is Not Hot Enough
- Descale Needed: This is often the culprit. Mineral buildup can prevent the water from heating properly. Perform the descaling process as described above.
- Allow Full Heating: Make sure the “Ready” light has illuminated before you start brewing.
H2: Brewer Making Strange Noises
- Air in the System: Sometimes, air can get trapped in the water pump. Try running a few brew cycles with the water reservoir removed and then reinserting it while the brewer is still hot.
- Normal Operation: Some gurgling and humming sounds are normal during the heating and brewing process.
H2: K-Cup Pod Not Punctured Properly
- Check K-Cup: Ensure the K-Cup pod is properly seated in the holder.
- Clear Exit Needle: The exit needle at the bottom of the K-Cup holder might be clogged with coffee grounds. Carefully use a paperclip or pin to dislodge any blockage.
Choosing Between the K50 and K Classic
Given that the Keurig K50 and Keurig K Classic are essentially the same machine (often designated as the K55), the choice between them boils down to availability and price.
Recommendation: Don’t stress too much about finding a specific “K50” versus a “K Classic.” Instead, look for a brewer that fits the description of this generation of Keurig single-serve brewers. If you find a K50 at a good price, go for it! If a K Classic is on sale, that’s a great option too. Focus on the features we’ve discussed – the simple controls, brew size options, and removable reservoir – as these are the core benefits you’ll be getting.
Conclusion
The Keurig K50 and Keurig K Classic represent a robust and user-friendly entry point into the world of single-serve coffee brewing. While the naming can be a little confusing, understanding that they are largely the same reliable brewer simplifies the decision-making process. They offer the essential Keurig experience: quick, convenient brewing of your favorite K-Cup beverages with minimal fuss.
Whether you’re looking for a no-nonsense brewer for your first apartment, a secondary machine for your office, or simply want a dependable way to make a single cup of coffee without waste, the K50/K Classic is an excellent choice. By following the setup, usage, and maintenance tips in this guide, you’ll be well on your way to enjoying delicious, perfectly brewed coffee, day after day. Happy brewing!
