

Deciding between the Keurig K55 and K50? This comprehensive guide breaks down their similarities and differences, offering practical advice on choosing the best Keurig brewer for your kitchen. We’ll cover features, brewing processes, and maintenance, ensuring you make an informed purchase.
Key Takeaways
- Identical Core Functionality: Both the Keurig K55 and K50 are essentially the same brewer, offering the same core brewing experience and features.
- Minor Cosmetic Differences: The primary distinction lies in the labeling and subtle aesthetic variations, not in performance or capabilities.
- Brew Size Options: Both machines allow you to brew in multiple sizes (e.g., 6, 8, and 10 oz), catering to your desired coffee strength.
- Ease of Use: Both models are designed for simplicity, featuring straightforward button controls and easy K-Cup pod insertion.
- Water Reservoir: They share a generous water reservoir size, reducing the frequency of refills for multiple cups.
- Maintenance and Cleaning: The descaling and cleaning processes are identical for both the K55 and K50, requiring regular attention for optimal performance.
- Value Proposition: When choosing between them, price and slight visual preferences are the main deciding factors, as performance is equivalent.
Keurig K55 Vs Keurig K50: A Comprehensive Guide to Choosing Your Perfect Brewer
Welcome to the ultimate showdown between two of Keurig’s most popular single-serve coffee makers: the Keurig K55 and the Keurig K50. If you’re in the market for a convenient way to brew your morning cup of coffee, or any beverage throughout the day, you’ve likely encountered these two models. Many consumers find themselves scratching their heads, wondering what the real difference is. The good news? It’s far less complicated than it might seem. In this comprehensive guide, we’ll delve deep into the Keurig K55 versus Keurig K50, unraveling their similarities, highlighting any minuscule distinctions, and providing you with all the information you need to make the best choice for your kitchen and your coffee routine.
Keurig has revolutionized the home coffee experience, offering speed, variety, and unparalleled ease of use. The K55 and K50 models represent the heart of their classic lineup, designed for everyday enjoyment. They are known for their robust construction and user-friendly interfaces. Whether you’re a seasoned Keurig enthusiast or a complete beginner, understanding these two machines will empower you to brew your perfect cup, every time.
Throughout this guide, we’ll cover everything from the unboxing and initial setup to daily brewing, cleaning, and maintenance. We’ll explore the features that make these Keurig brewers so popular and offer practical tips to enhance your brewing experience. By the end, you’ll have a crystal-clear understanding of whether the Keurig K55 or the Keurig K50 is the right fit for you. So, let’s get started on your journey to the perfect cup!
Understanding the Keurig K55 and K50: The Core Similarities
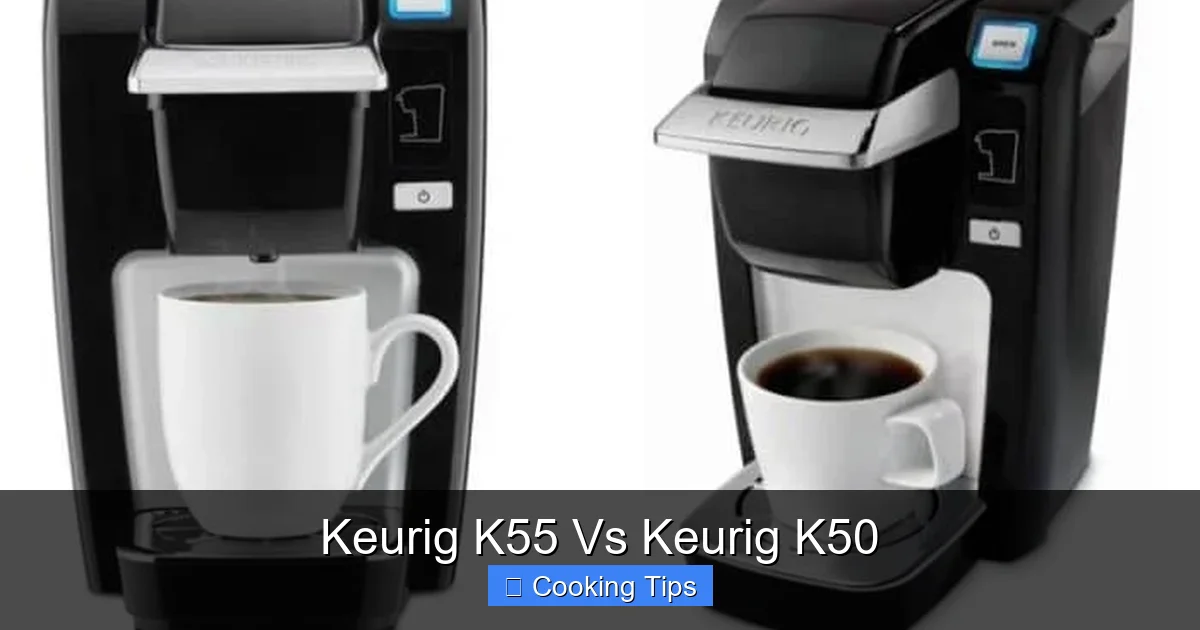
Let’s cut straight to the chase: the Keurig K55 and the Keurig K50 are, for all intents and purposes, the same coffee maker. Keurig has a history of offering slightly different model names for what are essentially identical machines, often differentiating them by minor aesthetic variations or the retailer where they are sold. This can lead to confusion, but it also means that the core functionality, performance, and features you can expect are identical across both the K55 and the K50.
Visual guide about Keurig K55 Vs Keurig K50
Image source: artofbarista.com
This is fantastic news for consumers because it simplifies the decision-making process significantly. You don’t need to worry about one machine offering superior brewing power or a wider range of features than the other. Instead, your choice will likely come down to availability, price, and perhaps a slight preference for the visual styling of one over the other. Let’s explore these shared characteristics in more detail.
Brewing Technology and Performance
Both the K55 and K50 utilize Keurig’s patented brewing system. This system involves piercing a K-Cup pod and then forcing hot water through the grounds at an optimal temperature and pressure to extract the best flavor. The result is a consistently brewed, delicious cup of coffee in under a minute.
- Brew Size Options: You’ll find that both machines offer the same brew size options. Typically, this includes 6 oz, 8 oz, and 10 oz cups. This allows you to customize the strength and volume of your coffee based on your preference and the type of K-Cup pod you are using. Some pods are designed for specific brew sizes to ensure optimal flavor extraction.
- Brew Time: Expect a swift brewing process with both models. From turning on the machine to the final drip, a cup of coffee is usually ready in about a minute. This speed is a hallmark of Keurig brewers and is a major draw for busy mornings.
- Temperature Control: While neither model offers precise digital temperature control like some higher-end units, they are engineered to heat water to the ideal brewing temperature, ensuring a satisfying extraction.
Ease of Use and Design
The user interface on both the K55 and K50 is designed with simplicity in mind. You won’t find overly complicated menus or confusing buttons. The focus is on intuitive operation, making them accessible for anyone to use.
- Simple Button Controls: Typically, you’ll find a power button, a brew button, and buttons to select your desired brew size. The indicators are clear and easy to understand.
- K-Cup Pod System: The insertion and disposal of K-Cup pods are identical. You simply lift the handle, insert the pod, close the handle, select your brew size, and press brew. It’s a streamlined process designed for maximum convenience.
- Removable Drip Tray: Both machines feature a removable drip tray. This is incredibly useful for accommodating taller travel mugs or for easy cleaning after spills.
Water Reservoir and Capacity
A significant feature of both the K55 and K50 is their water reservoir capacity. This is crucial for minimizing refills, especially if you’re brewing multiple cups throughout the day or have a household with several coffee drinkers.
- Generous Reservoir Size: Both models typically come with a 48 oz water reservoir. This means you can brew approximately 6-8 cups of coffee before needing to refill, depending on the brew size you select. This capacity strikes a good balance between convenience and counter space.
- Easy to Remove and Fill: The water reservoir is usually designed to be easily detached from the back of the brewer, making it simple to fill at the sink and reattach.
The Subtle Differences: What Sets Them Apart? (Mostly Aesthetics)
As we’ve established, the performance and functionality of the Keurig K55 and K50 are identical. So, what are the supposed differences? Primarily, they are cosmetic and related to marketing. Keurig may release the same underlying brewer under different model numbers to cater to different retail partners or to refresh its product line without fundamentally altering a successful design.
Model Naming and Branding
The most obvious difference is the name itself: K55 versus K50. This can sometimes be tied to specific retail channels. For instance, one model might be exclusive to a particular big-box store, while the other is available more broadly online or at different retailers. This is a common practice in the appliance industry to manage inventory and sales channels.
Minor Design Touches
Occasionally, you might notice very slight variations in the finish, the color of accent pieces, or the exact shape of the buttons or casing. However, these are purely superficial and do not impact the brewing process or the quality of the coffee produced. It’s akin to two car models from the same manufacturer using the same engine but having slightly different grille designs.
Packaging and Included Accessories
It’s also possible that the packaging or the specific sample K-Cup pods included in the box might differ slightly. However, the core components of the brewer itself will remain the same.
How-To Guide: Brewing with Your Keurig K55 or K50
Now that you understand the similarities, let’s walk through the simple process of brewing a delicious cup of coffee with either your Keurig K55 or K50. It’s designed to be incredibly straightforward.
Step 1: Initial Setup and First Use
Before your first brew, it’s essential to prepare your machine. This ensures that any manufacturing residues are flushed out and the system is ready for optimal performance.
H3: Unpacking and Placement
Carefully unpack your Keurig brewer and remove all packaging materials. Place it on a dry, flat, and stable surface, away from the edge of your counter. Ensure there is adequate space around the brewer for ventilation.
H3: Rinsing the Water Reservoir
Remove the water reservoir. Wash it thoroughly with mild soap and warm water. Rinse it well and reattach it to the brewer. Fill the reservoir with fresh, filtered water up to the fill line.
H3: Priming the Brewer
Plug in your Keurig brewer and turn it on. The power light will illuminate. Place a mug on the drip tray. Press the brew button (without a K-Cup pod inserted). The brewer will go through a rinsing cycle, dispensing hot water into your mug. Discard this hot water. Repeat this rinsing cycle 2-3 times to ensure the internal system is clean.
Step 2: Brewing Your First Cup
With the initial setup complete, you’re ready to brew your first delicious cup of coffee, tea, or hot chocolate.
H3: Filling the Water Reservoir
Ensure the water reservoir is filled with fresh, cold water. For the best taste, it’s recommended to use filtered water. Do not fill past the “MAX” fill line.
H3: Selecting and Inserting a K-Cup Pod
Choose your favorite K-Cup pod. Lift the handle of the Keurig brewer to open the pod holder. Place the K-Cup pod into the holder, ensuring it sits flat. Close the handle completely. You will feel a slight resistance as it seals.
H3: Choosing Your Brew Size
Place your mug on the drip tray. The removable drip tray can be taken out to accommodate taller travel mugs. Select your desired brew size by pressing the corresponding button (e.g., 6 oz, 8 oz, 10 oz). The selected size button will illuminate.
H3: Starting the Brew Cycle
Press the flashing “Brew” button. The brewer will begin heating the water if it’s not already at temperature, and then the brewing cycle will start. The process is quick, usually taking less than a minute.
H3: Enjoying Your Beverage
Once the brewing is complete, carefully remove your mug. Your hot, fresh beverage is ready to be enjoyed! When you’re finished, you can lift the handle again to eject the used K-Cup pod into a discard bin. The brewer will then go into standby mode after a period of inactivity.
Maintenance and Cleaning: Keeping Your Brewer in Top Shape
Regular maintenance is key to ensuring your Keurig K55 or K50 continues to brew perfectly and lasts for years. These machines are generally low-maintenance, but a few simple steps will keep them running smoothly.
Regular Cleaning
H3: Daily/Weekly Cleaning
- Wipe Down the Exterior: Use a damp cloth to wipe down the outside of the brewer.
- Clean the Drip Tray: Remove and wash the drip tray with warm, soapy water. Rinse and dry thoroughly before replacing it.
- Clean the K-Cup Holder: After brewing, when the handle is up, you can often see the K-Cup holder. Occasionally, you may need to rinse this out if coffee grounds have fallen in. Ensure the brewer is unplugged and cool before attempting to clean inside the K-Cup holder mechanism.
Descaling Your Keurig
Over time, mineral deposits from your water can build up inside the brewer, affecting its performance and taste. Descaling is the process of removing these deposits.
H3: How Often to Descale
Keurig recommends descaling your brewer every 3-6 months, depending on the hardness of your water. You’ll likely notice slower brewing times, unusual noises, or a change in coffee taste as indicators that descaling is needed.
H3: The Descaling Process
- Empty the Reservoir: Remove any water from the reservoir and empty any K-Cup pod from the holder.
- Use a Descaling Solution: Pour a descaling solution (Keurig brand or a vinegar/water solution, though Keurig recommends their specific solution for best results) into the reservoir. Follow the instructions on the descaling solution package for the correct ratio.
- Run Brew Cycles: Place a mug on the drip tray. Run multiple brew cycles (without K-Cup pods) until the reservoir is empty, dispensing the descaling solution.
- Rinse with Fresh Water: Once the descaling solution is gone, rinse the water reservoir thoroughly. Fill it with fresh, cold water and run at least 12 full brew cycles to rinse out any remaining descaling solution.
- Final Rinse: After the rinse cycles, empty the reservoir one last time, and refill it with fresh water. Run one more brew cycle to ensure no residual taste remains.
Important Note: Always refer to your Keurig owner’s manual for the most accurate and specific descaling instructions for your model.
Troubleshooting Common Issues
While Keurig brewers are generally reliable, you might encounter a few minor issues. Here are some common problems and their solutions for the K55 and K50.
Brewer Won’t Turn On
- Check Power Cord: Ensure the power cord is securely plugged into a working electrical outlet. Try a different outlet if necessary.
- Power Button: Make sure you are pressing the power button correctly.
Coffee Not Brewing or Brewing Slowly
- Water Reservoir: Ensure the water reservoir is properly seated and filled with water.
- K-Cup Pod: Make sure the K-Cup pod is inserted correctly and the handle is fully closed. Check if the pod is clogged.
- Need to Descale: This is the most common reason for slow brewing. Follow the descaling instructions above.
- Need to Clean the Needle: The exit needle (where coffee dispenses) or the entrance needle (that pierces the pod) can get clogged with coffee grounds. Refer to your manual for how to safely clean these.
Coffee Tastes Weak or Watery
- Brew Size: You might be selecting a larger brew size than intended for the K-Cup pod. Try a smaller brew size.
- K-Cup Pod Quality: The K-Cup pod itself might be older or of a lower quality. Try a different brand or a fresher pod.
- Need to Descale: Mineral buildup can affect extraction.
Brewer Makes Strange Noises
Some gurgling or whirring noises are normal during the brewing process as the pump and water circulate. However, excessively loud or unusual noises could indicate a need for descaling or a potential issue with the pump. If the problem persists after descaling, contact Keurig customer support.
Conclusion: Your Choice is Clear
As we’ve thoroughly explored, the Keurig K55 and Keurig K50 are remarkably similar, offering the same convenient brewing experience, user-friendly design, and reliable performance. The primary differences lie in their model names and potentially minor cosmetic variations, making the choice between them a straightforward decision based on availability and personal preference.
Whether you opt for the K55 or the K50, you are investing in a high-quality, easy-to-use single-serve coffee maker that will deliver a delicious cup at the touch of a button. Remember to perform regular cleaning and descaling to keep your brewer in optimal condition and to ensure the best possible taste from your K-Cup pods. With this guide, you’re now well-equipped to make an informed decision and enjoy countless perfect cups of your favorite beverages.
